One common problem lies at the heart of 95% or more of all "broken" gadgets...
Do you know what that common problem is? If you come to understand this one universal issue, and aren't afraid to deal with it, you will be able to fix almost anything.

Coffee
Photo courtesy of Clem Onojeghuo and http://unsplash.com
So, what's the common issue? We'll get to that in a few minutes, because I need to tell you what happened yesterday that got me thinking about this.
Yesterday our coffee maker broke.
I'm going to use our coffee maker as a concrete example of "How To Fix (Almost) Anything." After all, it inspired me to write this article for you!
But first, rewind about fifty years...
I've been fixing things since I was a kid. It started out with my mom's stuff. When her toaster broke, I took it apart, figured out what was wrong, and fixed it.
Then mom's camera broke. When she bought another one, I said "Hey mom, can I have your old camera?" I proceeded to take it apart, figured out what was wrong, and fixed it. Voila! I had a neat half-frame 35mm camera of my own!
As I learned by doing how to fix one thing after another, a common thread began to become evident...
Now fast-forward to yesterday.
As usual in the morning, I started my cup of coffee and walked away. Unlike my daily routine, when I came back, I discovered an overflowing cup and a machine that was still spitting and splashing.

Our Coffee Maker (Original Photo)
Bummer!
Now I had a mess to clean up! After the cleanup, I decided it was time to take out my Leatherman Squirt E4, my most favorite pocket tool set.
Sadly, the E4 has been retired. I bought mine for a song some years back when Radio Shack was blowing out their private-labeled version. You can occasionally still find an E4 on the used market. When I thought I'd lost mine, I panicked and bought a replacement off of eBay. Then, thank God, I found the original. Now I have a spare!
But enough about tools! The point is that you usually don't need anything fancy to fix things. In the case of the errant coffee maker, I only needed two very simple, commonly available tools; a Philips screwdriver and a toothbrush.
And so, Let's get started fixing this thing...
Looking at the top of the coffee maker, there are two screws holding a cover on. They hide under the "fill cover," which is rotated out of the way in this picture.
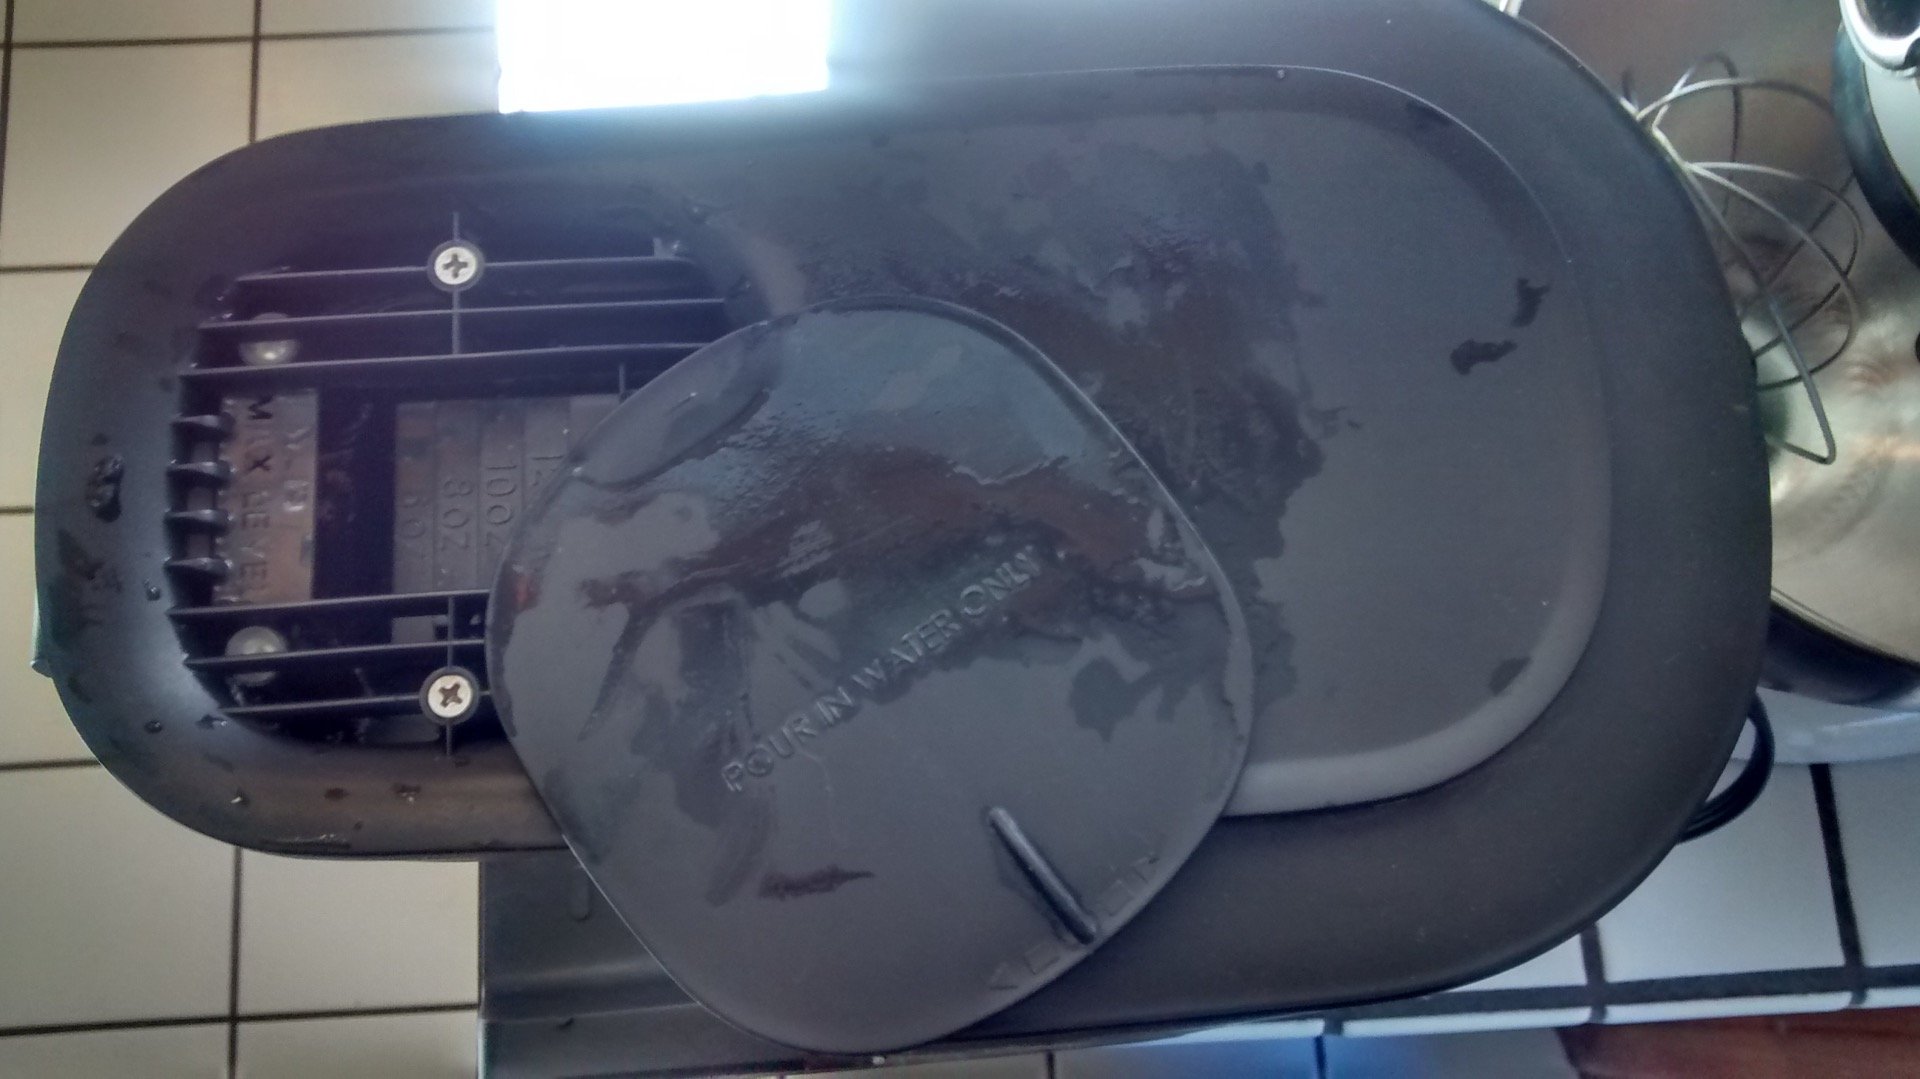
The Top (Original Photo)
I opened the Philips screwdrive on my E4 and started by removing the screws and setting them aside. BTW, it's a good idea to store the parts that you take off in a bowl or container of some kind.
It's also a really good idea to take pictures at each step as you take things apart! Then when the time comes to put your device back together, if you forget what happens next, just review the photos!
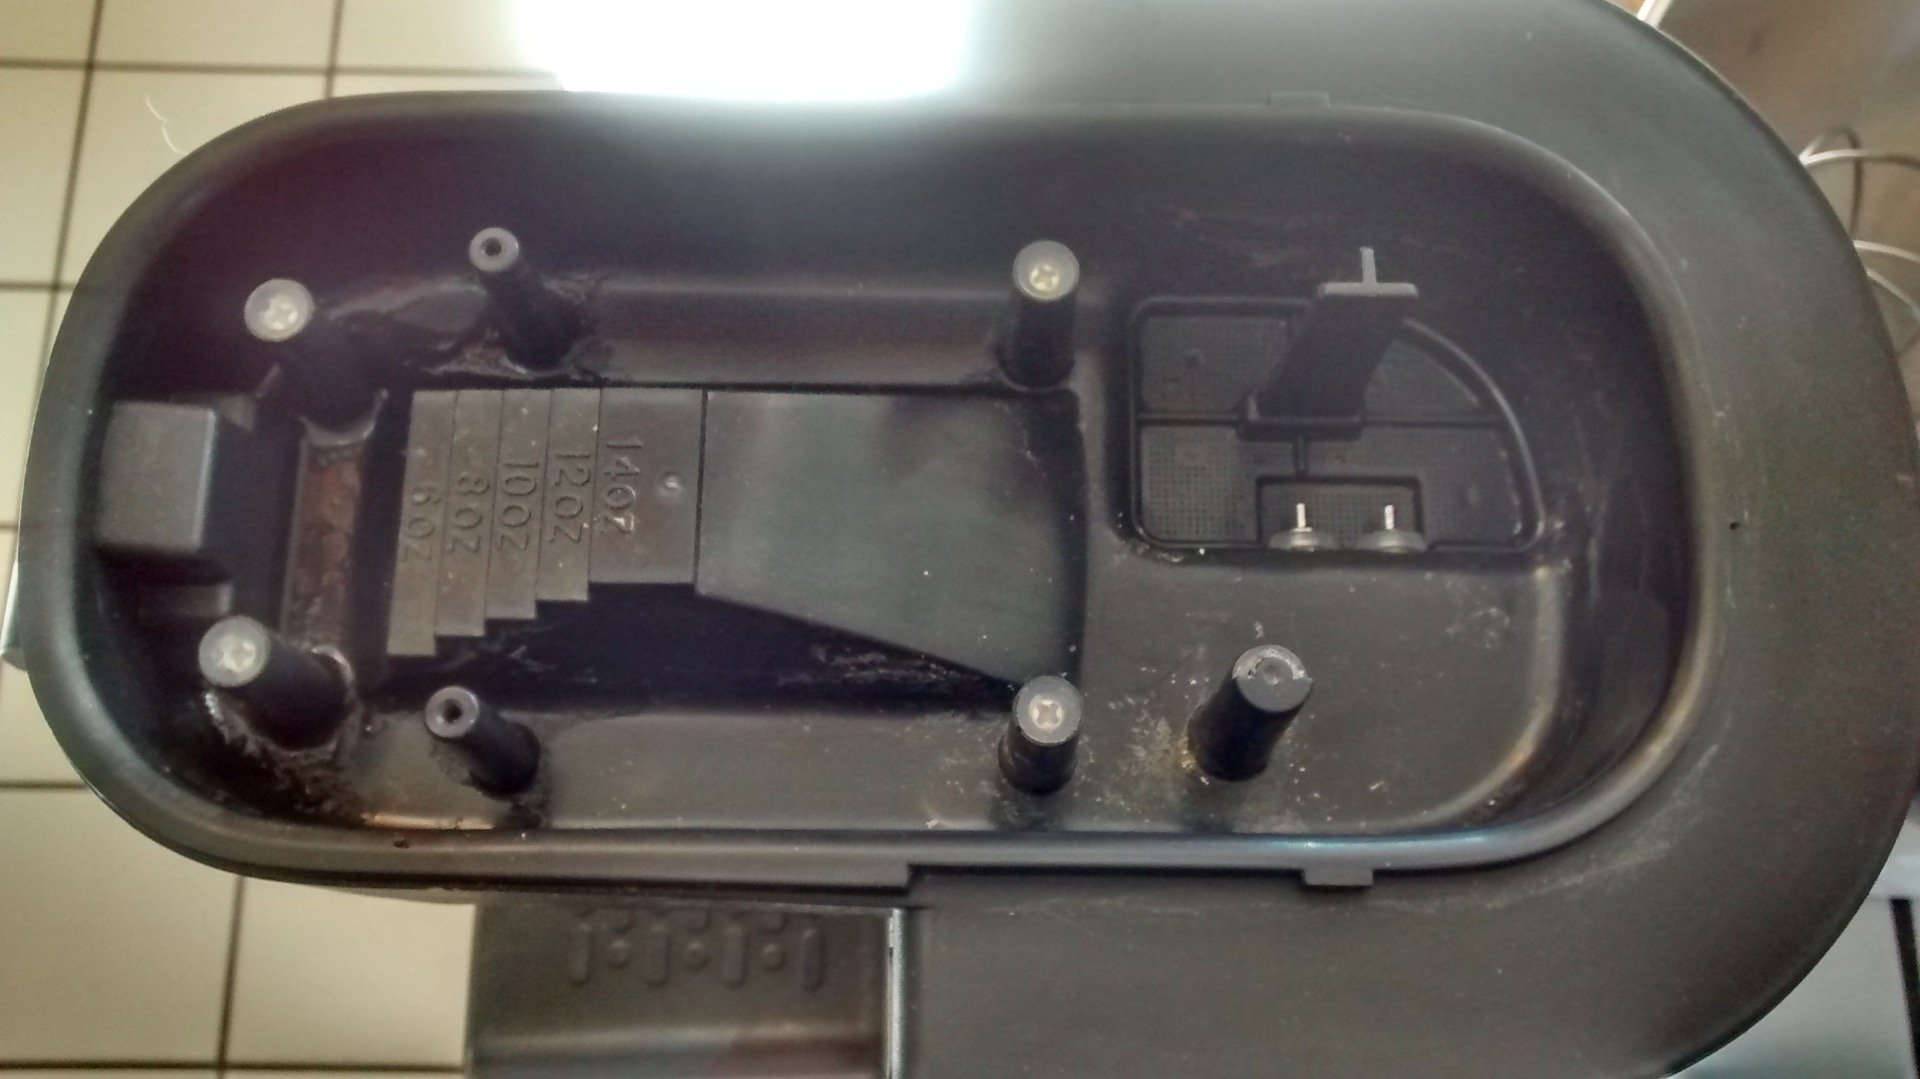
Coffee Maker Guts (Original Photo)
I removed the cover. Now that I could see inside, I noticed a puddle of water in back on the right.... When I took this photo, I had already cleared out the water - but initially, water was covering the two small silvery probes near the middle right of the photo.
Because the probes were covered with water, the machine just kept running and running, never shutting down!
It's finally time for "The Big Reveal"...
Here's the secret you've been waiting for. Why hadn't the water gone down? Why were the silvery probes still covered, keeping the machine running?
The "secret problem" at the heart of 99-44/100% of all repair jobs is... wait for it...
DIRT!!!
In almost every case, if you can locate and clean the DIRT out of whatever it is you are repairing, and if you can successfully re-assemble your repair job, you will once again have a working system.
Usually, you don't even have to understand exactly why the system stopped working. If you just clean out the dirt, your machine is likely to be "good to go" again.
A quick note about exceptions...
Of course, there are exceptions to the dirt rule... Things that you won't find easy to fix. For example, electronic circuits tend to be somewhat esoteric. The chips on them, in particular, can be quite stubborn.
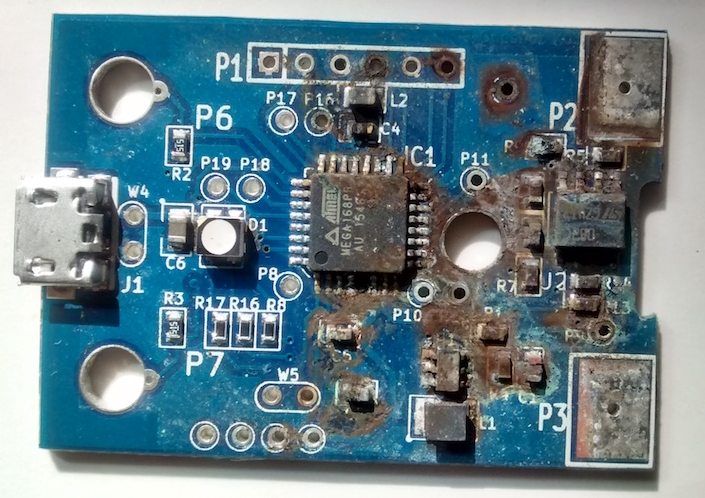
An Unfortunate PCB, Minus The Smoke (Original Photo)
The example circuit board
in this photo was allowed to get wet. Sadly, getting the PCB wet caused the smoke from several chips to be released. And, as everyone knows, once you let the smoke out of an electronic chip, it is very hard to put it back in!
Fortunately for us, all the coffee maker circuitry was fine,
and in my rather wide experience with fixing things, that is usually true.
In the case of our coffee maker, the problem was "the ususal suspects," i.e. DIRT! The water strainer pictured here was the main culprit...
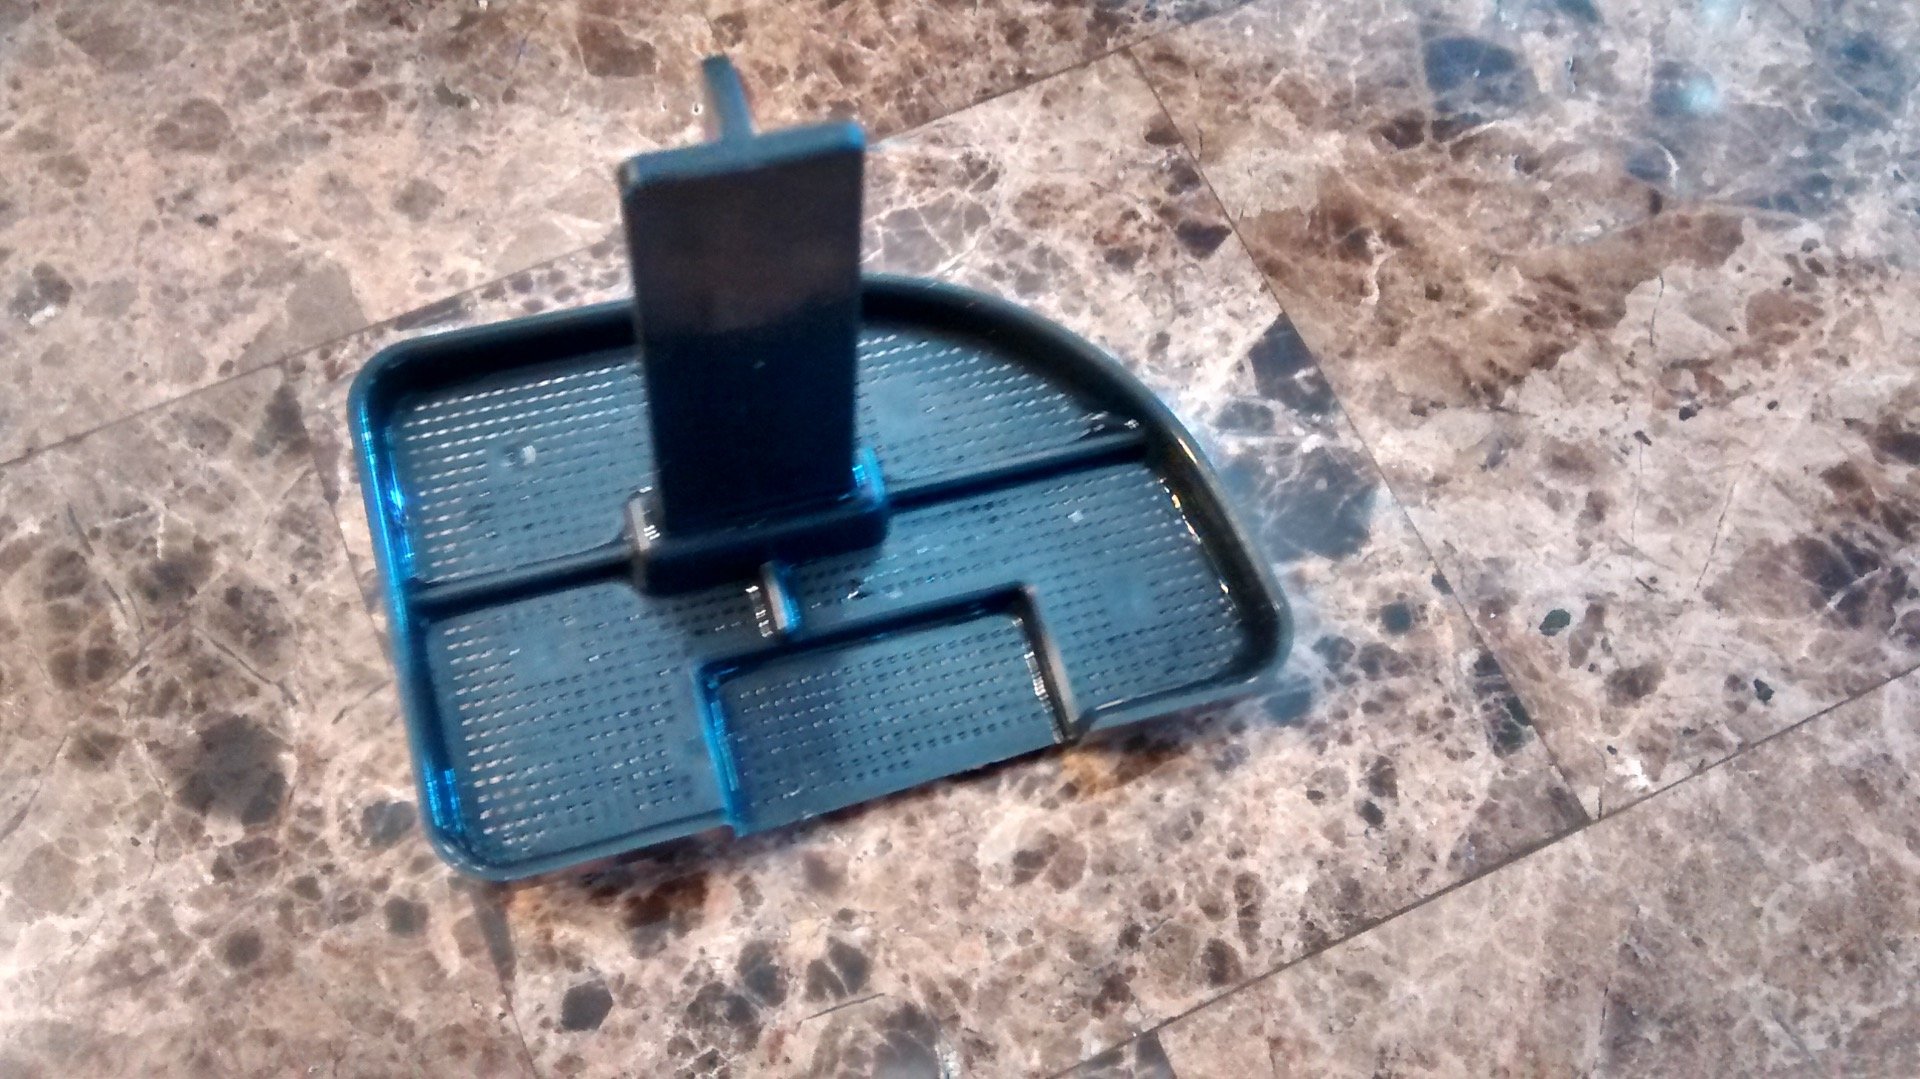
Coffee Maker Water Strainer (Original Photo)
Just look at all the tiny holes in this piece of plastic. My rough estimate is close to 1,000 holes. By design, water should go through the holes while bits of stray debris that end up in the hopper are kept out.
The purpose of all this is to keep dirt and debris out of the boiling chamber and the rest of the coffee maker system plumbing. Well, it obviously was doing it's job!
Here's what happened...
The tiny holes were coated and filled with slime and debris, preventing the last of the water from going down into the heating chamber.

An Essential Tool
Image courtesy of Clker-Free-Vector-Images and http://pixabay.com
And so, the solution was to simply use an old toothbrush to scrub the dirt out of the holes in the strainer. While I was at it, I cleaned the rest of the hopper as well, simply wiping it down thoroughly with a few damp paper towels.
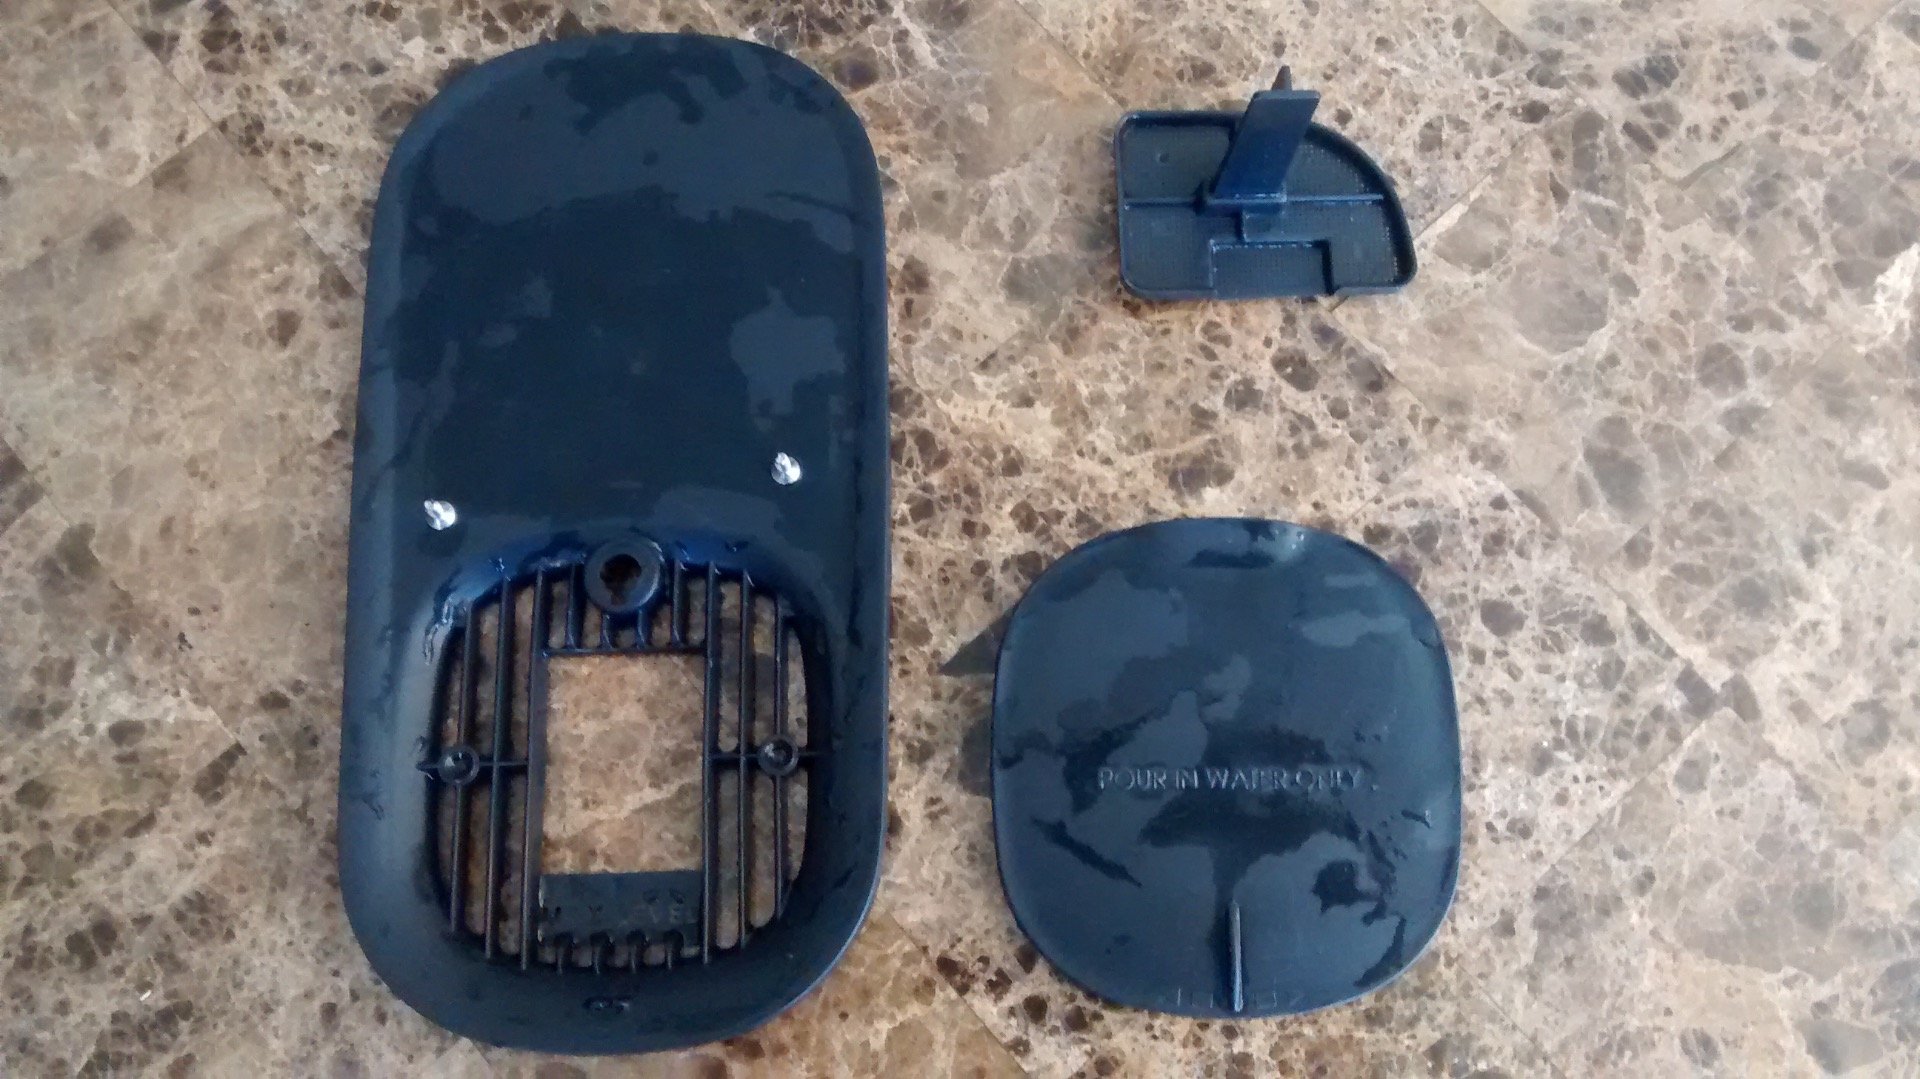
Only FIVE Parts! (Original Photo)
Now, in case you're worried about complexity,
just consider the simplicity of the coffee maker in this example. Many modern devices are fairly simple mechanically. More and more of the complexity has migrated to the "smarts" of the control systems, now run by very low cost microcontrollers.
In this coffee maker, the complete count (including screws) of parts that I had to remove in order to accomplish a repair, was five. Only five parts! The rest of the job was simply cleaning!

Coffee
Photo courtesy of Worthy Of Elegance and http://unsplash.com
So there is absolutely no doubt about it - you can do this sort of thing too!
Summarizing the repair process that will enable you to "Fix (Almost) Anything":
- Carefully disassemble your gadget, whatever it may be.
- Save all parts in a container.
- Take photos along the way so you won't forget something later.
- CLEAN ALL PARTS THOROUGHLY!
- Systematically re-assemble your gadget.
- Try it out to verify that it's now working.
- GOOD JOB! ENJOY the results!
For a topical index to many of my other interesting articles, CLICK HERE