Source
Today's post is a bit different from my usual fare. I typically discuss something cool about bacteria because they're awesome and I've studied them for the past 10 years. However, whenever I talk with non-scientists I realize that I take for granted a ton of the knowledge I have about science. I've been in the lab for so long that I've forgotten what I didn't know when I was just starting my science career. This is a problem many scientists have. If you've gone to a science lecture and been totally lost or been inundated with science jargon from a university professor you might know what I'm talking about.
Unfortunately, this creates a large barrier in scientific communication. A scientist's work is only relevant if they can communicate it well, and scientists are never formally taught how to do this. In light of this, I'd like to teach myself to communicate to non-scientists by explaining a basic scientific concept.
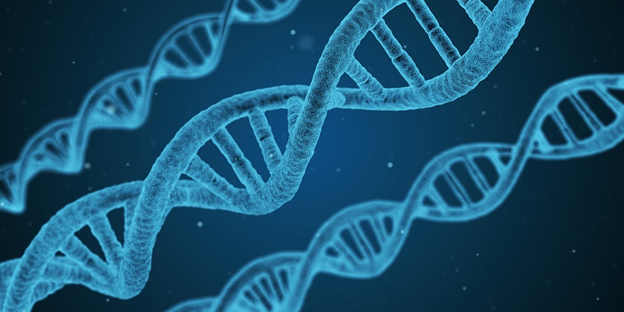
How to visualize DNA
Here, I'll try to explain some of the cool ways scientists can observe DNA. My focus will be on the common techniques one would initially use to analyze a sample in lab.
The most difficult part about visualizing DNA is that it’s so damn small. You can’t see DNA molecules with the naked eye or even with a high powered light microscope. Usually, the DNA I work with in lab is suspended in a drop of water in a small tube.
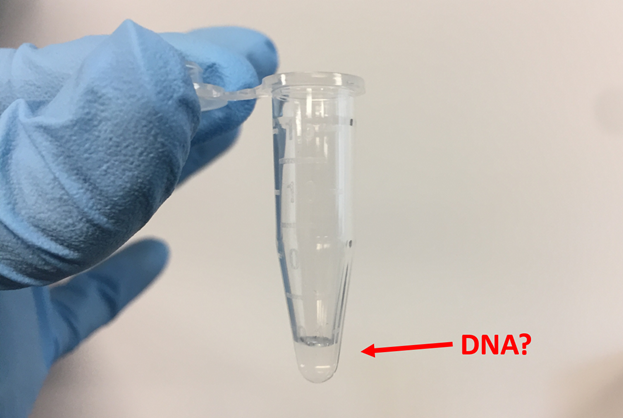
This photo was taken by me while in lab.
The water in this tube is perfectly clear and I have no way of knowing that it actually contains DNA just by looking at it. When I get a tube like this, there are several quantitative techniques I can perform to confirm the presence of DNA:
Quantitative Techniques
1.) Test for viscosity: Since DNA molecules are long strands that anneal to each other, they can be very viscous in liquid if they're at a high enough concentration. If I notice the sample sticking together while pipetting it, I'll often know that I have a lot of DNA in the sample.
2.) Precipitate the DNA: It is possible to evaporate all the water in the tube and leave behind only DNA. It will appear as a tiny white spec in the bottom of the tube. However, this isn't very informative as you can't easily tell how much DNA you have and it takes a while.
3.) Use an instrument to determine DNA quantity: These instruments are standard in most molecular biology labs these days. The two most common ones I see these days are the Nanodrop and the Qubit.
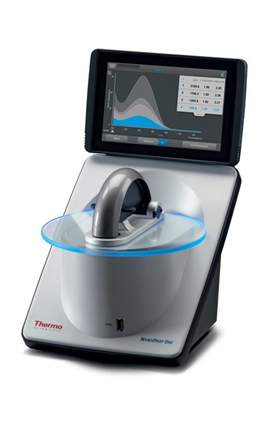
The Nanodrop: This instrument takes advantage of the fact that DNA absorbs ultraviolet light. It shines UV light through a DNA sample, and measures how much of the light is absorbed passing through the sample. It’s amazingly fast (it takes a few seconds to look at a single sample) and gives a very satisfying Ca-CHUNK sound when you use it, but requires pure DNA samples as contaminants may also absorb UV light. Many DNA samples contain some degree of contamination, so this instrument isn't as accurate as I would like.
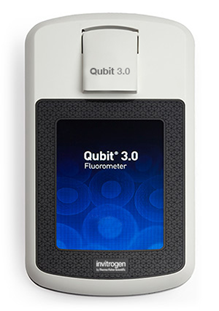
The Qubit: The Qubit takes a bit longer to use than the Nanodrop as you have to mix a small portion of your DNA sample with a special reagent in a clear tube. This reagent becomes fluorescent in the presence of DNA and you can measure this fluorescence by putting the clear tube into the Qubit instrument. Even though it requires extra steps, I love this instrument because it’s easy to use and it’s very accurate.
Agarose gel electrophoresis.
At this point, I'll know whether or not DNA is in my tube and how much I have, but I don't know anything about it. One of the most common techniques I can perform to analyze this DNA is agarose gel electrophoresis. Agarose is very similar to Jello, but doesn’t taste nearly as good. It’s a white powder that can form a molded gel when dissolved in liquid. Most gels are cast as thin rectangles with small holes lined up on one end.
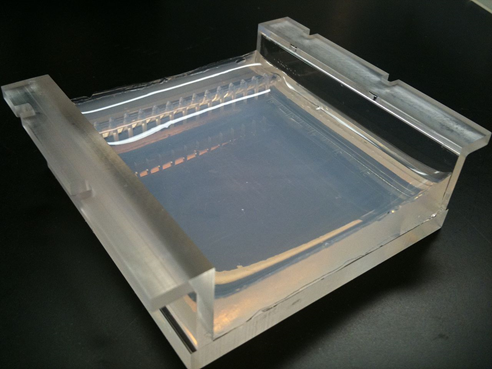
An agarose gel (3). I’ve seen a lot of these in my day.
The holes are called wells, and DNA is added to the holes, and pushed through the gel using an electric current. DNA is negatively charged so it will slowly move thought the gel as the current is applied.
The most important feature of this technique is that larger DNA molecules will move more slowly through the gel than smaller ones. To try to understand why this happens, I visualize dragging a string through a thick bush. A small length of string will pass through just fine, but larger string will get tangled up on branches and be more difficult to pull through. In a similar manner, larger DNA has more difficulty migrating through the agarose and therefore moves slower. The reason this is important is because we can use it to determine the size of our DNA by running our DNA sample against a DNA ladder, a mixture of DNA fragments of a known sizes.
However, we still have a problem. As I mentioned before, DNA can't be seen with the naked eye so we need to find a way to visualize it. The most effective method is by adding a compound that becomes fluorescent when it contacts DNA. The most common molecule used for this is ethidium bromide. It inserts itself between DNA base pairs and will glow under ultraviolet light.
So, the steps we need to take to analyze our DNA with agarose gel electrophoresis are as follows:
1.) Create an agarose gel containing ethidium bromide.
2.) Add our sample into the gel alongside a DNA ladder.
3.) Apply an electric current to the gel to push the DNA through it.
4.) Visualize our DNA under UV light.
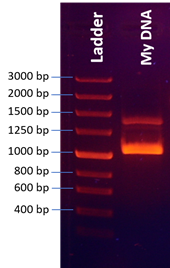
A typical gel will look something like the image on the right (4):
In this example, our DNA sample appears to be two separate DNA fragments of about 1400 and 1100 base pairs.
At this point, we know how much DNA we have and its approximate size. We also have a nice image where we can "see" our DNA on a gel. Depending on what we need the DNA for, we might be done with our analysis. The DNA can now be used for sequencing, transformations, or any experiments that might need it.
I hope you liked this test article. I definitely enjoyed writing it, but it was a challenge to not fall back into the scientific lingo I’m comfortable with. Please let me know your thoughts and whether anything was unclear in the comments.
Sources
(1) https://www.quora.com/Can-we-see-a-strand-of-DNA-under-a-microscope
(2) https://www.thermofisher.com
(3) https://en.wikipedia.org/wiki/Agarose_gel_electrophoresis
(4) https://et.wikipedia.org/wiki/Geelelektroforees
Images:
Unless noted otherwise, All images used have been labelled for re-use on Google Images or are taken by me. If any image owner has an issue with this article, please contact me and I will address the issue.