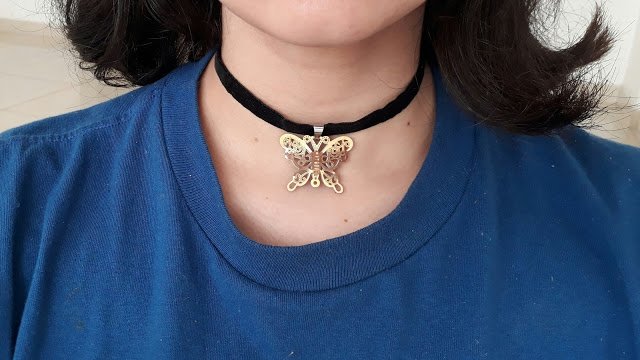
Velvety softness for an elegant and elongated neck
It felt like a Do It Yourself day, so I went to the nearest trinket store in Pamplona and bought some bits and pieces to make my own choker. I personally have thousands of chokers, I friggin' LOVE them! They add a sassy element to any outfit, plus black velvet can look cute and menacing at the same time. Grrr 😉
Without further ado, here's how to make your own:
What you'll need:
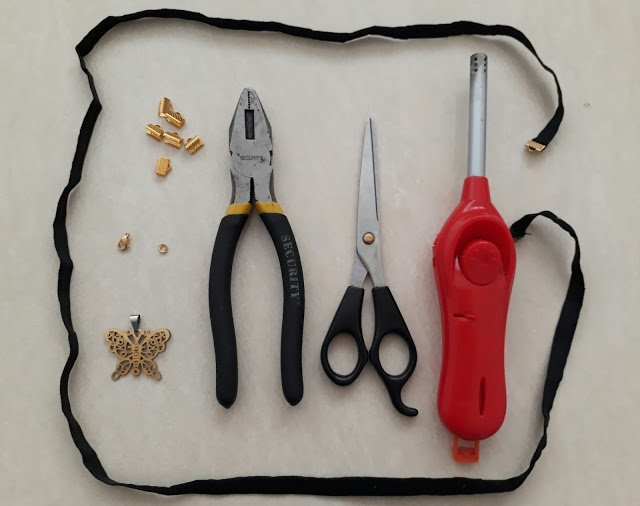
- A velvet ribbon (about 3ft long and 1/3 inch wide)
- Pliers
- Scissors
- Closures or clasps
- Jump rings (2 or more)
- Ribbon ends (2)
- Lighter (mine is a kitchen lighter)
Steps:
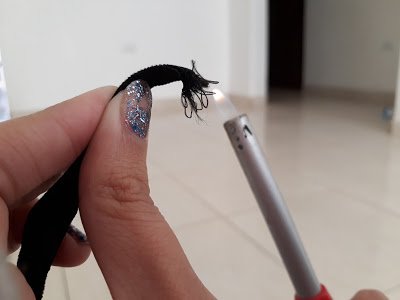
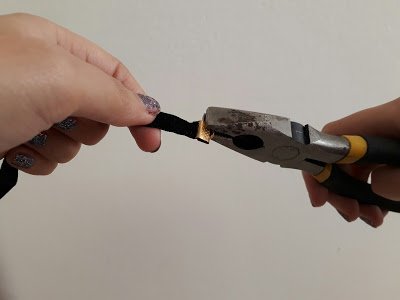
1. Grab the end of your velvet ribbon and burn off all the tiny unraveling strings so that your choker doesn't self destroy itself after two uses.
2. Fold a bit of that ribbon tip and add the ribbon end to it (if you fold it, the ribbon end has more to grasp on to). Clasp it shut with the pliers.
3. Open a jump ring (or the first of a string of jump rings, if you want a more flexible fit) with the tip of the scissors.
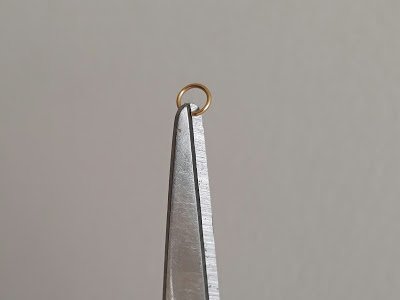
4. Hook the jump ring onto the ribbon end and clamp it shut (tight) with the pliers.
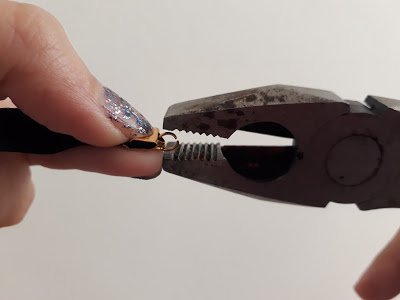
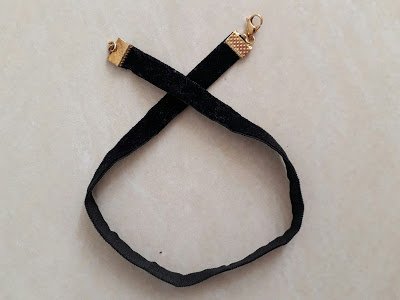
5. Measure the ribbon on your neck and mark with your finger where you would like it to end. Then, add a bit more (for the folding part) and cut it. Do steps 1, 2, 3 and 4 to this end again, but before closing the jump ring, hook on the closure.
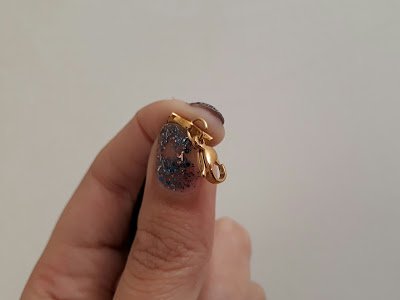
6. Your choker has to look like this by now:
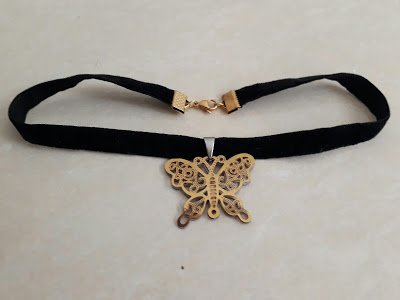
You may leave it as is and it would look fabulous. Very minimalist..
7. ..buuuut, if you want to add a bit more puh-zazz to it, you could add a pendant to it, like I did.
.
.
.
Hope you like this easy tutorial. It really is very simple to make, so if you make your own PLEASE let me know, I'd love to see it! Suggestions, requests or opinions? Leave them in the comments! 😊

- I did a photo shoot! | Iglesia del Carmen, Panama
- Concurso @simon.bolivar "Promociona Steemit en 2 minutos"
- Photography Project
- How to | Long and strong nails