Repository
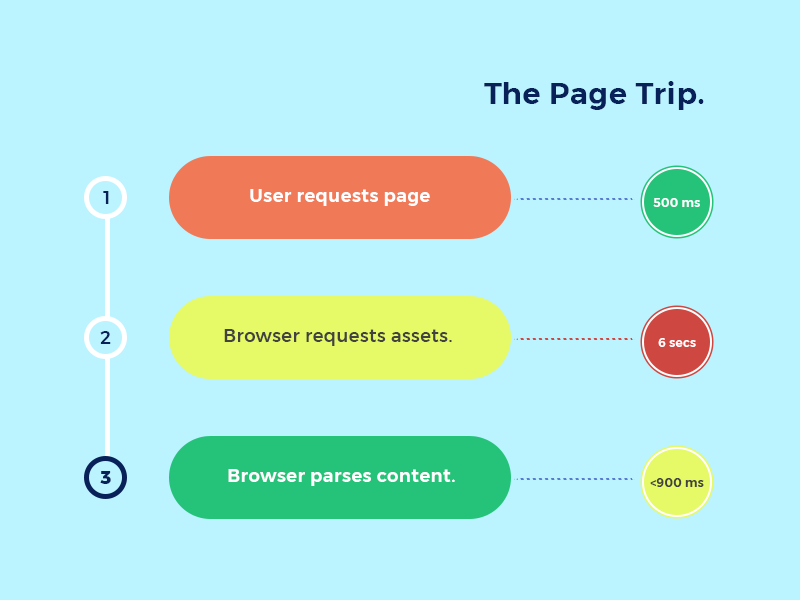
As web/mobile application developers and software creators, we are always on the lookout for ways we can improve the performance and quality of the experience of the solutions we architect. On the web, we can enhance the performance of our application as regards loading time by minimizing the number of HTTP requests we make for critical assets. If we can reduce the number of requests for CSS and JavaScript assets our application makes, we get improved load times.

We'll be looking at reducing the total amount of requests for CSS and JavaScript in our app to a maximum of two requests. How do we accomplish this feat? We'll be leveraging the following techniques:
- CSS-in-JS with Styled Components
- Code splitting and lazy loading with Webpack.
Let's dive in. We'll be building the user interface for a Hip Hop quotes application called FireLiners with React. We'll be leveraging the Styled Components CSS-in-JS library alongside Styled Systems. We'll also be leveraging the Priceline One Design System as the base for our user interface.
Difficulty
- Intermediate
What Will I Learn?
At the end of this tutorial, we should have attained sufficient mastery of performance optimization techniques as concerns asset loading. We'll also understand the construction of user interfaces with the Styled Components library and Styled Systems. We'll cover the following concepts. We'll then proceed to build a web application utilizing the knowledge we've garnered so far.
- Understanding the CSS-in-JS paradigm and its implications for performance.
- Harnessing Styled Components for Rapid Development.
- Code Splitting and Route Based Loading with Webpack.
Requirements
- Node.js 8.0 or greater.
- NPM 3.0 or greater.
- Yarn package manager
- Git
- An intermediate level of ReactJS knowledge.
- Keen interest and patience.
Introduction to CSS-in-JS.
We'll be breaking down a couple of concepts to gain a proper head start on our task.
- What is CSS-in-JS?
CSS-in-JS is a technique that utilizes JavaScript as the technology for generating styles. These styles may be occur inline (i.e within the style attribute of a DOM element) or may be extracted into a style element injected at the head. CSS-in-JS may also be leveraged by NodeJS servers to generate styles for the application using SSR (Server Side Rendering)
Why Should I Use CSS-in-JS?
CSS-in-JS has multiple benefits for your app's end users and for your development experience. We'll be exploring a few benefits. CSS-in-JS can help you:
Maintain a Singular Development Context: With CSS-in-JS, you can step out of incessant context switches thanks to the maintenance of a single development context. You no longer need to switch between SASS, Stylus and LESS files when building applications. You get to write all your code in one easily accessible place.
Eliminate Styling Fragmentation: CSS-in-JS allows you to freely write styles without worrying about compatibility with other styling preprocessors as all your code is available and can be used in any environment where JavaScript is ran.
Keep HTTP Requests Minimal: Multiple HTTP requests are usually the chief culprits to blame for poor load times. Loading multiple assets can interfere with paint times and other browser processes. We can keep the number of HTTP requests issued for assets low by utilizing CSS-in-JS.
Leverage the Full Power of JavaScript: CSS-in-JS allows us to leverage all the capabilities of JavaScript when writing code. We are able to take advantage of native JavaScript features like the
map,filterandreducewithin our CSS. For instance, we could write styles that only apply within a certain time range by leveraging theDateclass in JavaScript.
How Do I Get Started With CSS-in-JS
Multiple CSS-in-JS solutions exist at the moment. The most popular solutions at the moment are Styled Components, Emotion, Glamorous and Aphrodite. We'll be using the Styled Components library for the duration of this tutorial but other solutions use a similar API to Styled Components.
Code Splitting in Webpack
Webpack is the module bundler of choice for JavaScript developers around the world. Webpack is used to compile JavaScript modules. Once you've installed Webpack, you can interface with Webpack either through its CLI or API. You can learn more about Webpack here
Webpack comes loaded with many valuable tools. One of the tools we'll be harnessing is the code-splitting functionality. Code splitting allows us to separate our code into multiple chunks that can be loaded in parallel. The most common usage for code splitting is the splitting of a monolithic code base into a 'main bundle' and a 'commons bundle'. The commons bundle contains code that is required for the whole application to run. This code can be separated from the man bundle and cached while in production as this code rarely needs to be updated. Special optimizations like minification should be run on this bundle as it tends to be huge for most use cases.
Setup
Let's install the create-react-app application scaffold. This will help us generate a minimal, non-opinionated React application.
npm i -g create-react-app
Let's create a project we'll be calling fire-liners. We can do this by
create-react-app fire-liners && cd fire-liners
Since create-react-app assumes some default configurations, to gain better control over the setup, we'll eject all the config scripts to the root of the application.
npm run eject -y
With all our config files ejected, our structure should resemble the below now:
fire-liners/
- config/
- jest/
- env.js
- polyfills.js
- webpack.config.dev.js
- webpack.config.prod.js
- webpackDevServer.config.js
- node_modules/
- public/
- favicon.ico
- index.html
+manifest.json
- scripts/
- build.js
- start.js
- test.js
- src/
- App.css
- App.js
- App.test.js
- index.css
- index.js
- logo.svg
- registerServiceWorker.js
+package.json
- config/
For brevity and ease of understanding, we'll not be using any state management libraries like Redux, Saga or MobX. Let's get fire-liners running
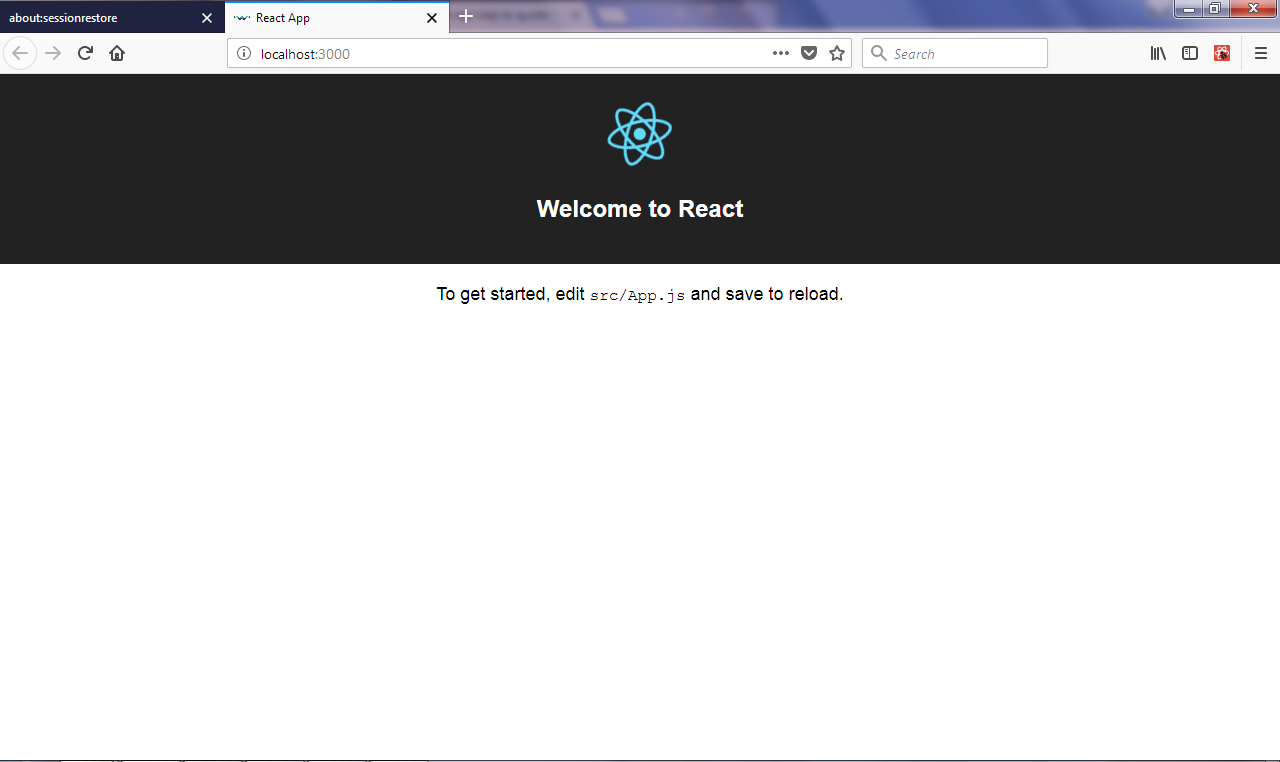
npm start
This will spin up http://localhost:3001 on your local browser. We get the default screen below.

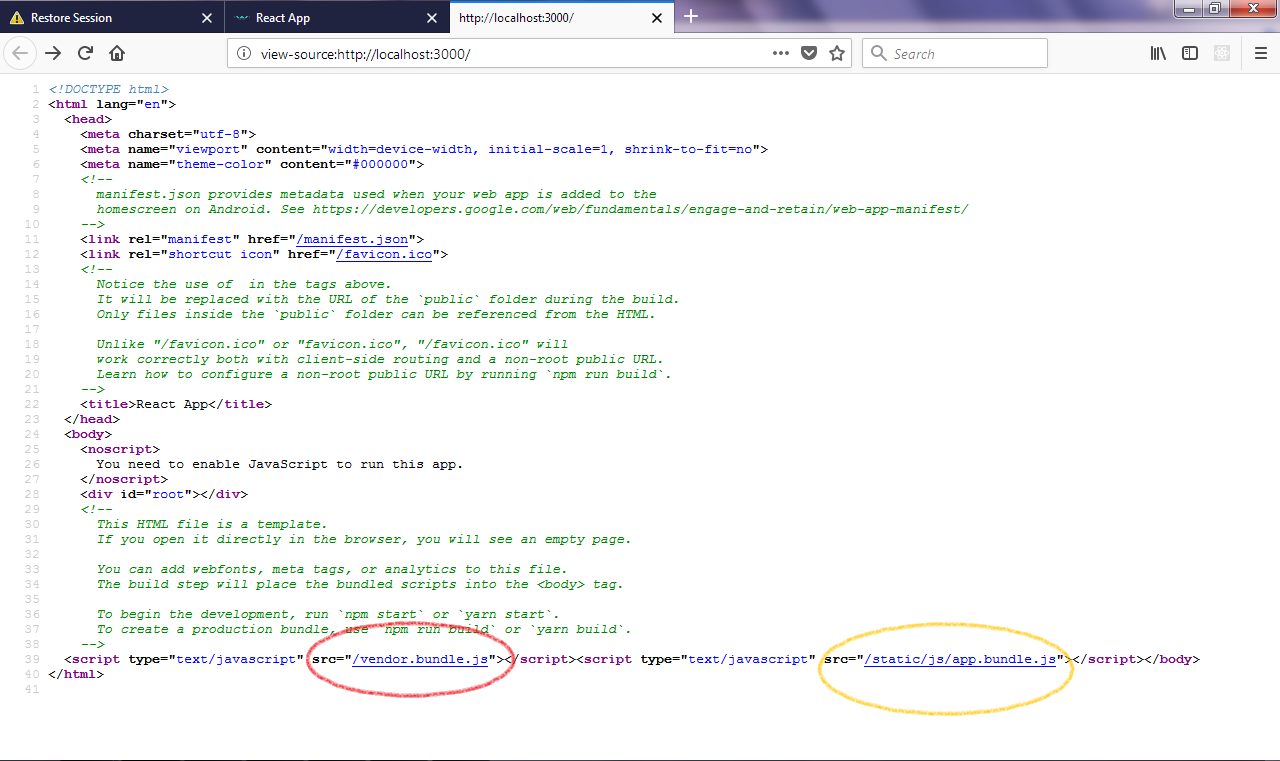
If we peer into the source code with Ctrl + U in the browser window, we should notice the below

This clearly shows that all our code is going into one giant bundle.js module. We'd like to harness Webpack code splitting to achieve app.bundle.js and vendor.bundle.js bundles. To do this, we'll be using the Webpack Common Chunks plugin and tweaking our configuration a little.
Let's head over to config/webpack.config.dev.js and add the Webpack Common Chunks plugin to the end of the plugins array available in the module property. Our initialization options includes the name we'll call the common chunks we're extracting out of the main bundle, we'll call this file vendor.bundle.js. We'll only create this file if we have more than two shared chunks in the main bundle.
    new webpack.optimize.CommonsChunkPlugin({
        name: "vendor",
        filename: "vendor.bundle.js",
        minChunks: 2
    }),
Next, we'll take a look at the entry property. It is structured like this
  entry: [
    // We ship a few polyfills by default:
    require.resolve('./polyfills'),
    paths.appIndexJs,
  ],
Our Common Chunks plugin expects all vendor code to be available in the entry with the "vendor" property. Let's adjust the entry property to the resemble the code below.
  entry: {
    "vendor": [
        "react",
        "react-dom",
        // We ship a few polyfills by default:
        require.resolve('./polyfills'),
        require.resolve('react-dev-utils/webpackHotDevClient')
    ],
    // Finally, this is your app's code:
    "app": paths.appIndexJs,
    },
Here we are specifying all the libraries we'd like to move to the vendor.bundle.js in the vendor array.
Finally, we need to modify the filename property in the output object to output the "bundle" suffix.
filename: 'static/js/[name].bundle.js',
With that done, we run npm start and we get a result like below.

Look at that! We now have two bundles, our app.bundle.js and our vendor.bundle.js modules. We'll now proceed to getting our app CSS-in-JS ready.
Getting Started with CSS-in-JS.
We'll now setup CSS-in-JS capabilities for our app. To do this, we'll need to install the following:
Styled Components: This library will help us turn strings or objects to valid CSS. It also helps us properly scope our CSS classes to avoid namespace pollution and style clashes.
Styled Systems: This helps us setup some sensible defaults for spacing, colors and also provide us with some very useful primitive styled components like
<Box/>,<Flex/>and<Input/>Priceline Design System: Provides us with some more opinionated CSS-in-JS components as a base for our interface.
We can install these modules by running
npm i styled-system pcln-design-system styled-components --save
With these installed, we'll proceed to restructuring our code for better separation of concerns.
Our new application structure looks like the one below:
fire-liners/
- config/
- jest/
- env.js
- polyfills.js
- webpack.config.dev.js
- webpack.config.prod.js
- webpackDevServer.config.js
- node_modules/
- public/
- favicon.ico
- index.html
- manifest.json
- scripts/
- build.js
- start.js
- test.js
- src/
- components/
- Header/
- index.js
- logo.svg
- Header/
- containers/
- App/
- App.test.js
- index.js
- registerServiceWorker.js
+package.json
- components/
- config/
We'll have to reflect the changes we made to our application structure within our JavaScript files. In src/index.js we change:
import App from './App.js';
To this one below
import App from './containers/App';
We'll create index.js at src/containers/App and add some code. We'll start working with styled components and Priceline's design system. We'll be displaying a list of quotes by hip hop artists. First of all we'll import some modules from react, styled components and pcln-design-system. We'll also import our Header.
import React from 'react';
import styled from 'styled-components'
import {
    Box,
    BlockLink,
    Flex,
    Link,
    Text,
    ThemeProvider
} from 'pcln-design-system'
import Header from '../../components/Header';
We'll hard code some liners. These will mimic the data we'll be fetching in subsequent installments from our server.
const liners = [
    {
        id: 1,
        author: "Immortal Technique",
        government_name: "Felipe Andres Coronel",
        body: "The purpose of life is a life with a purpose. Rather die for what I believe in than live a life that is worthless.",
        photo: "immortal-technique.jpg"
    },
    {
        id: 2,
        author: "Eminem",
        government_name: "Marshall Mathers",
        body: "I don't rap for dead presidents. I'd rather see the president dead.",
        photo: "eminem.jpg"
    },
    {
        id: 3,
        author: "Andre 3000",
        body: "Hell just fell, 3000 more degrees, cooler, but y'all can't measure my worth; and before you do, you'll need a ruler made by all the Greek gods.",
        photo: "andre-3k.jpg"
    }
]
We'll create a Circle micro-component to serve as a placeholder for images we'll load in the future. This circle will extend the Box base (from styled system) and add some niceties like border radius.
const Circle = styled(Box)`
    border-radius: 100%;
    width: 60px;
    height: 60px;
    display: inline-block;
`;
Our App class will extend React's component class and in our render method, we'll add some markup. Brace up this will be a little interesting. We'll be wrapping our code in a ThemeProvider. Theme providers allow us to apply specific defaults and theming to our application. We're wrapping our Header and app code within the ThemeProvider component.
class App extends React.Component {
  render() {
    return (
        <ThemeProvider>
            <div className="App">
              <Header/>
            </div>
        </ThemeProvider>
    );
  }
}
Next up after our header is our list of liners. We'll be using the Flex component to layout our elements. We'll also use the Box component (the base of the circle component earlier). We're leveraging responsive width parameters to set the width of the box to 90% at the "small breakpoint", 80% at "medium" and 60% at "large". We loop through our liners with liners.map(liner => {...}) and then we setup some more elements.
We utilize responsive font sizes in our <Text/> element to make our font sizes 16px, 24px and 32px respectively at small, medium and large breakpoints.
              <Flex justify="center" alignItems="center">

                <Box width={[ 0.9, 0.8, 0.6 ]} p={3}>
                    <Text fontSize={3} mb={3} bold>Recent Quotes</Text>
                    {
                        liners.map(liner => (
                            <BlockLink href={'/liners/' + liner.id}>
                                <Flex bg="lightGray" style={{borderRadius: '4px'}} p={3} mb={3}>
                                    <Flex width={[0.5, 0.7, 0.2]}>
                                        <Circle bg="gray" mr={5}></Circle>
                                    </Flex>
                                    <Flex flexDirection="column" width={[0.5, 0.7, 0.7]}>
                                        <Text mb={3} width={1} italic fontSize={[1, 2, 3]}>
                                            {liner.body}
                                        </Text>
                                        <Link href={'/authors/' + liner.author}>
                                            <Text fontSize={1} mb={3} color="gray" align="right" bold>{liner.author}</Text>
                                        </Link>
                                    </Flex>

                                </Flex>
                            </BlockLink>
                        ))
                    }

                 </Box>
              </Flex>

export default App
Next, we'll work on our Header component. Create an index.js file at src/components/Header and add some code to it. We will use some Priceline components to get better.
import React from 'react';
import {
    Button,
    Icon,
    IconButton,
    Flex,
    Link,
    Text
} from 'pcln-design-system';
Next, we'll define a MenuButton component for our header. This will simply display a menu button.
const MenuButton = props => (
    <Flex width={1 / 3} align="center">
        <IconButton name="menu" />
    </Flex>
);
Next, we display the brand in the middle of the header. For now, this will just be text.
const Brand = props => (
    <Flex width={1 / 3} justify="center" align="center">
        <Link href="http://a.t">
            <Text color="black">FireLiners</Text>
        </Link>
    </Flex>
);
Our third header component is a component that simply provides an add line button.
const AddLineButton = props => (
    <Flex width={1 / 3} justify="right">
        <Button radius={15} size="small">
            <Flex>
                <Icon name="plus"/>
                <Text mt={1}>New</Text>
            </Flex>
        </Button>
    </Flex>
);
Finally, we bring them all together in our Header class.
const Header = props => (
    <Flex className="App-header" mb={3} justify="center" bg="yellow">
        <Flex width={[ 0.9, 0.8, 0.6 ]}>
            <MenuButton />
            <Brand/>
            <AddLineButton/>
        </Flex>
    </Flex>
)

export default Header;
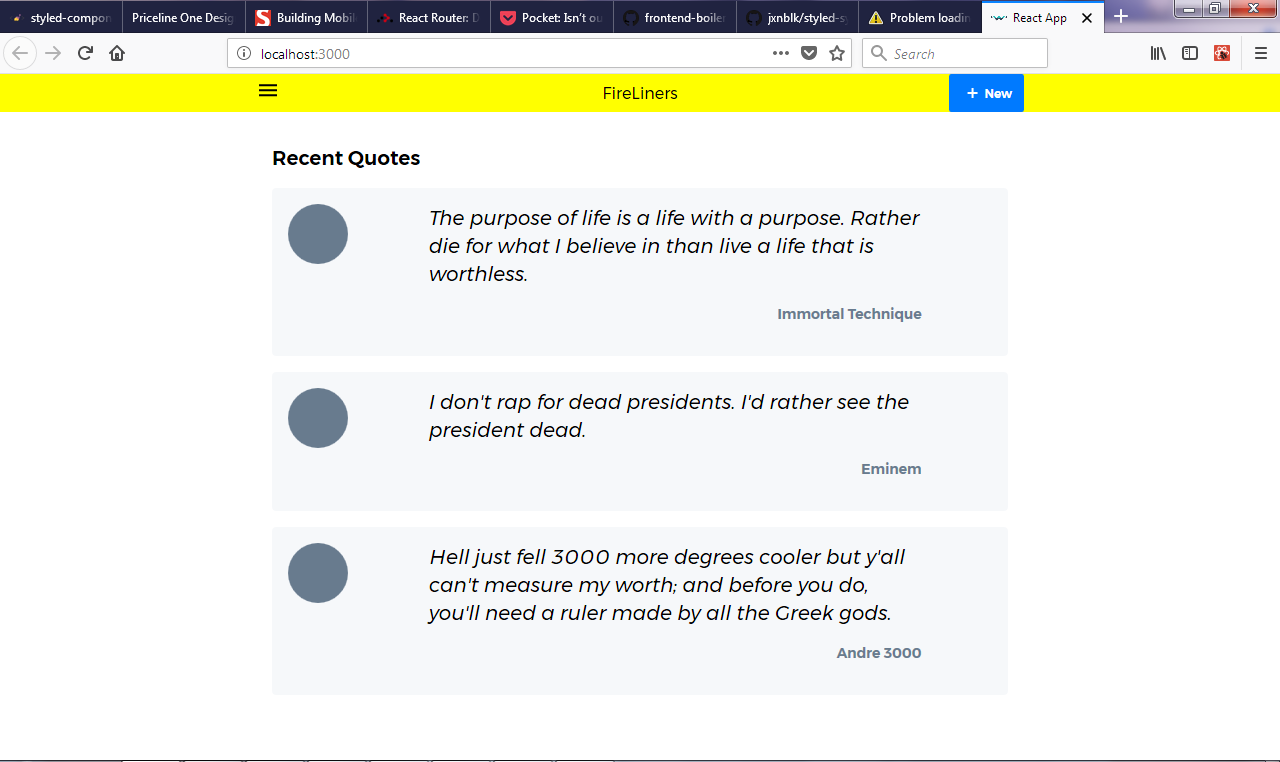
Great! Let's run
npm start
...And we should have a screen that looks like the one below.

Conclusion
CSS-in-JS and Webpack code splitting are such powerful tools. Leveraging these technologies, We learned how to build really interesting UI that performs appreciably well with load times by stripping out additional HTTP requests for CSS.
In our next installment, we'll explore some more possibilities with Webpack and CSS-in-JS. We'll look at lazy loaded code as an even more advanced performance technique with Webpack.
