Repository
- https://github.com/nodejs/node
- https://github.com/webpack-contrib/webpack-serve
- https://github.com/oclif/oclif
What Will I Learn?
- listening to tab browser activity
- sending tab browser activity as a beacon data
- creating internal Webhook using koa-router and koa-body
- emit tab activity event between 2 layers of abstraction using EventEmitter
Requirements
- Basic understanding of Javascript and Typescript
- Basic understanding of client-side Javascript and nodejs API
- Some knowledge about event-based programming
- Install npm or yarn
- Install some code-editor/IDE (VSCode or alike)
- A web browser that supports current W3C HTML5 Standard
Difficulty
- Intermediate
Tutorial Contents
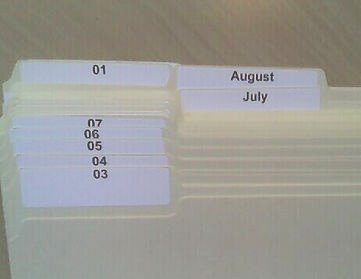
Tab is a graphical control element that allows multiple documents or panels to be contained within a single window, using tabs as a navigational widget for switching between sets of documents[1] which are modeled after tickler file[2]. Most Web Browser now has Tab functionality so the user can switch between page easily. A study of tabbed browsing behavior in June 2009 found that users switched tabs in 57% of tab sessions, and 36% of users used new tabs to open search engine results at least once during that period[3]. This is one of many reasons why many website record user activities to find out if their website is interesting by measuring how long it takes for a user to switch tab.
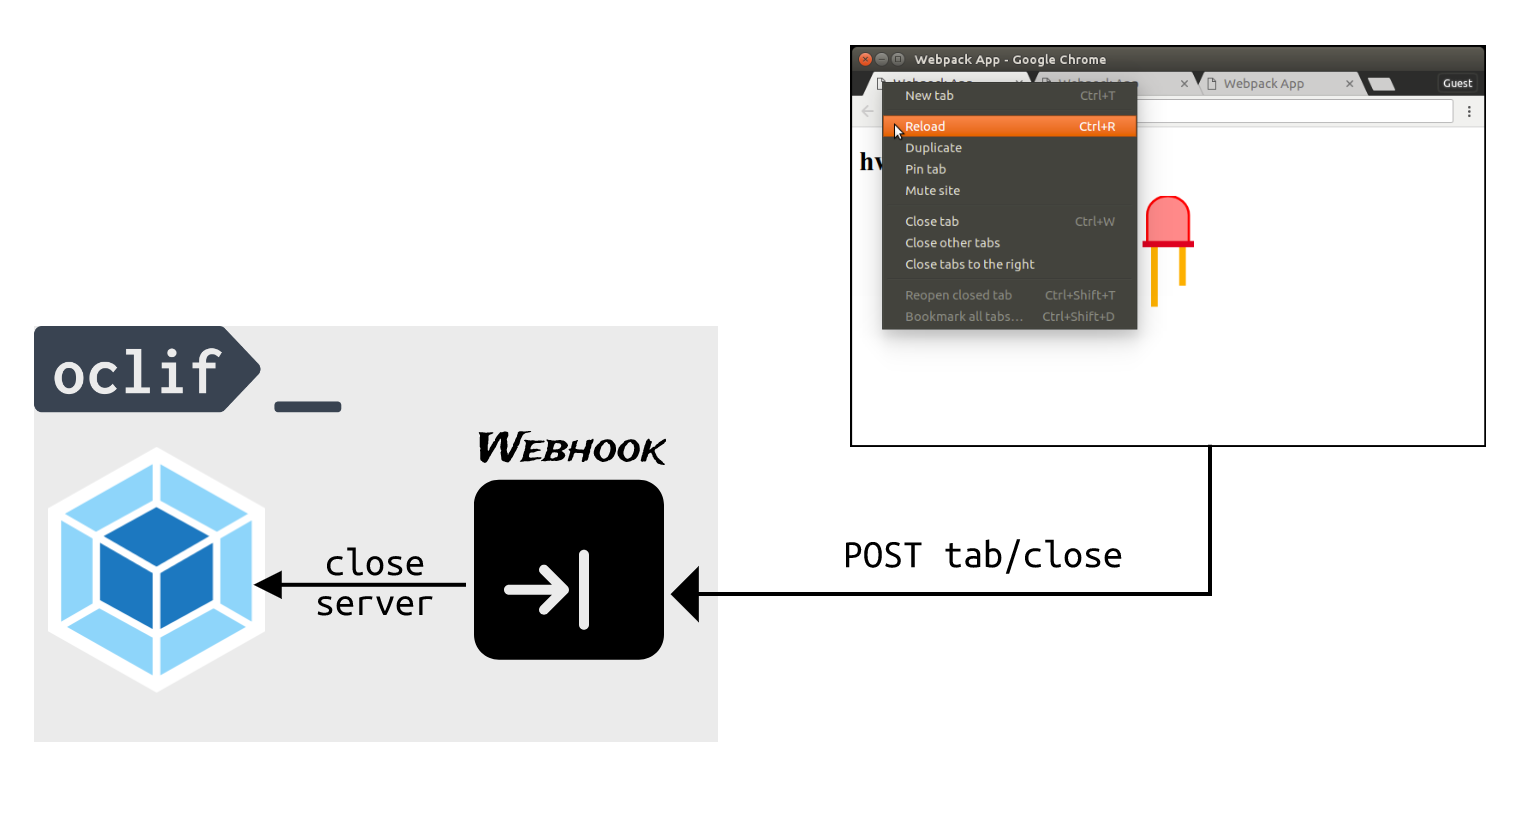
Although this tutorial not going to cover how to build a website/webapp but rather than building a dev tool, sending tab activity to server still can come handy for some use case and problem. In the last tutorial, we create custom CLI that can serve incomplete HTML file (which actually compiled into JS) with --help documentation and suggestion when the command is not complete. It also demonstrates how we can use WebComponent inside that HTML like file. In this tutorial, we will try to send Tab activity of Web Browser to the server (our custom CLI) and make decision base on that.
🌐 Detecting Tab activity in the browser and send it to server
Web Browser has many functionalities for listening to some event that happens as the user interacts with the interface. Most functionality are follow W3C/IETF standard for DOM, HTML, and SVG. At the first phase/era, many web browser doesn't have some standard that they can agree for (especially in the event models) which cause some website compatible in some browser but not the others one. To combat this, World Wide Web Consortium (W3C) create specification in DOM Level 2[4]. However, there is a flaw in that specification in the event flow because the event ordering and global event handler were unspecified. To fix this, they release UI Events specification[5] which most of the event handler now proxied into window object. Now the question begins to arise on how to detect when the user switches the tab and this is where W3C release specification for Page Visibility which determines the visibility state of a top-level browsing context[6]. Not only answering on how to detect tab switching, those specifications also can aid in the development of resource efficient web applications. Summary, if we try to create a state diagram on how Tab Browser works at this age, we can get the result as shown in Figure 2.

As we can see in Figure 2, Tab Browser has 5 different states (open, close, reload, show, hide) and also 4 events (load, unload, hidden, visible) which we will use in Code Change 1. Actually, there are more than 4 events which signal the progress[7] when the user loads a page but since we don't need that, we only use those 4 events.
const sendState = name => navigator.sendBeacon(`/$event/${name}`, window.name);1. helper function to send state to server utilizing
navigator.sendBeaconandwindow.namewindow.addEventListener('load', () => { if (!window.name) { window.name = 'tab-'+crypto.getRandomValues(new Uint16Array(1)).join(''); sendState('tab/open'); visibilityChange(); } else { sendState('tab/reload'); visibilityChange(); } }); window.addEventListener('unload', () => {if (window.name) sendState('tab/close')});2. detecting open, close, and refresh tab
const visibilityChange = () => document.hidden ? sendState('tab/hide') : sendState('tab/show');
document.addEventListener('visibilitychange', visibilityChange);
3. detecting switch tab
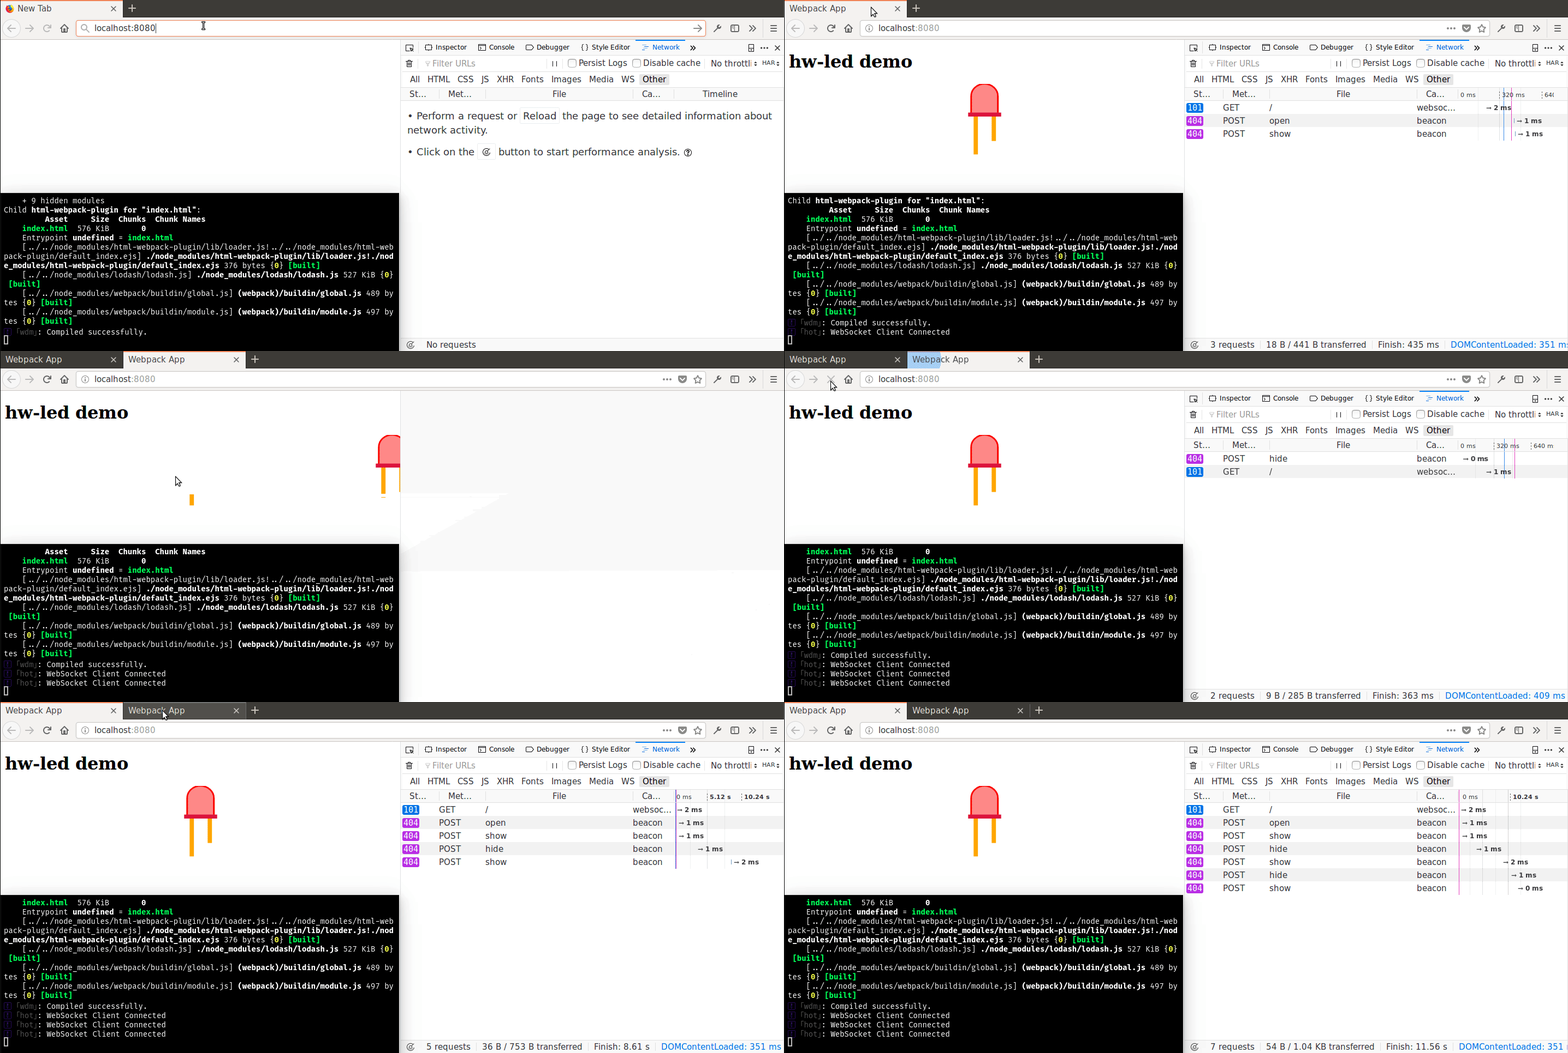
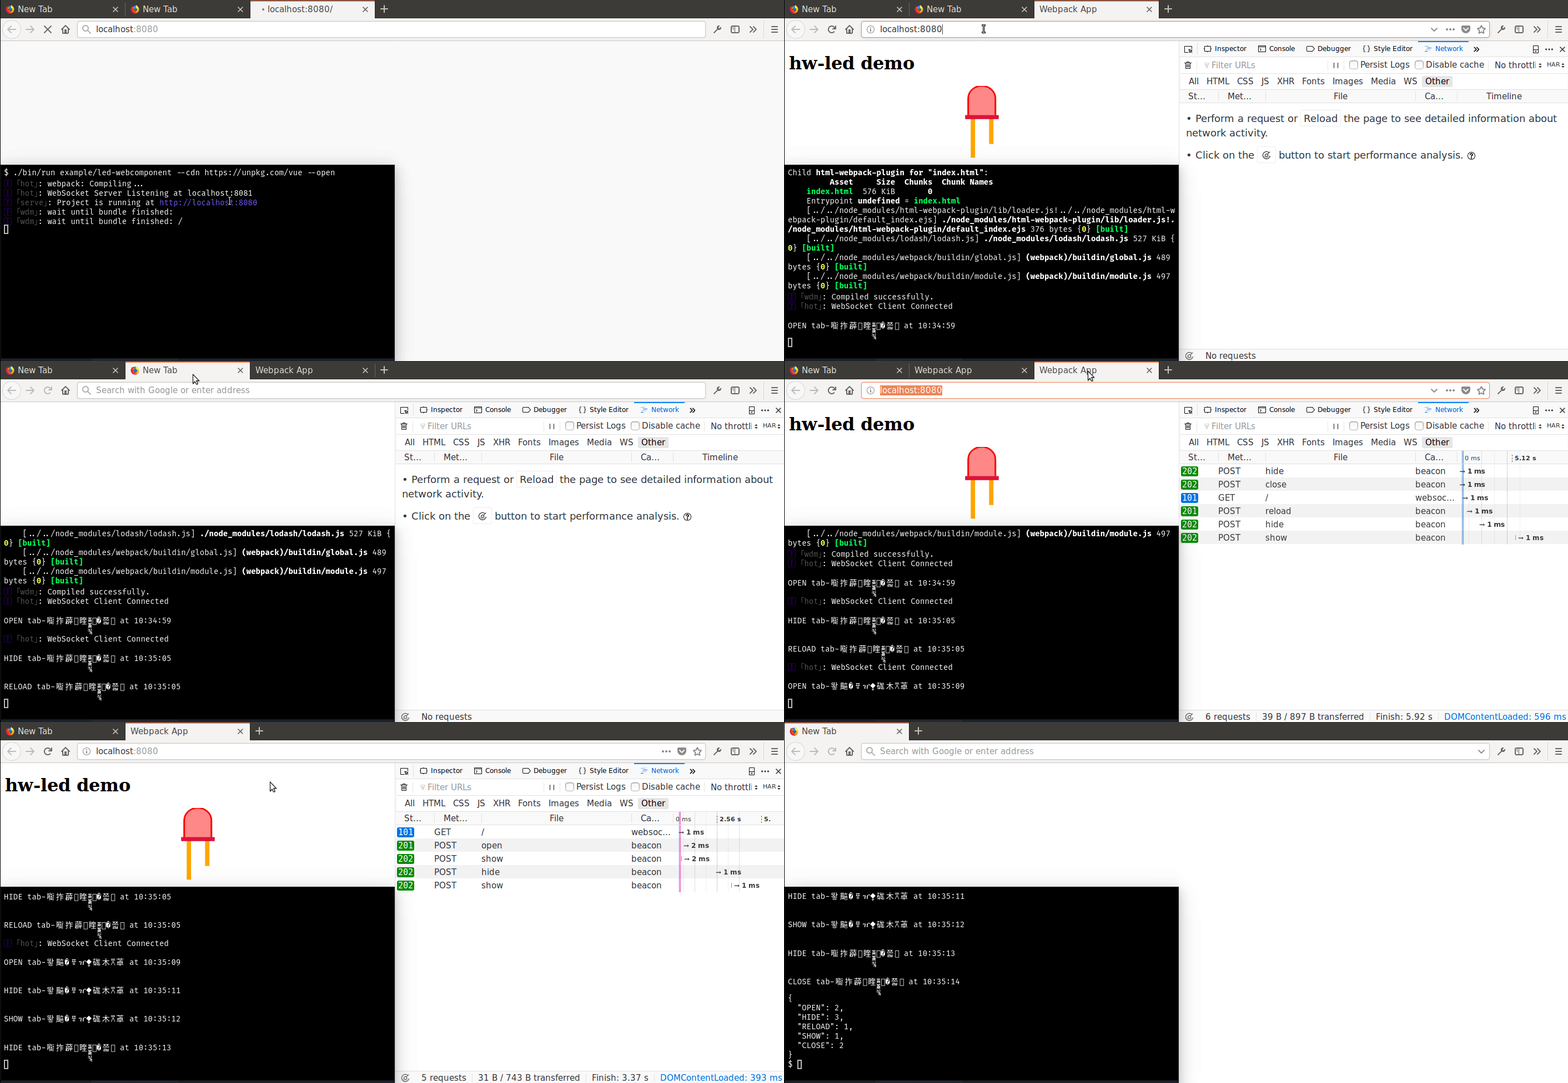
Beacon is an interface that web developers can use to schedule asynchronous and non-blocking delivery of data that minimizes resource contention with other time-critical operations while ensuring that such requests are still processed and delivered to the destination[8]. By using the sendBeacon() method in Code Change 1.1, the data is transmitted asynchronously to the web server when the User Agent (Web Browser) has an opportunity to do so, without delaying the unload or affecting the performance of the next navigation[9]. In Code Change 1.2, we try to detect if the tab browser has opened (load), reloaded, or closed (unload). Note that there is no special event for detecting tab reload, the only way we can detect tab reload is to give the opened tab unique identity using generated cryptographic number (crypto.getRandomValue) which stored in window.name then check if that variable contains a value when load event is fired again. If we look at the state diagram in Figure 2, we also need to detect tab switching which why we call visibilityChange (implemented in Code Change 1.3) after sending state tab/open or tab/reload. This is because we want to know if the opened tab is shown or not in case the user click duplicate on the tab which demonstrated in Figure 3. In Code Change 1.3, we begin to see something strange here. Instead of using window, we use document because it does not yet need to be proxied to window in the current Page Visibility specification[6].
🐸 Recieve Tab activity from client (web browser)
Koa is a web framework which does not bundle any middleware within the core and can be viewed as an abstraction of node.js's http. Unlike Express which aim to be an application framework for node.js, Koa aims to be a smaller, more expressive, and more robust foundation for web applications and APIs[10]. Maybe this one of many reason why webpack-dev-server being rewritten into webpack-serve which leverage Koa to serve the generated static HTML file while use native WebSockets to do hot-reloading stuff via webpack-hot-client.
| webpack-dev-server | webpack-serve | |
|---|---|---|
| Initial release | 23 Dec 2014 | 12 Feb 2018 |
| under the hood | Express.js | Koa.js |
| API | not aligned | API first |
| Development status | only maintenance | accept new feature |
| Total | work slower but supports old browsers | fast alternative |
In this part we will create Koa middleware using koa-router to accept beacon data through HTTP POST method and parse (unzip) HTTP Message Body into plain text through koa-body as shown in Code Change 2. Actually koa-body will automatically parse it based on HTTP Header Content-Type.
yarn add koa-body koa-router
yarn add @types/koa-router --dev
1. install Koa middleware for routing HTTP request and parse it's content
import Router = require('koa-router')
import TabWebhook from './tab-activity'

const route = new Router()
export const tab = new TabWebhook('/tab')

route.use('/$event', tab.Router.routes(), tab.Router.allowedMethods())

export default route
2. ./controller/event/index.ts register router for Tab Webhook
let count = {} as {[key: string]: number}

const print = (msg: string) => {
  console.log(`\n${msg} at ${new Date().toLocaleTimeString()}\n`)
  const state = msg.split(' ')[0]
  count[state] = ++count[state] || 1
}

const close = (server: serve.Instance) => {
  count.CLOSE += 1
  console.log(JSON.stringify(count, null, 2))
  server.close()
}
3. ./index.ts helper function to print event, record its statistic, and close webpack server
import event, {tab} from './controller/event'
.
.
  async run() {
    .
    .
    const webpackServer = await serve({
      config: webpack.config,
      open: flags.open,
      add: app => app.use(event.routes()).use(event.allowedMethods()) // register HTTP routing
    })

    // #region listen, print, and react to all tab event
    tab.on('close', id => tab.allClosed ? close(webpackServer) : print(`CLOSE ${id}`))

    tab.on('open', id => print(`OPEN ${id}`))
    tab.on('reload', id => print(`RELOAD ${id}`))
    tab.on('hide', id => print(`HIDE ${id}`))
    tab.on('show', id => print(`SHOW ${id}`))
    // #endregion
  }
4. how to use
./controller/event
After we install Koa middleware as shown in Code Change 2.1, we begin to use koa-router to handle all POST request on endpoints prefixed with /$event/tab (Code Change 2.2). Since koa-router support to use nested routes, we register TabWebhook.Router middleware into route /$event like we normally register middleware into Koa instance by using .use() function. Because we define the prefix would be /tab when instantiating TabWebhook, our route path becomes /$event/tab. In Code Change 2.3, we create helper a function print() to print the fired event and also record how many times it fire while the close() function will webpack server and print the statistic how many times all of each tab event is fired. After we implement the base router and some helper function, we begin to register (add) the router middleware that we created in Code Change 2.2 into webpack server instance then listen, print, and react to all Tab event. In this case, we react only "when all tab is closing then close webpack server" while the others event only just records and print the event name its tab id. For more detail see the sequence diagram in Figure 4.
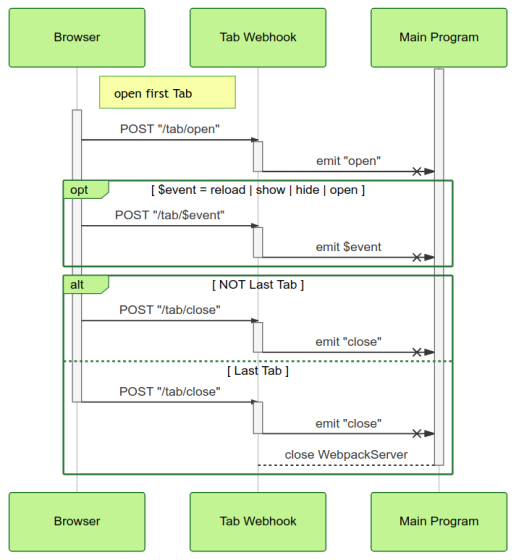
In Figure 4, we see that to achieve the end result as shown in Figure 5, we need to proxied the beacon data sent as a POST request into event emitter (emit $event) via Tab Webhook. Based on that sequence diagram, we also need to close the webpack server only when the user closes the last opened tab which also closes our main program automatically. Also, notice that the Main Program is already running when the Browser opens its the first tab. There is also some sort of delay to make POST request when the tab begins to open because in Code Change 1.2 we listen to load event which only emits after the page is loaded successfully.
📁 Implementing Tab Webhook
Webhooks are automated calls that are triggered when a specific event happens. Usually, webhooks receive calls through HTTP POST only when the external system we are hooked to has a data update. Webhooks are commonly used to perform smaller requests and tasks[12]. Figure 4 is the example webhooks we are going to implement written in Code Change 3.
import {EventEmitter} from 'events'
import {basename} from 'path'
import Router = require('koa-router')
import bodyparser = require('koa-body')

const router = new Router()
router.use(bodyparser())

export default class extends EventEmitter {
  // Implementation details
}
🏁 1. preparation
  Router = router
  get allClosed() {return this.openedOnce ? this.IDs.length === 0 : false}
  get allInactive() {return this.activeIDs.length === 0}

  // Stores
  IDs: string[] = []
  activeIDs: string[] = []
  get inactiveIDs(): string[] {
    return this.IDs.filter(i => this.activeIDs.indexOf(i) < 0)
  }

  // Buffered States
  private openedOnce?: boolean
  private onload = new Array(2) as boolean[]
🔧 2. [inside class] create helper variable, states, and stores
  private post(path: string) {
    const event = basename(path)

    const delay = (time: number, callback: () => void) => setTimeout(() => {
      context.status = 202
      if (this.onload.every(load => load === false)) callback()
      this.onload.shift()
      this.onload.push(false)
    }, time)

    return {
      insertAt: (store: any[], time = 400) => router.post(path,
        context => delay(time, context, () => this.insert(event, store, context))),
      deleteAt: (store: any[], time = 400) => router.post(path,
        context => delay(time, context, () => this.delete(event, store, context))),
    }
  }

  private insert(event: string, store: string[], context: IRouterContext) {
    store.push(context.request.body)
    this.signal(event, context)
  }

  private delete(event: string, store: string[], context: IRouterContext) {
    if (this.IDs.includes(context.request.body)) {
      const index = store.indexOf(context.request.body)
      store.splice(index, 1)
      this.signal(event, context)
    }
  }

  private signal(event: string, context: IRouterContext) {
    this.emit(event, context.request.body)
    context.status = 201
  }
🏗 3. [inside class] create helper function to store and emit Tab states/events
  constructor(prefix?: string) {
    super()
    prefix = prefix || ''

    router.post(`${prefix}/open`, context => {
      this.openedOnce = true
      this.onload.fill(true)
      this.insert('open', this.IDs, context)
    })
    this.post(`${prefix}/show`).insertAt(this.activeIDs)

    this.post(`${prefix}/close`).deleteAt(this.IDs, 500)
    this.post(`${prefix}/hide`).deleteAt(this.activeIDs, 700)

    router.post(`${prefix}/reload`, context => {
      this.onload.fill(true)
      this.signal('reload', context)
    })
  }
🚄 4. [inside class] create webhooks when
TabWebhookclass is instantiate
In Code Change 3.1, we declare TabWebhook class which inherit class EventEmitter so that we can send (emit) event which will be listened in the main program as shown in Code Change 2.4. Then in Code Change 3.2, we declare members to store the Tab IDs and also which ID is active in activeIDs variable. We also need to buffer states which hold by openedOnce and onload variable. The onload variable takes 2 array of Boolean because UI Events[5] which signal the page status like load and unload intersect with Page Visibility[6] event visibilitychange and cause the event to be fired 2 times. For example when event tab/close is emitted, tab/hide event will also be emitted. The worse thing is the order of event being emitted is different between Web Browsers.

In Code Change 3.3, we begin to create a helper function to do routing while also store Tab ID so it can be counted plus solving the problem that 2 events being emitted with an unpredictable order. To do this, we utilize unelegant technique by delaying the execution (see function delay inside post(path)) of insert and delete operation which also emits the corresponding event (see function signal) depicted in Figure 6. The delete function is a little bit special here because it only executes if the IDs contain the request body which is the Tab ID of the Tab that currently emits the corresponding event. That mechanism helps us avoid the condition when TabWebhook emits event hide before the event reload is emitted caused by user hit the reload button.
In Code Change 3.4, we finally use the helper function and variable we have created before. The states tab/hide and tab/show control activeIDs array while tab/open and tab/close control IDs array. There is some special treatment when handling states tab/open and tab/reload which buffer the state into variable openedOnce and onload. As the name suggest, onload will be filled with true when browser send state tab/open or tab/reload because those 2 events are from UI Events[5] load shown in Code Change 1.2. The openedonce is just a variable indicating that there is at least one Tab has been opened before so when allClosed is called (Code Change 2.4), it will return true if previously there is an opened Tab which avoids the main program to exit suddenly.
Conclusion
Summary listening tab activity in the server is a really tricky task that needs to use unelegant way like delaying to force event order and using the buffered state to avoid conflict between 2 events that reside on different W3C specification. This happens because there is no clear lifecycle specification of Tab Browser activity. However, we need this feature because in the next tutorial we will use Tab activity to gracefully close WebSocket connection and switch it to another one if there is Tabs that are still opened.
Parting words
This is the second tutorials (PoC) of this series. I realize this solution has data race condition, for example, if user open-reload-open then close all tab in a really fast way, the program will not close or maybe close to early. Also if someone does Reload All Tabs command, the program will unexpectedly close. Still need to think a way to solve this problem but for now, I will ignore this issue. I estimate that this series will consist of 4 parts:
| Topic | Goal | Progress | |
|---|---|---|---|
| part 1 | more focus on how to utilize oclif, webpack, and svelte | create custom CLI to serve incomplete HTML like file | complete |
| part 2 | focus on how Tab Browser event works | listen to Tab Browser activity in the server | complete |
| part 3 | begin to enter the main topic "Creating RPC Server on Web Browser" | create reverse RPC through WebSocket | need to fix some bug 🐛 |
| part 4 | focus on how to create a proxy that bridge between Unix Socket and WebSocket | end-user can create Rust program to control the HTML like file via Unix Socket | have a clue how to do it in Rust ⚙️ |
References
- Tab (GUI) History
- Tickler File
- Parallel Browsing Behavior on the Web
- W3C - DOM Level 2 Events Specification
- W3C - Changes between DOM Level 2 Events and UI Events
- W3C - Page Visibility Level 2
- W3C - Progress Events Specification
- W3C - Beacon Specification
- MDN - Navigator.sendBeacon()
- Koa vs Express
- How is webpack-serve different from webpack-dev-server?
- Webhook vs API: What’s the Difference?
Curiculum
- Related Tutorials
