Even though it's already Thursday, I would like to participate in VEGAN WEDNESDAY initiated by my dear friend @heart-to-heart . I was busy yesterday with Fruits and Veggies Monday winners announcement, so I hope it's okay that I am one day late and you will like this delicious recipe I created for my daughter's BD, back in May
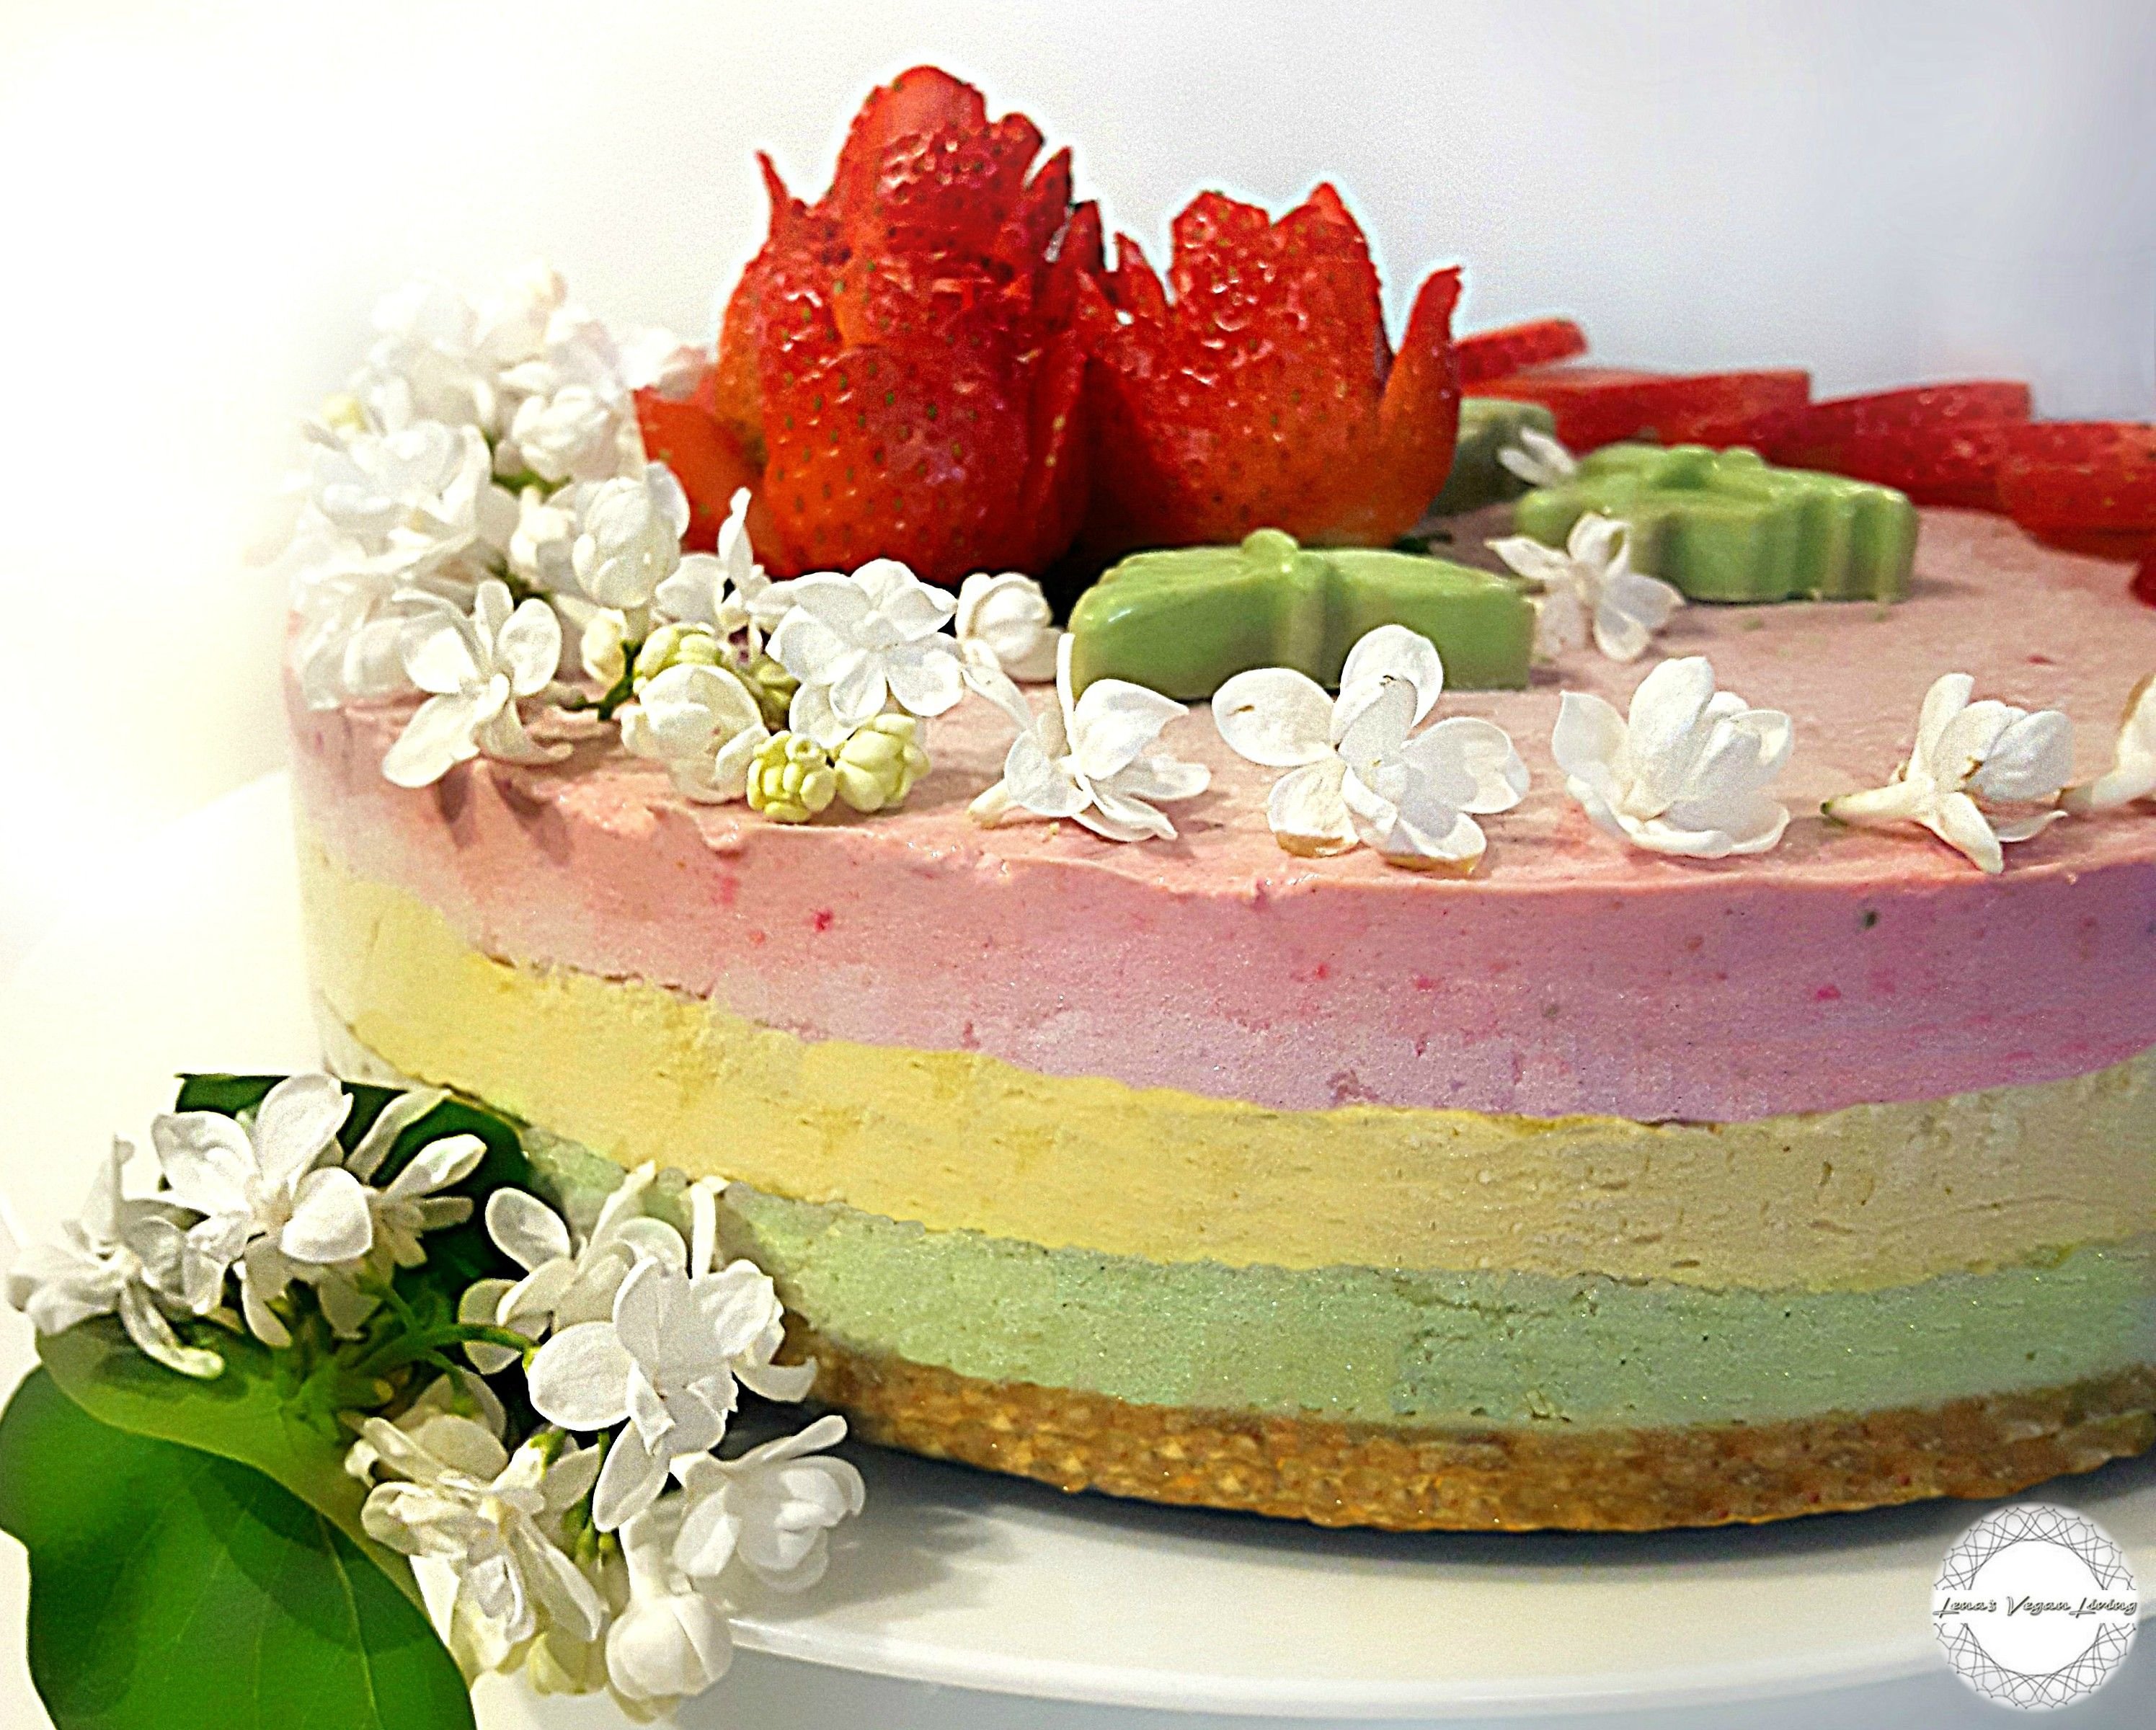
This is a very special cake, because I made it for my daughter’s birthday. We are both born in May, which is my favorite month in a year, even though the weather wasn’t the best this year so far. Nevertheless, we had the chance to have a lovely picnic in the park and celebrate our birthdays, while this cake was still in the freezer. My birthday is three days before my daughter’s, so I gave it to her little but later. It was a surprise and she was especially impressed by the roses made of strawberries.
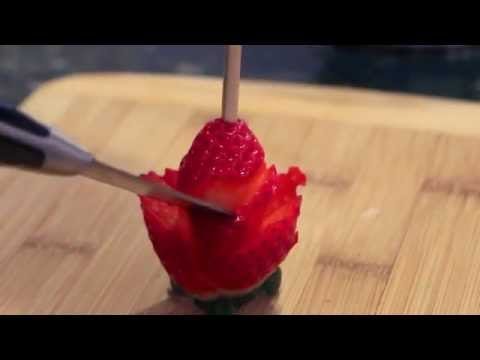
If you like them too, you can watch a You Tube video I found. It is attached at end of the page. My roses are not too perfect, because my strawberries were little bit too chubby and flat on two sides. You can’t really see it on the shape of the roses, but if you take a closer look at the strawberry slices, you will know what I mean.
The main thing is that the cake is absolutely delicious and no sweetener added. At least that’s how I made it, but you can add little bit of maple syrup if you wish. Either way, this is a totally guilt free, super healthy dessert.

STRAWBERRY RAINBOW
Triple Layer Cashew Mousse Cake with Strawberries, Mango & Matcha
Raw - Vegan – Gluten Free
Author: Lena's Vegan Living
Serves: 12 to16
Strawberry Rainbow
Author: Lena Novak - Lena's Vegan Living
Recipe type: Dessert
Serves: 12 to16
INGREDIENTS
For the crust
Dates 1cup (pitted presoaked 15min)
Raw Brazilian nuts 1/3 cup
Raw Almonds 1/3 cup
Raw Pecans 1/3 cups
Raw Macadamia nuts 1/3 cup
Coconut oil 1/4 cup (melted over the steam)
Pinch of Vanilla powder
Pinch of Himalayan pink salt
Spring form cake pan 9 inch
Food processor
Spatula
PROCESS
Blend all in a food processor by pressing pulse slowly and gradually until you get semi smooth texture.
When ready, place the mixture in the middle of the cake form (you may line the bottom with parchment paper, but it’s not necessary).
Start pressing down with spatula and eventually with your fingers to make it evenly flat.
When ready, place it into the freezer for ½ hour.
FOR THE FILLING
Raw Cashew nuts 4 ½ cups, 1 1/2cup for each layer (presoaked for 6 hours)
Organic cold pressed coconut oil 3tbs, 1tbs for each layer (melted above the steam)
Thick coconut cream 6tbs, 2tbs for each layer (for the best results I recommend cooled Thai brand)
Ripe bananas 3, 1 for each layer (sliced)
Matcha 1tbs for the bottom layer
Mango for the middle layer (peeled and sliced)
Fresh strawberries 1cup for the top layer (washed and sliced)
Vanilla powder pinch ¼ tsp for each layer
Maple syrup 3 tbs, 1 tbs for each layer (optional)
Pinch of Himalayan Pink Salt
PROCESS
Start blending all the ingredients for the Matcha layer starting with the cashews in a food processor by pressing pulse slowly and gradually first, and then on full speed until you get completely smooth texture.
Pour into your cake form by starting from the middle spreading with spatula all the way to the edges.
When ready, place it again into the freezer for ½ hour to let the layer firm up.
In the mean time repeat the process with the mango layer.
When ready, careful pour the layer on top of the Matcha layer and place into freezer for ½ hour.
Repeat the same with the top strawberry layer and store the cake into freezer for at least 6 hours.
When ready, move the cake from freezer to refrigerator for couple of hours before you remove the spring form.
You may have to wait couple more hours before is totally thawed and ready to be served.
Decorate your cake, ½ before serving.
TOP LAYER & DECORATION
Strawberries fresh 1cup (strawberry rose tutorial video is at the bottom of the page)
White Lilac (optional)
BUTTERFLIES
Matcha ¼ tsp
Canned coconut cream ¼ cup
Banana ¼
Squeeze bottle
Butterfly Silicone chocolate mold tray
For the butterflies, blend all the ingredients in a food processor.
By using the squeeze bottle, fill up few butterflies of the mold and place it into the freezer for couple of hours.
When ready, carefully remove them from the tray and decorate your cake.
NOTE:
This cake has to be stored in the refrigerator in a sealed container or freezer if you wish to last longer.
THANK YOU FOR VISITING & BON APPETITE 🍓💚🍓
https://www.lenasveganliving.com/