Sometimes Honey Bees just need a little help to get them through those long winter months, or in the first of spring when there aren't many food sources out yet. Many beekeepers add an in hive feeder or hivetop feeder to give the bees easy access to additional food when it is needed. While these feeders are readily available, a high quality one can cost you around $70…so, why not build one yourself? We did just that and want to show you how;
 The Detail
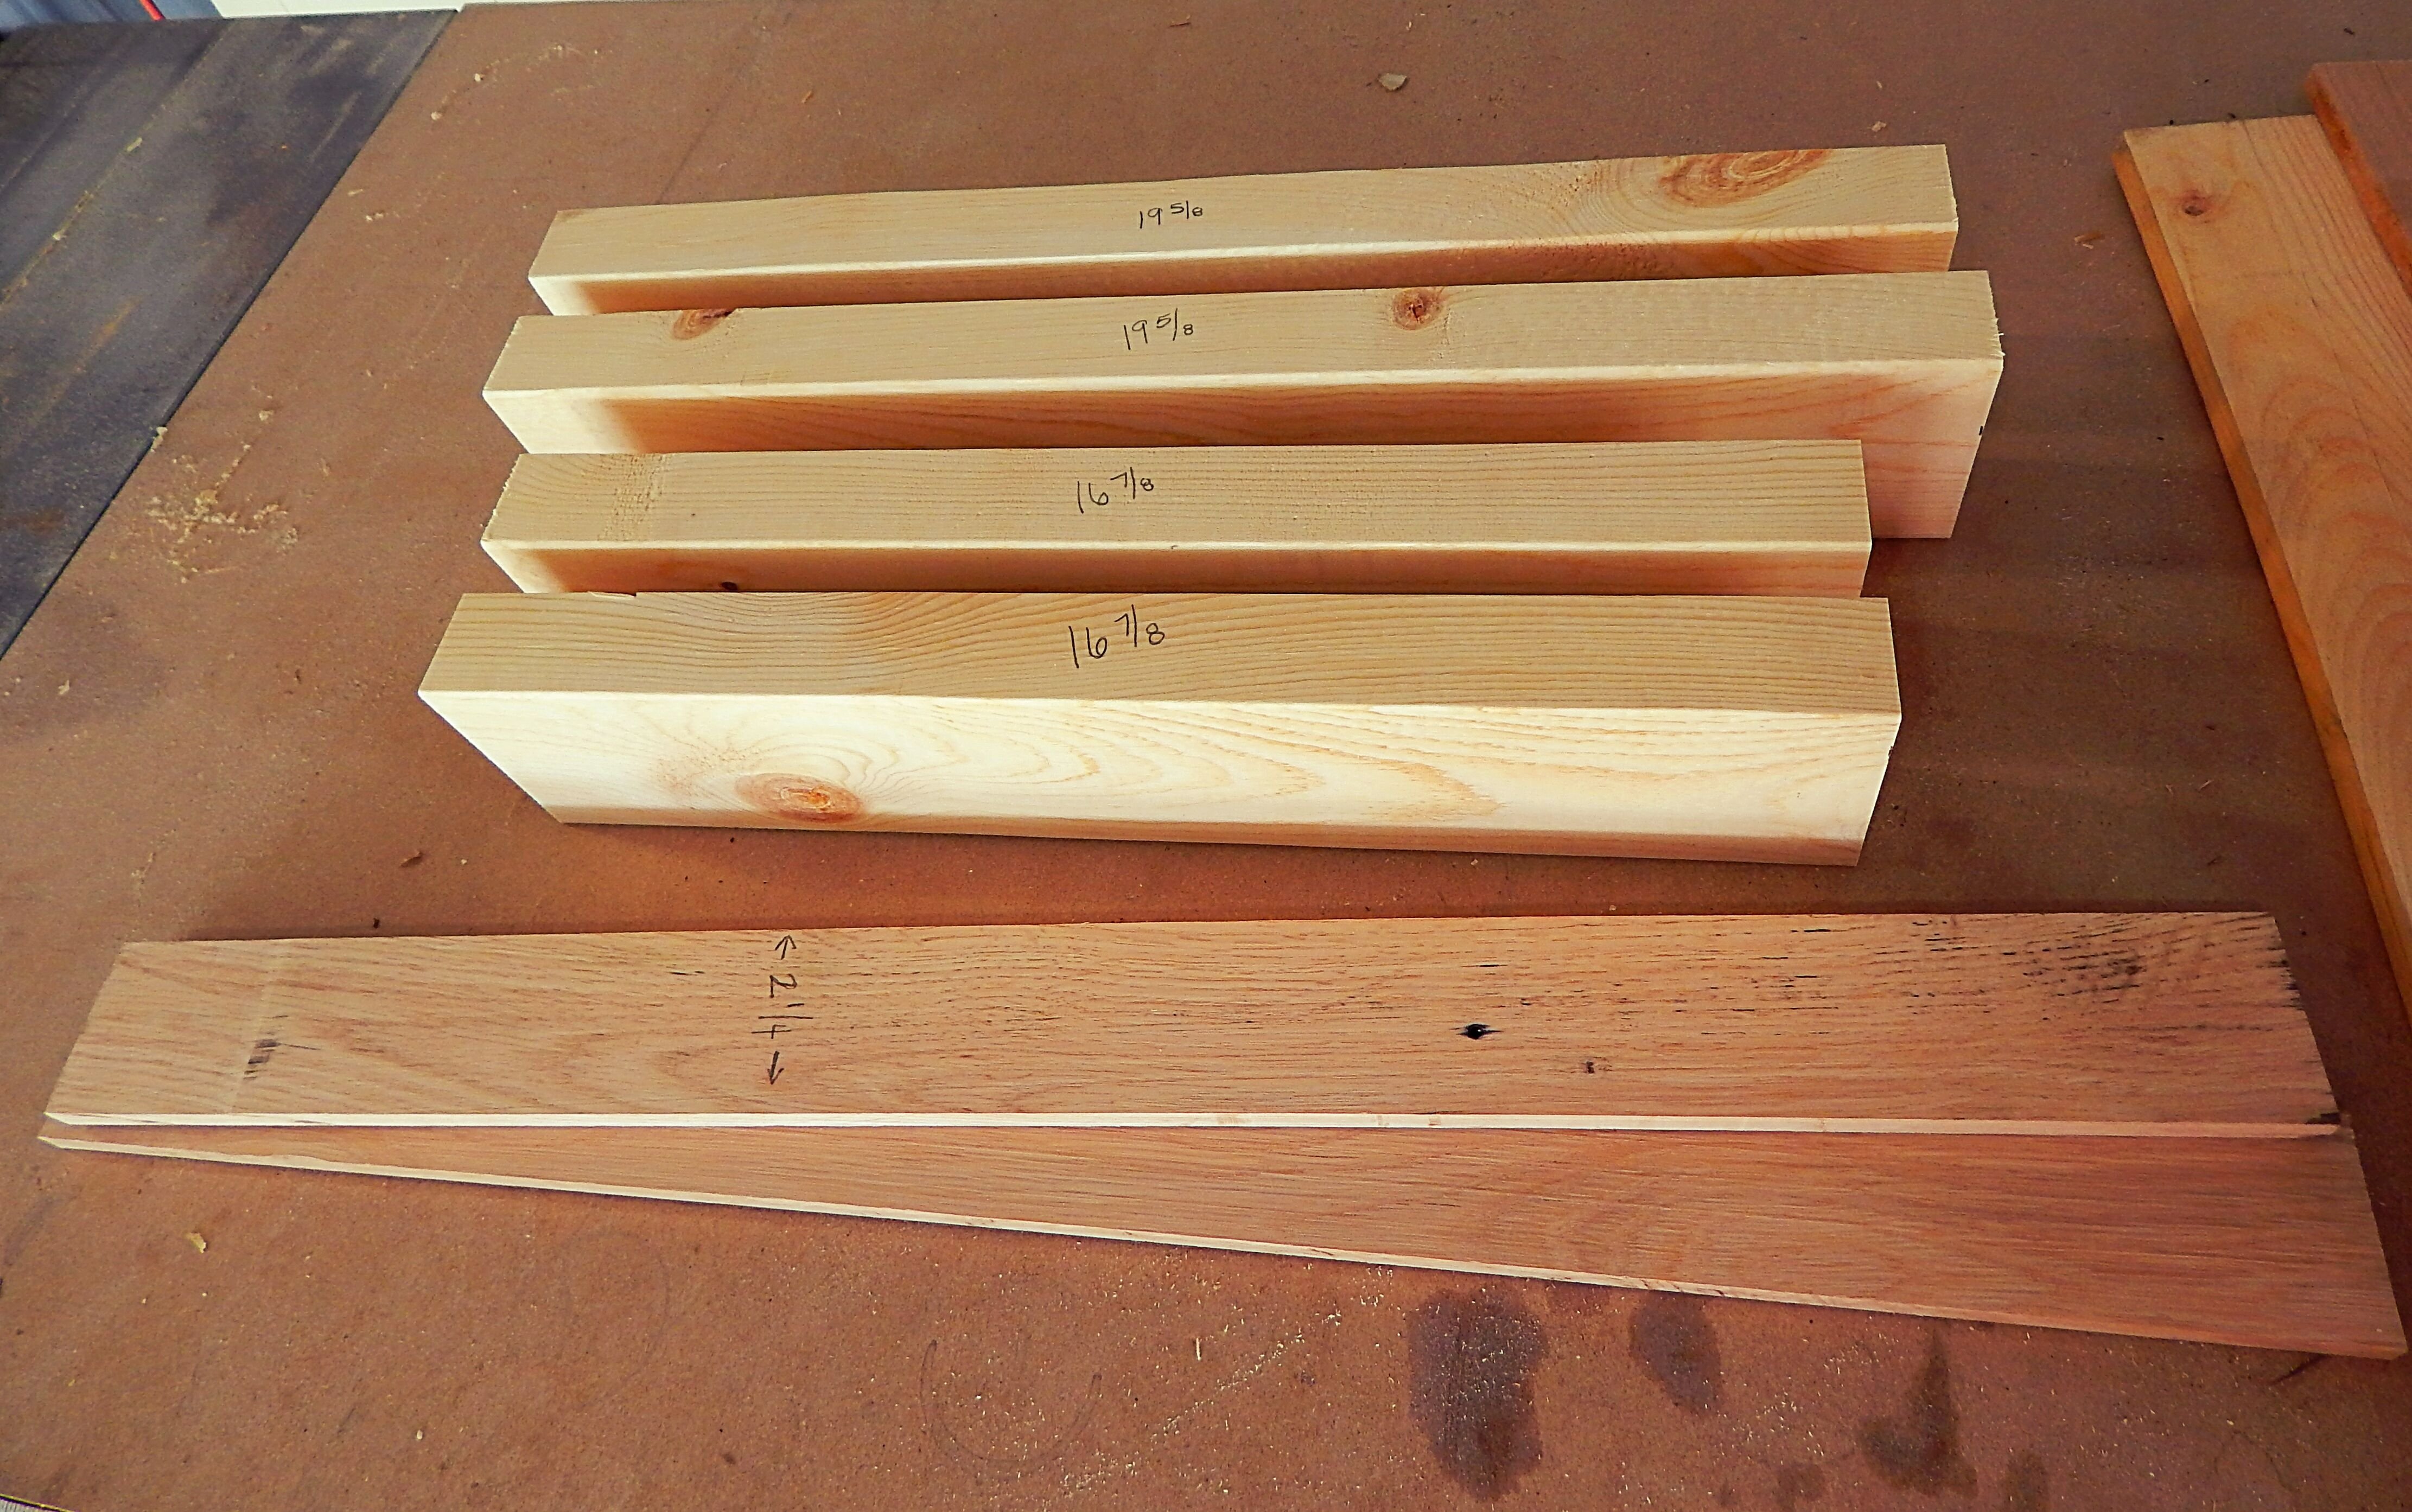
 We are going to start with taking a simple 2x4 and cutting it into the following lengths;
- 19 5/8" x 2
- 16 7/8" x 2
Then for the interior slats we used a piece of pallet wood that had been planed down, but you could also rip them from the scraps left over from the 2x4 to the following dimensions;
- 15" x 2 1/4" x 1/2" x 2
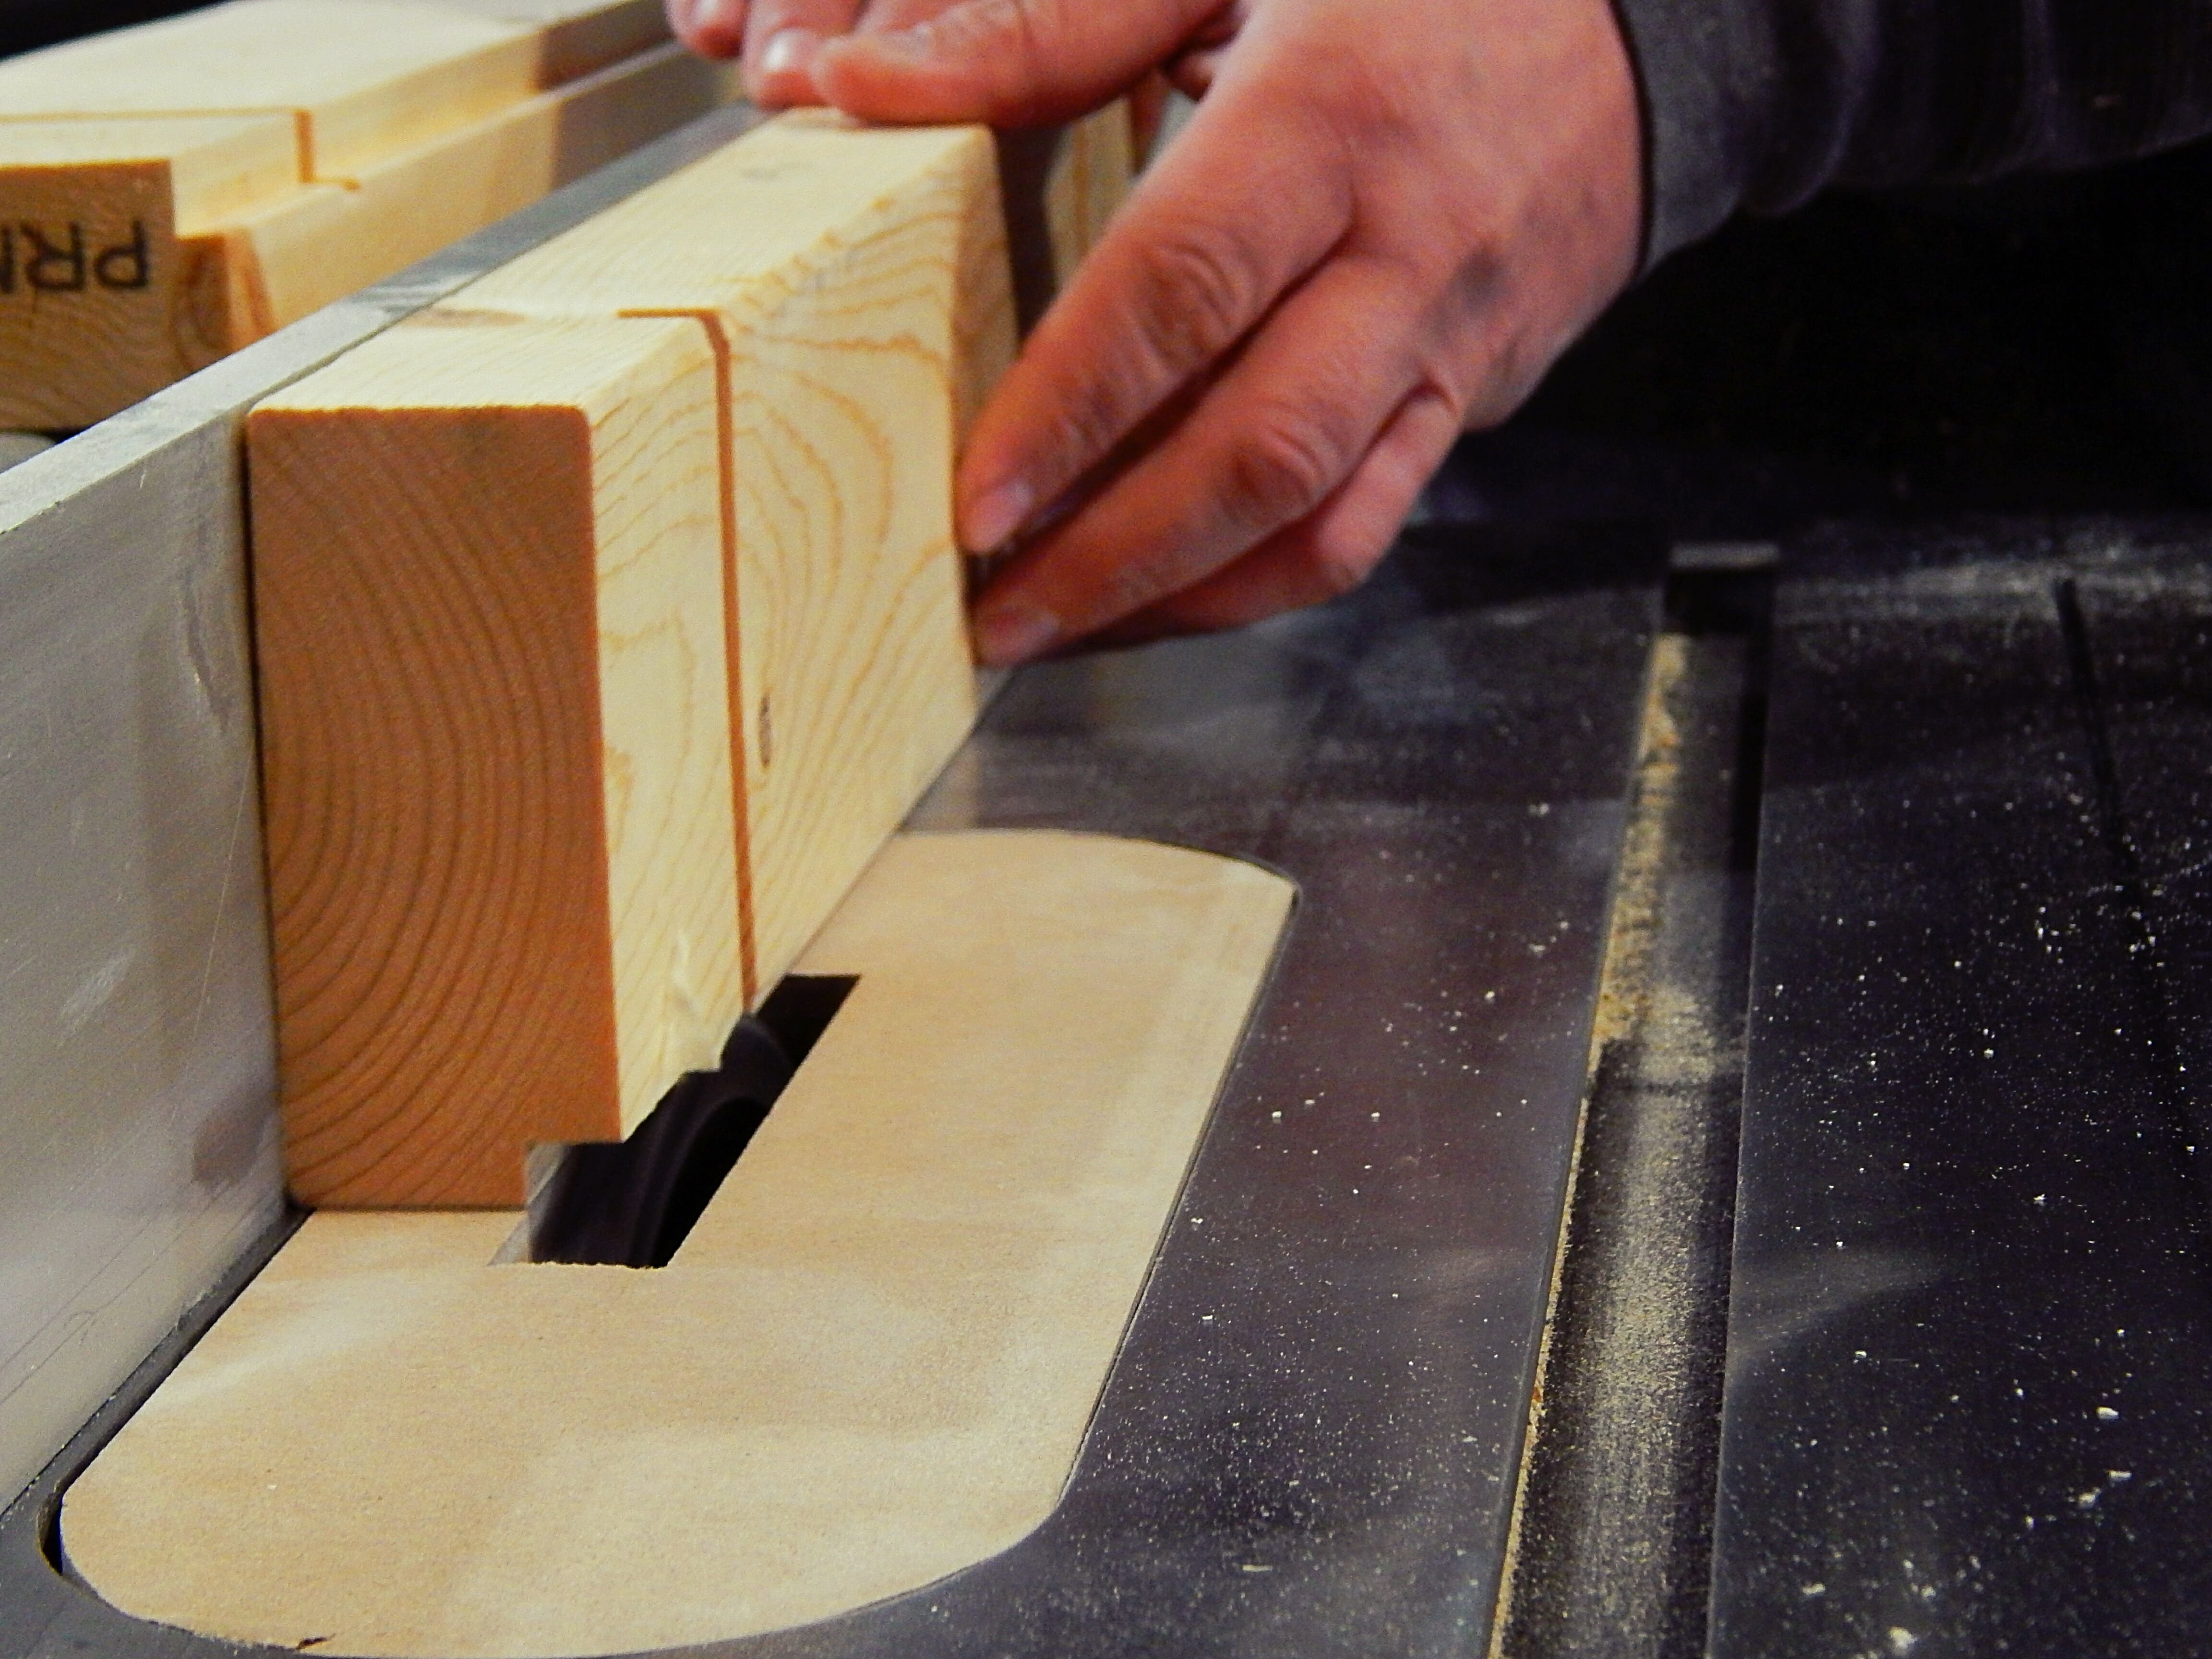
*****NOTICE TABLE SAW BLADE GUARD HAS BEEN REMOVED FOR DEMONSTRATION PURPOSES, WE DO NOT ADVISE USING YOUR TABLE SAW WITHOUT PROPER SAFETY ATTACHMENTS AND EQUIPMENT.****
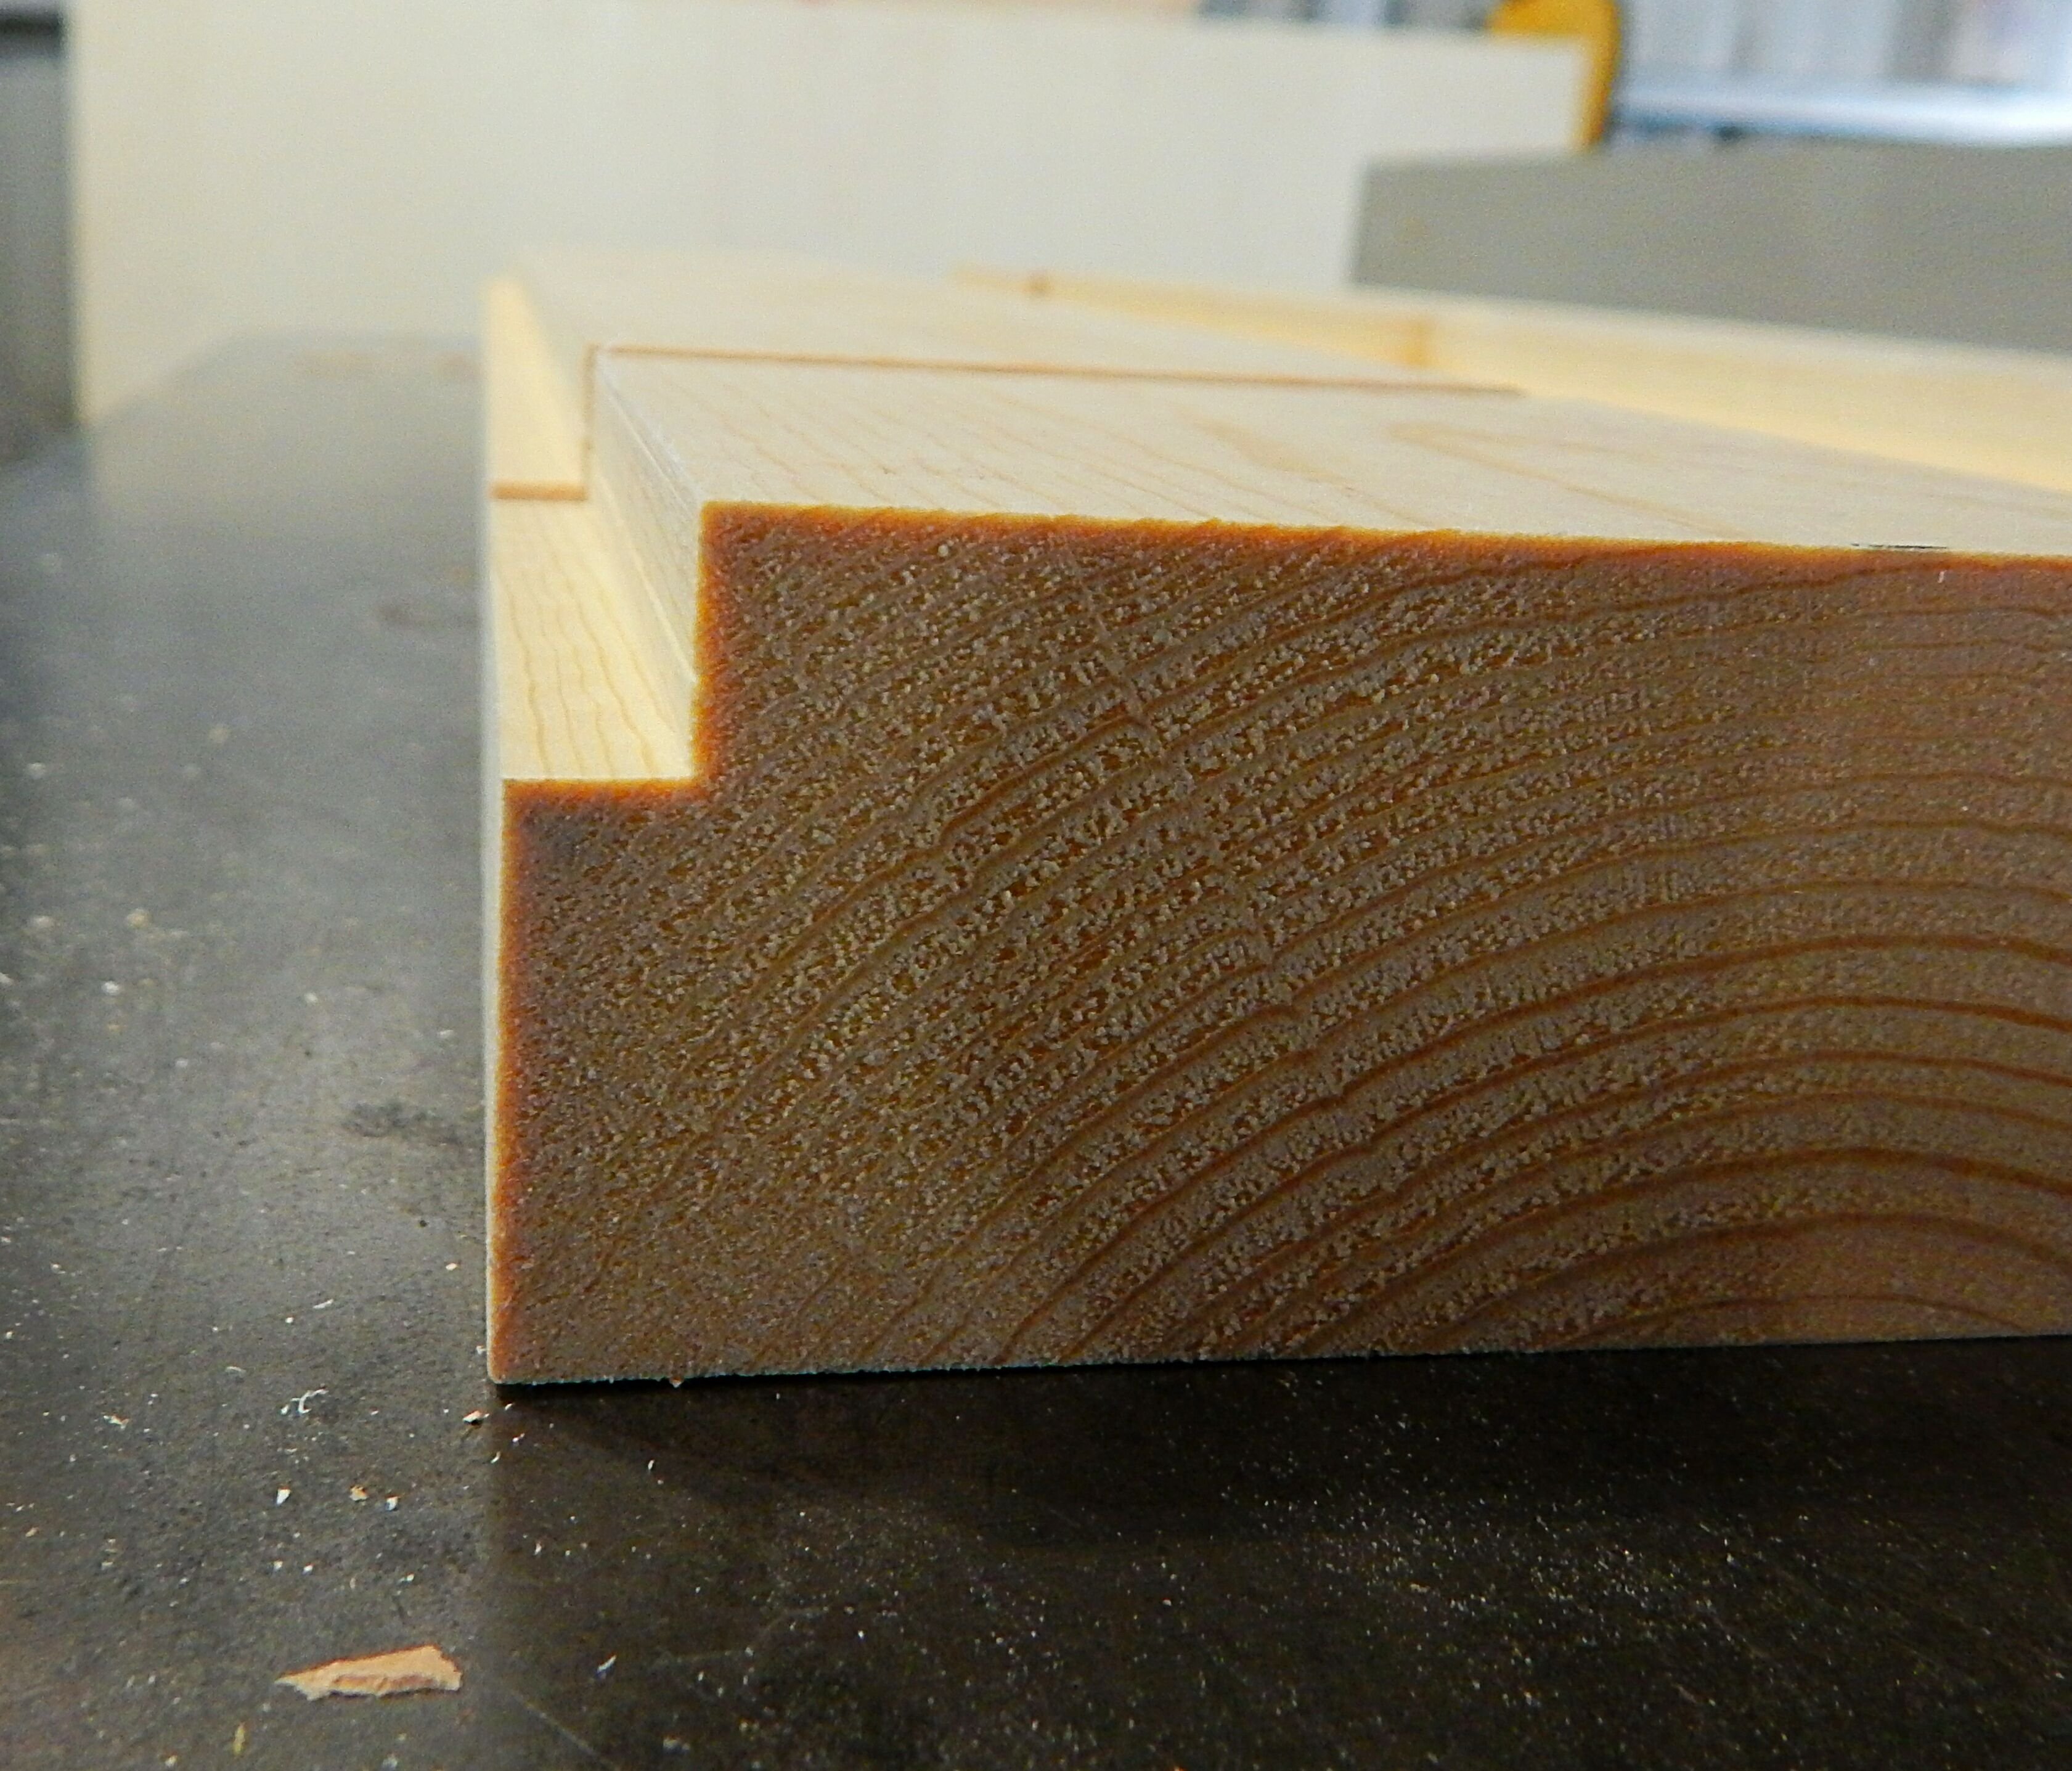
We then are going to set our 1/2" Dado Blade and set it to 1/2" up and 2 3/4" off the fence. Then run the 19 5/8" boards on both ends.
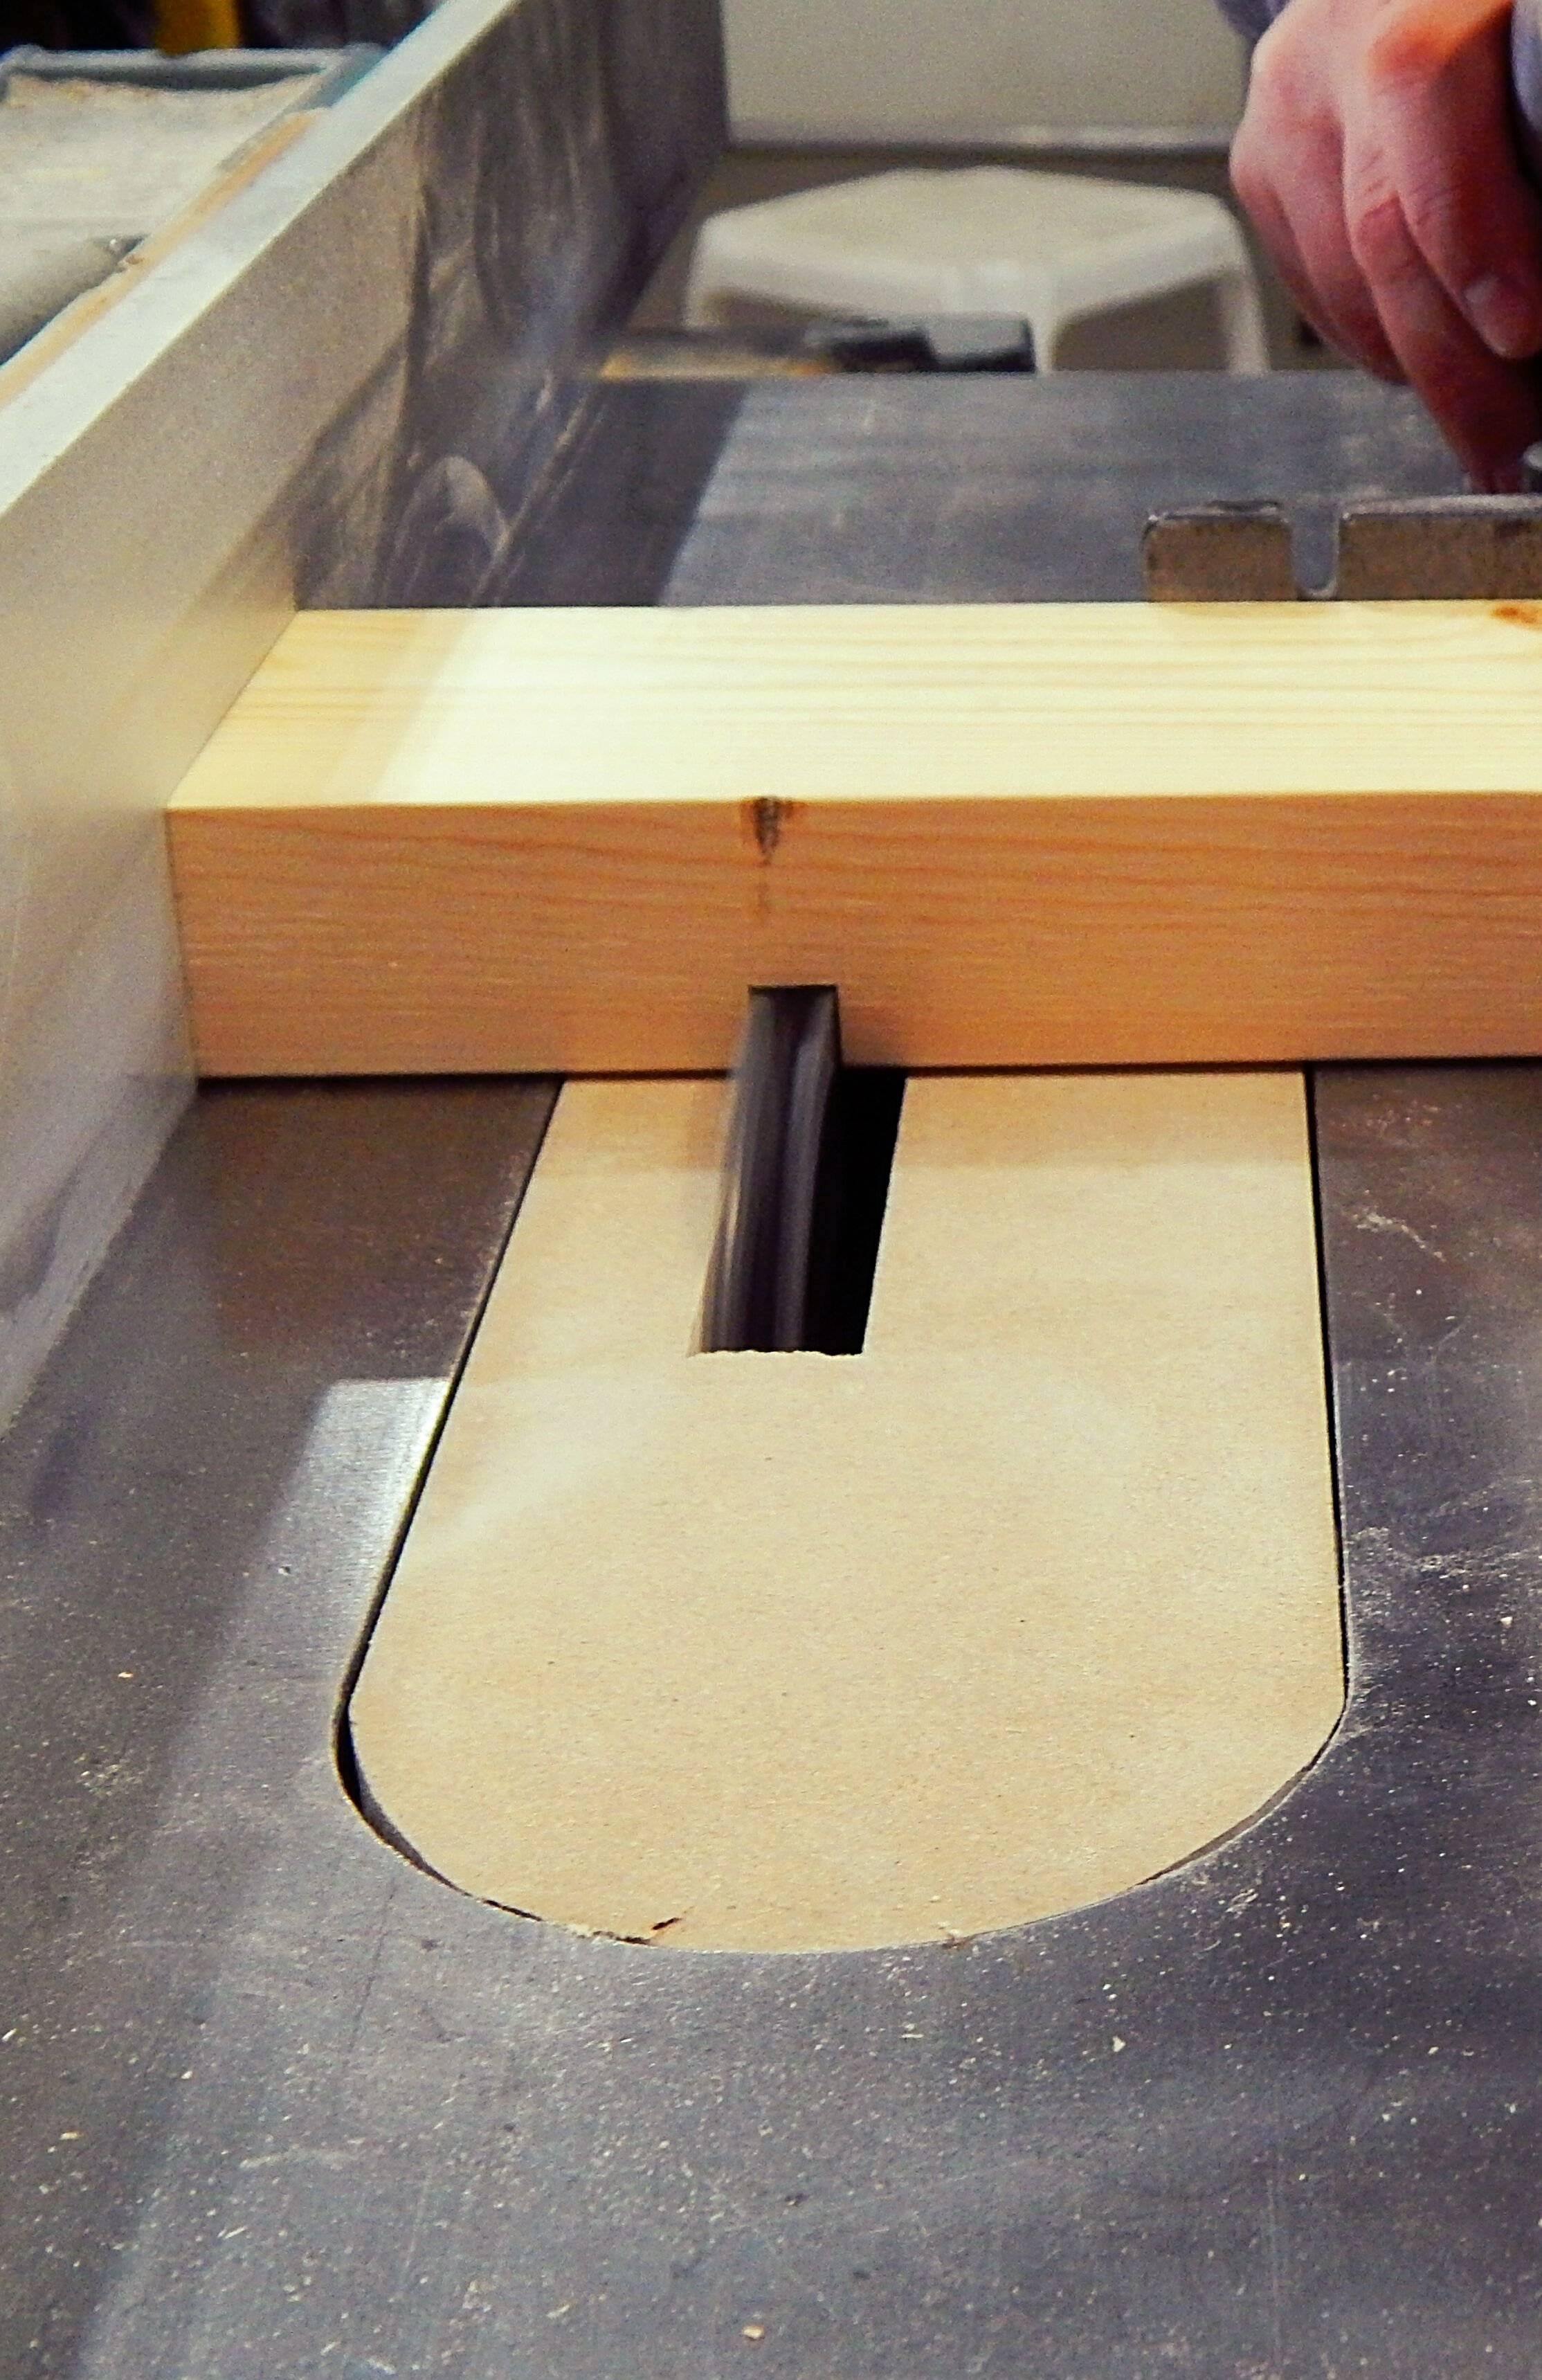
To get this..
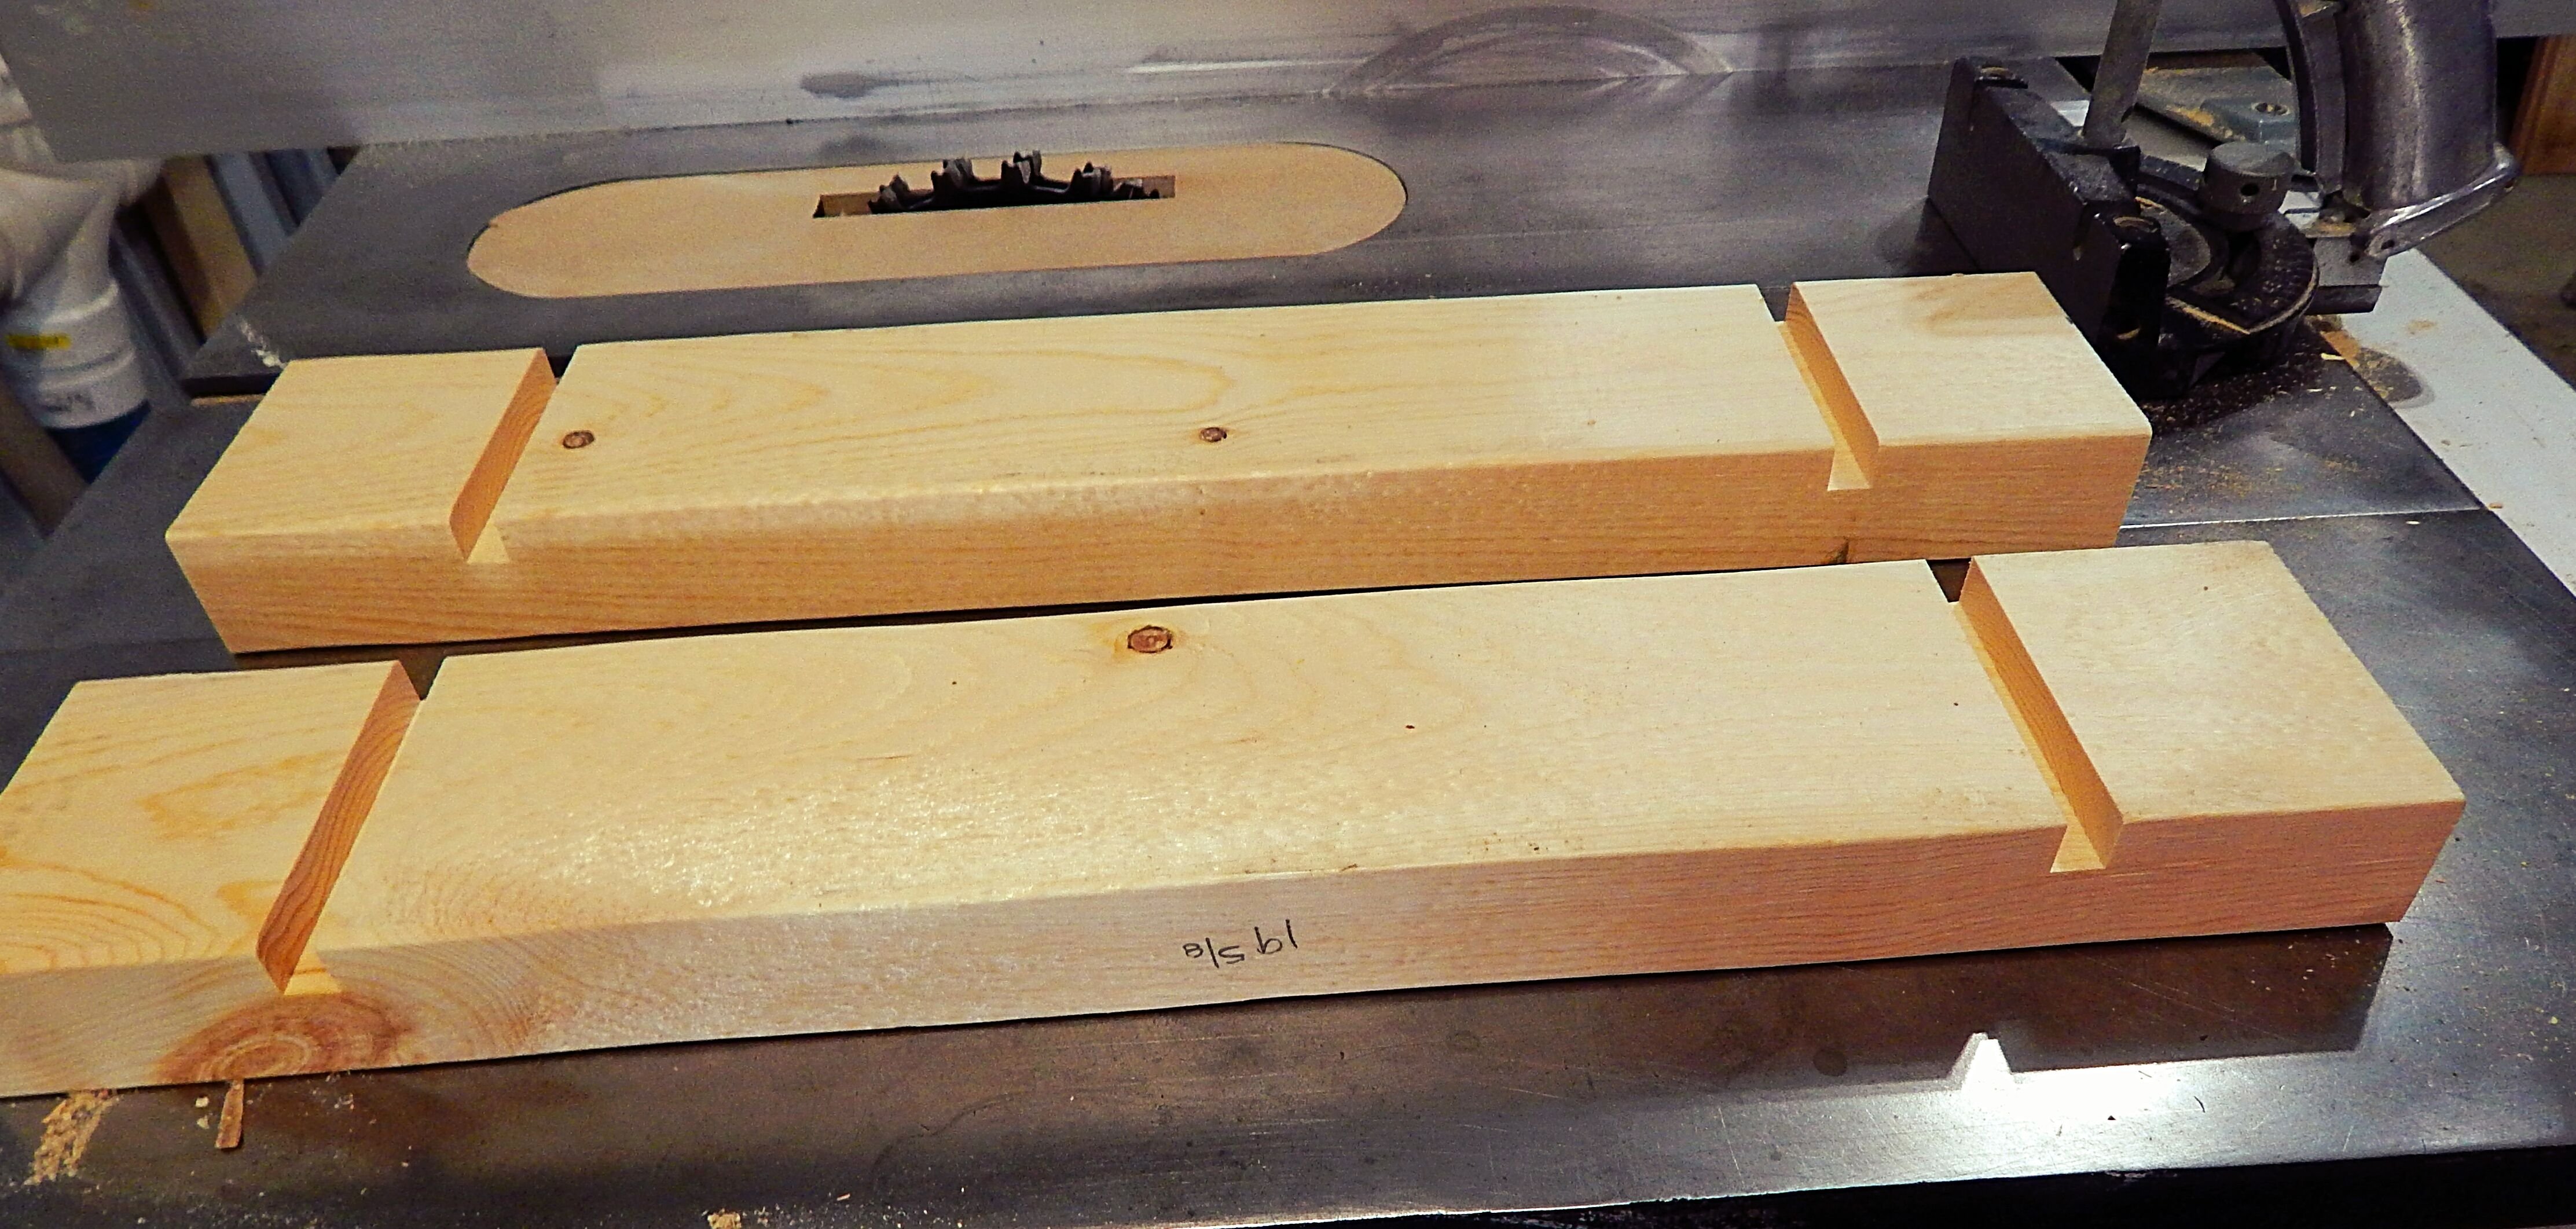
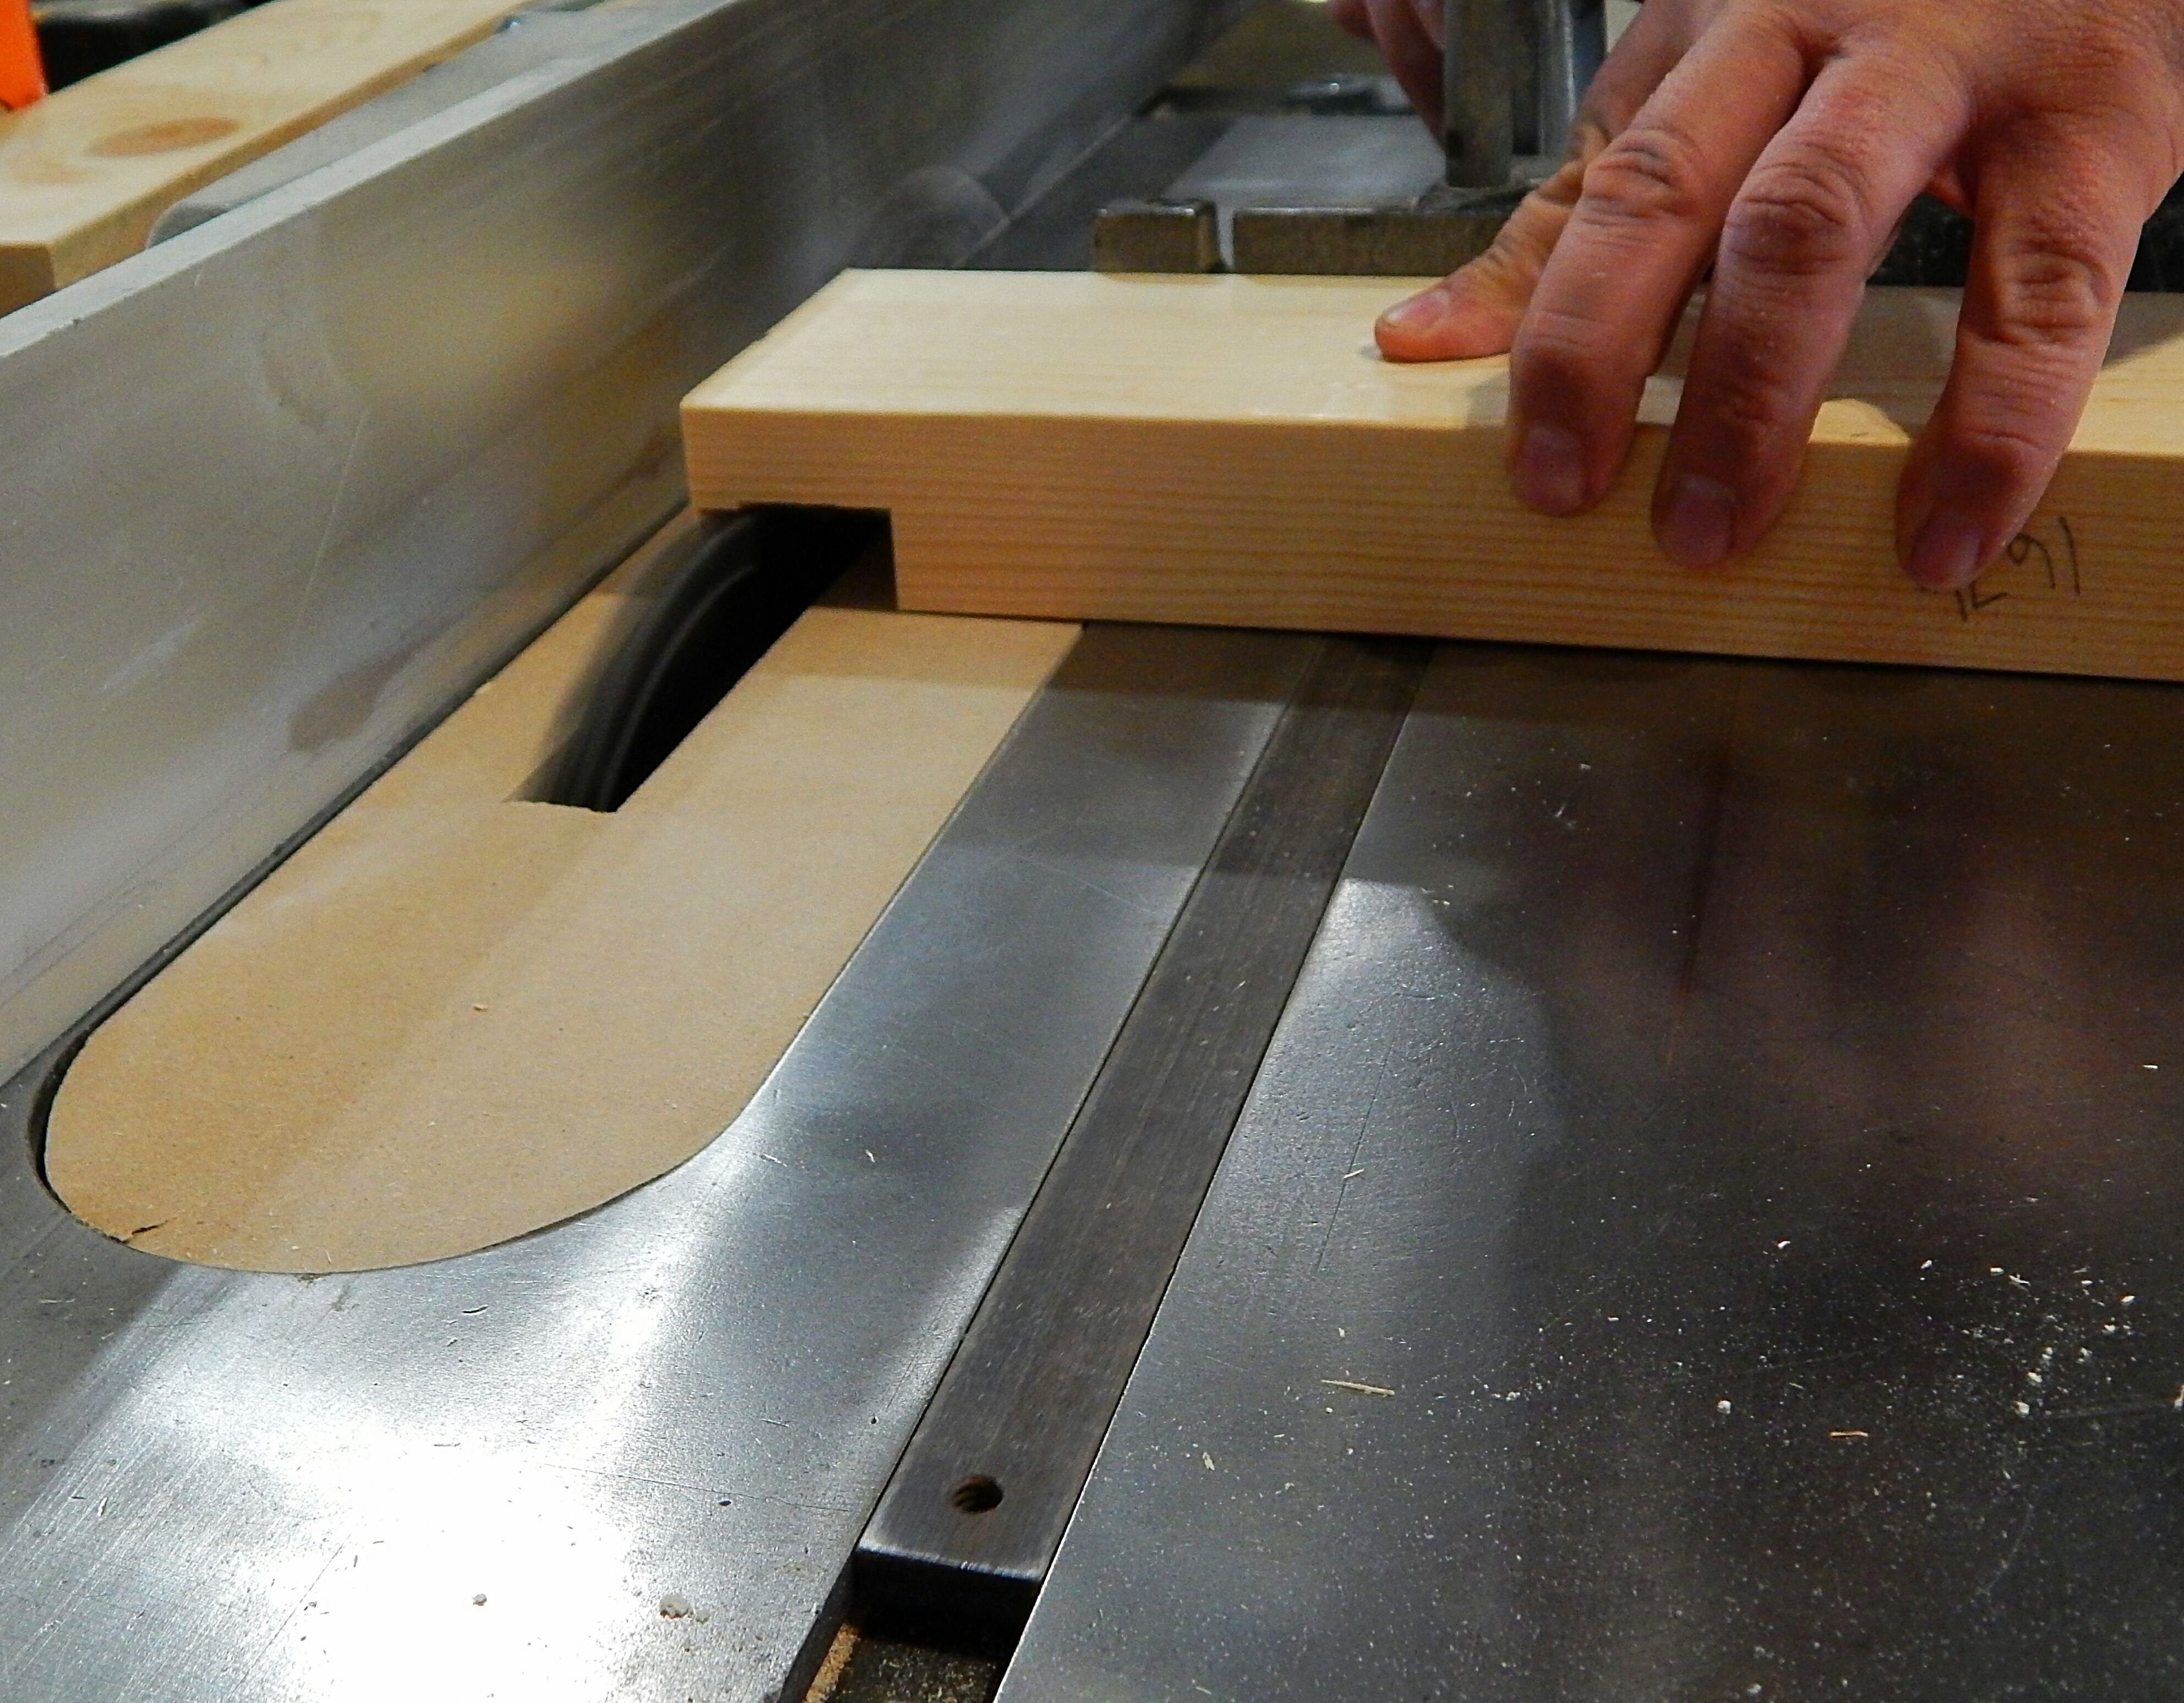
Next, we set our Dado Blade to 1" off the fence and raise it to 1/4" up and run the 19 5/8" board through with the 3 1/2" side up.
Which will give us the recess for our base board to set in.
Then with our 1/2" Dado Blade still 1" off the fence we raise it to 3/4" up and run our 16 7/8" boards through on both ends, removing the 1 1/2" of material to make our rabbet joints.
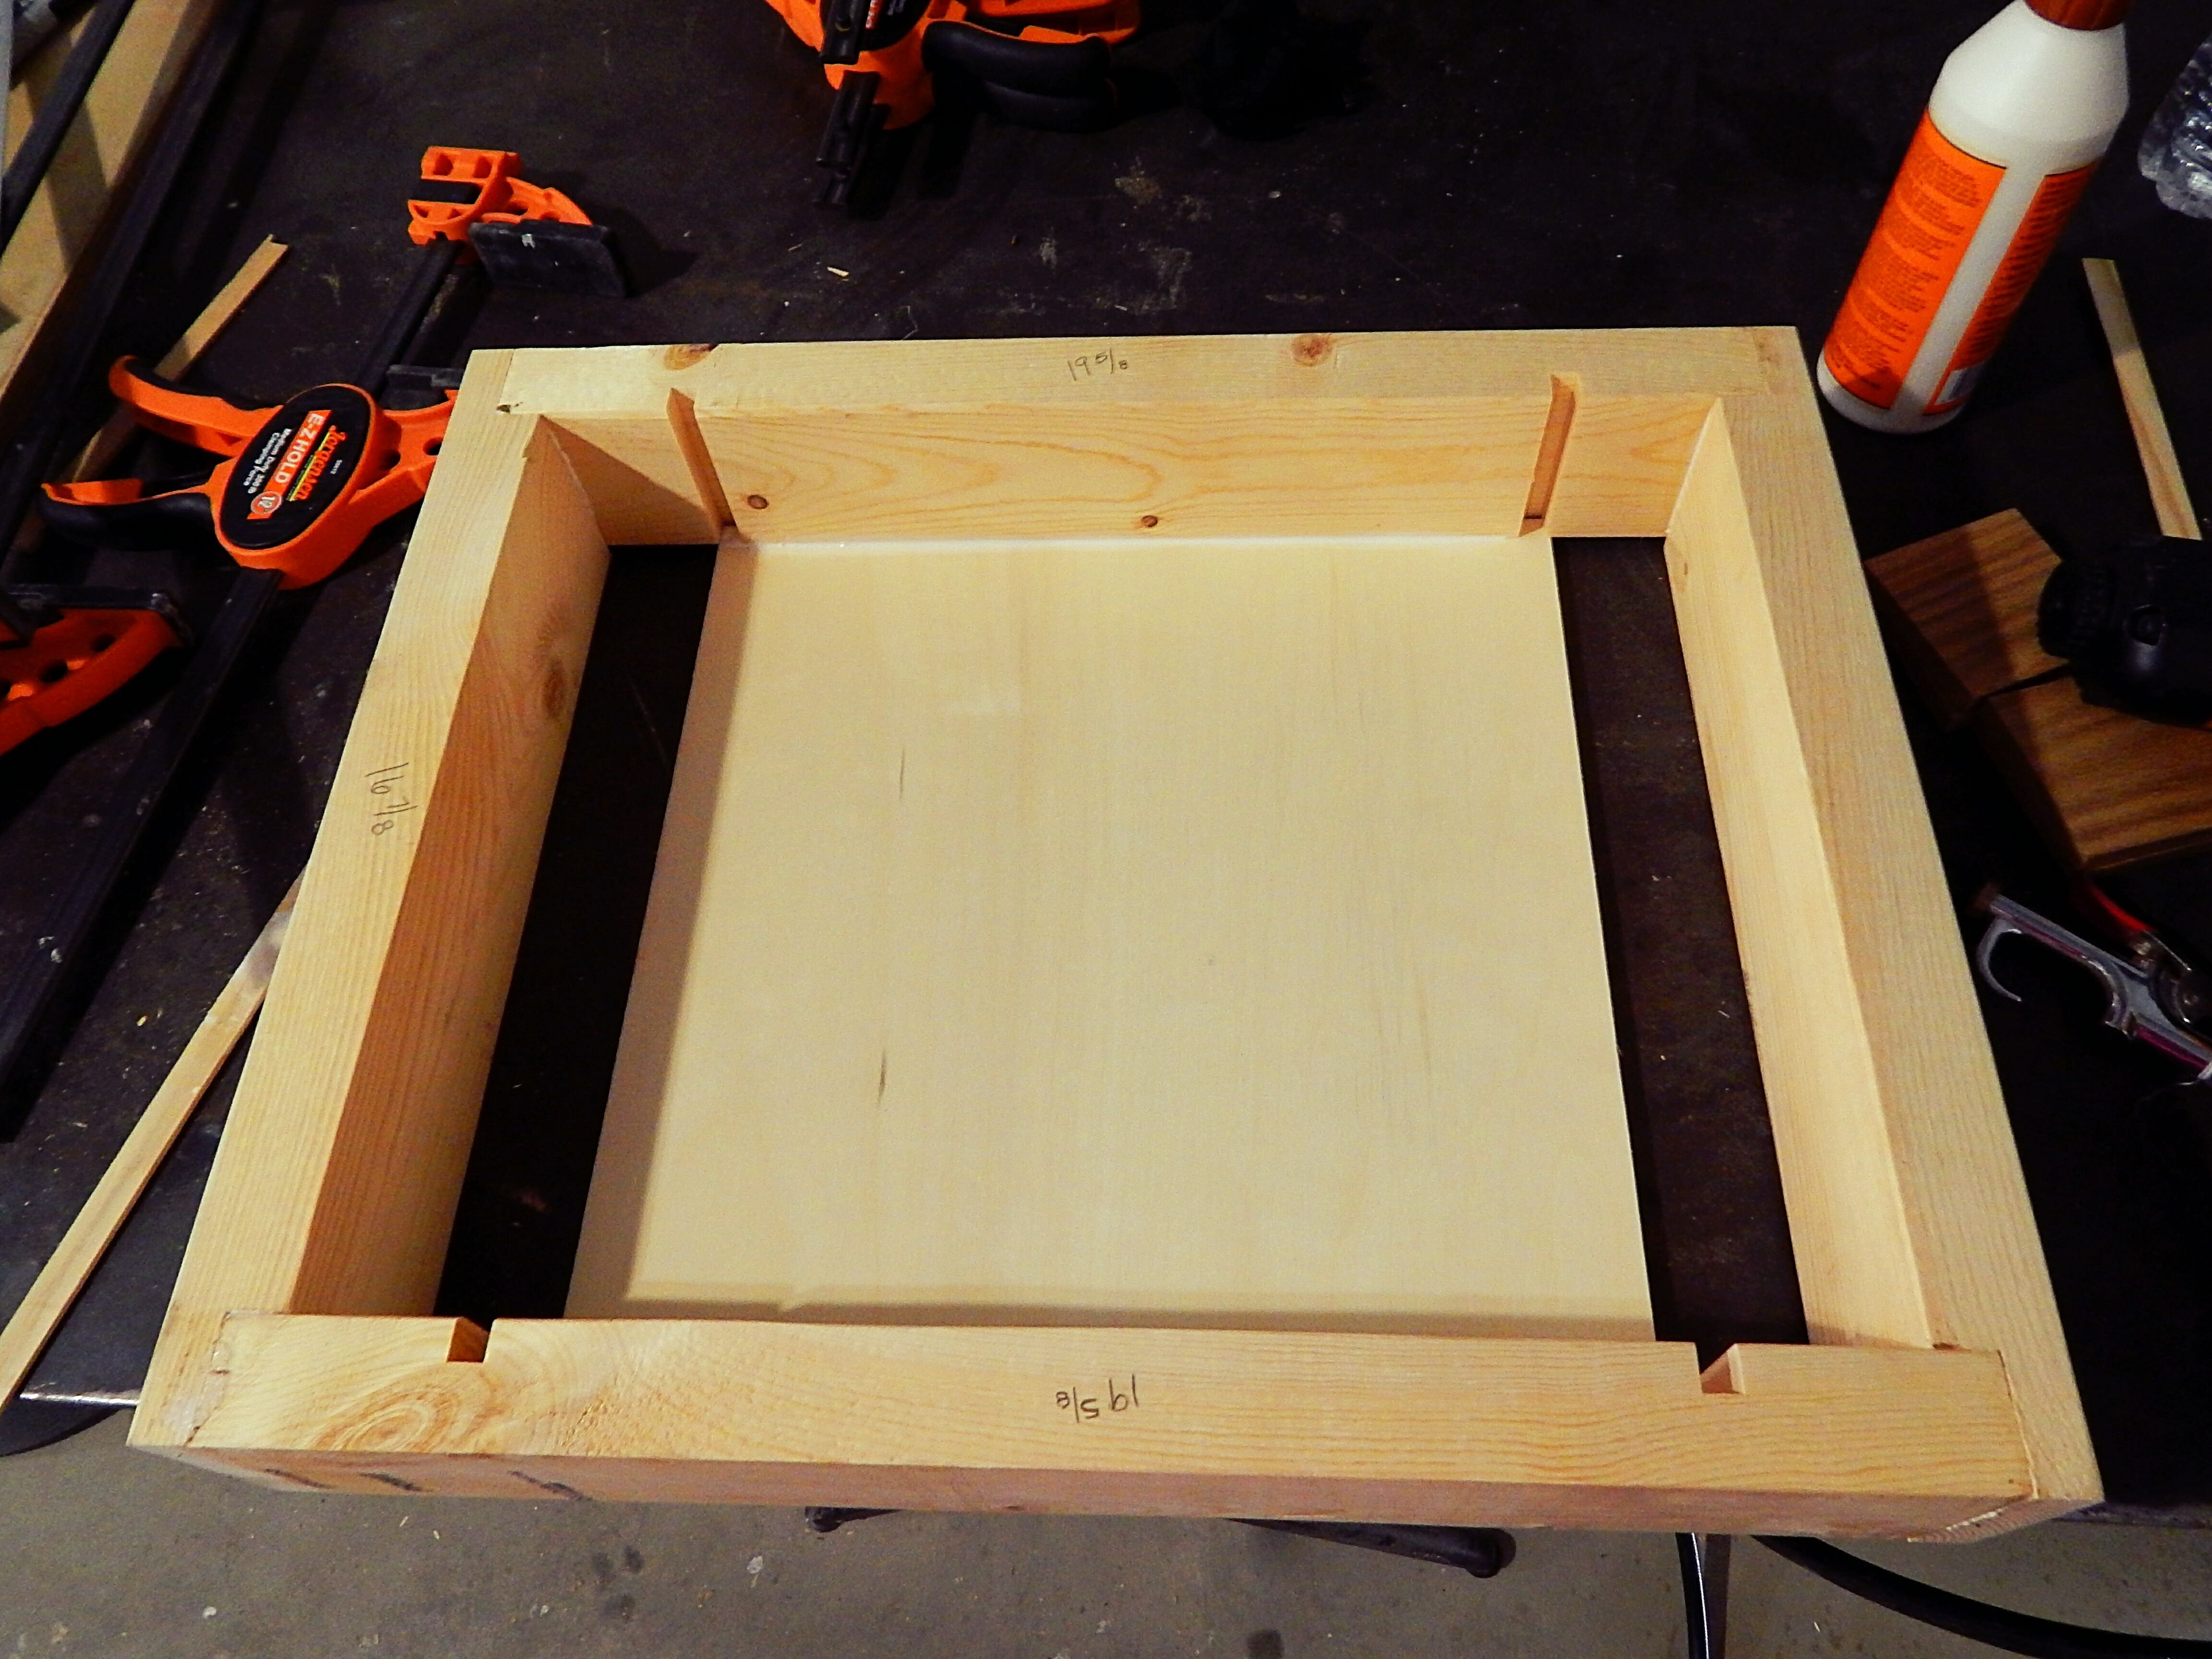
Next we need to our base board. We used some scrap plywood we had and cut it to
- 14 3/4" x 14 1/4" x 1/4" thick
This piece will set in the bottom on the feeder like so...
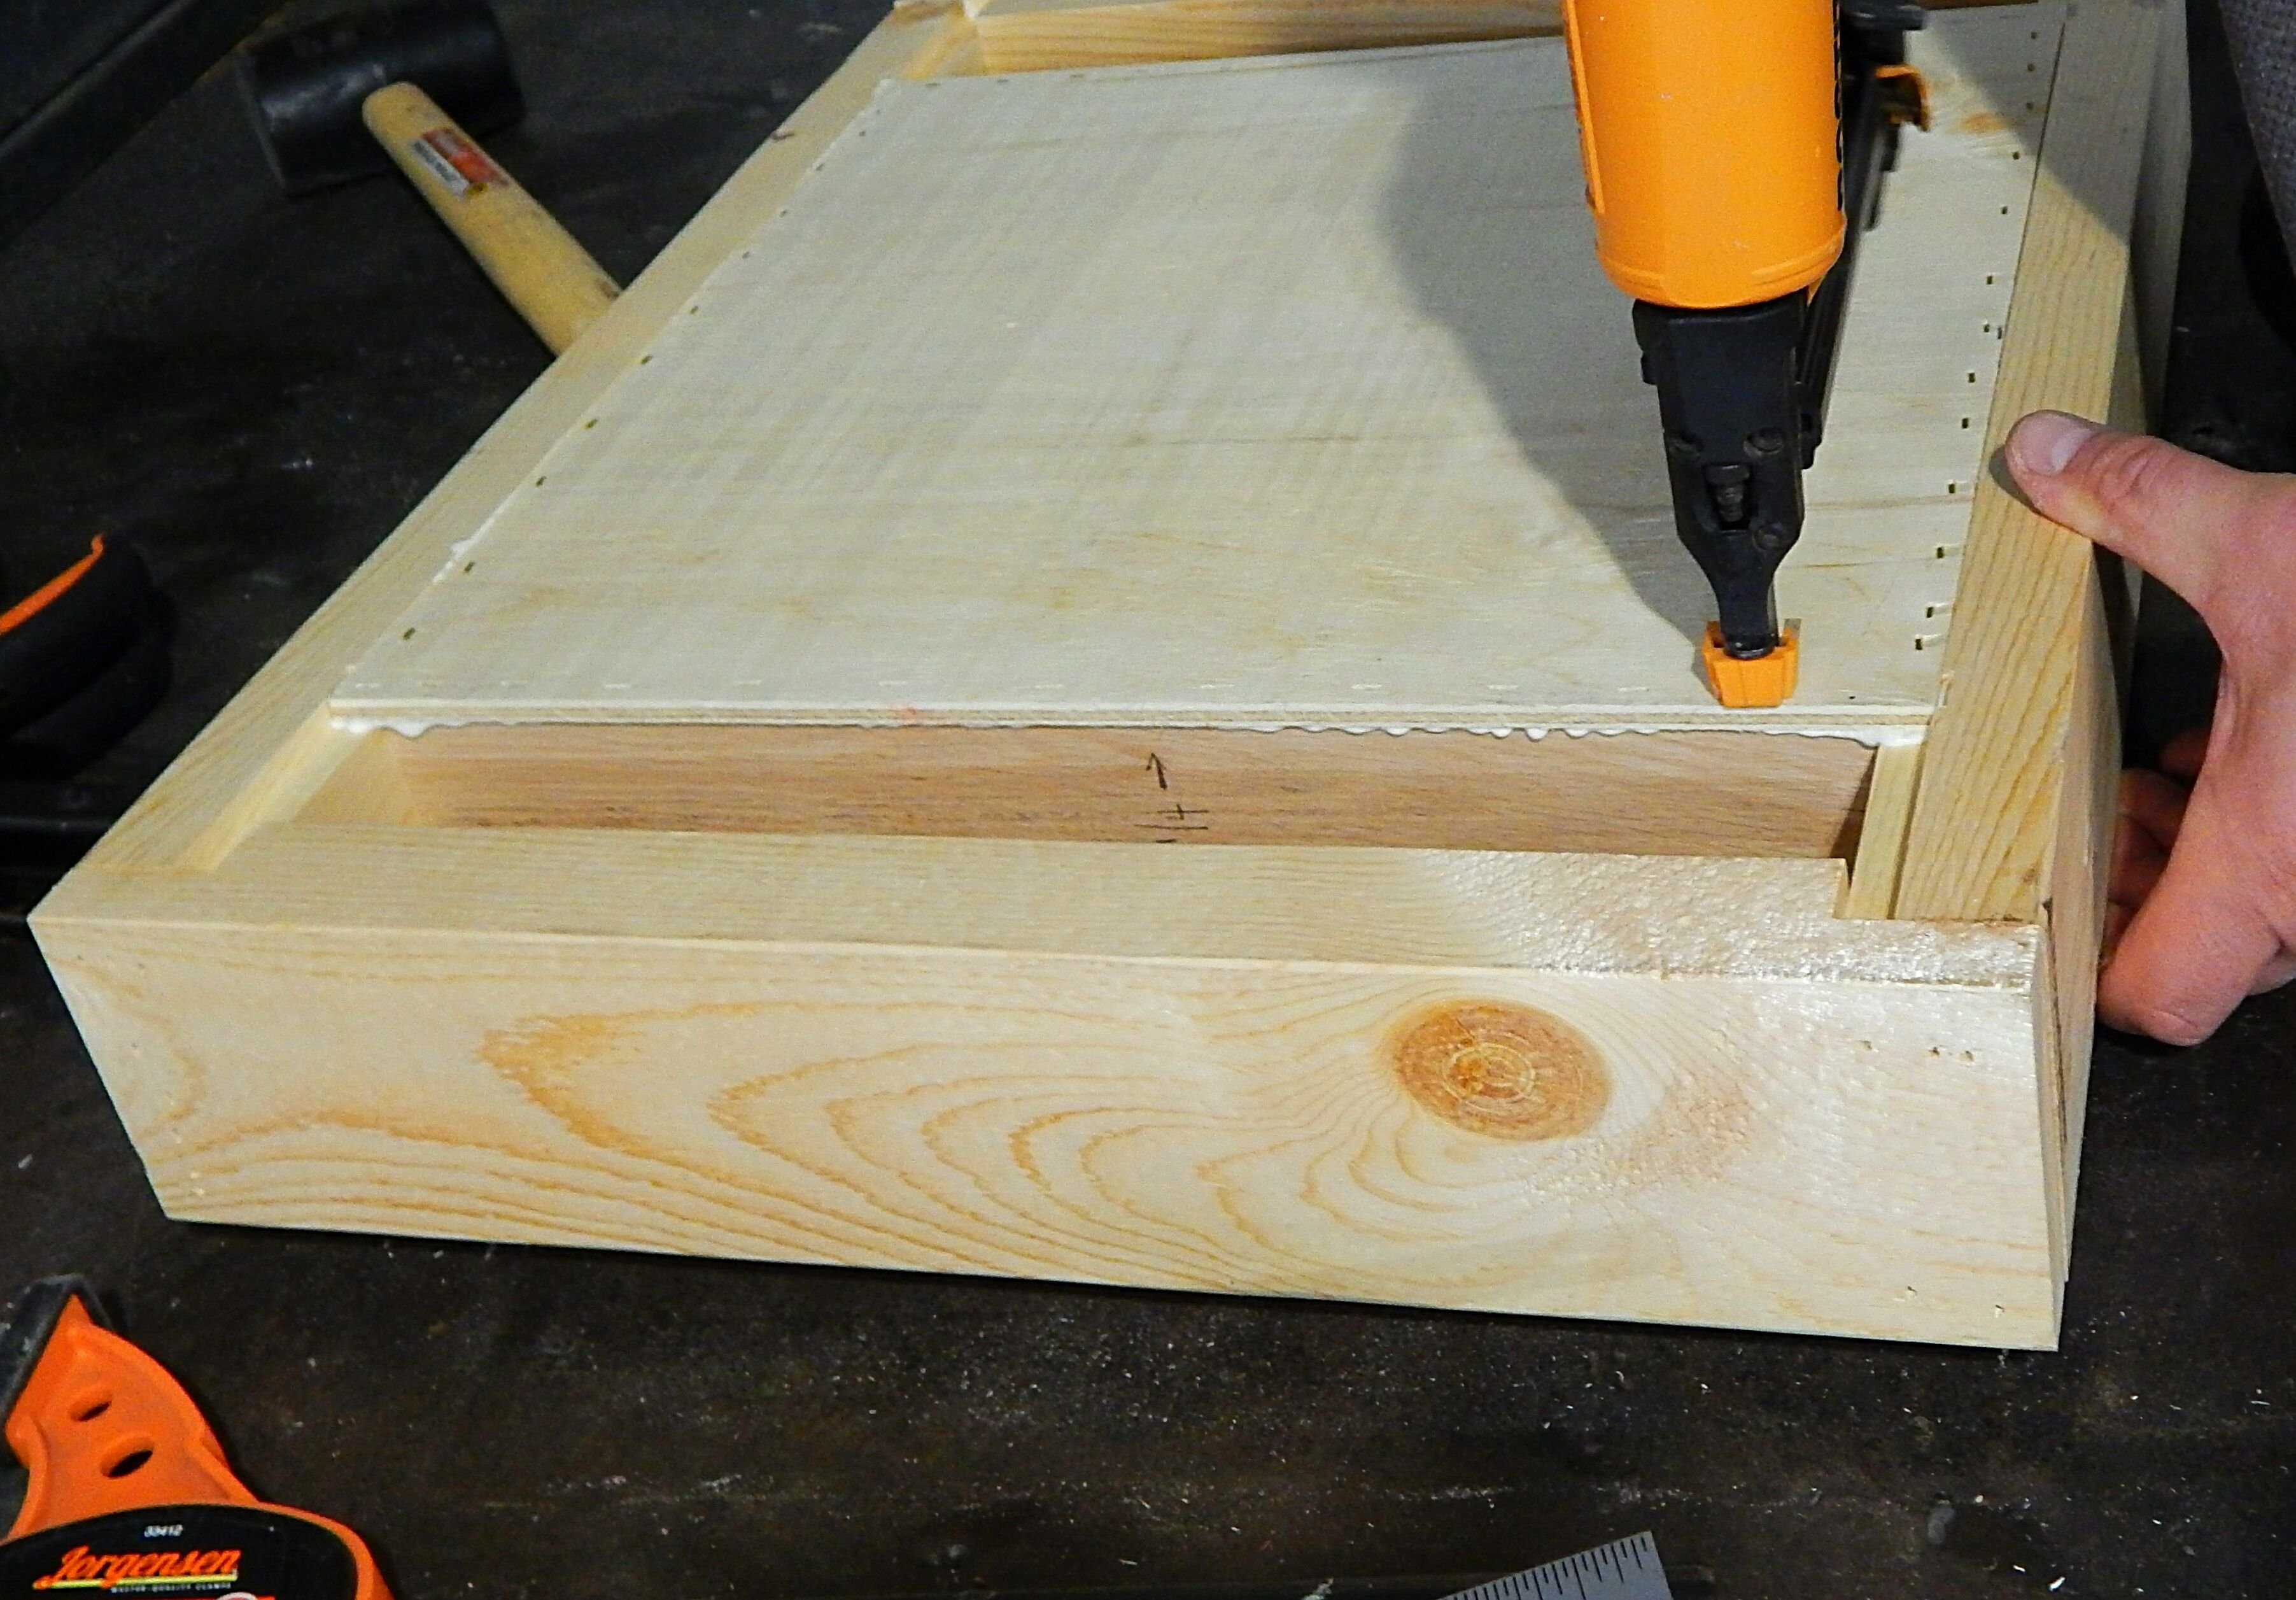
We then use an exterior wood glue to secure the base board into place, then insert our slat pieces. It is important to smooth the wood glue as you would if you were caulking a seam, to ensure there will be no leaks.
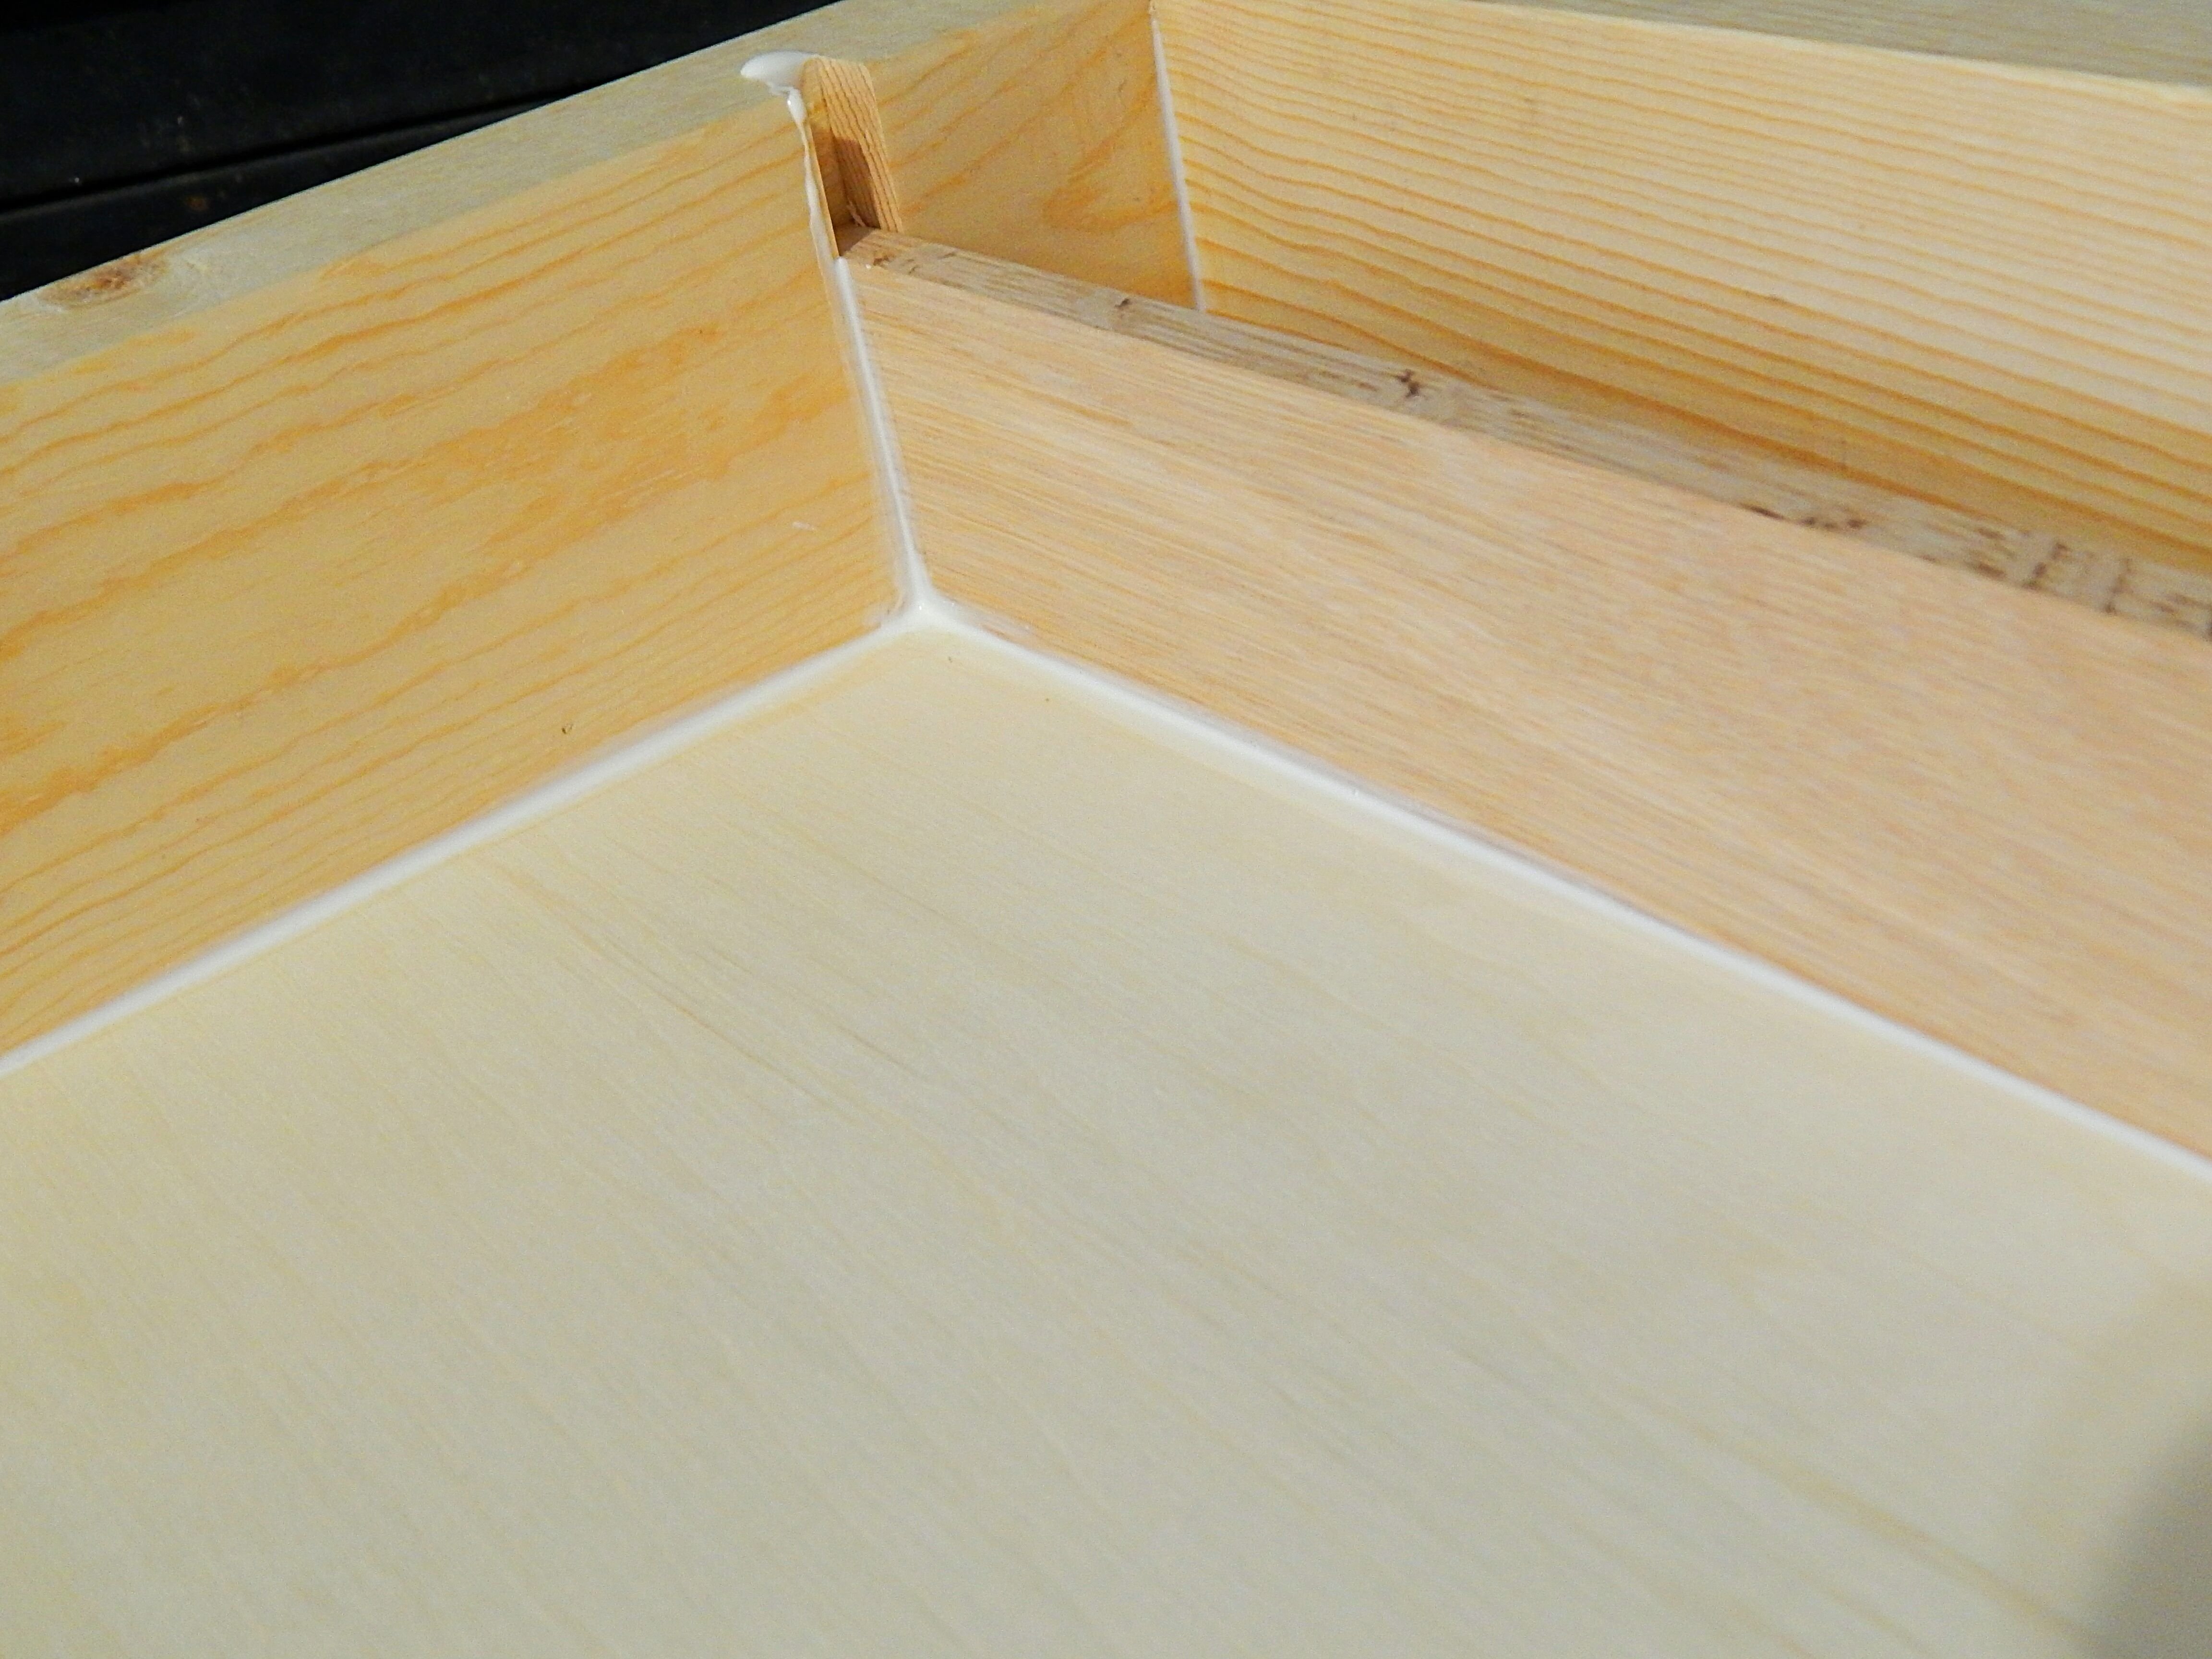
Then staple along the bottom of the base board and on each corner of the box to add strength.
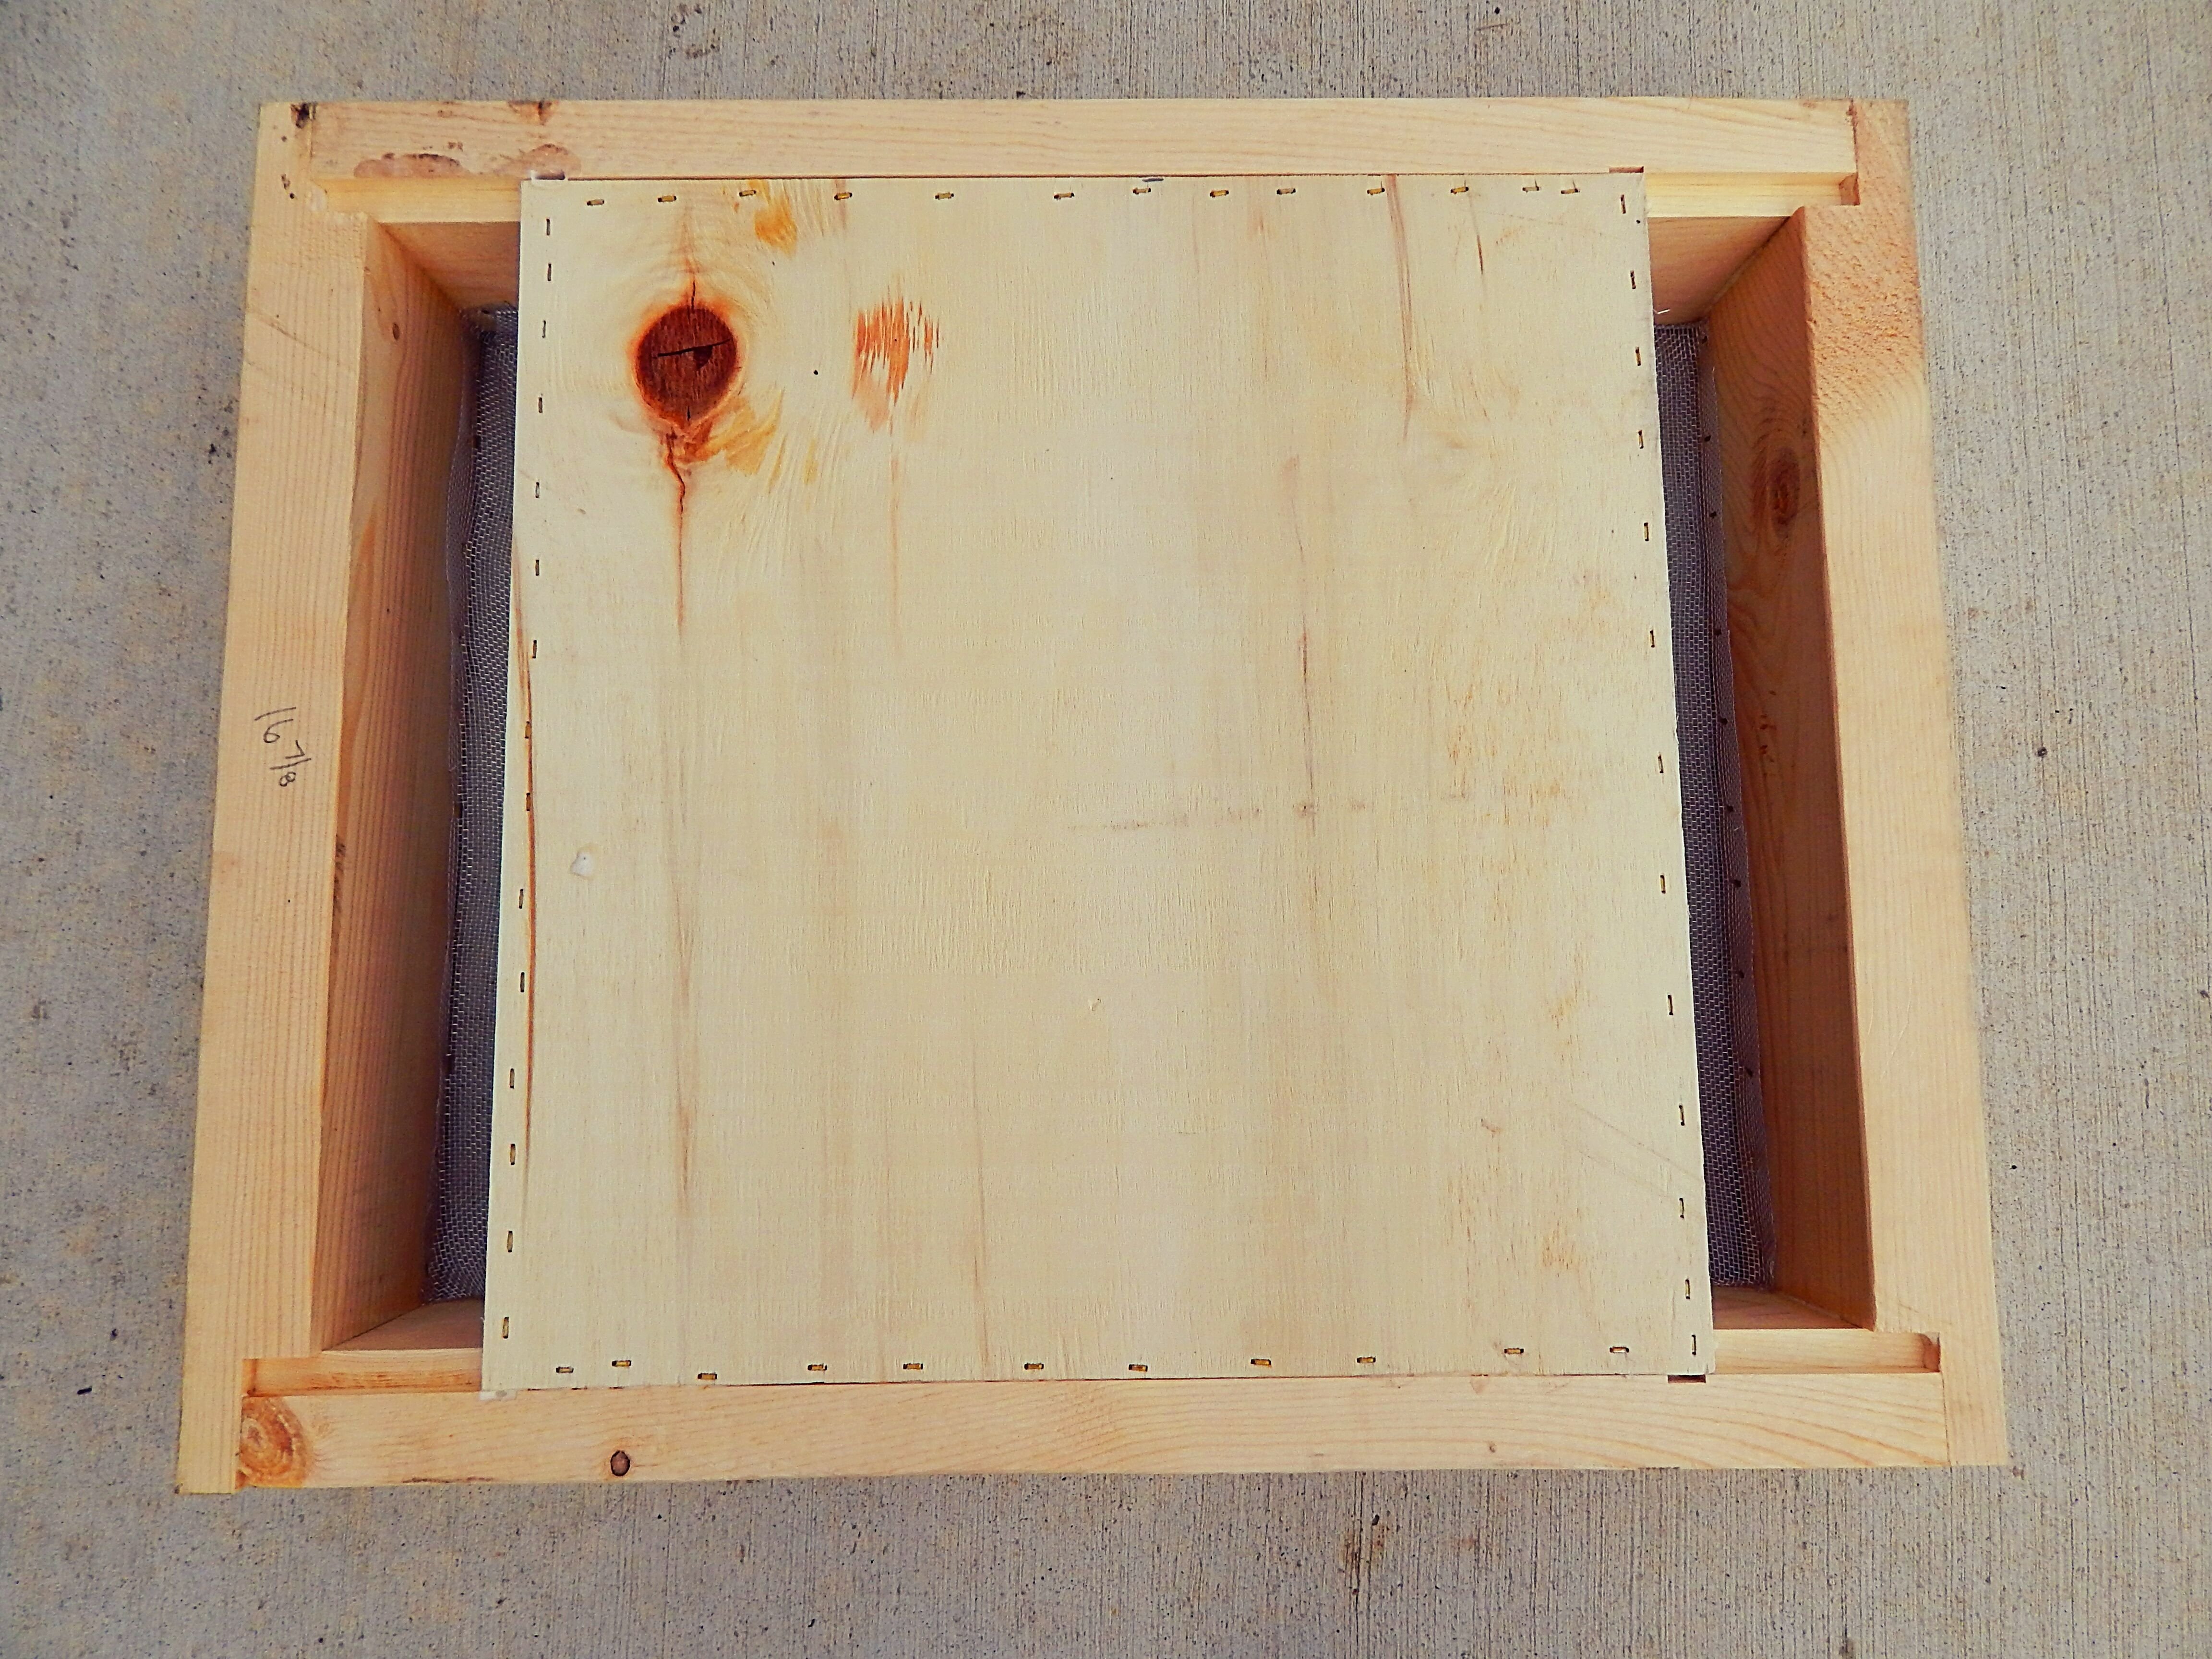
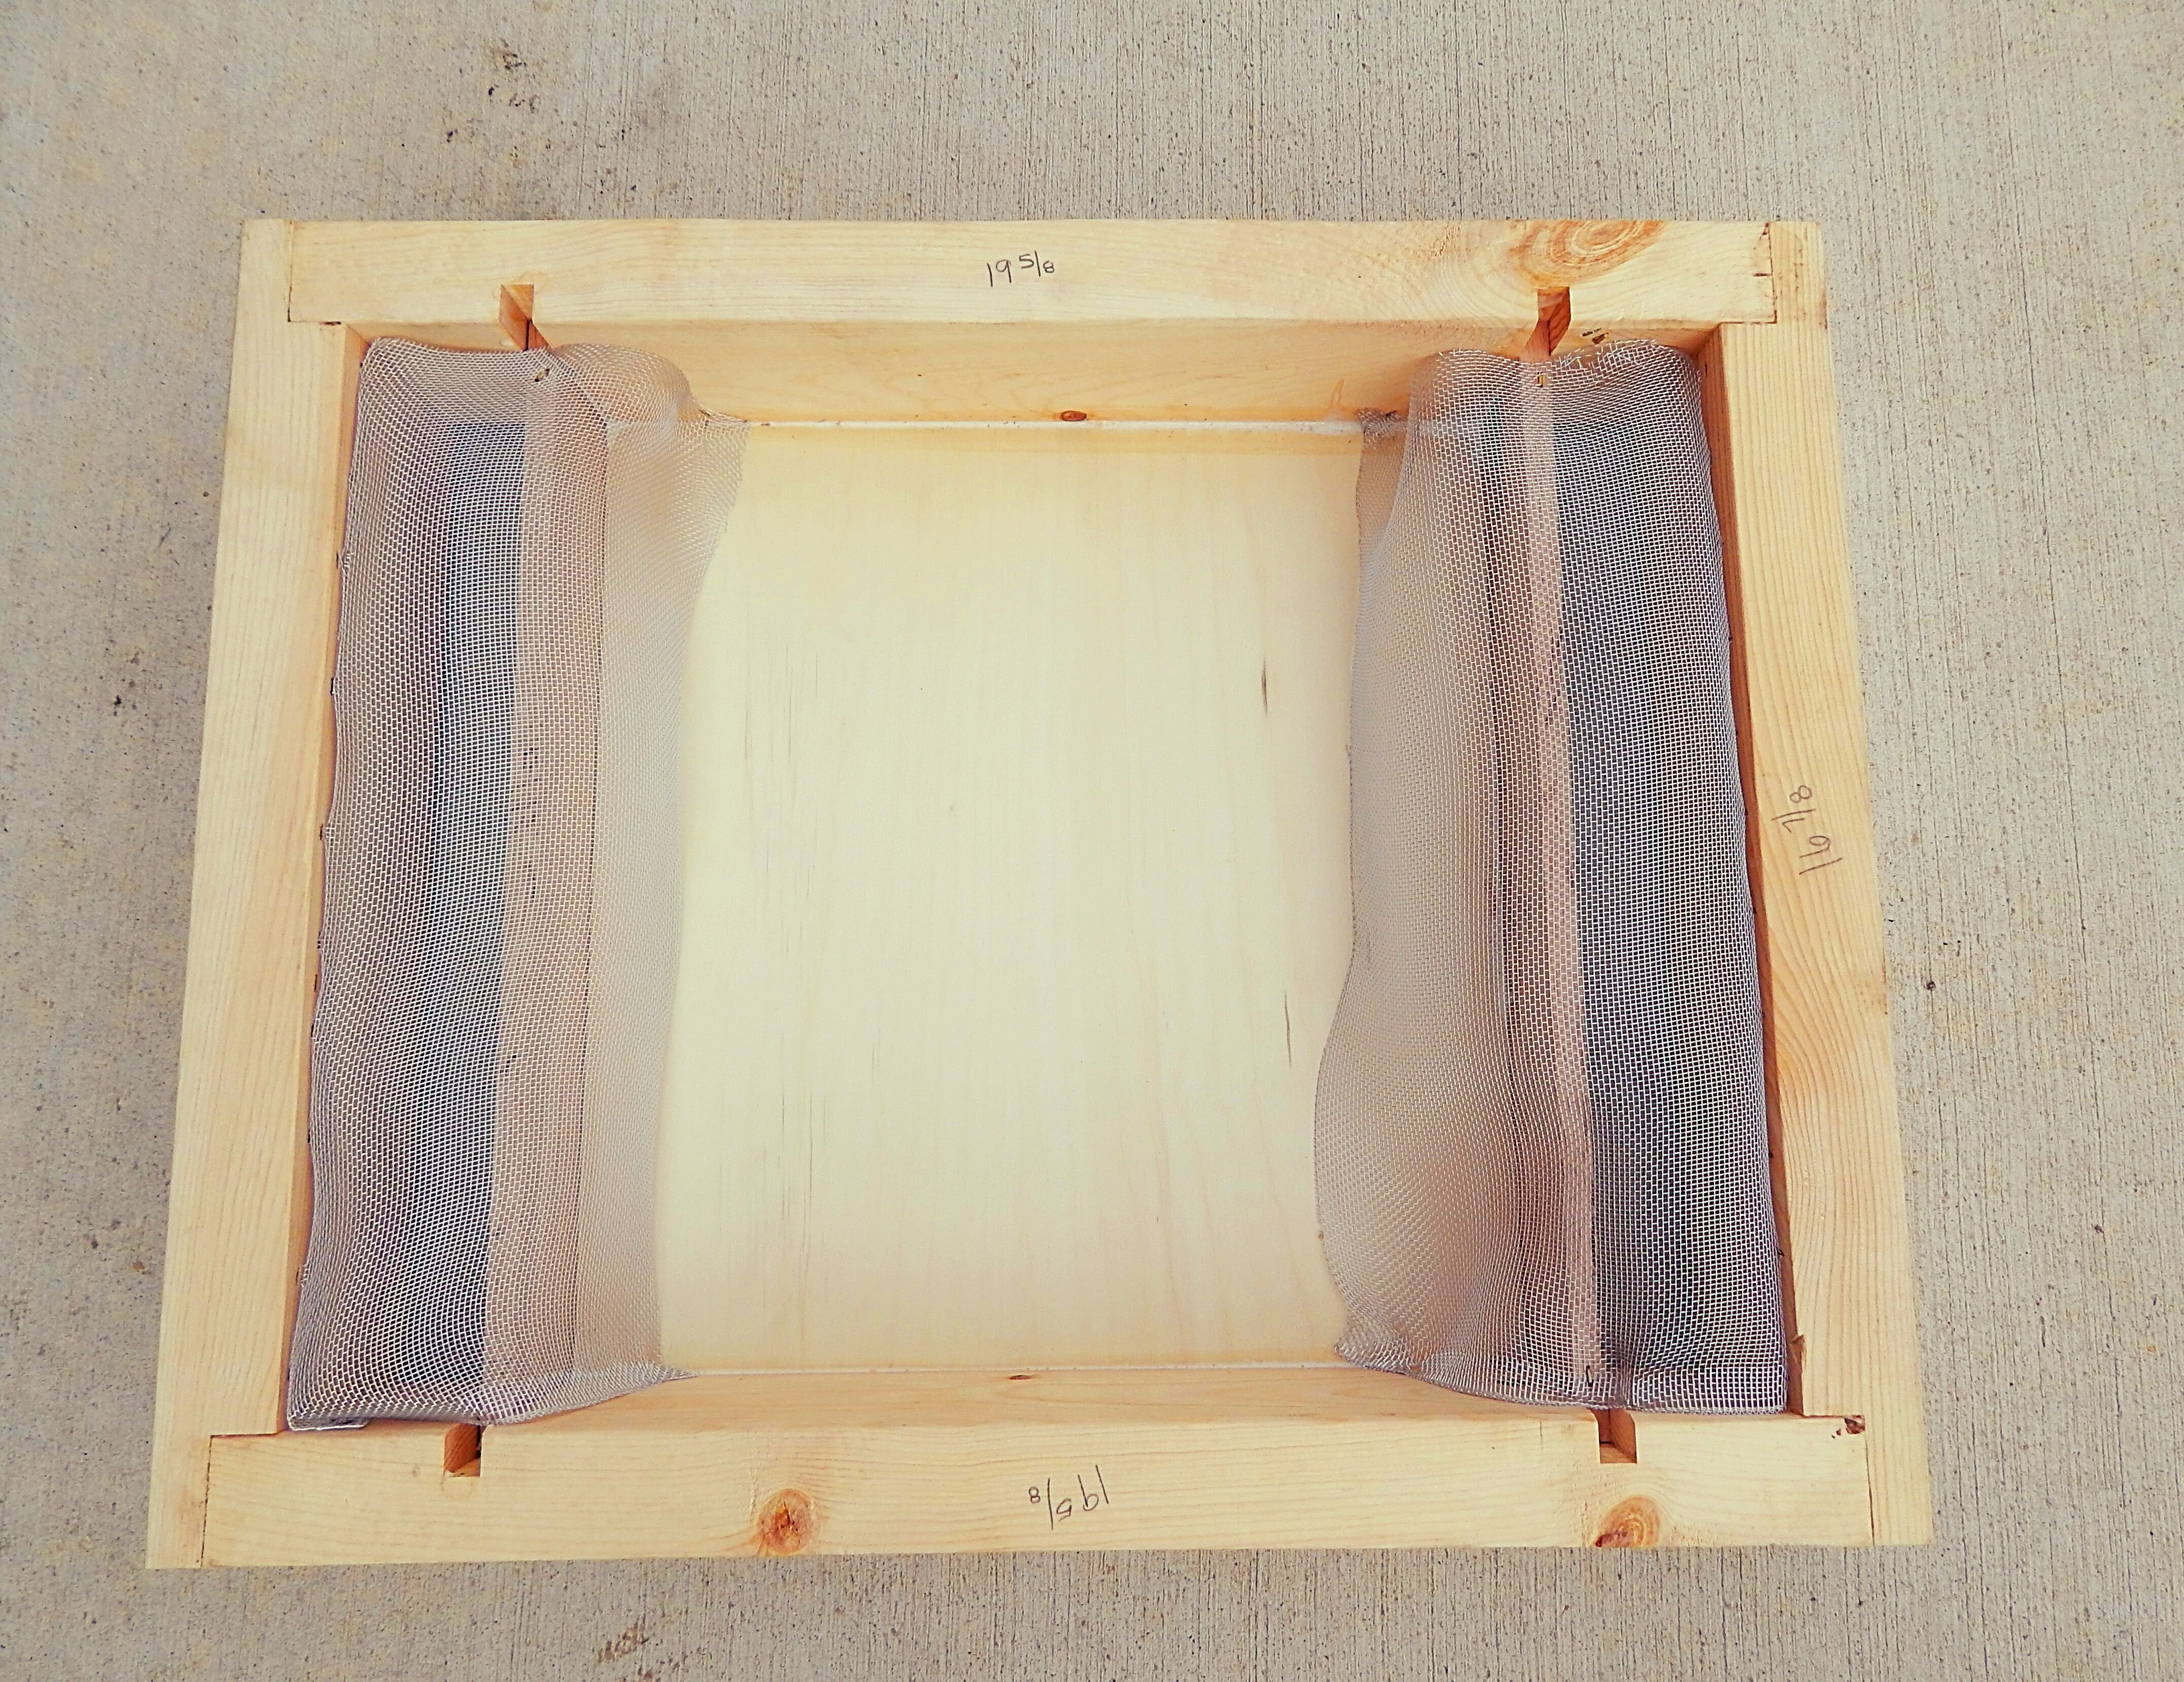
We used some left over screen material as a surface to allow the bees to climb to get access to the honey water and to ensure that they can safely get back out. We just simply stapled that into place over the slats and attached to the base board. You can simply remove this screen and use granulated sugar during the winter months.
Leaving you with a sturdy, high quality hivetop feeder for a fraction of the cost. This feeder cost us right under $10 in materials vs the $70 one we had spotted online. Of course you can get a cheap version for about $20, but you will only get about a years use out of those. This is an extremely sturdy, well made, strong feeder that we will be able to use for years to come.
We hope you have found this post helpful!
Thank you for reading,
Happy Homesteading