Intro: Modern Shave Horse
Howdy Y'all.
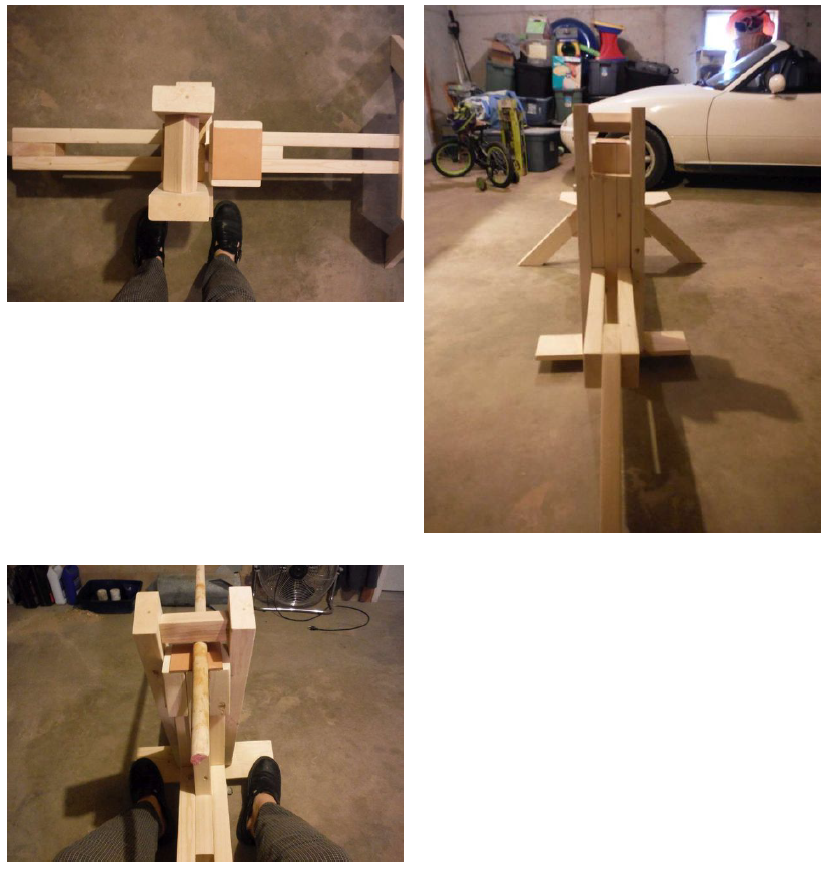
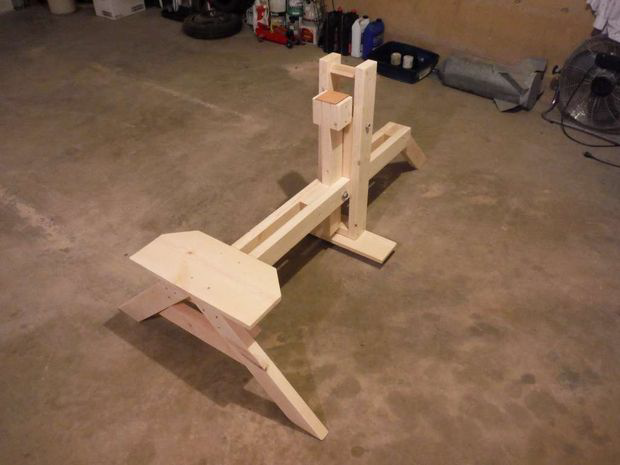
I finally built a tool that I have always wanted, a shave horse. Once upon a time when I was in the SCA I made a little stool using some branches and a piece of firewood. The key component to building that little stool was a shaving bench used in conjunction with a drawknife. With a bench like this one may securely work on shaping green wood into chair spindles and legs. I am going to use mine to shape stool legs and tool handles. I'll cover the art of using a shaving bench in other projects that are on deck.
A shave horse is a work bench with a foot actuated horizontal clamp. There are 2 main styles the German style that had a dumb head, that is basically a block on on a lever with a plank for the foot bar. The second is the English style bodgers bench, that uses two levers with a piece of stock for the clamp. Both styles use a stationary surface to hold the piece to be worked against. The German offers better leverage with the English a even clamp. I went with a combination of the two styles I used an English head with a German style foot pedal. Oh and I sized mine for a 6'2" guy with a 32" inseam if you are shorter or taller you may need to tweak the final dimensions to fit you. Wikipedia has a pretty good article on how they were used and lots of pictures. http://en.wikipedia.org/wiki/Shaving_horse
Materials used
4 - 2'x4'x8" Premium grade stud ($3 each left over from workbench)
1 - 1"x10"x18" Pine Board (Scrap from work bench) $2
1 - 2"x2"x6" Oak Square Stock (Scrap from lumberyard) $2
1 - 1/2"x8" Carriage Bolt. (3 for $4)
1 - 1/2"x6" Hex Head Bolt (3 for $3.50)
4 - 1/2" Washers (bag for $2)
2 - 1/2" Nuts (bag for $2)
1 1"x6"x24" Pine board (scrap from workbench)
2 1/2 #10 GRK Uber Grade Screws (left over from workbench)
1 1/4 #8 GRK Uber Grade Screws (left over from workbench)
Square of 16oz tanned leather 3 1/2" by 3 1/2" (Craft supplies on hand)
Tube of Loctite contact Adhesive (Craft Supplies on hand)
###Tools Used
Bar Clamps
Impact Screw Gun
Drill with 1/2 inch arbor bit
Reciprocating Saw, with flush cut wood and metal cutting blades
Circular saw
1/4 Sheet Palm sander with 60 git sand paper.
Tape Measure
Ruler
Carpenters Protractor
Pencil
Rotary cutting wheel with cutting mat for the leather.
And while not used specifically in the construction of this project I held up my Draw Knife up where I was in the process of coming up with my design.
Safety Equipment
Eye Protection - stuff flies everywhere
Hearing protection - Power tools be loud Yo!
Dusk mask - Air good... sawdust bad...
When using the draw knife may I suggest a heavy canvas or leather apron to prevent disembowelment.
Step 1: The Bench Base
I am going to split this up into several steps The first will be the frame for the bench. The second will be the stationary work surface. The third is the clamping bar and the last will be finishing up the bench and final adjustments.
Unless specified in the directions I used 2 1/2 #10 screws for my construction. Referring to 2x4" is the common dimensions for studs in the US. Actual size is closer to 1 1/2" x 3 1/2" But the typical american woodworker can find 2x4's in their local hardware store. Lengths are exact to what I cut for my horse. I also ensure that every angle that is 90* is square before attaching. All surfaces are sanded using 60 grit paper on a 1/4 sheet random orbital sander. I like the finished edges and splinters suck. Sorry for the rest of the world but in the US lumber is sold in "SAE" measurements You will need to adjust accordingly for the far more precise metric system.
###Cut the following lengths of wood
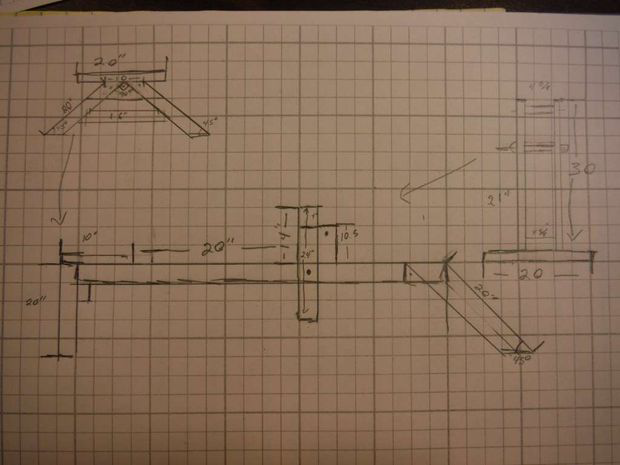
2 - 2x4x50" lengths for the mainframe
3 - 2x4x20" lengths cut into a parallelogram with 45-degree angles on each end.
1 - 2x4x16" Trapezoid for the rear leg cross brace.
1 - 2x4x10" Trapezoid for the rear leg mount.
1 - 1x10x18" board for the seat.
Retain the scrap triangular cut off 2x4" and a scrap 4" 2x4"
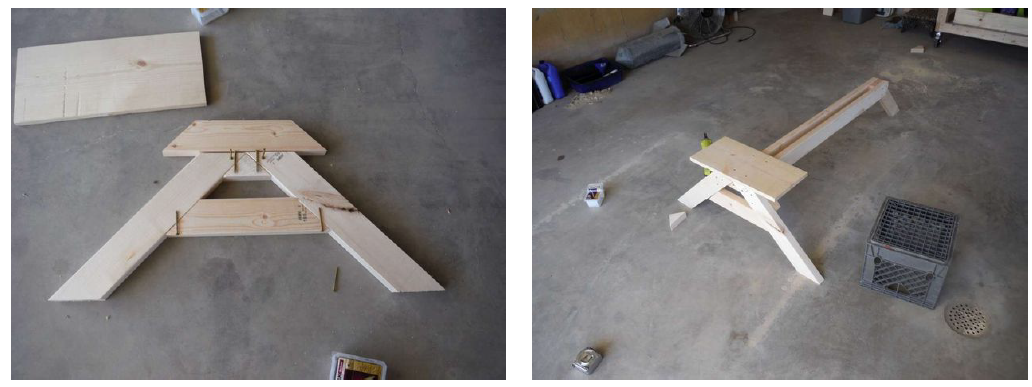
First I set out the pieces for the base to play around with how I was going to mount them to the frame.
Then I used 2 1/2" #10 screws to secure the square tailpiece to the end of the frame.
Then I aligned and screwed one of the 3 parallelogram legs to the "front" end of one of a side beam.
Screw the triangular scrap behind the front leg to function as a brace.
Screw on the other side rail.
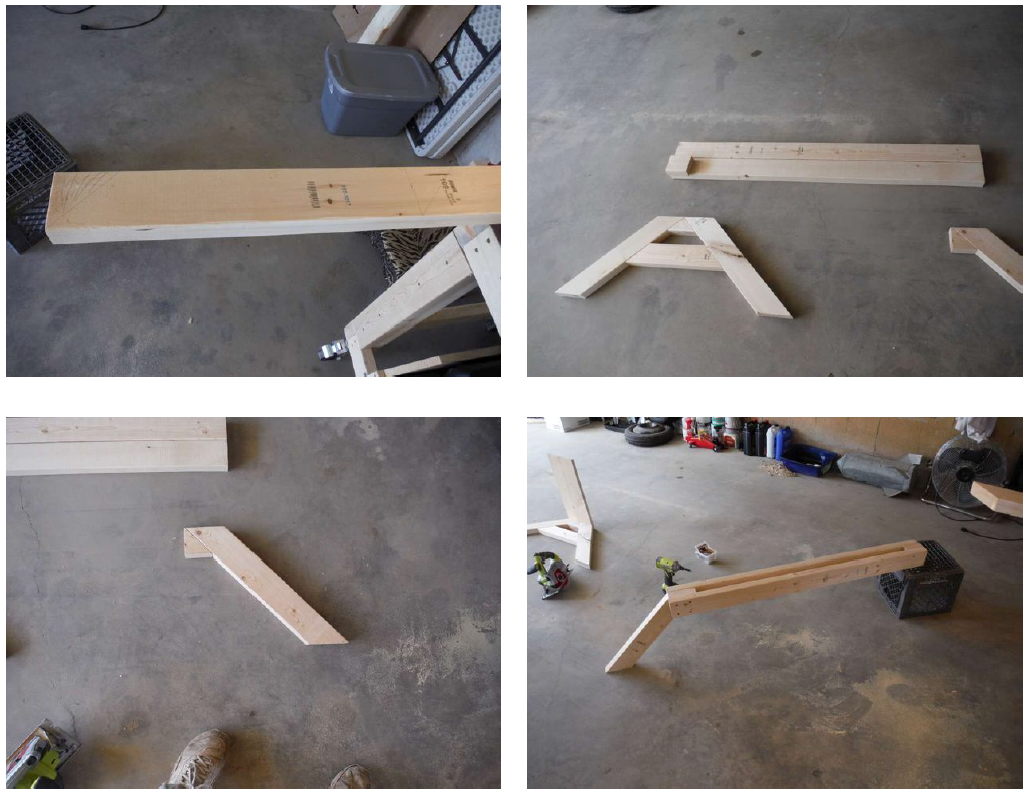
Center and screw on the tail 2x4x10" trapezoid.
Align the 2 legs to the rear clamp and screw it into place.
Secure the cross brace with 2 screws to the rear 2 legs.
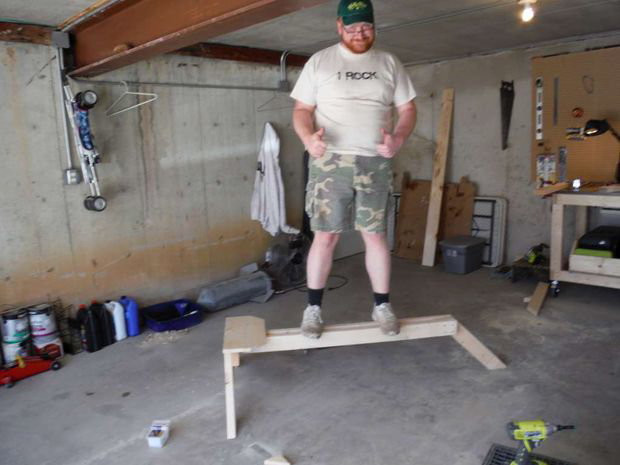
Right the table, center and affix the seat to the bench with 1 1/4" screws I also trimmed the corners off the front edge of the seat to go with the whole triangular 45 degree aesthetic of my bench. This also prevents digging a corner into my legs when sitting down.
Step 2: The Lower Clamp Jaw. Measurements and fitting
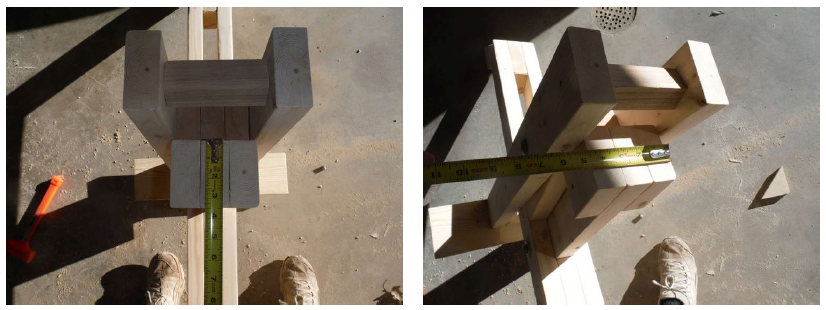
Ok on to the to make the stationary portion of the clamp, I have no idea what the heck this part is actually called. So I will dub thee the lower clamp jaw. I just wanted the jaw to be stationary but easily adjustable so it will rid in a mortise and be secured with a 1/2" bolt I left enough tail end to provide the ability to be adjusted by drilling more holes as needed. The height adjustment hole I drilled in part 2, will function to hold up to 2 inch thick workpieces.
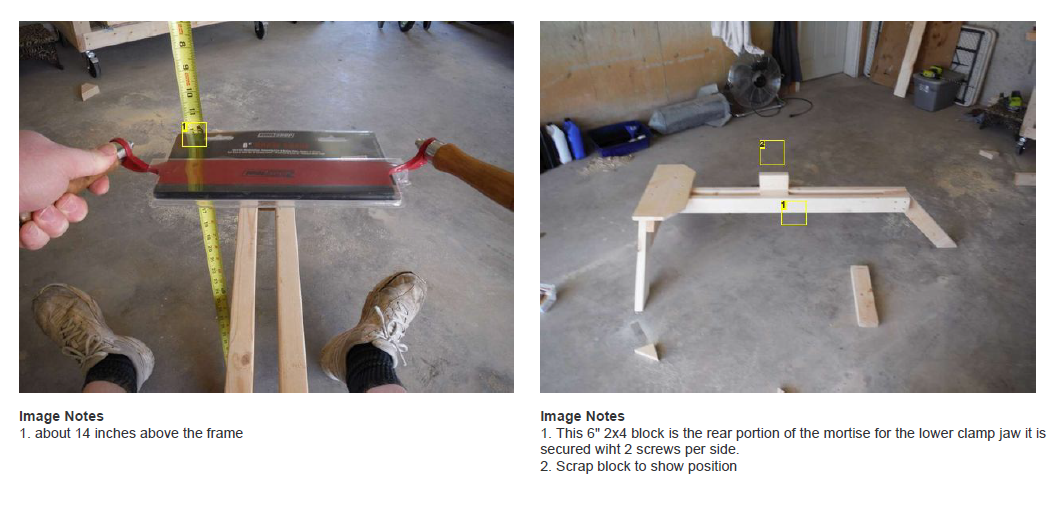
I made a few measurements First I held my draw knife out at a fully extended arms length and measured how far away from my body the edge was and how high it was off the center beam of the bench. This resulted in a working height that is about 14 inches above the bench and 20 inches laterally from the front edge of the seat.
Cut a - 2x4x6" - For the mortise rear support
Cut a 2x4x24" - center post section
Cut 2 - 2x4x4" - side blocks
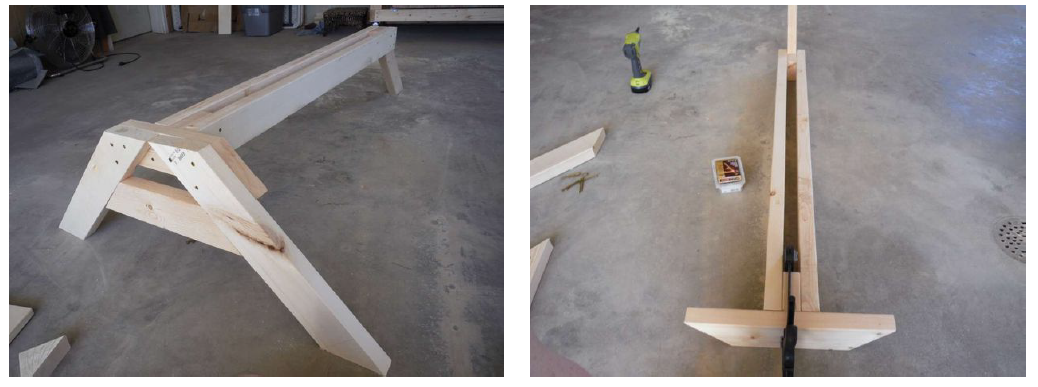
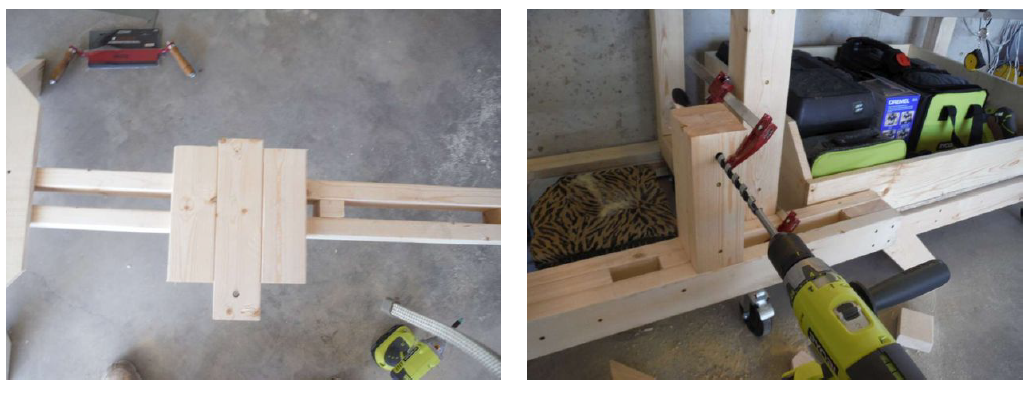
I screwed the 2x4x6" block with the front face 20" from the front of the seat. This block must be square to the frame as it provides the rear portion of the Mortise joint that the clamp base will ride in. I had originally set a 2 inch block for the front, however this was removed to bring the top clamp head closer to the operator.
Screw the 2 - 4" blocks to either side of the 24" long section and sand the clamp top edge perfectly flat and level.
To finish up the bottom half, I am going to have to make the top half. The reason I don't have many pictures in this step is that it was a lot of trial and error with test fitting I will affix things permanently in step 4.
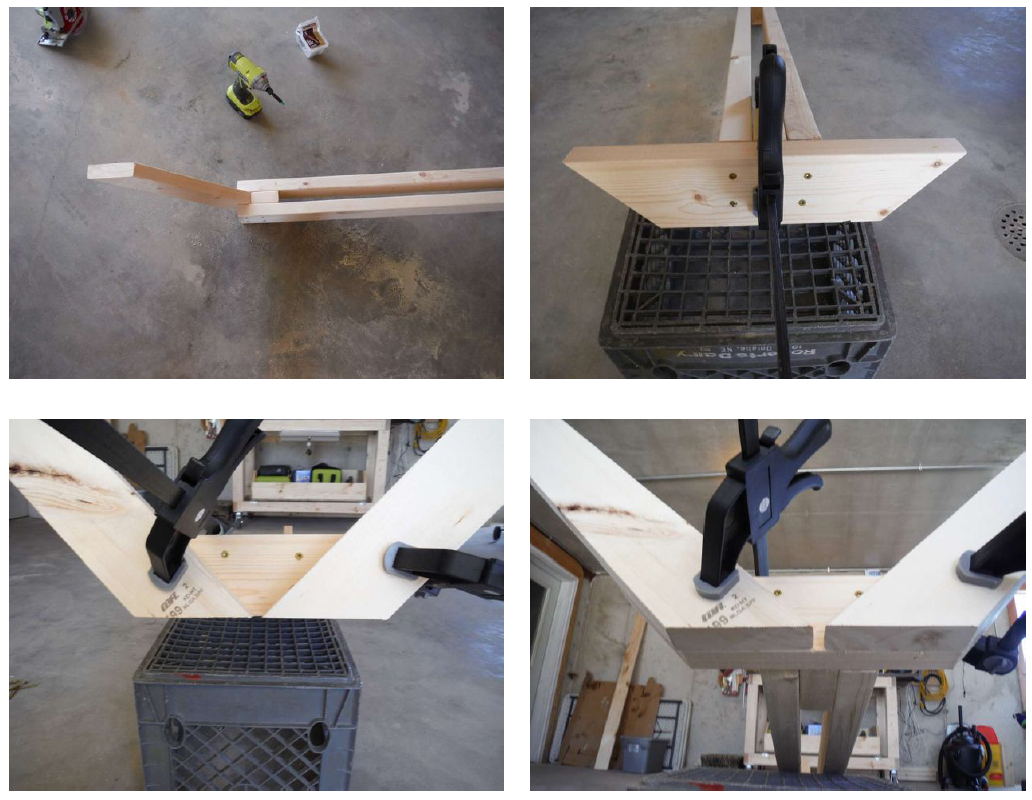
Step 3: Clamp Levers and Pivot Block.
For the top half of the clamp, I figured that I needed to make a tenon joint to fit the pivot above the main bench for improved leverage. This along with the wide treadle board are the key parts used from the German style bench. However as I am using 2x4's for my construction I needed 2 levers to hold the free spinning oak clamp block.
Thus providing the even clamping of the English bench.
I am going to call this the pivot block.
Cut 2 2x4x10 1/2"
Cut a 2x4x14" long.
Sandwich the 3 pieces with the longer piece resulting in a 3 1/2" tenon. Place the lower clamp jaw in its position and then place the pivot block flush and square with the clamp jaw. Screw the pivot block into place with 2 screws per side. then remove the Lower jaw by sliding it out of its now completed mortise.
Clamp a scrap block of wood to the rear side of the pivot block. Use the 1/2"x 12" auger bit drill a horizontal hole, centered 1 1/2" from the top edge. (see picture 2)
Clamp levers
Cut 2 - 2x4x30" long boards to be used as the levers.
Cut a 1x6x20" board to be used as the foot treadle.
Cut a 2x4x 4 5/8" block as a spacer for the treadle
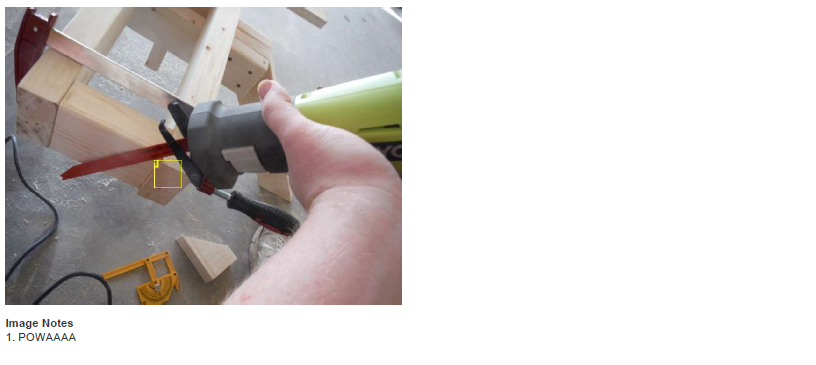
Clamp the levers together along with a block of scrap and drill a centered hole 21 Inches in. This will allow the treadle 1 - 1 1/2" of clearance if used on a flat floor. You may need to adjust this to fit you if so use blocks to find your ideal height. You can see I ensured that the drill bit was square and level on all axis before drilling and while drilling.
If your carriage bolt has a square head you may need to drive the bolt into a supported lever side. Use a hammer that is safe for striking large pieces of metal. I used a 2lb drilling hammer, a 16 oz ball peen would also be appropriate. Claw hammers not so much as they have a hardened head and striking a bolt may cause the hardened face to chip with force sufficient to injure.
At the end furthest from the hole just drilled clamp and screw the 2x4x4 5/8" block to affix the treadle. (see drawing or pictures)
Center the treadle board and align it flush with one side, and screw to the levers and spacer using 1 1/4" screws the flush side will be the front and face away from the user.
You see in the pictures, I miscut a lever to 30 1/4". I trimmed it to square using a reciprocating saw and a flush cut wood blade.
Sand the pivot block smooth and attach the treadle using an 8" carriage bolt through both levers and the pivot block. Note the Oak clamping face has not been mounted at this time.
We need to finish the lower half of the clamp first. Unfortunately, with a thickness of 5 2x4"s I just had enough bolt left to screw a nut halfway on.
This will be sufficient for use but I may have to keep tightening it in the long run. Or perhaps some blue locktite.
The treadle should rotate on this bolt freely if there is some binding or stiffness you may need to sand more on the pivot block or shim the foot spacer to provide more clearance for the levers. ( i needed to add a 1/8th shim to my treadle spacer due to some slight twisting of the left lever 2x4.

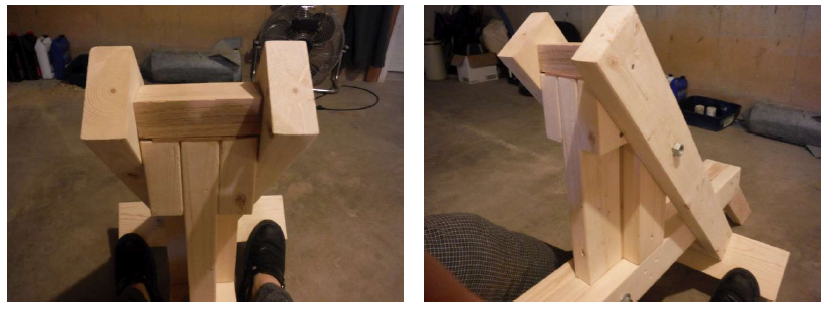
Step 4: Putting the clamp altogether
This is going to be a cumulation of all the steps
I stacked some scrap blocks under the lower clamp post to bring it up to the 14" height that was determined in Part 1 After the post is up to height I clamped a piece of scrap and bored a centered 1/2" hole through the frame and the lower jaw post.
After the hole is bored place 2 washers on a 6" bolt and thread it through the hole place another 2 washers on the free end and thread a 1/2" nut.
From the pictures, you will see that there is about an inch that could really gouge up a shin so I grabbed the reciprocating saw again with a metal cutting blade to cut the extra length off. I used my old standby of used motor oil as cutting oil to prevent the blade from burning up while cutting through the bolt.
Cut a 2x2x4 5/8" oak block for the clamp surface.
After you have your block cut square it along the face of the lower jaw closest to you. While seated on the bench use your feet to push the treadle to bring the lever arms in. Once you are happy with the position of your arms around the block secure it with a single 2 1/2" screw on each side. After you sand the entire bench these screws will be backed out slightly to allow the block to rotate so that a flat surface is pressing the workpiece into the lower clamp.

Step 5: The Finishing Touches.
If you have gotten this far you these are just the finishing touches to ensure that you don't get any splinters on your bottom. Sand it down. As I was using 2x4's and pine boards there were some surface imperfections. I went though and gave every surface a rough sand with 60 grit paper on a 1/4 sheet palm sander.
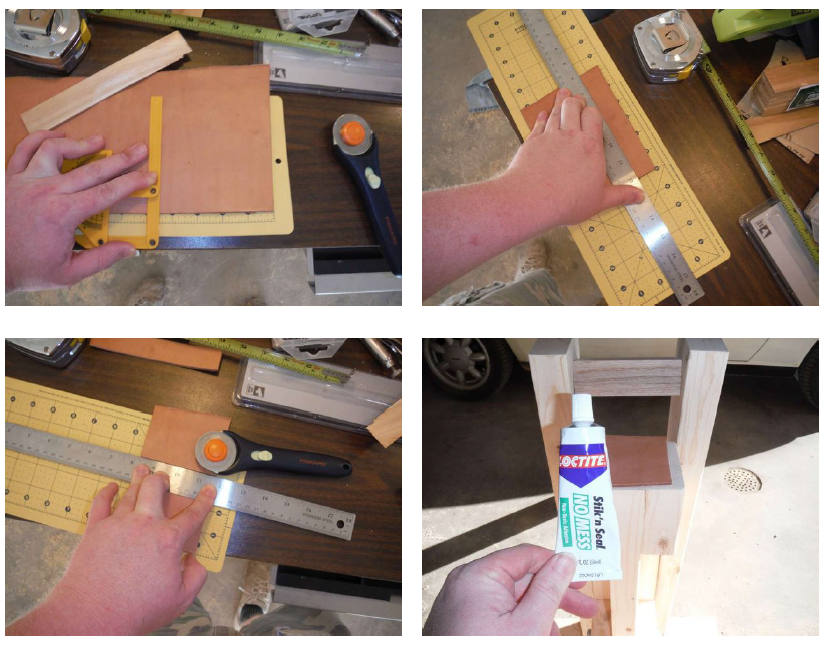
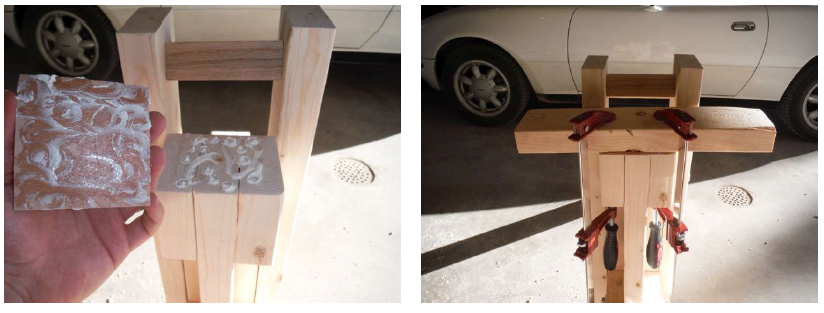
After the bench is sufficiently sanded. I figured a piece of leather on the top of the lower clamp surface would dress up the tool, provide a bit extra grab, and protect the piece being worked.
I wound up having just enough scrap leather, to cut a 3 1/2" square of 16oz saddle skirt. To cut leather I use a metal ruler for a straight edge and a quilters graduated cutting mat and rotary cutter. this ensures a sharp edge that is easily repeatable. Triple check to make sure that your fingertips are not near the edge of your ruler. If it cuts leather in one pass it will cut your fingers off just as easily.
In my leatherworking bin, I had a tube of Loctite contact adhesive apply the adhesive according to the directions on the tube. Apply to each piece center the patch of leather and clamp using a scrap 2x4 block.
The clamps can be removed after 2 hours however full cure is not achieved for 24. I just left it clamped overnight and removed the clamps this morning to grab the final batch of pictures.
I hope you have enjoyed this how to build journal. Thank you for reading.