First I'd like to give a giant thanks to @stellabelle for the awesome gif she made for me, I totally dig it.
Moving along, to the next steps in my series about making the large and involved Mermaid Mosaic.
If you haven't seen Parts 1, 2 or 3, I recommend at least scanning the images quickly to make sense of this project and our process.
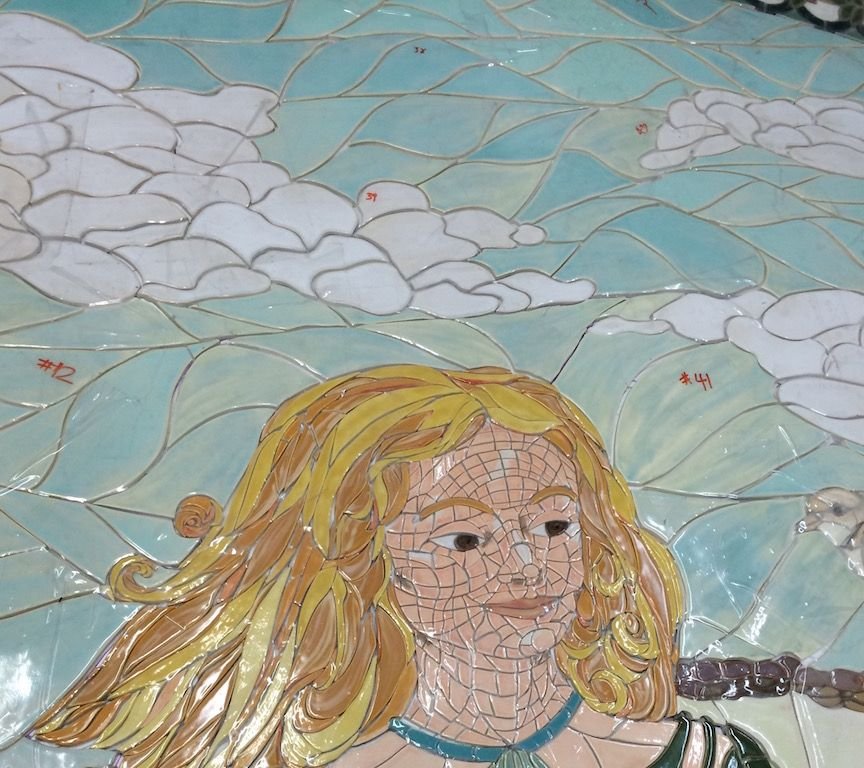
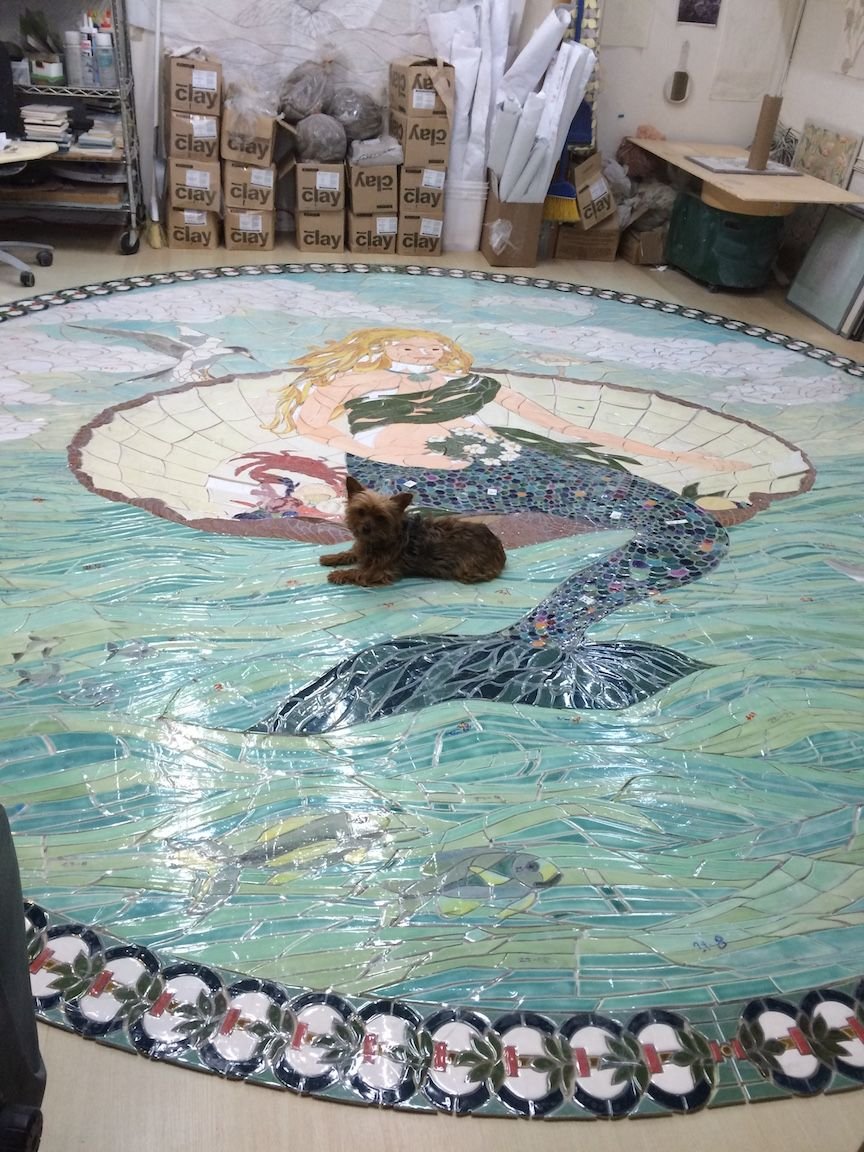
disregard the sheen of the tape over the tiles, it covers a lovely surface
Once all of the parts of the mosaic were cut from wet clay, bisque fired, then glazed and glaze fired, we put each section together. The tiles are held together with a face-adhesive that is like a giant sheet of tape that holds the tiles in place for the installers.
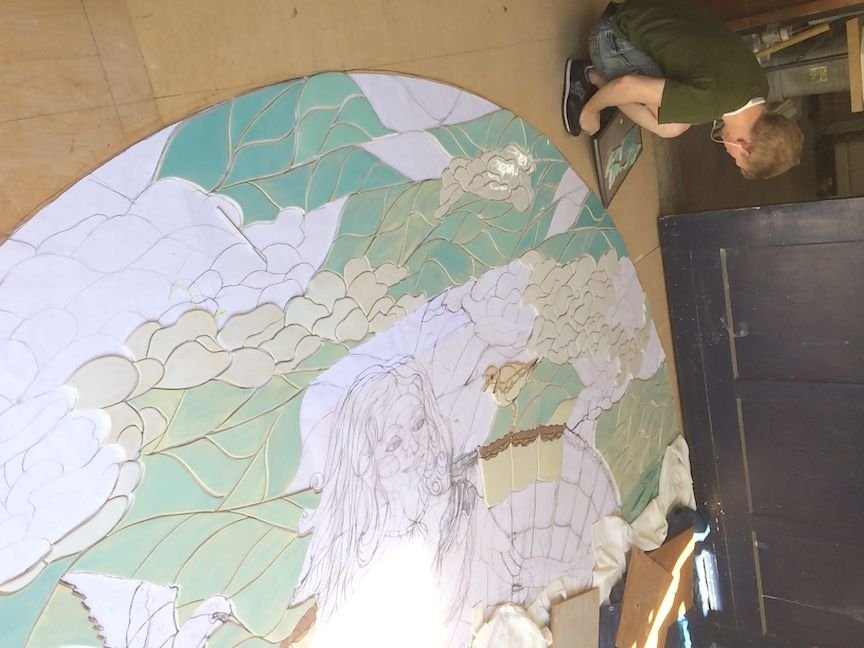
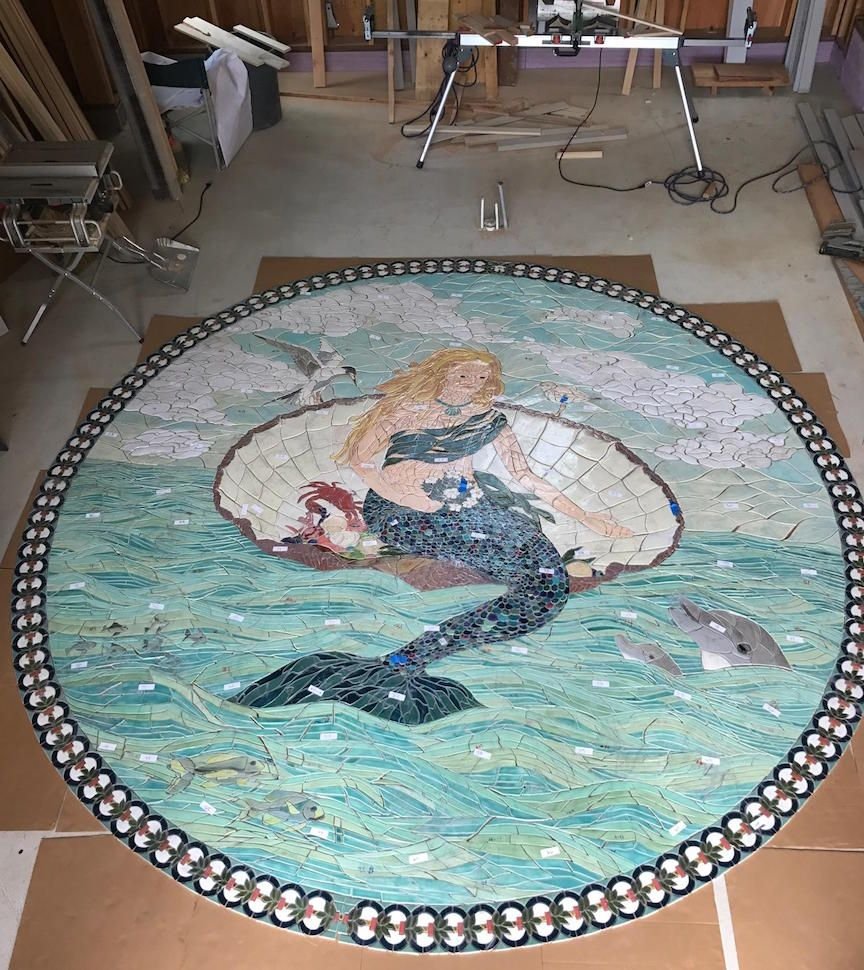
When most of the piece has been made and many sections assembled, we need to see what it looks like so we enlarged the drawing to full size. We tacked it together over 4' x 8' sheets of plywood to protect it and we also thought it would help with portability if needed. As it turned out, the sheets of plywood were far too heavy for 2 of us to move once we put the tile on it.
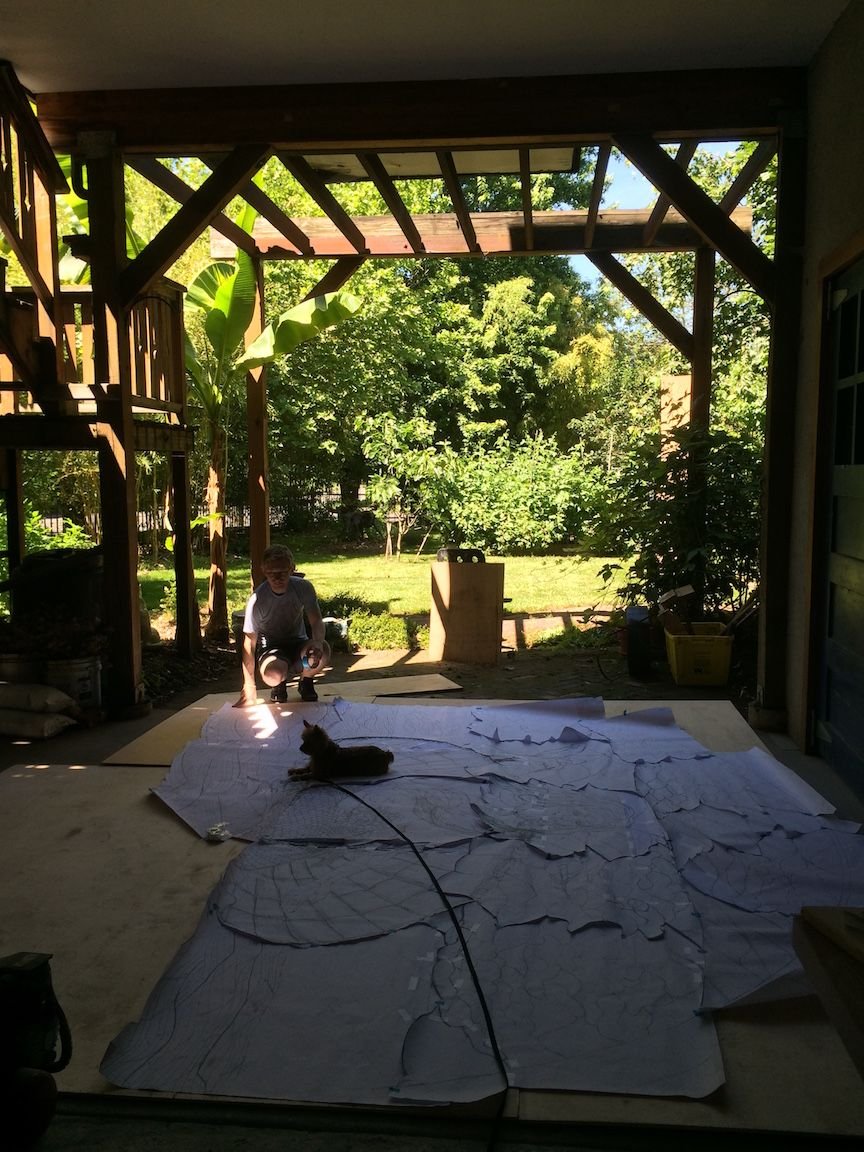
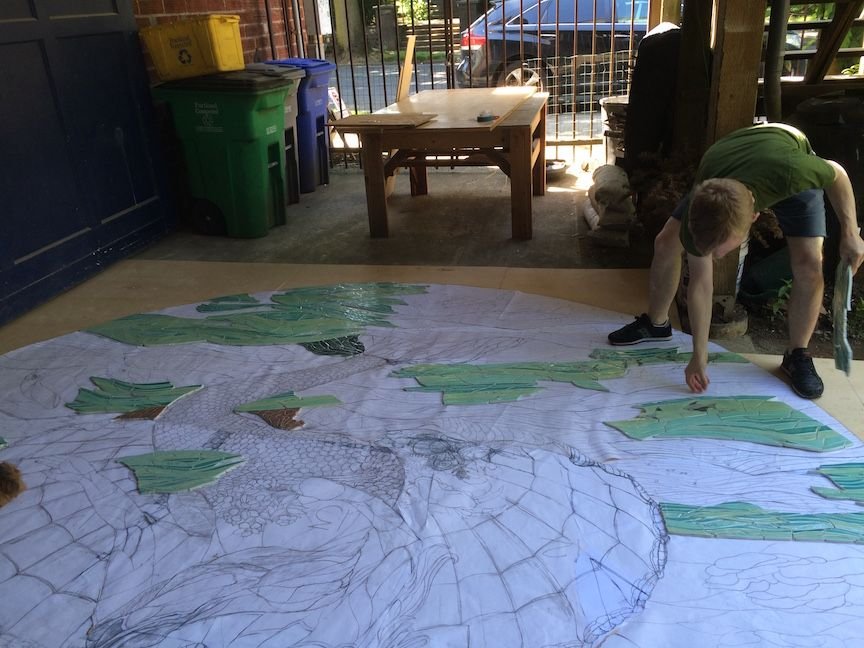
Next we took each section and lay it out together with the others over the drawing to be sure they fit and that all pieces were there. This was also a chance to do some more quality checking. I have a good sized studio but this 144 Square Foot piece was too big to put together in my studio without moving everything out. It was summer so we decided to do the lay out outside.
Lucy always does all she can to be of help. I've often thought that if I could find a way to channel her huge desire to be useful into income generation, we'd be rich. She may be small but as with most terriers she's mighty and when she applies herself to something her ambition and work ethic are phenomenal.

After a week the weather turned so we had to move most everything out of my studio and do the remaining work on the floor inside. For a few days while we finished, I couldn't reach my office and no one - including our studio renters - could enter the building through the front door because the mosaic was in the way! As was the nature of this project...one bizarre obstacle after another. By this point though our senses of humor were in full force and we were rolling with the waves of it all.
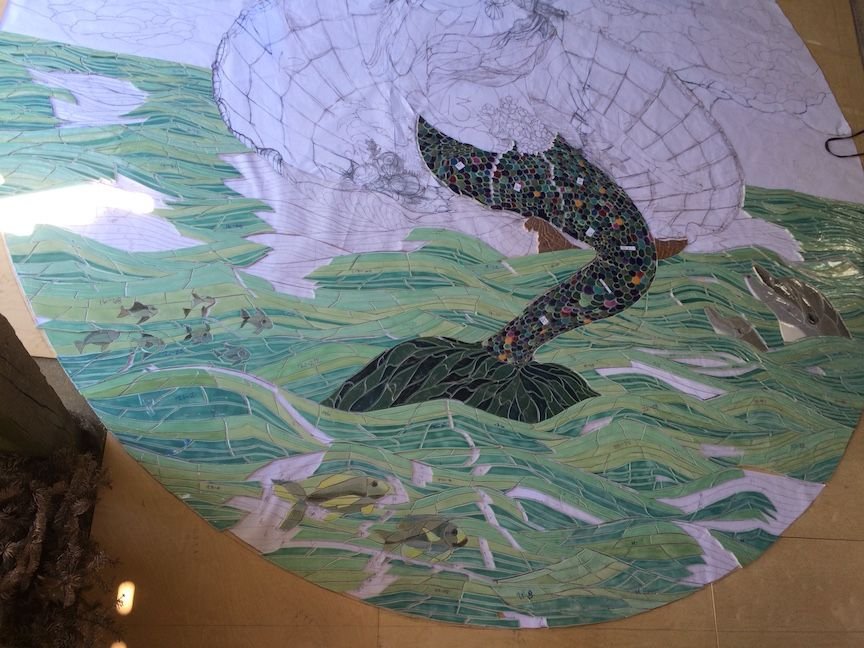
It's nearly finished here, but if you look carefully you can see holes where tiles are missing and the paper shows through. There is also a sort of icky sheen over the whole piece and this is the tape. The installers will remove it to reveal a gorgeous surface.
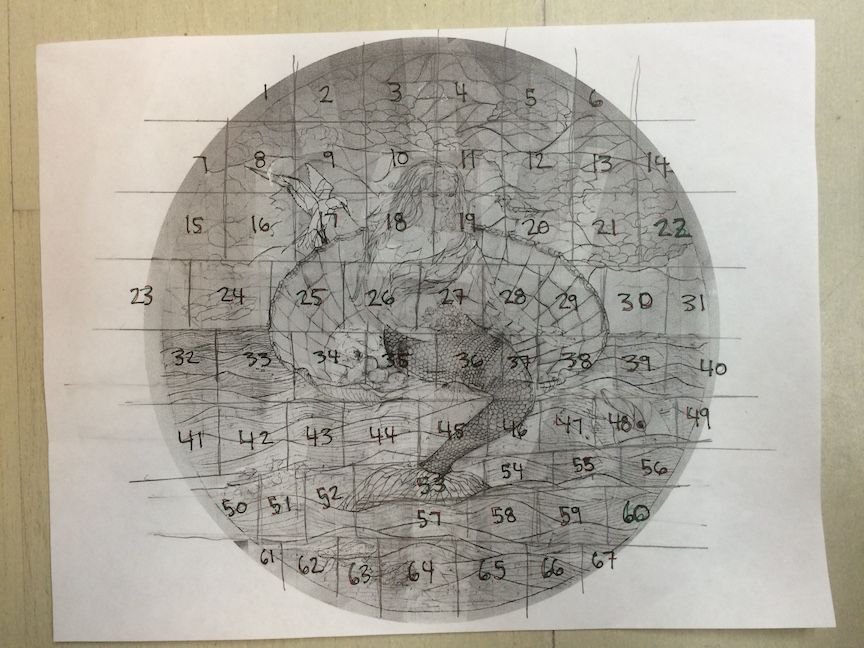
The "map" with numbered sections:
A year later, the installation team unpacked the mosaic at the site. When Rob and I arrived to go over details with them, they greeted us like celebrities shaking our hands and showering us with compliments- a very nice feeling after busting our asses!
Seeing the mosaic put together, we are gratified and pleased.
Here are all the numbered sections in the pool house on site awaiting good weather - not too sunny nor raining - for the installers to do their work.
Thanks for supporting my series, it's been fun to put this together to share with you! There will be one more installment which will be the installation video.
A Mermaid’s Song
by Anne Hunter
Now the dancing sunbeams play
On the green and glassy sea;
Come, and I will lead the way,
Where the pearly treasures be.
Come with me, and we will go
Where the rocks of coral grow;
Follow, follow, follow me.
Come, behold what treasures lie
Deep below the rolling waves,
Riches hid from human eye
Dimly shine in ocean's caves;
Stormy winds are far away,
Ebbing tides brook no delay;
Follow, follow, follow me.