If you hold OPEN.EOS on the Bitshares/OpenLedger DEX and have not moved and mapped them to a ERC-20 compatible wallet yet, and/or don't know how to do that, then this first tutorial is for you. Once you have your EOS Tokens moved to a MetaMask or MEW wallet come back and continue with this tutorial.
Part 2 - Generate EOS Keys and Register Your ETH Address on the Network
This tutorial will guide you through the process of making sure the Ethereum wallet you hold your EOS Token in is registered and mapped on the Ethereum network. Currently the EOS.io FAQs acknowledges MetaMask and MEW as the only two ERC-20 compatible wallets they 'recognize'.
First You Will Need New EOS Keys
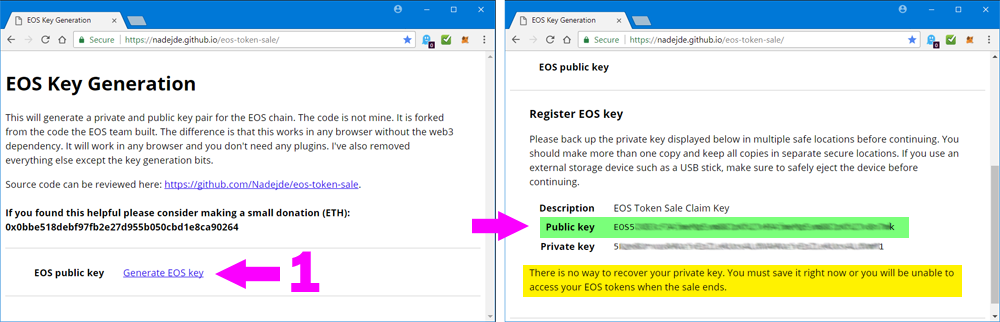
Go to https://nadejde.github.io/eos-token-sale/
- Click on "Generate EOS key"
- COPY and PASTE both the Public and Private Keys into Notepad or some other text editor and save that to your USB/SD Card with all your other passwords and keys. (Or write them down.)
😱 As Always - DO NOT save your keys to your local computer! EVER!
You will need the PUBLIC key for the next steps, and your PRIVATE key in the future to secure your EOS Wallet when that is made available later in June.
🔒 Log into your MetaMask wallet if it is not already unlocked.
Next We Will Access the EOS Contribution Contract
You will need a small amount of ETH in your wallet to send the registration transaction.

Go to https://www.myetherwallet.com/#contracts
- Select "EOS Contribution" from the Select Existing Contract Drop Down
- Click the "Access" button.
The Read / Write Contract Panel will open below the button - scroll down to it.
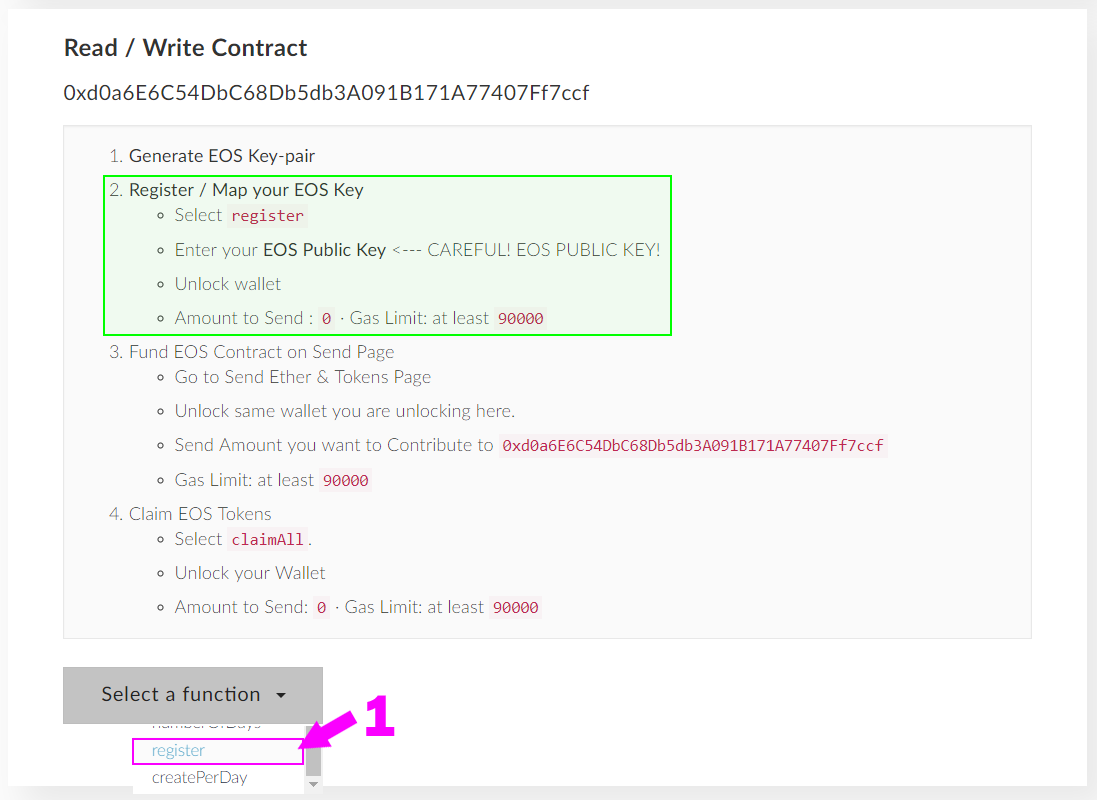
You will follow the process given in Step 2. Register / Map your EOS Key
- From the "Select a Function" button choose "register" from the drop down list.
This will once again open a new section under it.
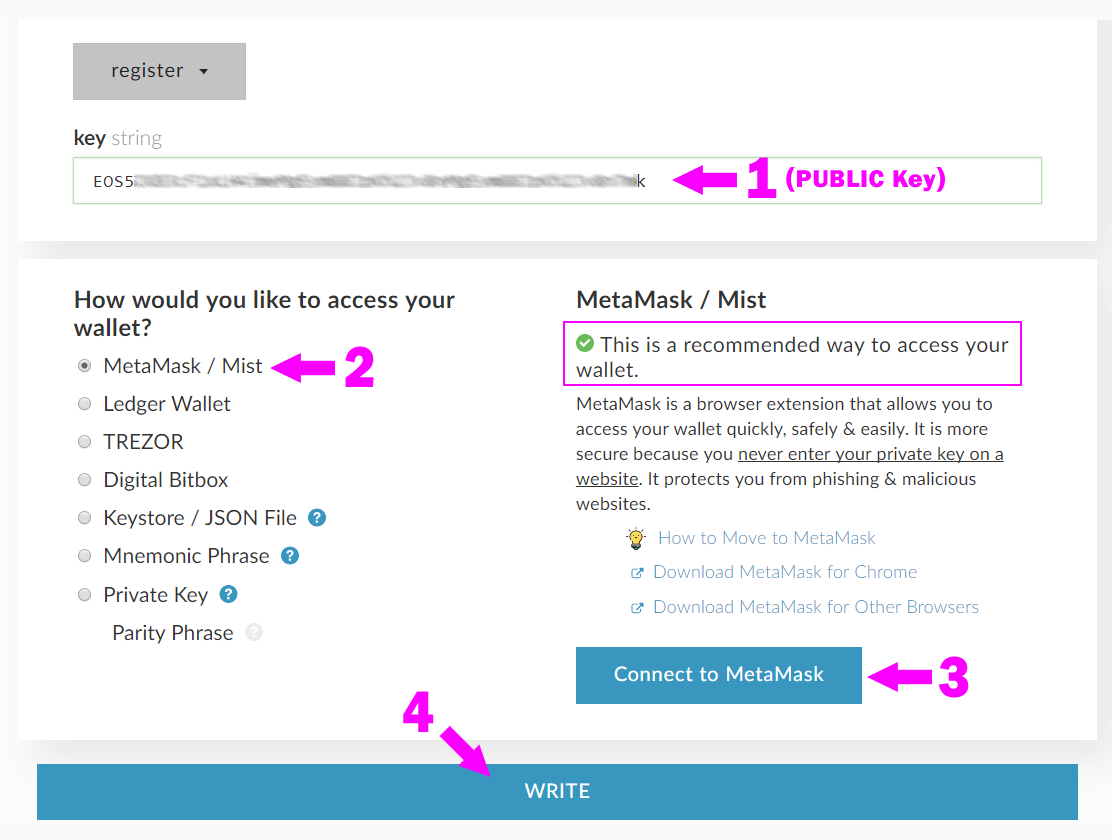
- PASTE in your EOS PUBLIC Key --- PUBLIC KEY ONLY!!!!
- Select MetaMask/Mist as the Wallet to Access
- Click the "Connect to MetaMask" button.
- The Wallet section will close... Click the "Write" button to continue.
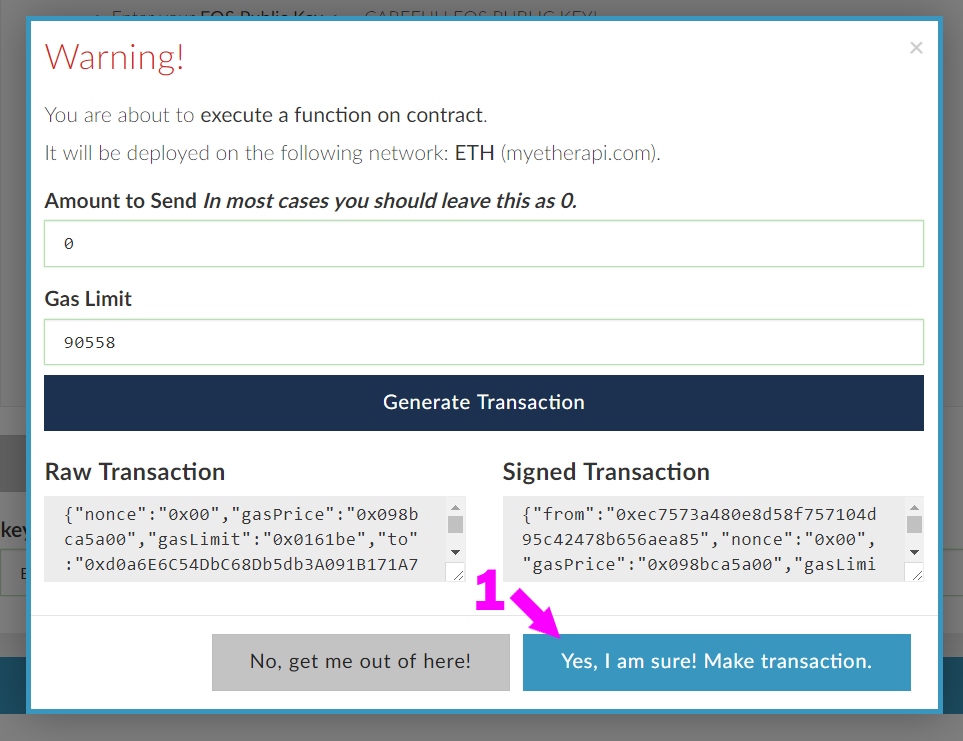
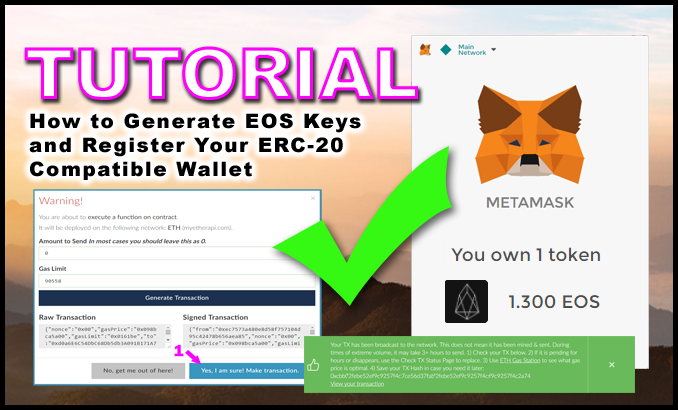
A transaction window will open up over the page.
- Leave everything alone and click the "Yes, I am Sure! Make transaction" button.
This will open your MetaMask wallet window on top.
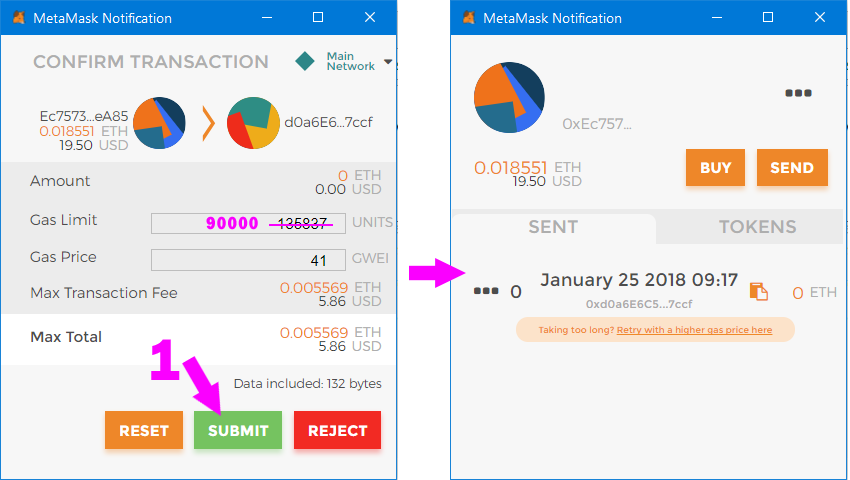
You will now see the familiar SEND / Confirm Transaction window in MetaMask. It is recommended to set the 'Gas Limit' to 90000, so that's what I did. This will reduce the transaction price to around $3.50 (at the time of this writing).
This is creating and sending a 0 ETH transaction to the EOS Contribution Contract address which will Register YOUR Ethereum wallet address on the network.
- Click "Submit".
You will see the pending transaction in your SENT list and a big green notice appear in the background on the myetherwallet.com web page.

Confirm the Address Has Been Properly Mapped and Registered
Once the transaction shows as confirmed in your wallet, you will need to check to make sure it has been properly registered to the EOS Token Contract on the Ethereum network.
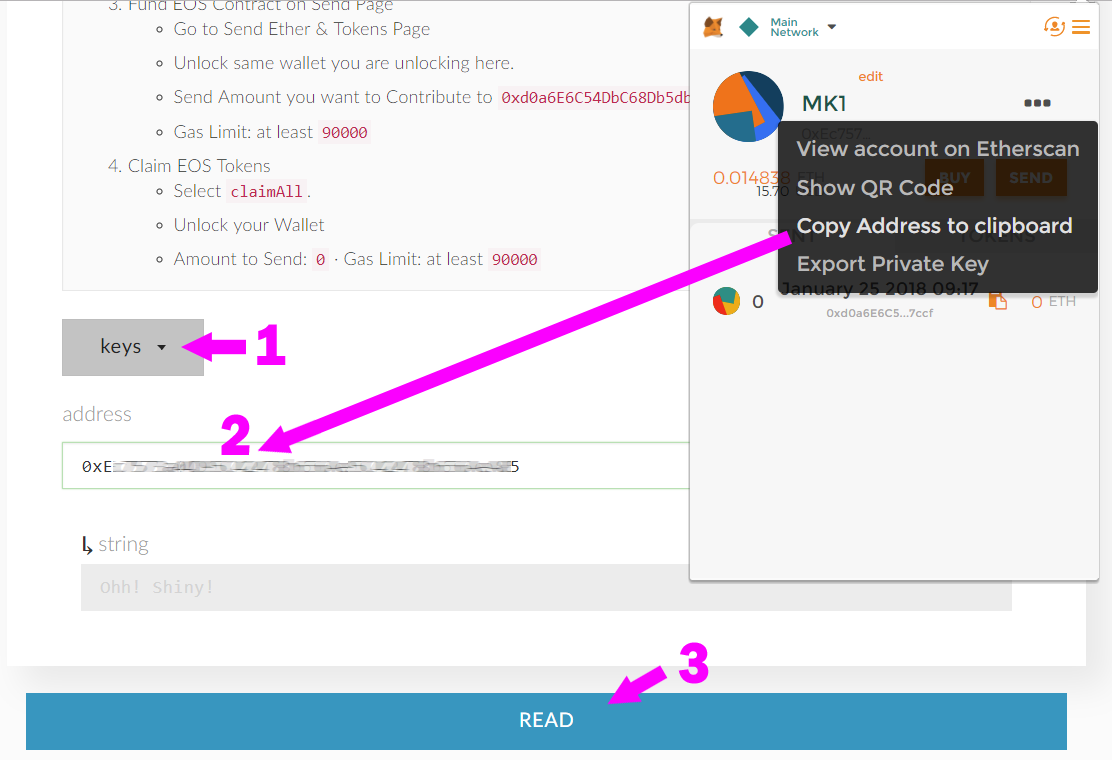
- Select "keys" from the function drop down list.
- COPY and PASTE your wallet address into the "address" field.
- Click the "READ" button.

If you see YOUR EOS PUBLIC Key appear in the "string" field - YOUR DONE!
🌟 Congratulations! You have successfully registered your new EOS keys to the token contract.
From this point forward, all EOS Tokens you transfer to that ETH wallet address and are holding in it on June 1, 2018 will be locked and registered.
Let me know what you think, please leave your comments below.
If I am missing any steps after this, or if you know of a faster way to manually set up EOS Keys and Register an ETH Wallet, please let us know in the comments.
If you found this tutorial helpful...
please UPVOTE this post and consider ReSteeming it
to help share this information with others.
Thanks for reading!