Hello everybody,
I wasn't sure what to write about next...hundreds of topics are jumping in my head daily, everything i encounter during the day makes me want to write about it :)
I can see a tree and immediately I am thinking about a great post about trees…
So after having another awesome Hummus lunch today I decided to write about Hummus...and specifically how to prepare the best possible version of it at your own home.
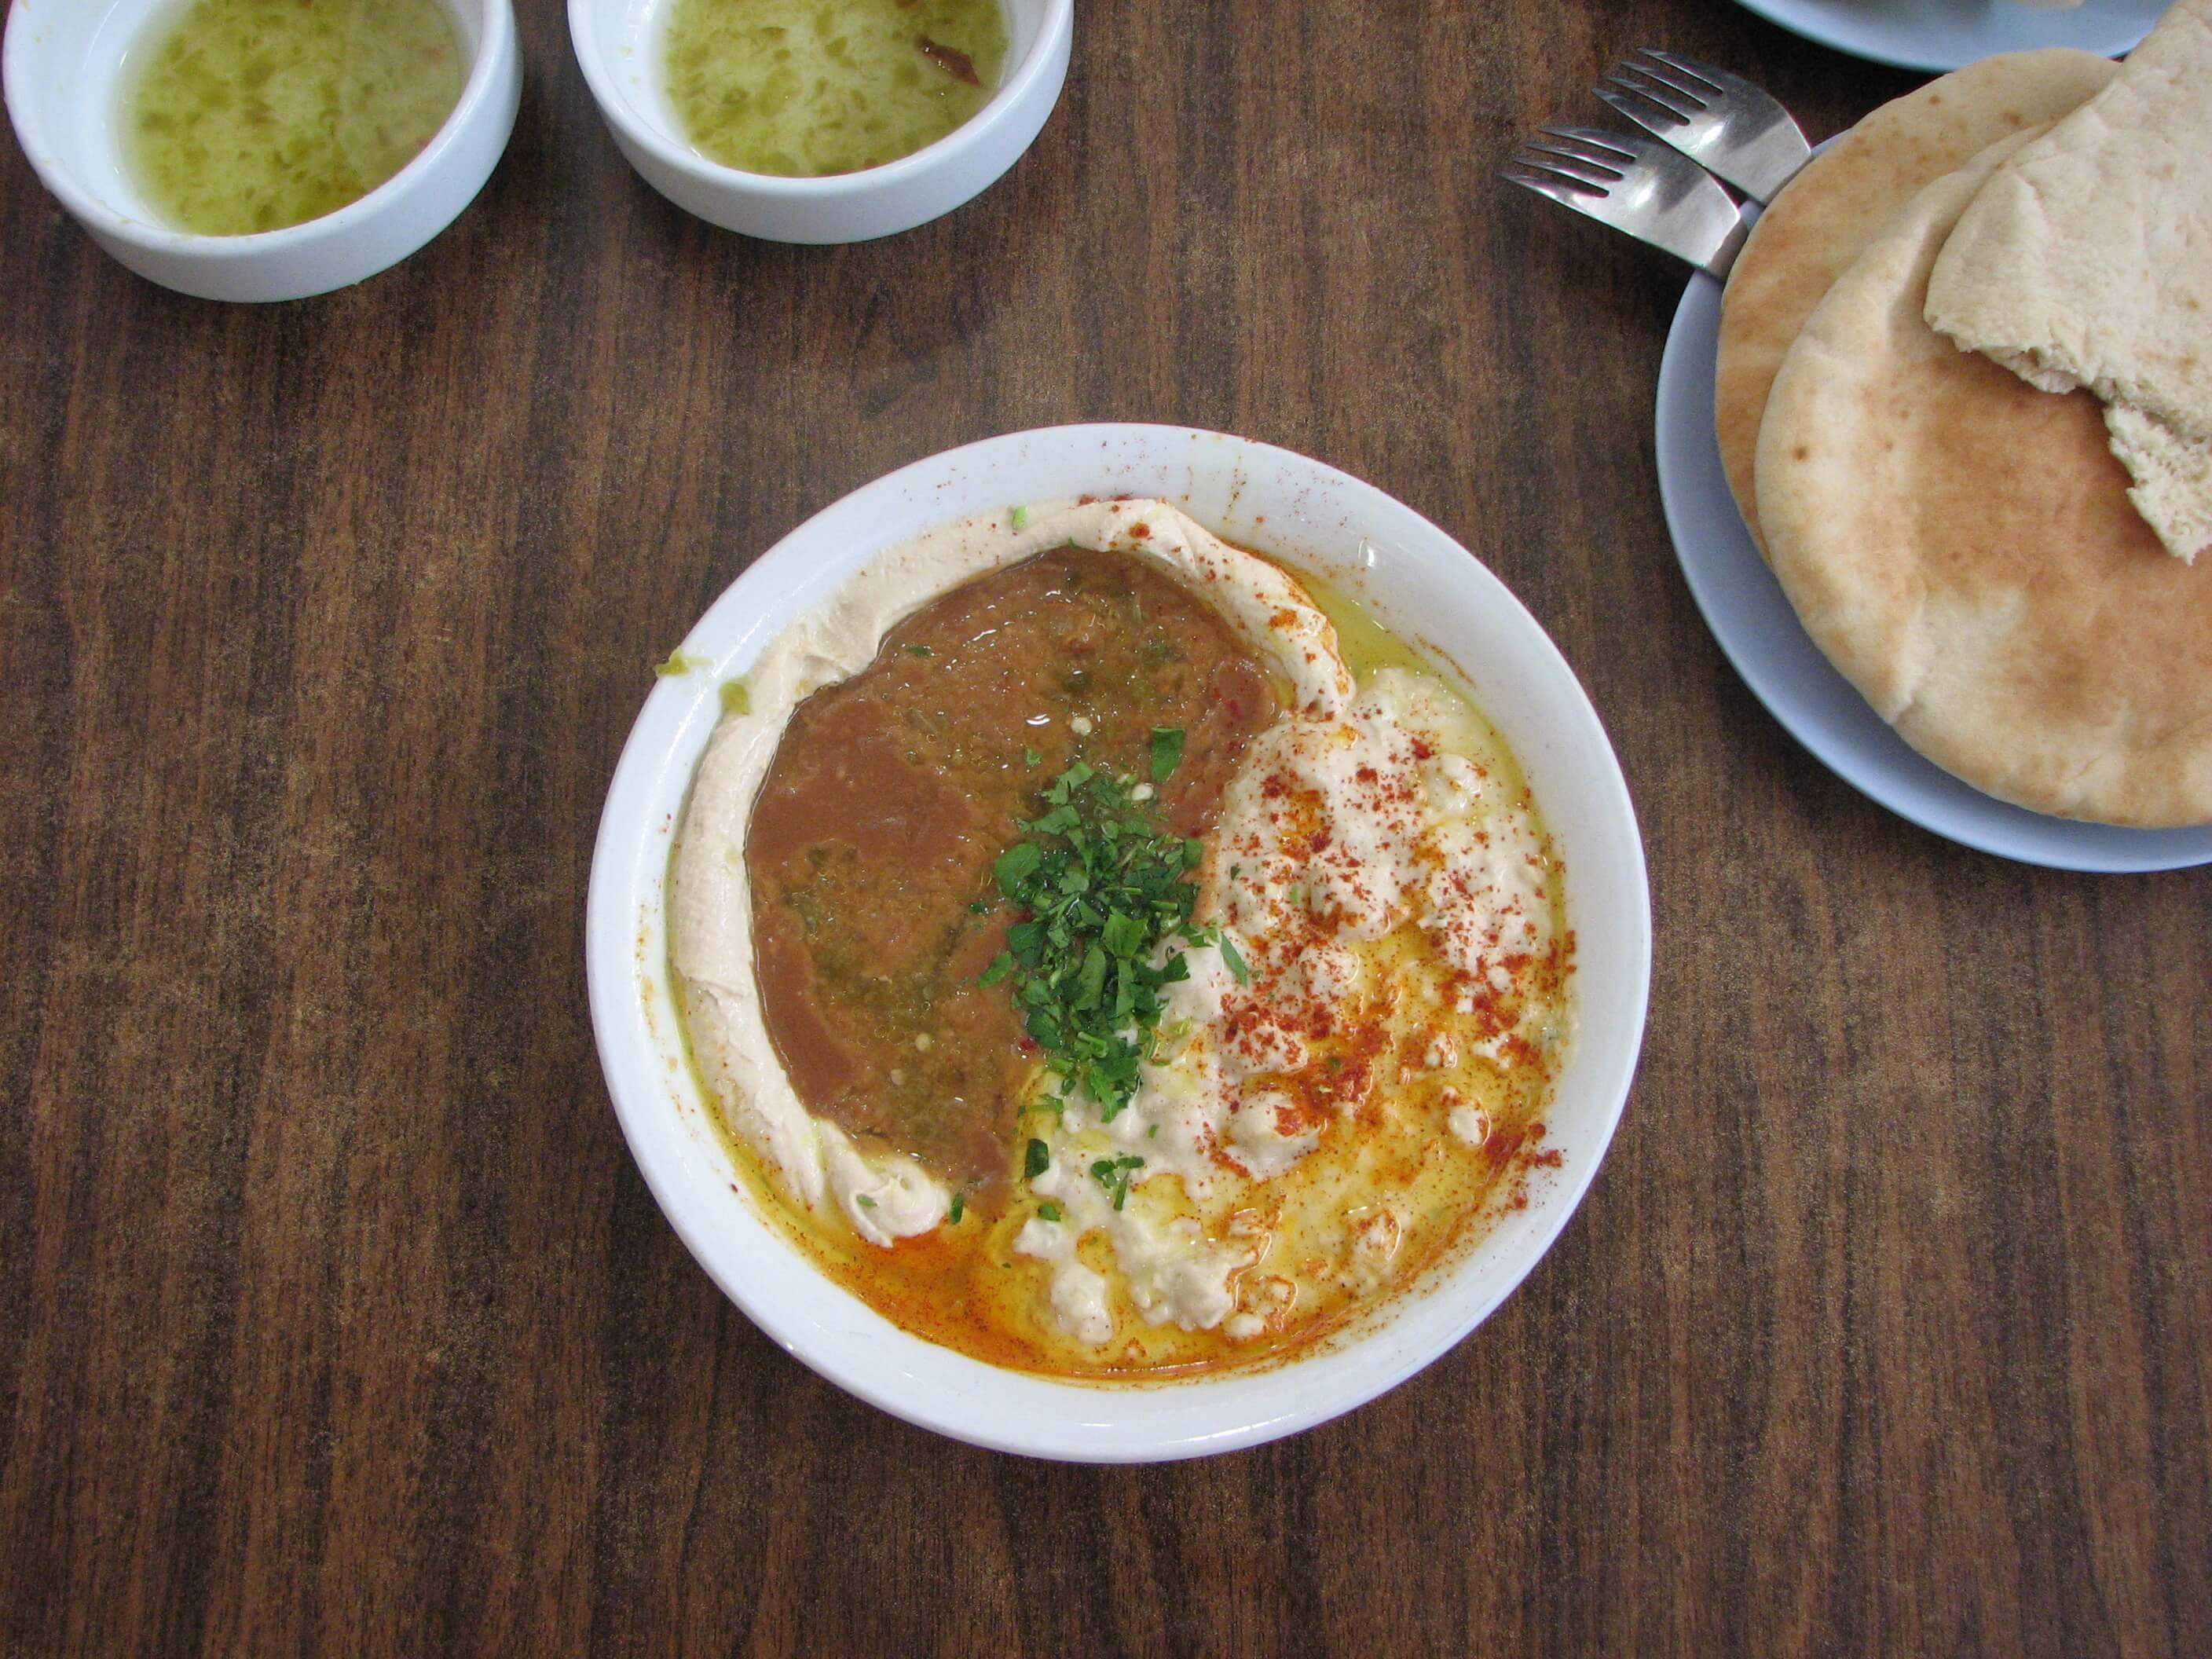
This what you would usualy get in an Israeli Hummusia - A plate with the hummus and the preferred toppings (in this case it is Egyptian faba beans and Mesabacha), a few Pita bread and some lemon juice mixed with garlic.
I am sure most of you out there heard about Hummus, the soft and creamy white paste that gaining popularity around the world.
Except being a delicious treat it also offers a great balance of nutritional value, being a great source of protein, carbs and fiber, healthy fat, vitamins and minerals and even might be a natural substitute for prozac.
My story with Hummus started many years ago, even before I became vegan, but for the past 10 years hummus has a major role in my diet, I believe 10% of my body mass is chickpeas :) …. But seriously now, I eat hummus often 3 or 4 times per week.

I eat Hummus often 3-4 times per week, it take 3 minutes to get the order, 20 minutes to eat and i am back on to my busy day, well fed and happy :)
In israel, Hummus considered national fast food and you can find a “Hummusia” (a place that sells hummus) in almost any corner and it is often a great solution for busy vegans (and many many non-vegans) during the day, as it is usually prepared and served in minutes and you can enjoy a great fulfilling and nutritious meal without the need to wait.

A typical "Hummusia
Although it seems like a very simple dish to prepare, as it only has a handful of ingredients,
Each place serves a slightly different version of the dish and there are hundreds of recipes that slightly vary from one another.

One of the most popular Hummus places in Jaffa, Israel
The best places although usually not really fancy and most of the time located in some strange locations are renowned throughout the country, and visitors often travel great distances to try the best local Hummus places.

A crowd waiting up in line to get their dreamy plate
On top of the plethora of the hummus joints in Israel, the supermarket shelves are filled with numerous varieties of premade hummus, as it is also being used as a spread for various sandwiches.
Though the store bought hummus are considered a much less healthier option as they contain preservatives and other unknown substances.
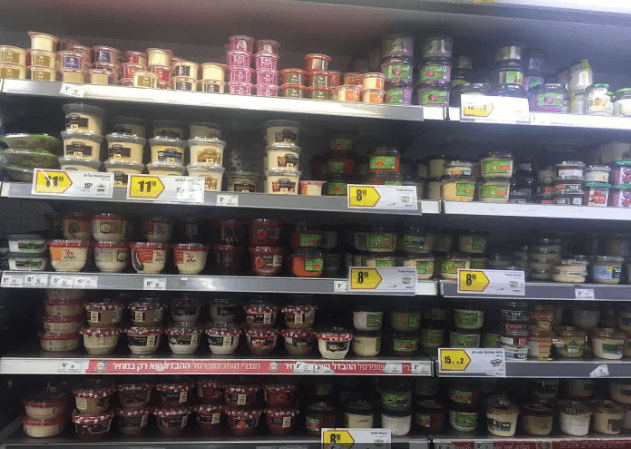
A supermarket shelf full of different Hummus varieties
So unless you leave in a place where you can easily find great hummus to eat, or even if you do , but still want to try to make your own… keep on reading, this recipe is for you.
Today I want to share with you years of experience and research on making the best possible “hummusia” style hummus at home, and although the internet is full of recipes on how to prepare a decent version of the dish using a canned chickpeas, I would suggest at least once to try to put an effort and prepare the hummus I suggest bellow, I think you will never be able to eat a store bought hummus again.
I had many attempts on trying to make my own hummus, I’ve been persistent over the years despite colossal failures.
Trying out different spices, with or without oil (ohh no!), peeling each cheakpea skin by hand because I was sure they was causing that terrible grainy texture.
I tried all kinds of chickpea varieties available to me and tried most of the possible ways to grind them.
There are many small tips I got along the way from some of the best hummus makers (hmm thats how you call them?) in israel, that make all the difference between a great consistent creamy hummus and a sandy, cement texture spread in your plate.
If you follow those important rules you will also be able to create a superb hummus at your own kitchen, but please remember that making great hummus takes time and patience but most importantly practice.
Its starts with the best variety
There are several varieties of chickpeas out there, the main ones being “Kabuli” and “Desi”.
But for our purpose we going to talk about Kabuli as it is this variety that usually being used for hummus preparation.
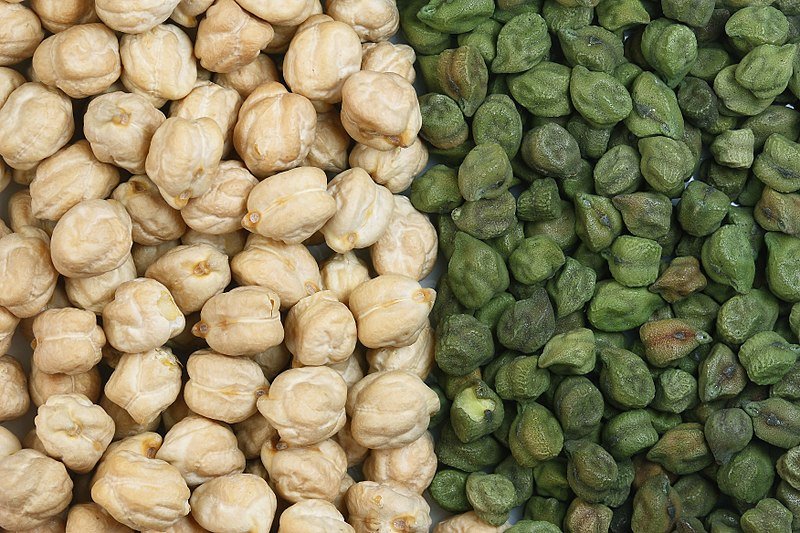
Kabuli Vs Desi Chickpeas
The Kabuli variety has lots of different types that differ in their size, color and taste richness….I believe the names vary from country to country, but let's stick with the most generic names” out there.
- Grabanzo Bean a.k.a Mexican Chickpea or Spanish Chickpea - this one is usually the most wide spread variety and usually the one that being sold in cans.
Its is really not a great choice for hummus and mostly suited for soups and stews.
- Middle-Eastern Chickpea - this general name has lots of different sub varieties inside, but usually the “middle eastern chickpea” represent the types grown in middle eastern countries like turkey, israel and other “Baladi” (endemic) varieties, which have no formal names. Those beans are the types that usually being used for hummus preparation, and the most widely desirable (being bought in huge amounts by hummus joins everywhere) , though often hard to find - the “Bulgarian Variety”.
Although the name suggests otherwise, its not really grown in Bulgaria, but rather in Turkey, and its is unique in its round shape and very very thin skin, that helps to achieve that perfect creamy texture.
So if you get a chance to lay your hands on some of those “bulgarian chickpeas” go a head as that will be the best choice to go with, but if not the the smallest variety you can find will work as well.
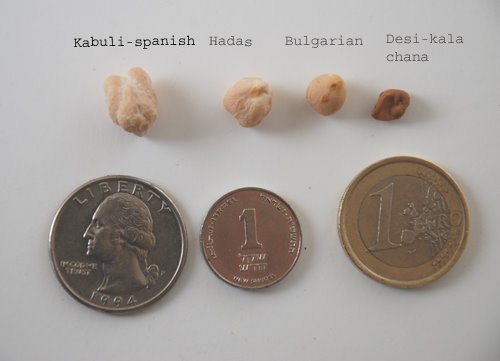
The steps for the perfect hummus
The quality of the hummus you will get as with any other food is a direct result of the quality of the ingredients you put in.
So here are a few tips to remember before we dive into the preparation:
- Use the “Bulgarian chickpeas”, if you cant find it try to find any other middle eastern variety.
Use the best raw white tehina (tahini) you can find.
Use a real lemon for the juice
Add the lemon and tahini only when the chickpeas cooled off a bit, so it want get cooked.
The Ingredients:
- Two cups of small chickpeas (preferably Bulgarian)
- 2/3 cup raw tahini of best quality you can find
- Juice squeezed from 2 small lemons - or - Juice of 1 lemon + 1 teaspoon of lemon salt (or a little less)
- 1 small-medium onion (optional)
- 3-5 garlic cloves
+1/3 - 1/4 teaspoon of cumin - 1 teaspoon of baking soda
- Salt according to your taste
And for the basic toppings:
Olive oil, parsley, a little paprika for the color
And now to the preparation:
1)Soaking
Soak the chickpeas in water with a flat spoon of baking soda per every liter of water.

***The baking soda weakens the cells on the skins of the chickpeas making them softer.
Without baking soda, It is really challenging to get to the desired texture even after hours of cooking..
The soda slightly changes the taste and smell, as well as the acidity of the hummus, but not necessarily for the worse. You can replace the baking soda with salt and the results will be very similar.
The more time the chickpeas will be soaked the faster the cooking process will be.
I usually soak them for couple of days in the refrigerator, but 12-16 hours over the counter top should suffice.
In the summer it is recommended to put the bowl in the refrigerator, otherwise the seeds might get spoiled. In winter you can leave them outside.
In the morning, rinse thoroughly, and leave for a few more hours in clean water.
If you prefer your hummus in a particularly smooth texture, you can continue to soak and rinse for one more day or even more.
The chickpeas will soak the water and swell, so make sure you have put a lot of water so you do not find the top grains out of the water the next day.
*Depends on where you are in the world, I would suggest not using tap water, as it often contain chlorine and other unwanted substances and as water being a major ingredient in hummus preparation I would suggest using mineral or filtered water throughout the process.
2)Preparation
After you soaked them for over 12 hours, rinse the seeds again until the water is transparent, drain and place in a pot of clean water at a height of 5 cm above the chickpeas.
Add the garlic cloves and the onion (you can skip the onion and add more garlic or other vegetables).
The vegetables that are added in small amount during the cooking process are often regarded as the “secret ingredient” in the most renowned of the hummus joins - carrot, sweet potato or parsley root in a small amount can do some magic, but usually a good quality tahini is all you going to need.
3)Cooking
Cook the hummus without salt.
Bring it to a boil and reduce the heat and let it simmer for about three quarters of an hour, until they soften a bit.
Add the baking soda and cook until the grains are completely softened and almost melting in your mouth. (Between two hours and six hours).

Then Add a little salt and cook for a little bit more.
A few things to consider:
High heat while cooking will break down the chickpea and more flavor will be mixed with the water, and we want to avoid that, so make sure you not going to crazy with the heat.
In the beginning of the cooking there will be a foam forming on top of your cooking pot, make sure to scoop that out together with any skins that are floating around.
If, after an hour or so, the seeds are not completely soft, something had gone wrong;
Or perhaps something mixed up in the execution, or it might even be due to the chickpeas not being of the best quality...anyhow it is not the end of the world - keep cooking for another hour or even two until they soften completely.

When the chickpeas are crushed easily between two fingers, they are ready. The hardcore crowd will remove all the skins from every seed, but as this is a big pain in the ass, and because most of the skins already dissolved during the cooking (especially if you used the bulgarian variety) this step is totally unnecessary and very time consuming.
Moving on…
Let the Pot cool for a while and then refrigerate it for several hours.
Then pour the chickpeas (including the garlic cloves, without the onions or any other vegetables) and some of the remaining liquid into a food processor and grind it up for about two minutes until the spread is soft and without any chunks.
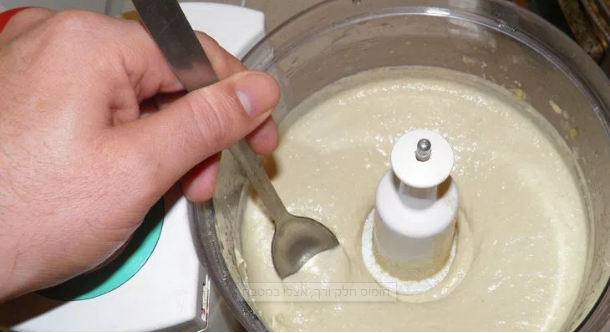
If the paste looks too thick, add a little liquid from the pot.
Do not pour the remaining water from the pot. It is very tasty and also very nutritious.
You can use it to prepare some other side dishes that are usually served on top of a Hummus dish - but we will talk more about it in part 2 of this post (for that make sure to keep about third of the cooked chickpeas aside)
Or alternatively use them in any soup or stew recipe, it will add a great richness to the soup.
The Tehina makes all the difference
Add a little raw tahini and turn on the food processor for another two minutes at low volume. Add the rest of the raw tahini and mix it a little bit more.
Gradually add the salt, lemon / lemon salt and cumin.
Not all at once - the most important thing is to be careful with not over-seasoning.

Storing and shelf life
After preparation, you should store it in a cold place in the refrigerator or eat immediately. The Hummus should be a little less thick than you want it, because it has a tendency to thicken in the fridge.
The hummus that you prepare at home will be the most delicious a few hours after the preparation and sometimes a day after.
If you store it properly it will remain tasty even after two or three days - maybe even more…
I have to admit I don't think that I've ever been able to make so much hummus that it will survive for so long ;)
A few things to remember :
The hummus is not served hot, but at room temperature. You can put hot toppings on top of it as part of the dish.
Optional Toppings for the hummus:
The chickpeas you saved from crushing in the food processor, mixed with some tahini,garlic and lemon, hot beans you cooked a long time, olive oil, spices like cumin, paprika, pepper and so on …. More about it in part 2 of this post
.
The hummus hardens in the fridge, so if you want to use it the next day, I would recommend taking it out from the fridge at least an hour before, and adding a bit of the cooking water to the hummus.
you should keep the dry chickpeas in the refrigerator to avoid any pests, and they will remain fresh for a long time

store your cooked chickpeas in a plastic box or a zip-lock image credit
The cooked chickpeas can be divided into small boxes and stored in a freezer, In there they can be stored more or less forever, and when you put them back into boiling water you will not feel any difference.
I hope you enjoyed this post to far, in part 2 i will give a few tips and toppings recipes that usually served with Hummus, so make sure you stay tuned…
If you have any questions on the steps explained above, or perhaps you have some ideas on how to improve the recipe I'll be happy to hear about it in the comments...
And if you get to try it out, then please share...
If you liked this post please upvote, follow and perhaps even resteem ;)
It will be much appreciated.
Bon appetit

My other posts so far:
Thrilling Paragliding In Pedra Bonita, Rio De Janeiro, Brazil
Excitement, Confusion, Doubts, Need for Advice from a Father to be
Art is everything for him, please meet this amazing Artist that nobody knows...
A few Crazy Stories from My Life that I have Never Shared Before - I am Pasha - #introduceyourself
