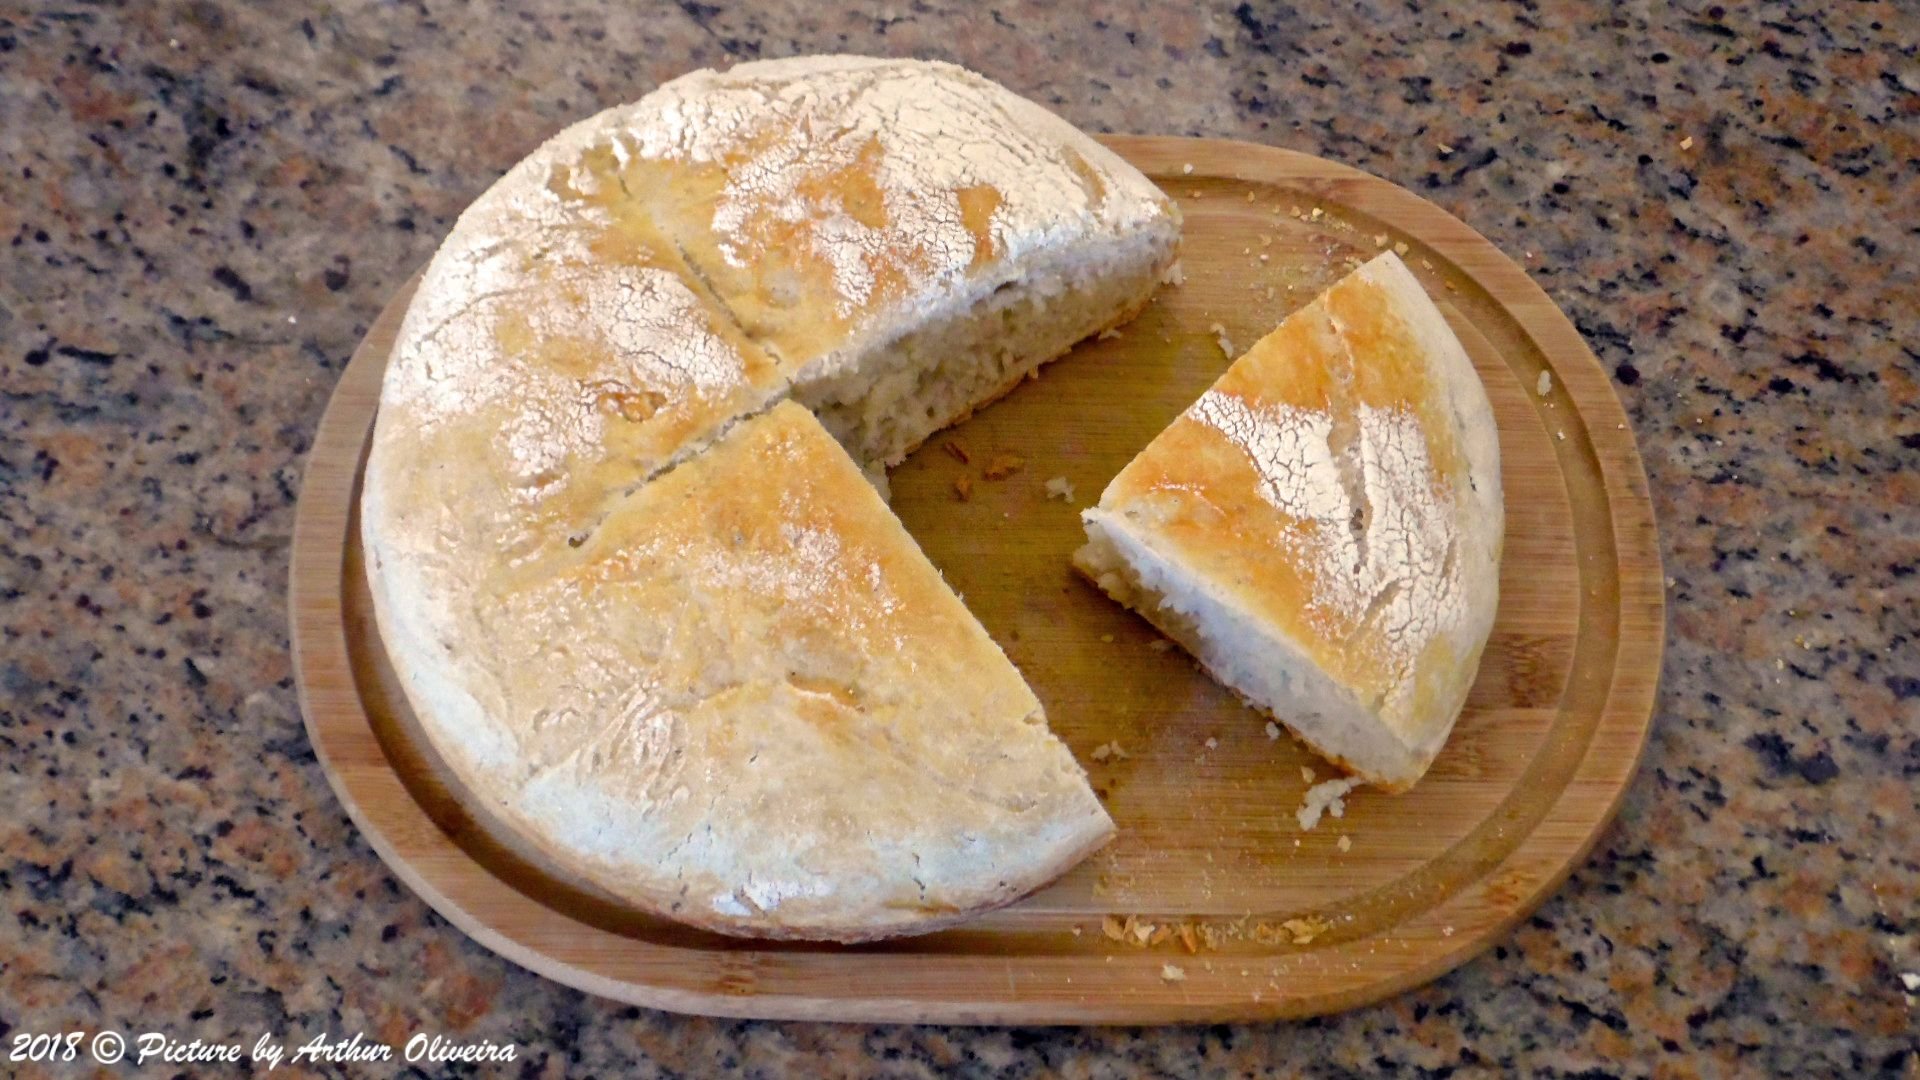
Heyho steemians! What a sunny day! Entry to #foodphotography. Simple homemade bread + Recipe
My first time entering food photography, I wanna bring something different. Have you ever appreciated a freshly home made bread? How does it feel?
The photo is not a super elaborate and beautiful food, nor the recipe is super complex. It's just a super simple and tasty bread.
I've learned this recipe from a sailor. On a sail boat, things need to be simple, practical and yet very good, otherwise there's no point. When I first experienced how I could produce my own bread I've stopped buying it at the supermarket, less industrialized food for half the price.
Less talking, more action.
Simple Homemade Bread + Recipe
You are going to need:
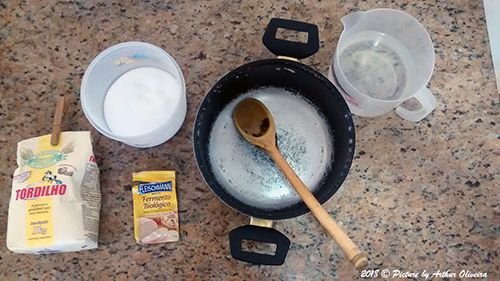
- 500g Wheat flour - Type 1
- Natural dry yeast
- Salt
- Water
- Utensils (pan and spoon)
Steps:
 Put 500g of flour in the pan + a shallow spoon of yeast
 Add a shallow spoon of salt
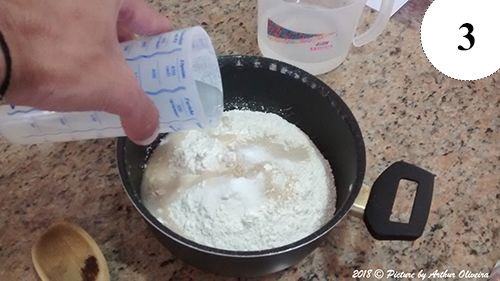 Add water. No more than a cup, but this is tricky. You'll have to feel the dough: You don't want it completely dry, nor too wet.
 Mix everything with the spoon. You can add more water if you feel it's too dry.
 The end result is something like this.
 Cover it with a cloth and leave it for at least 12 hours (yes, it's a lot). The more time you give, the better the bread will be.
Extra Steps:
Obs.: I don't have pictures for this part since I've just prepared the dough and I wanted to post. But don't worry, it's easy.
After you wait at least 12 hours you'll notice that the dough expanded quite a lot, covering almost all the pan. This is what makes the bread so soft and delicious.
There are some small steps before you can bake it.
- Add a little more flour to it, so it'll not stick to your hands nor to the pan.
- With your hand you need to kneed the dough, just enough to make it more compact and to give it a little form.
- Now take a cloth, put some flour on it, put the dough ball in there, wrap it and leave for another 1 hour.
- After the one hour you can put the ball inside a pan (the one you'll use to bake).
- Make two cuts crossing each other on top of the dough.
- Let it bake in the oven for 20 min (time will depend on your oven, check until somebody says "it smells like bread" xD or when it starts to get a golden colour. DO NOT OPEN THE OVEN TO CHECK, it'll loose heat.
Tips:
I prefer to use a normal pan to bake, just make sure you took the handles off or they'll burn.
I prefer the bread round, but a square form is optional, just make sure you are not using a pan that is too big, or the bread will be thin.
Hope you guys enjoyed this simple recipe, it takes less then 10 minutes to put everything together and there's no need to knead. The secret is in the rest time.
I like to prepare it during the evening to bake the other day during the morning, nothing like a freshly made bread, right?
If you liked it or have anything to add please, leave a comment down below. And most importantly, if you try it at home give your feedback!
A great day for you all
Hope you all enjoyed and thanks to @photocontests and @juliank for hosting this amazing contest idea, you are really encouraging me to look for my travel folders and bring the photos to public.

I'm Arthur. I blog about Brazil, Travel, Camping & Life Experiences.
Follow me to stay tunned for more info and tips.
10 LATEST RELATED POSTS:
Photo Series #25: Sports Photography | Kitesurfers at Laguna Garzon
Photo Series #26: Golden Hour Photography | Windsurfer
Photo Series #27: Landscape Photography | Mad Max Scenery
Photo Series #28: Vehicle Photography | Good Ol' Harley Davidson
Photo Series #29: Architectural Photography | Lighthouse Stairs
Photo Series #30: Golden Hour Photography | A great day at the beach
Photo Series #31: Landscape Photography | Beagle Channel
Photo Series #32: Vehicle Photography | Indian
Photo Series #33: Macro Photography | Noise Maker
Photo Series #34: Golden Hour Photography | Peace and Fishing