The creation of my current nest boxes developed out of necessity due to my poor design of the initial nest boxes, ie. incompetence.
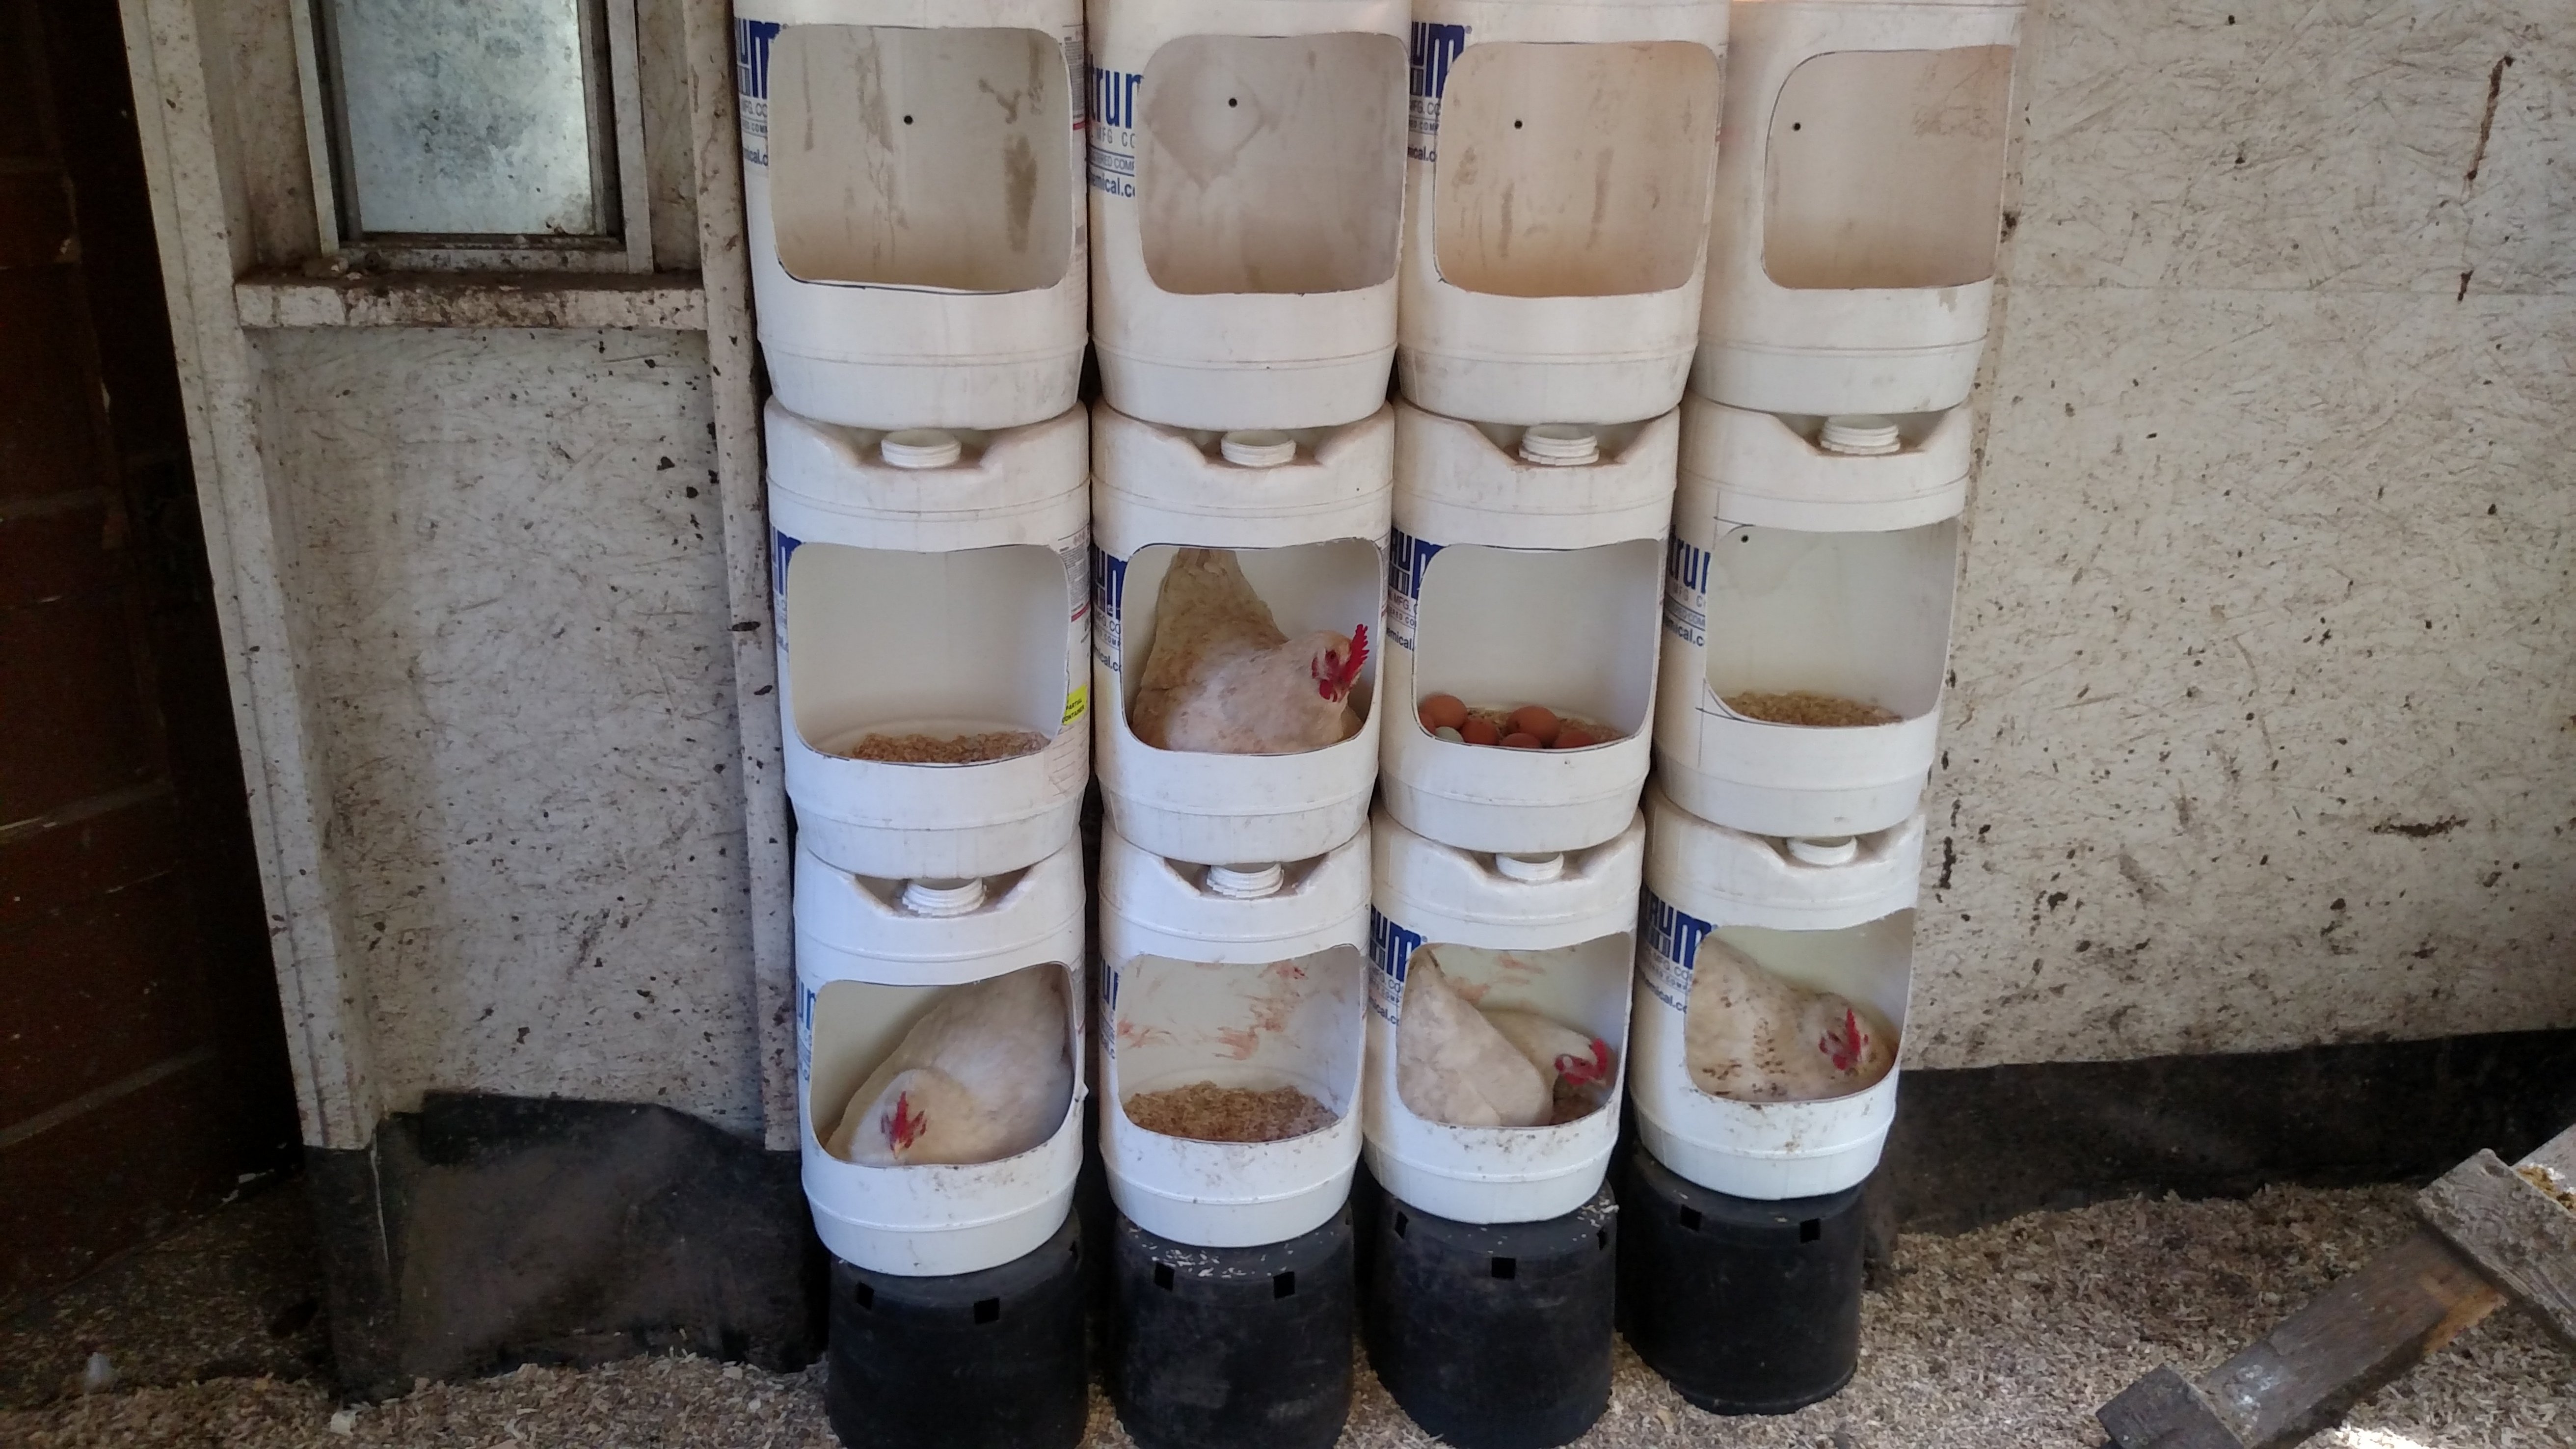

So, truth be told, my initial nest box design (pictured below) was cool and worked pretty well. I am pretty proud of the ingenuity of it and it cost me nothing to make. Okay, so maybe a couple dollars for the wood and screws. The good about my first design:
- It was removable via lifting them off of and out of the 2x4 brackets on either side
- Had a face on each nest box
- It was enough for my chickens at that time.
The bad part of the design was:
- The chickens perched on top which in turn allowed their weight to tip the top boxes off
- The lower boxes were at an angle opposite what they needed, they were higher in the back and lower in the front
- There was only enough room for 36 chickens to lay eggs ( avg 6 birds per box)
You can see the general design ideas, but the lower 3 sit at a poor angle which reduced their egg holding capacity. That is the opposite of the whole point of building nest boxes so I really needed to remedy the issue.
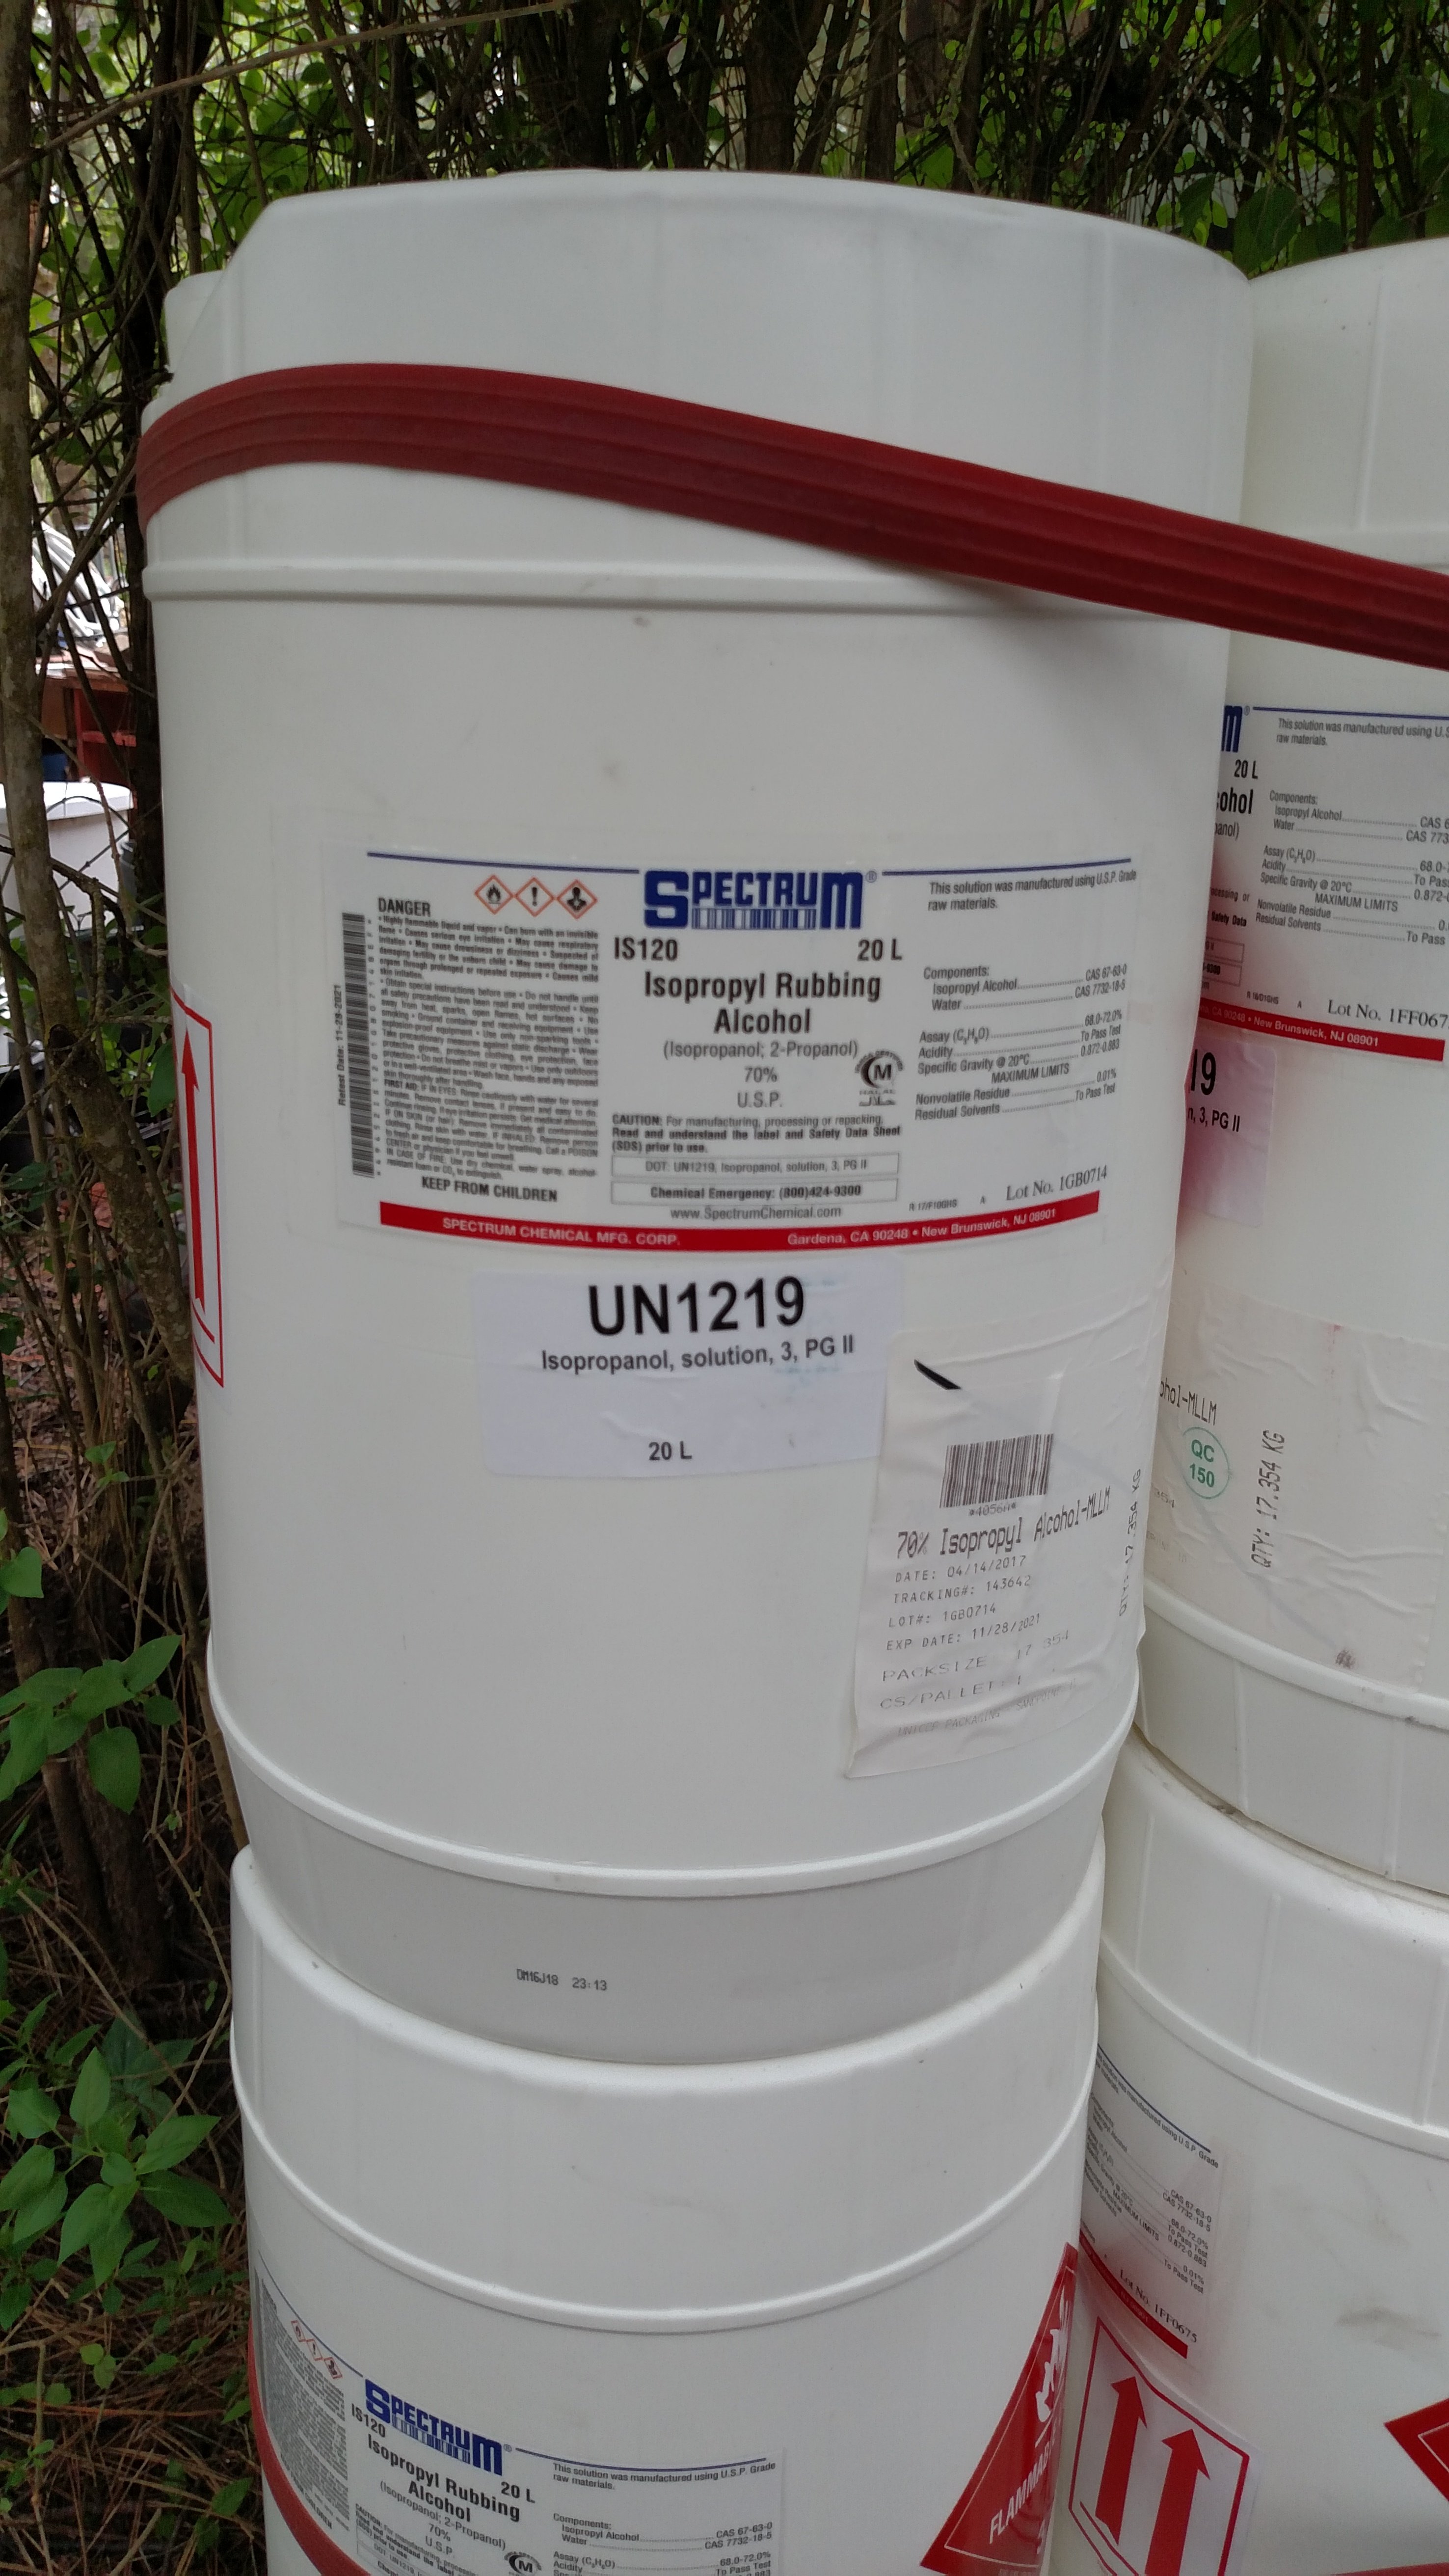
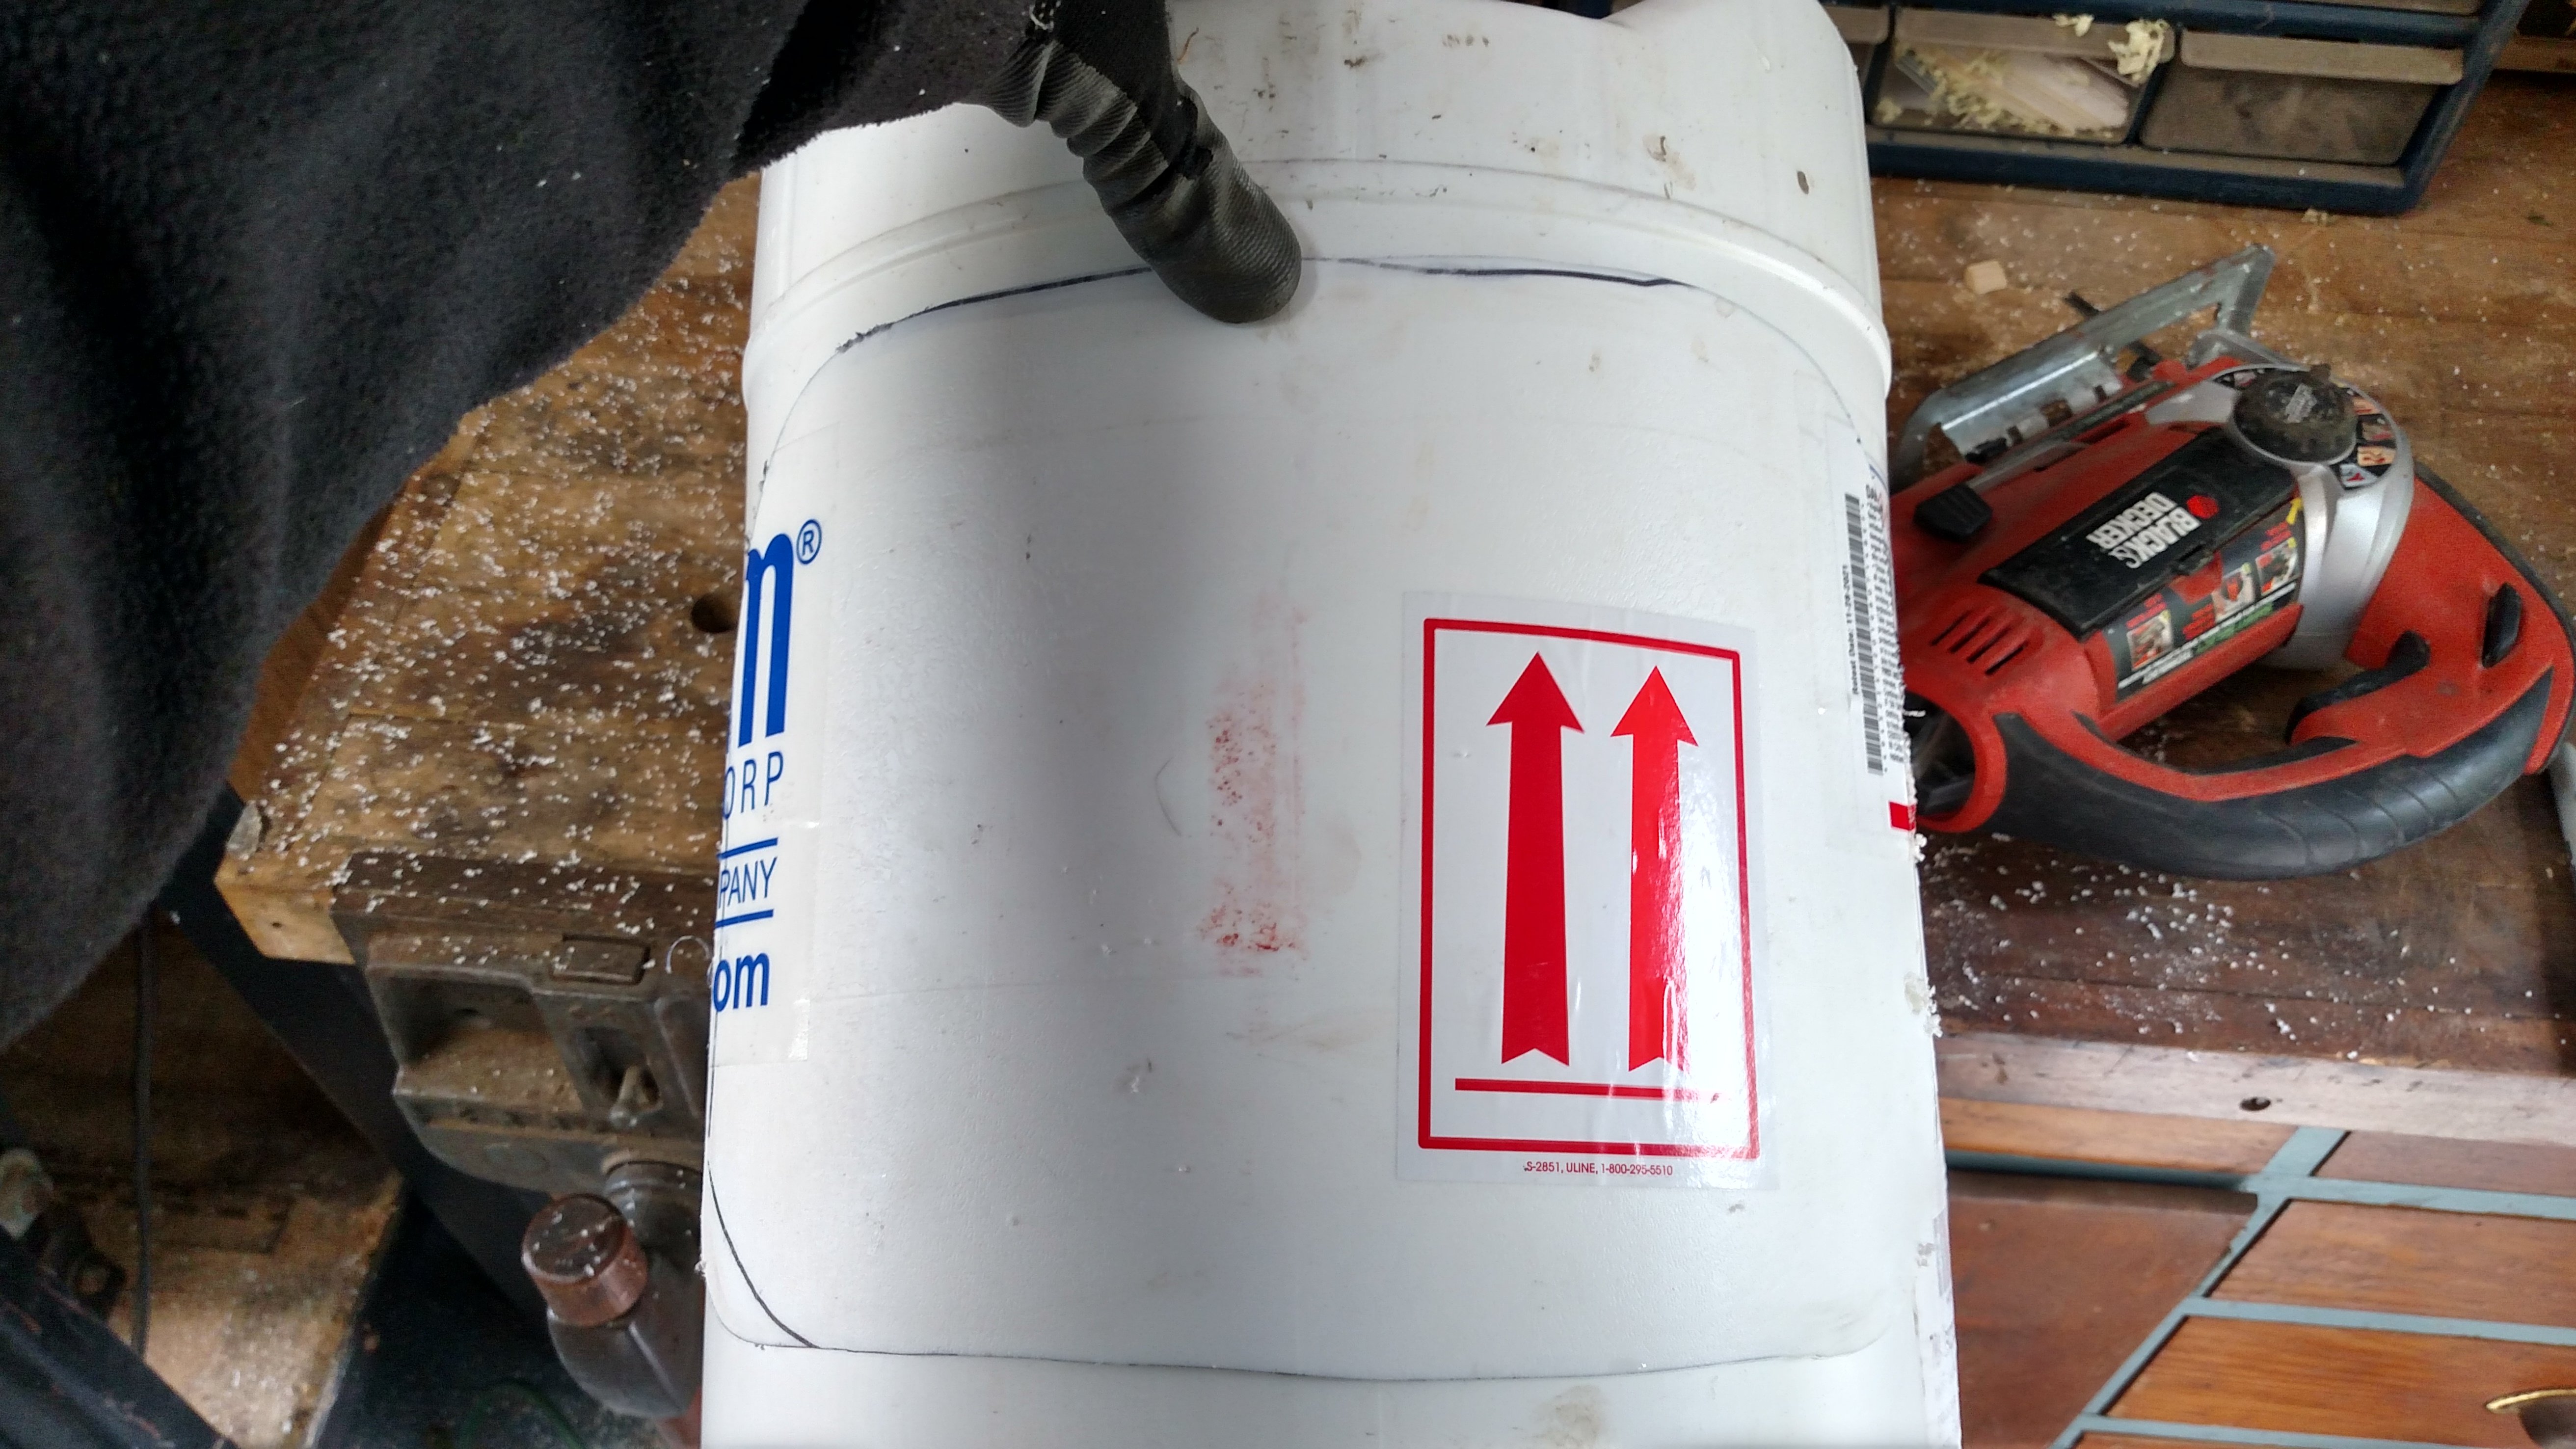
The impetus for this all started with the purchase of 36 of these 6 gallon Isopropyl Alcohol jugs for $1 each. (see my post Now I am ready to make some wine!!!) Of the 36 I purchased I used 12 for my nest boxes.
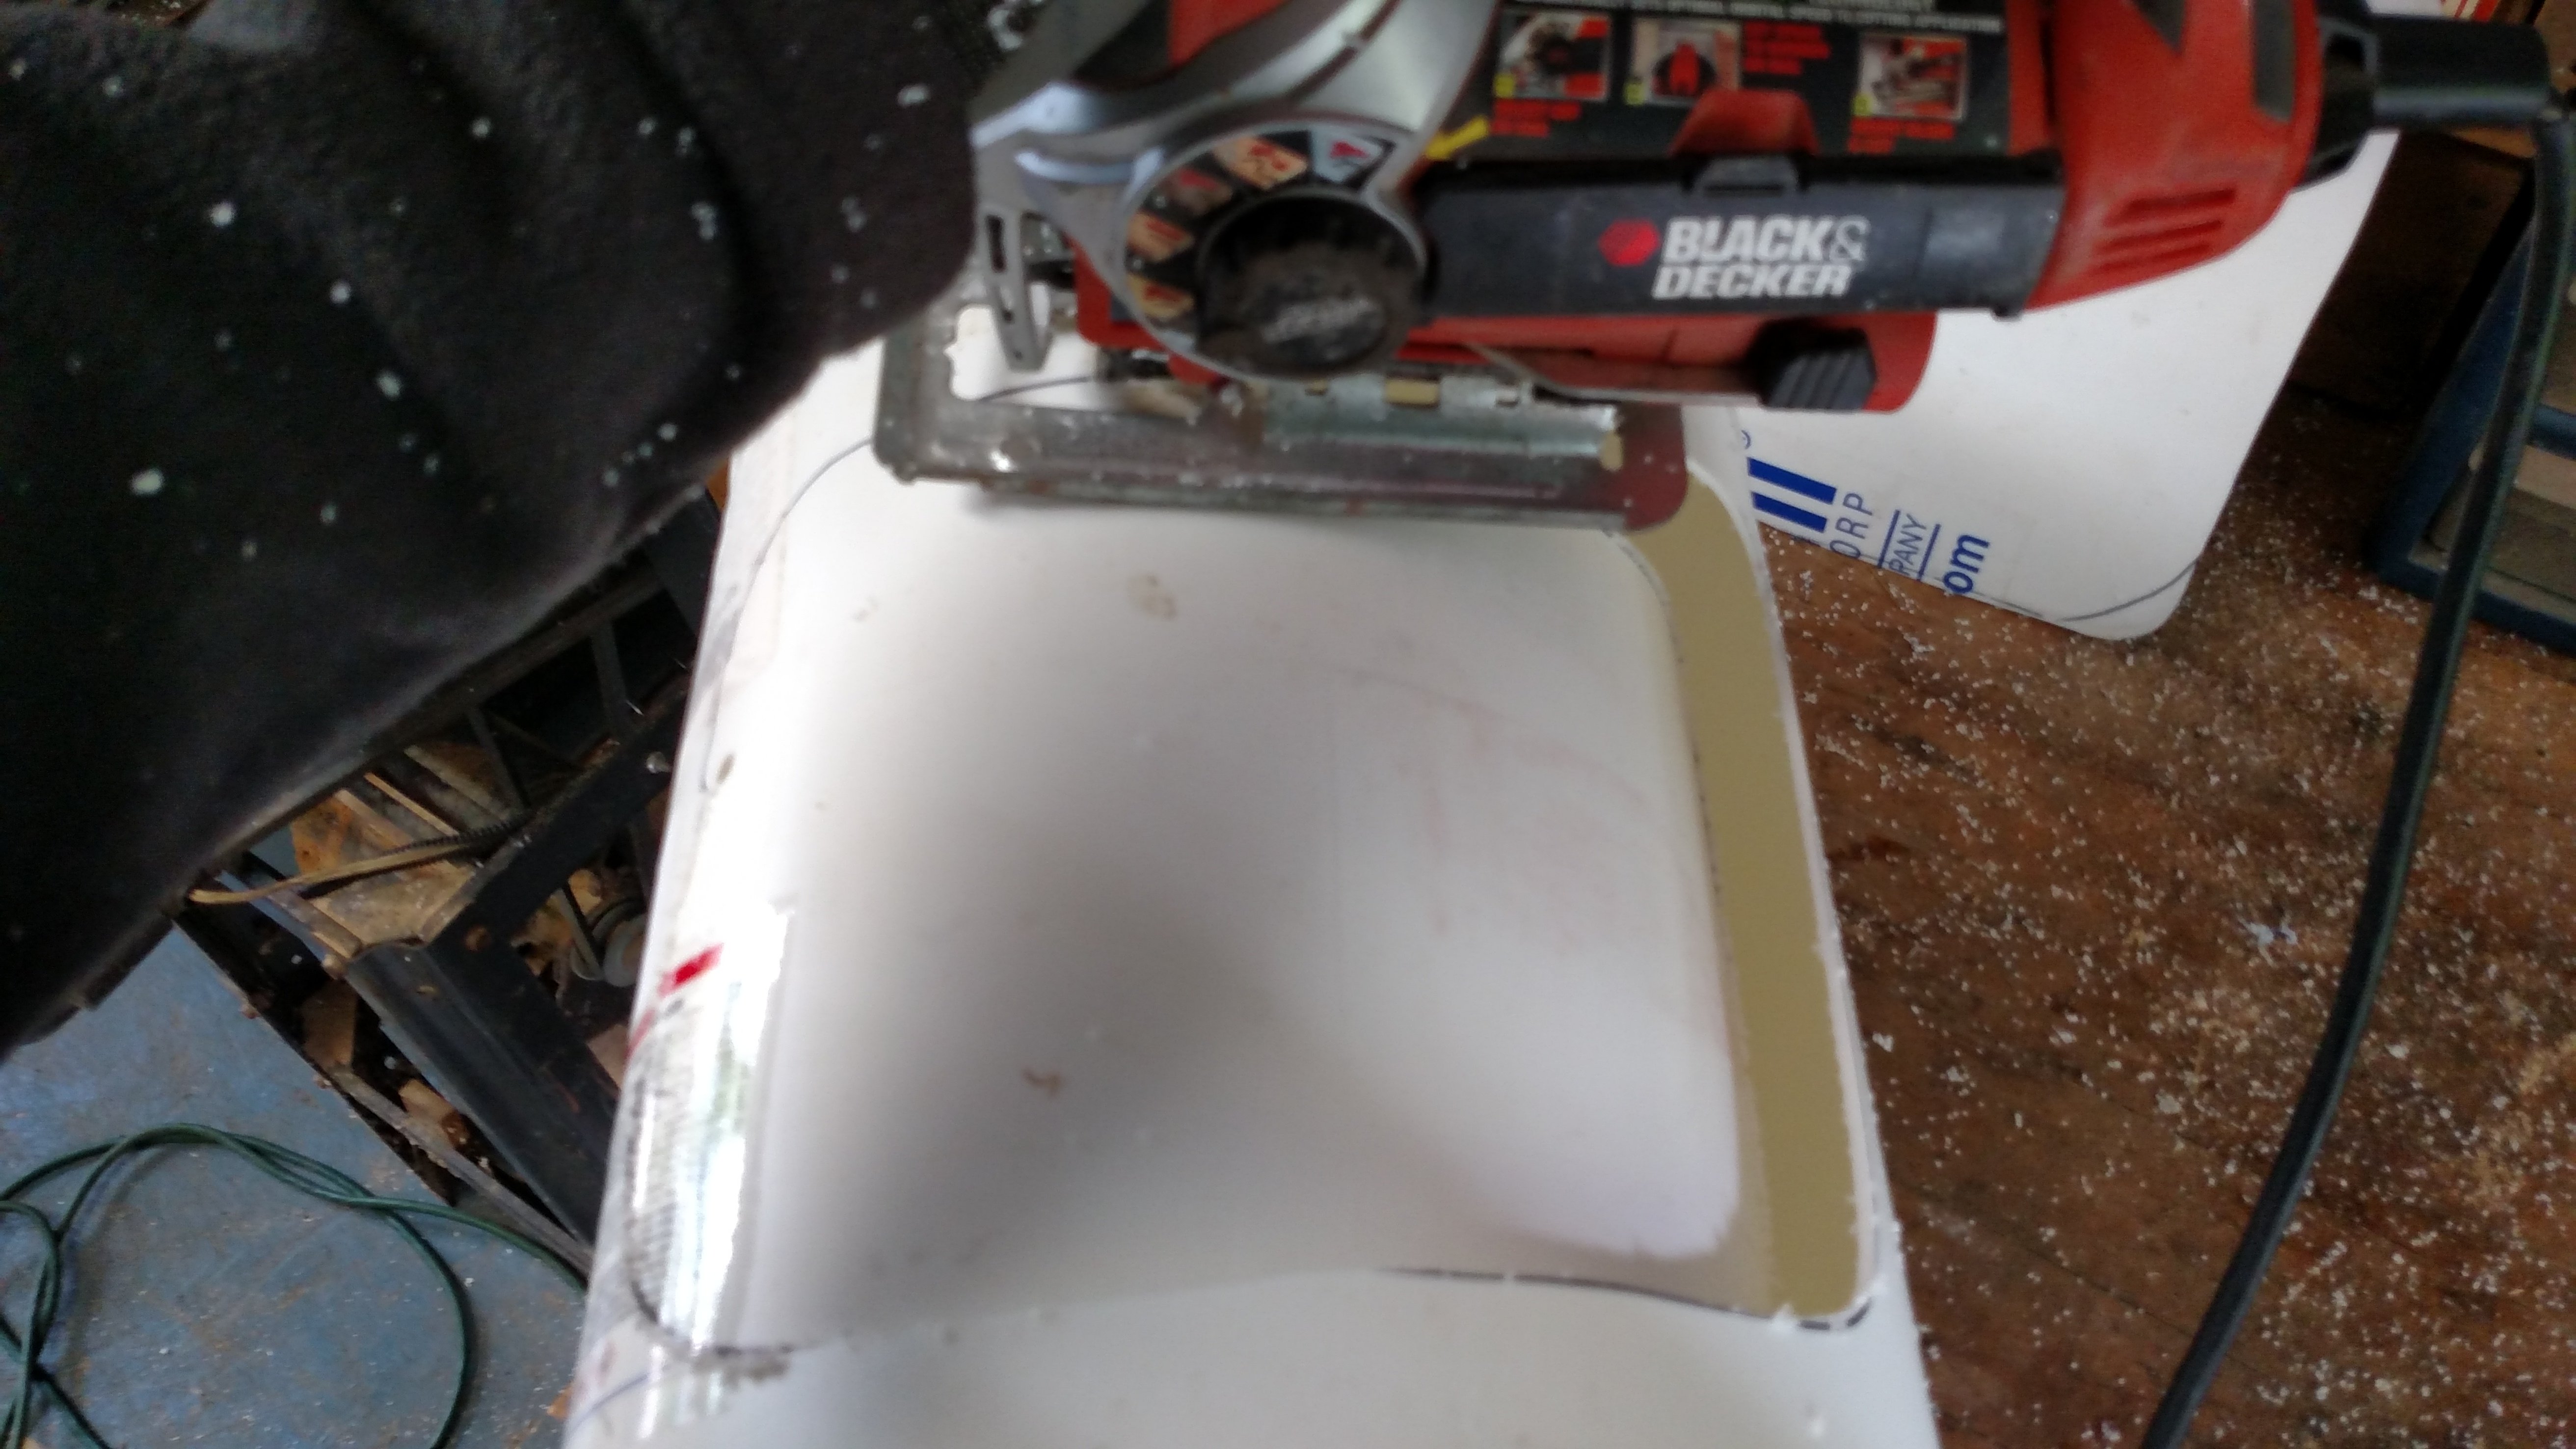
The first step was to mark out the size of the hole I was going to cut in the side of the jug. I had decided it was in my best interest to stack the jugs the way they were on the pallet since this is the strongest dimension. Initially I toyed with the idea of putting the jugs on their sides to allow for 2 hens per nest box, but structurally they could not handle the weight I would be putting on top by stacking. This first one is free hand drawn.
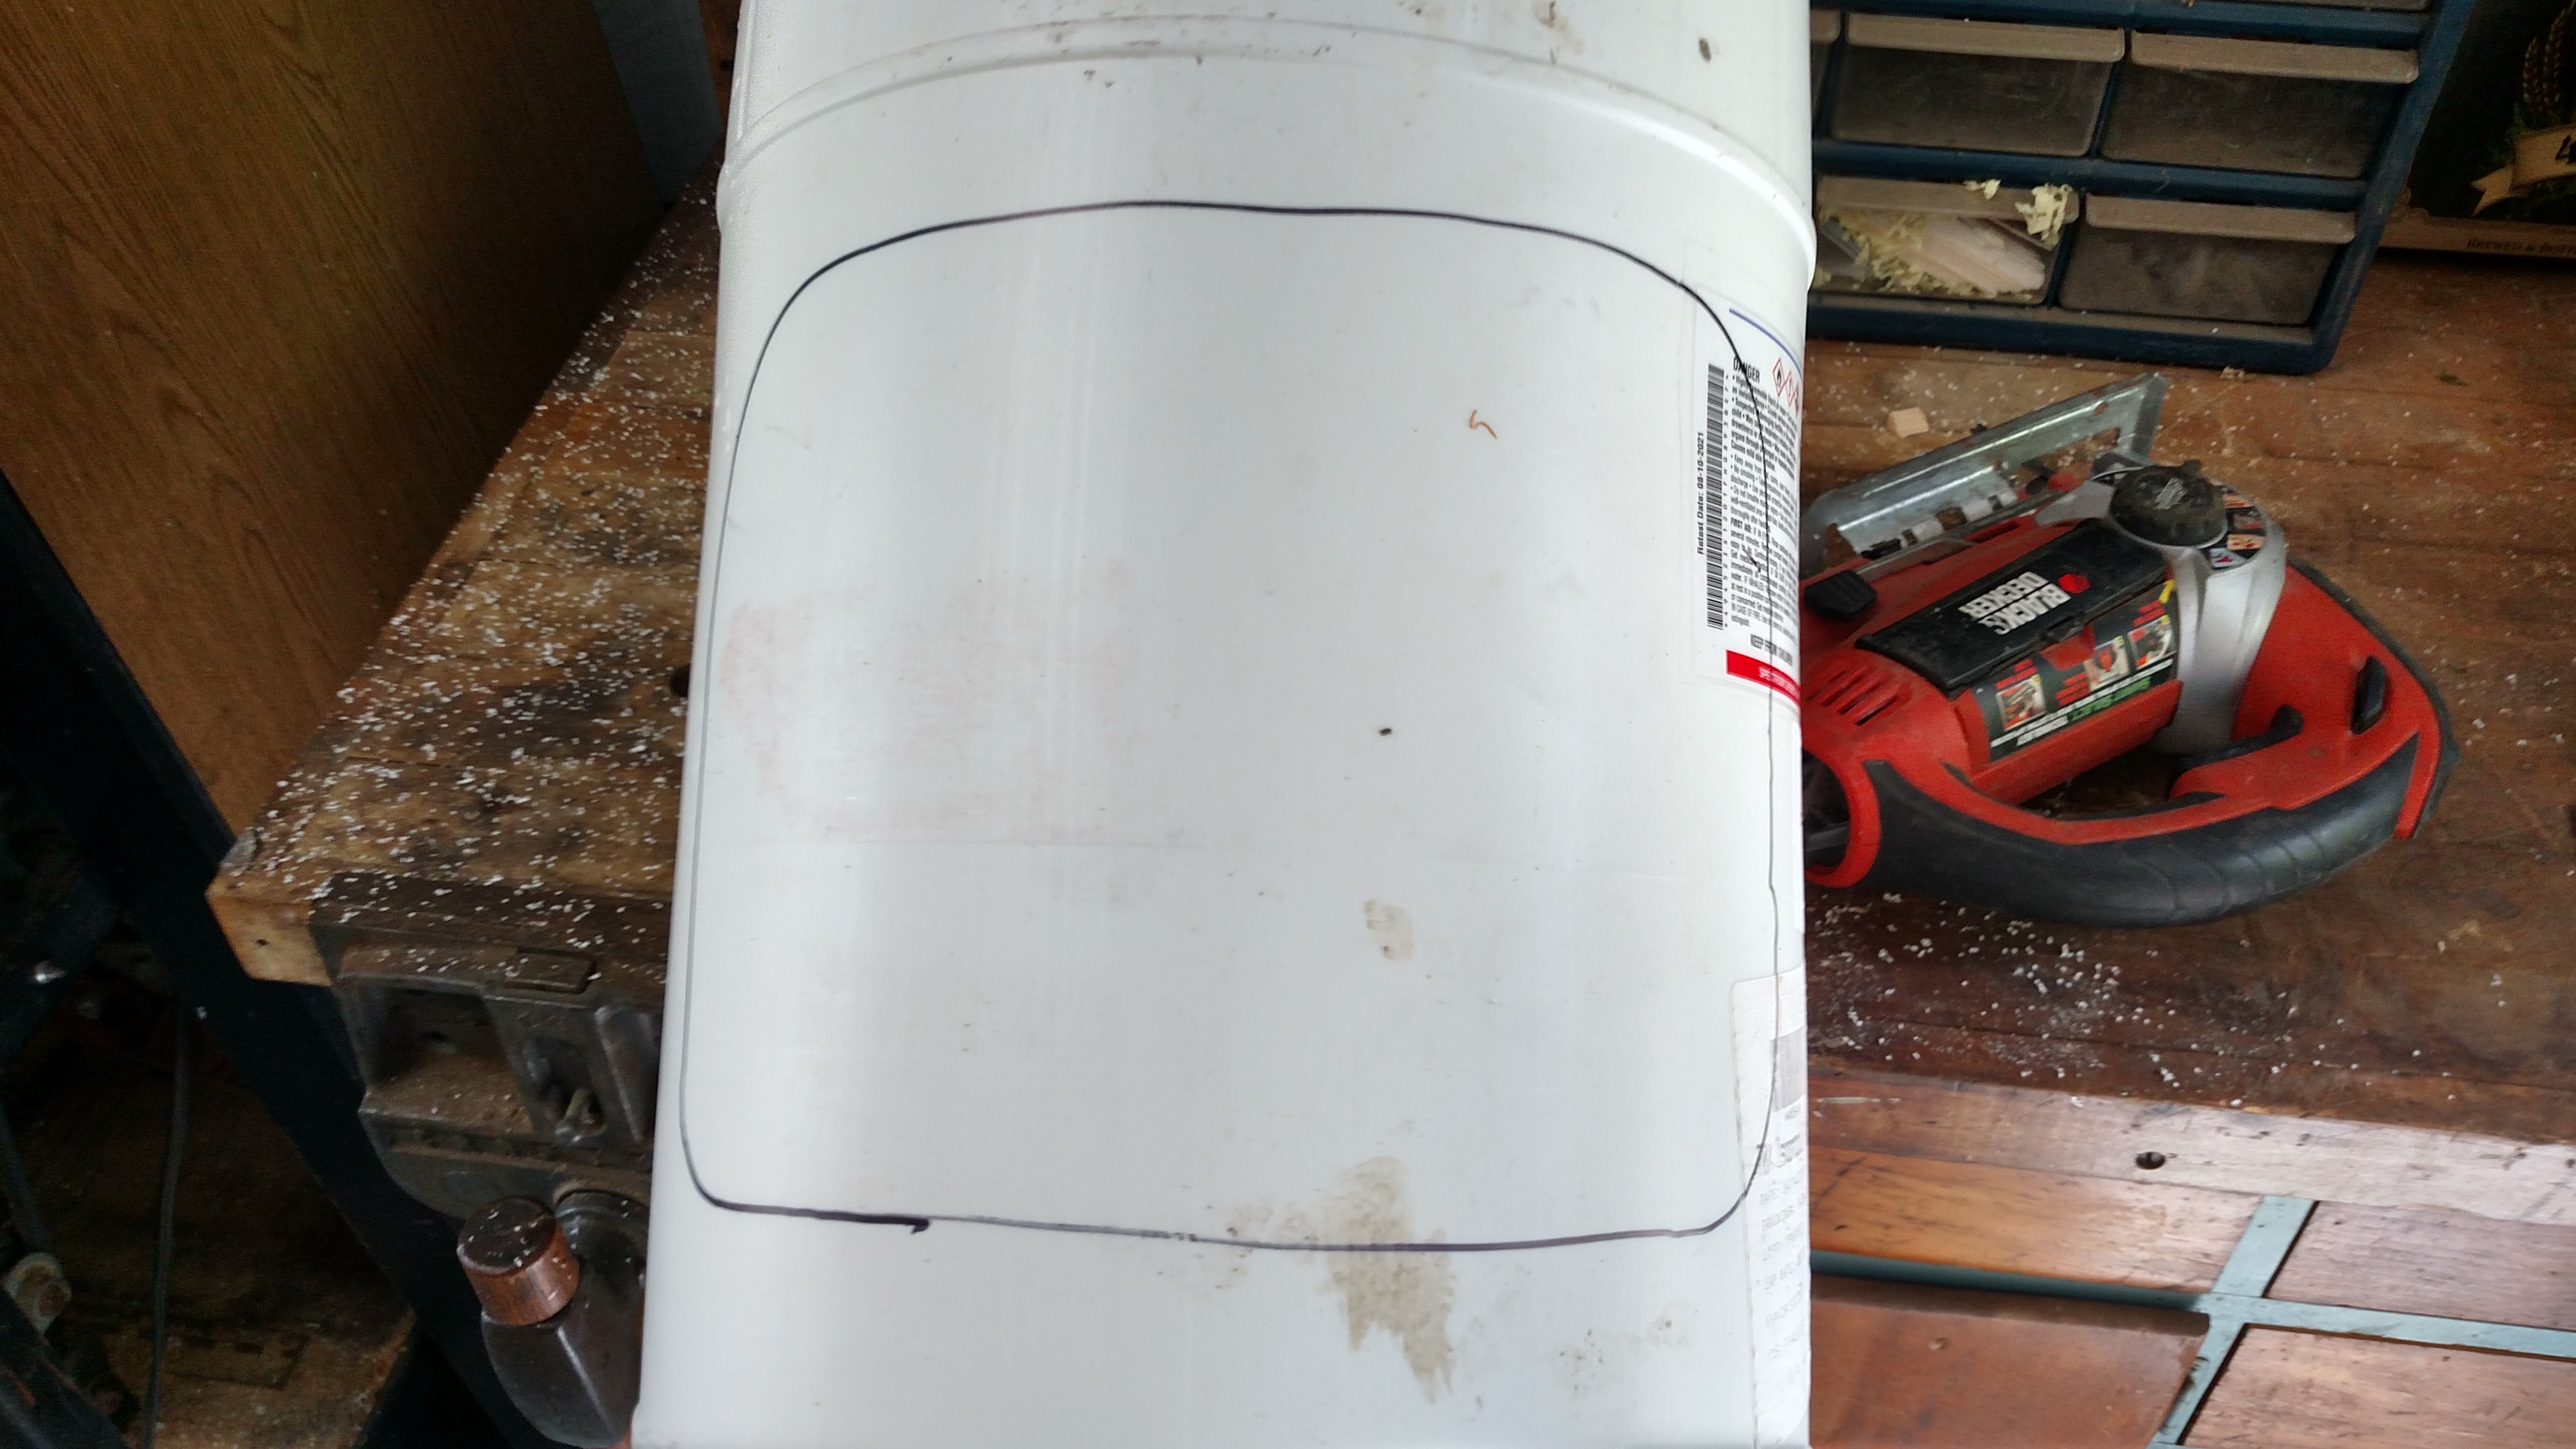
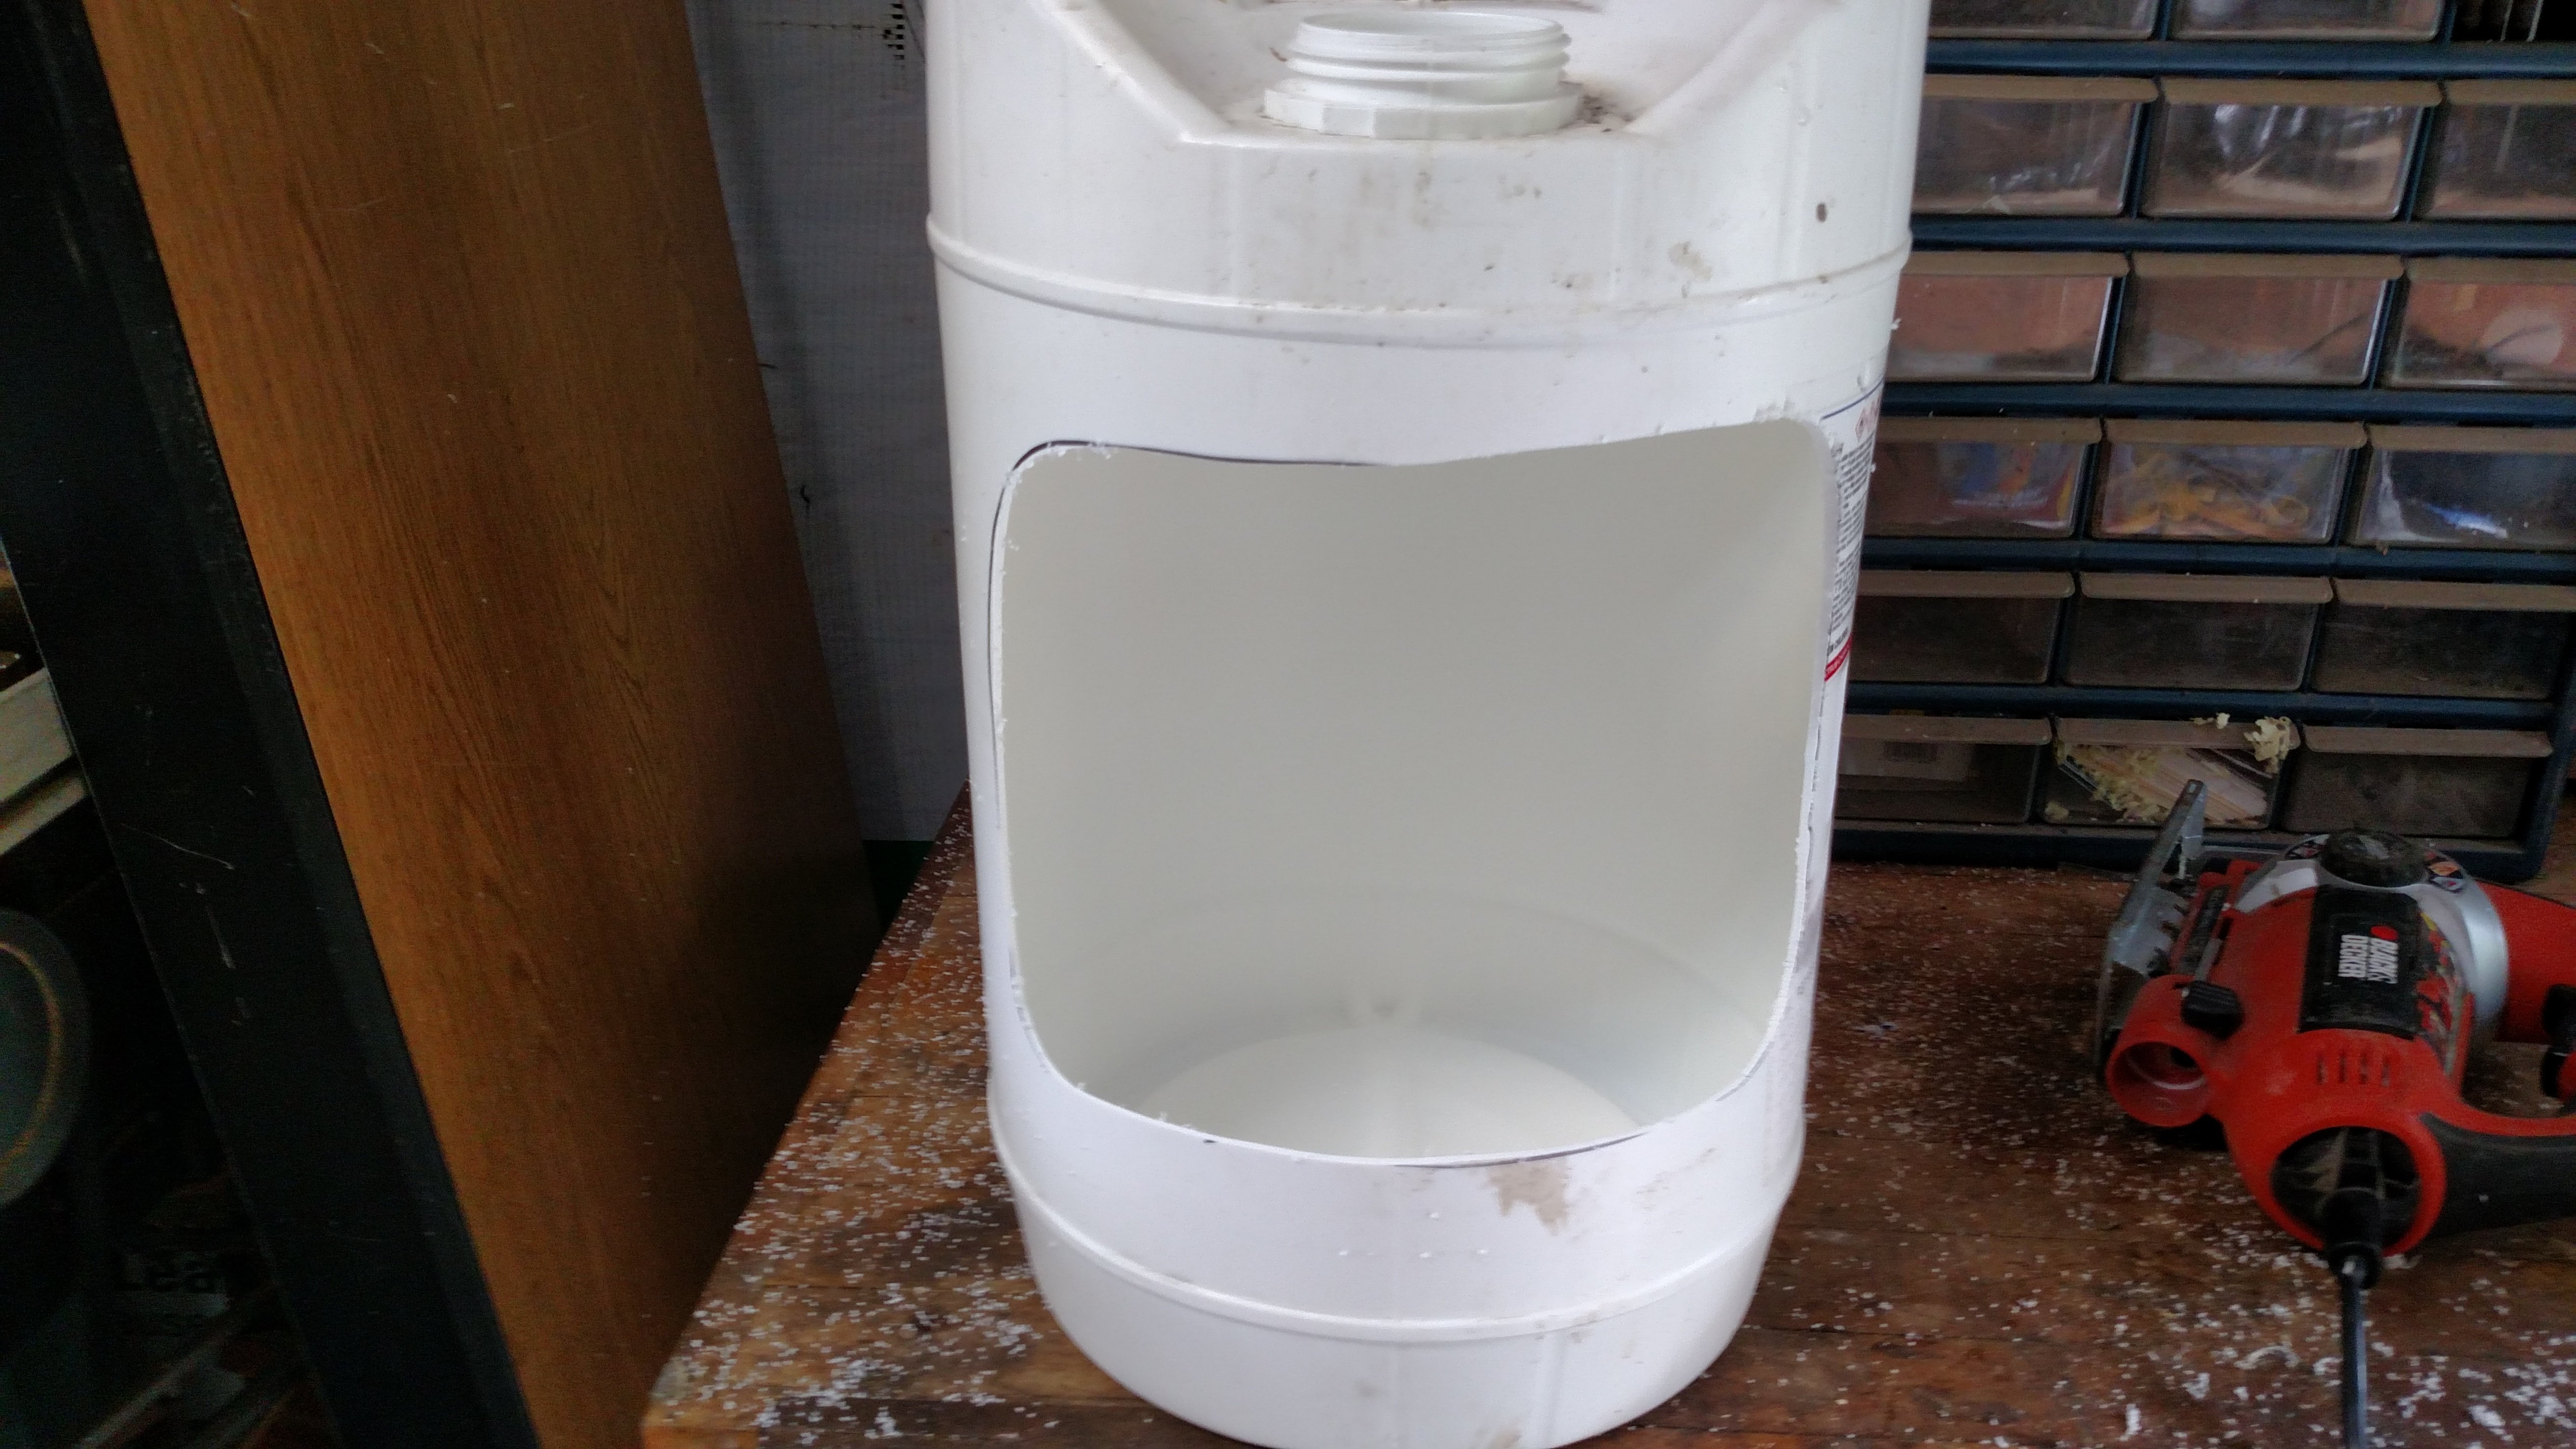
Each of the 11 subsequent jugs I was able to use the first cut out as a pattern to trace around. This worked really well for maintaining a consistent opening size so one nest box would not be given preference over another.
After marking the jug, I took my drill with a 1/4" drill bit and drilled my pilot hole. I like to put it near the line of the cut so there is more usable plastic left over on the cutout piece.
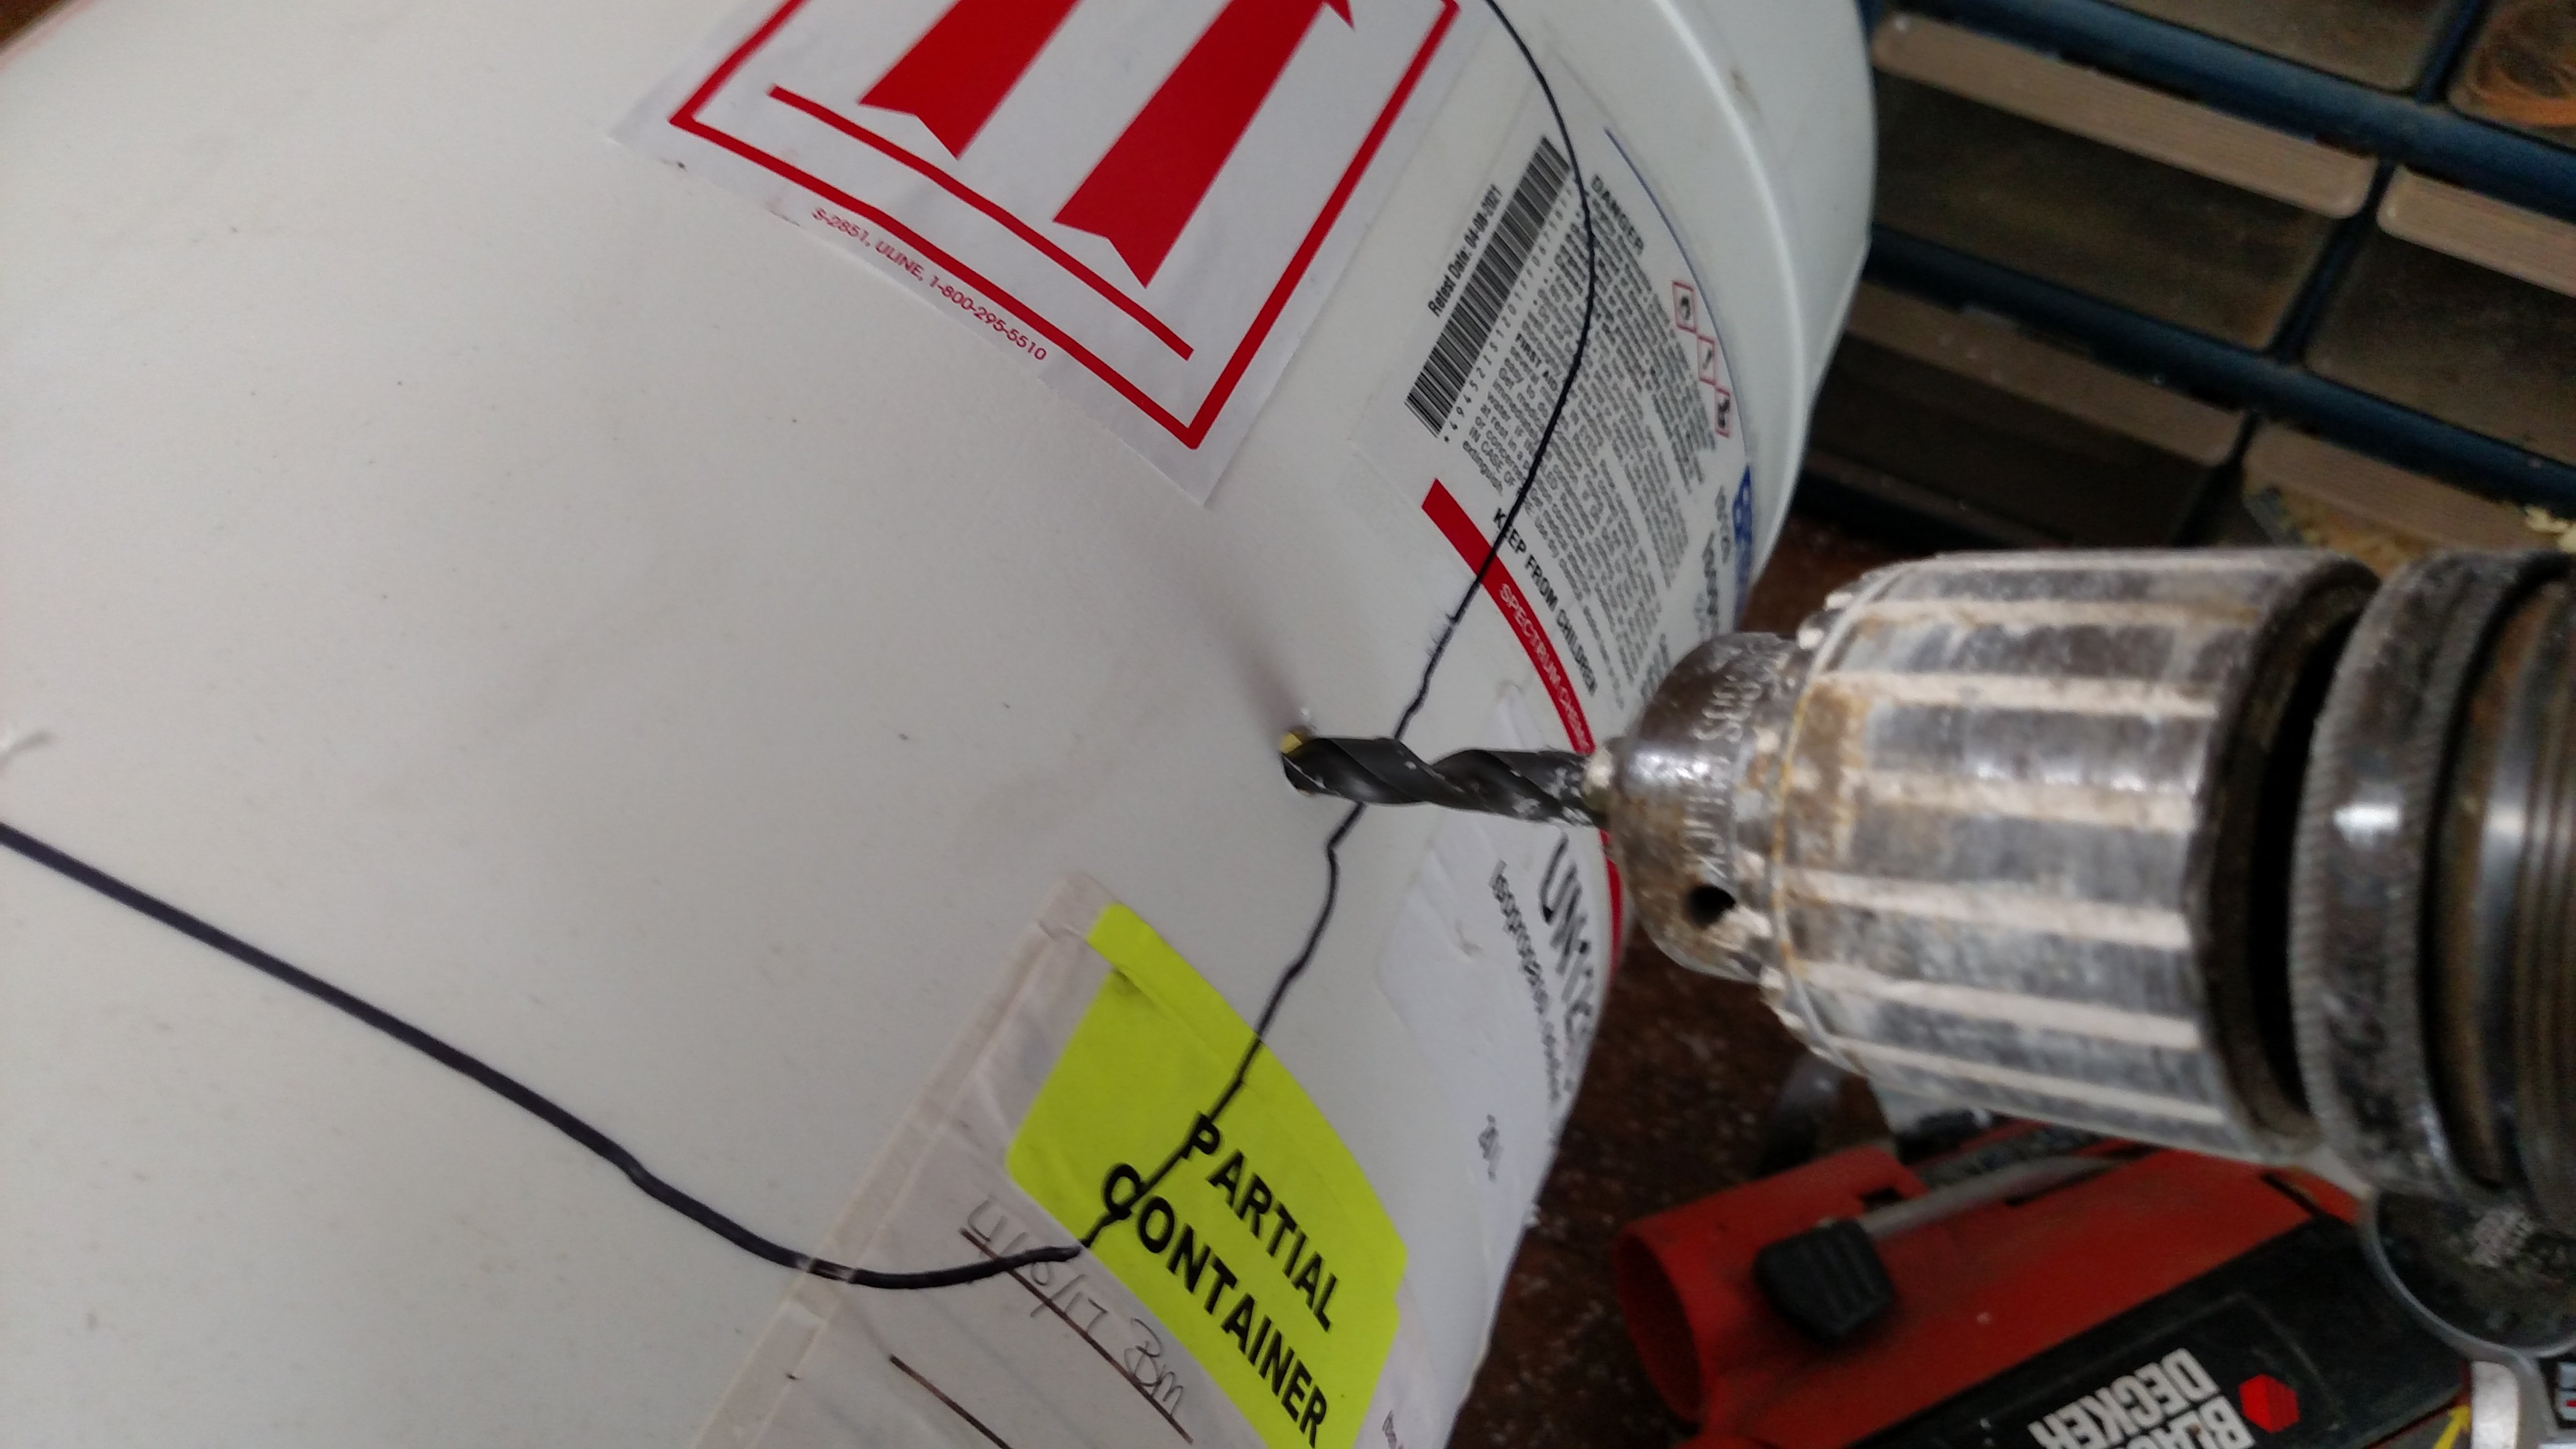
Next is to cut out the opening of the jug. I use a jigsaw with a general all purpose cutting blade. The jigsaw blade fits nicely inside of the 1/4" hole and is close to the cutting line.
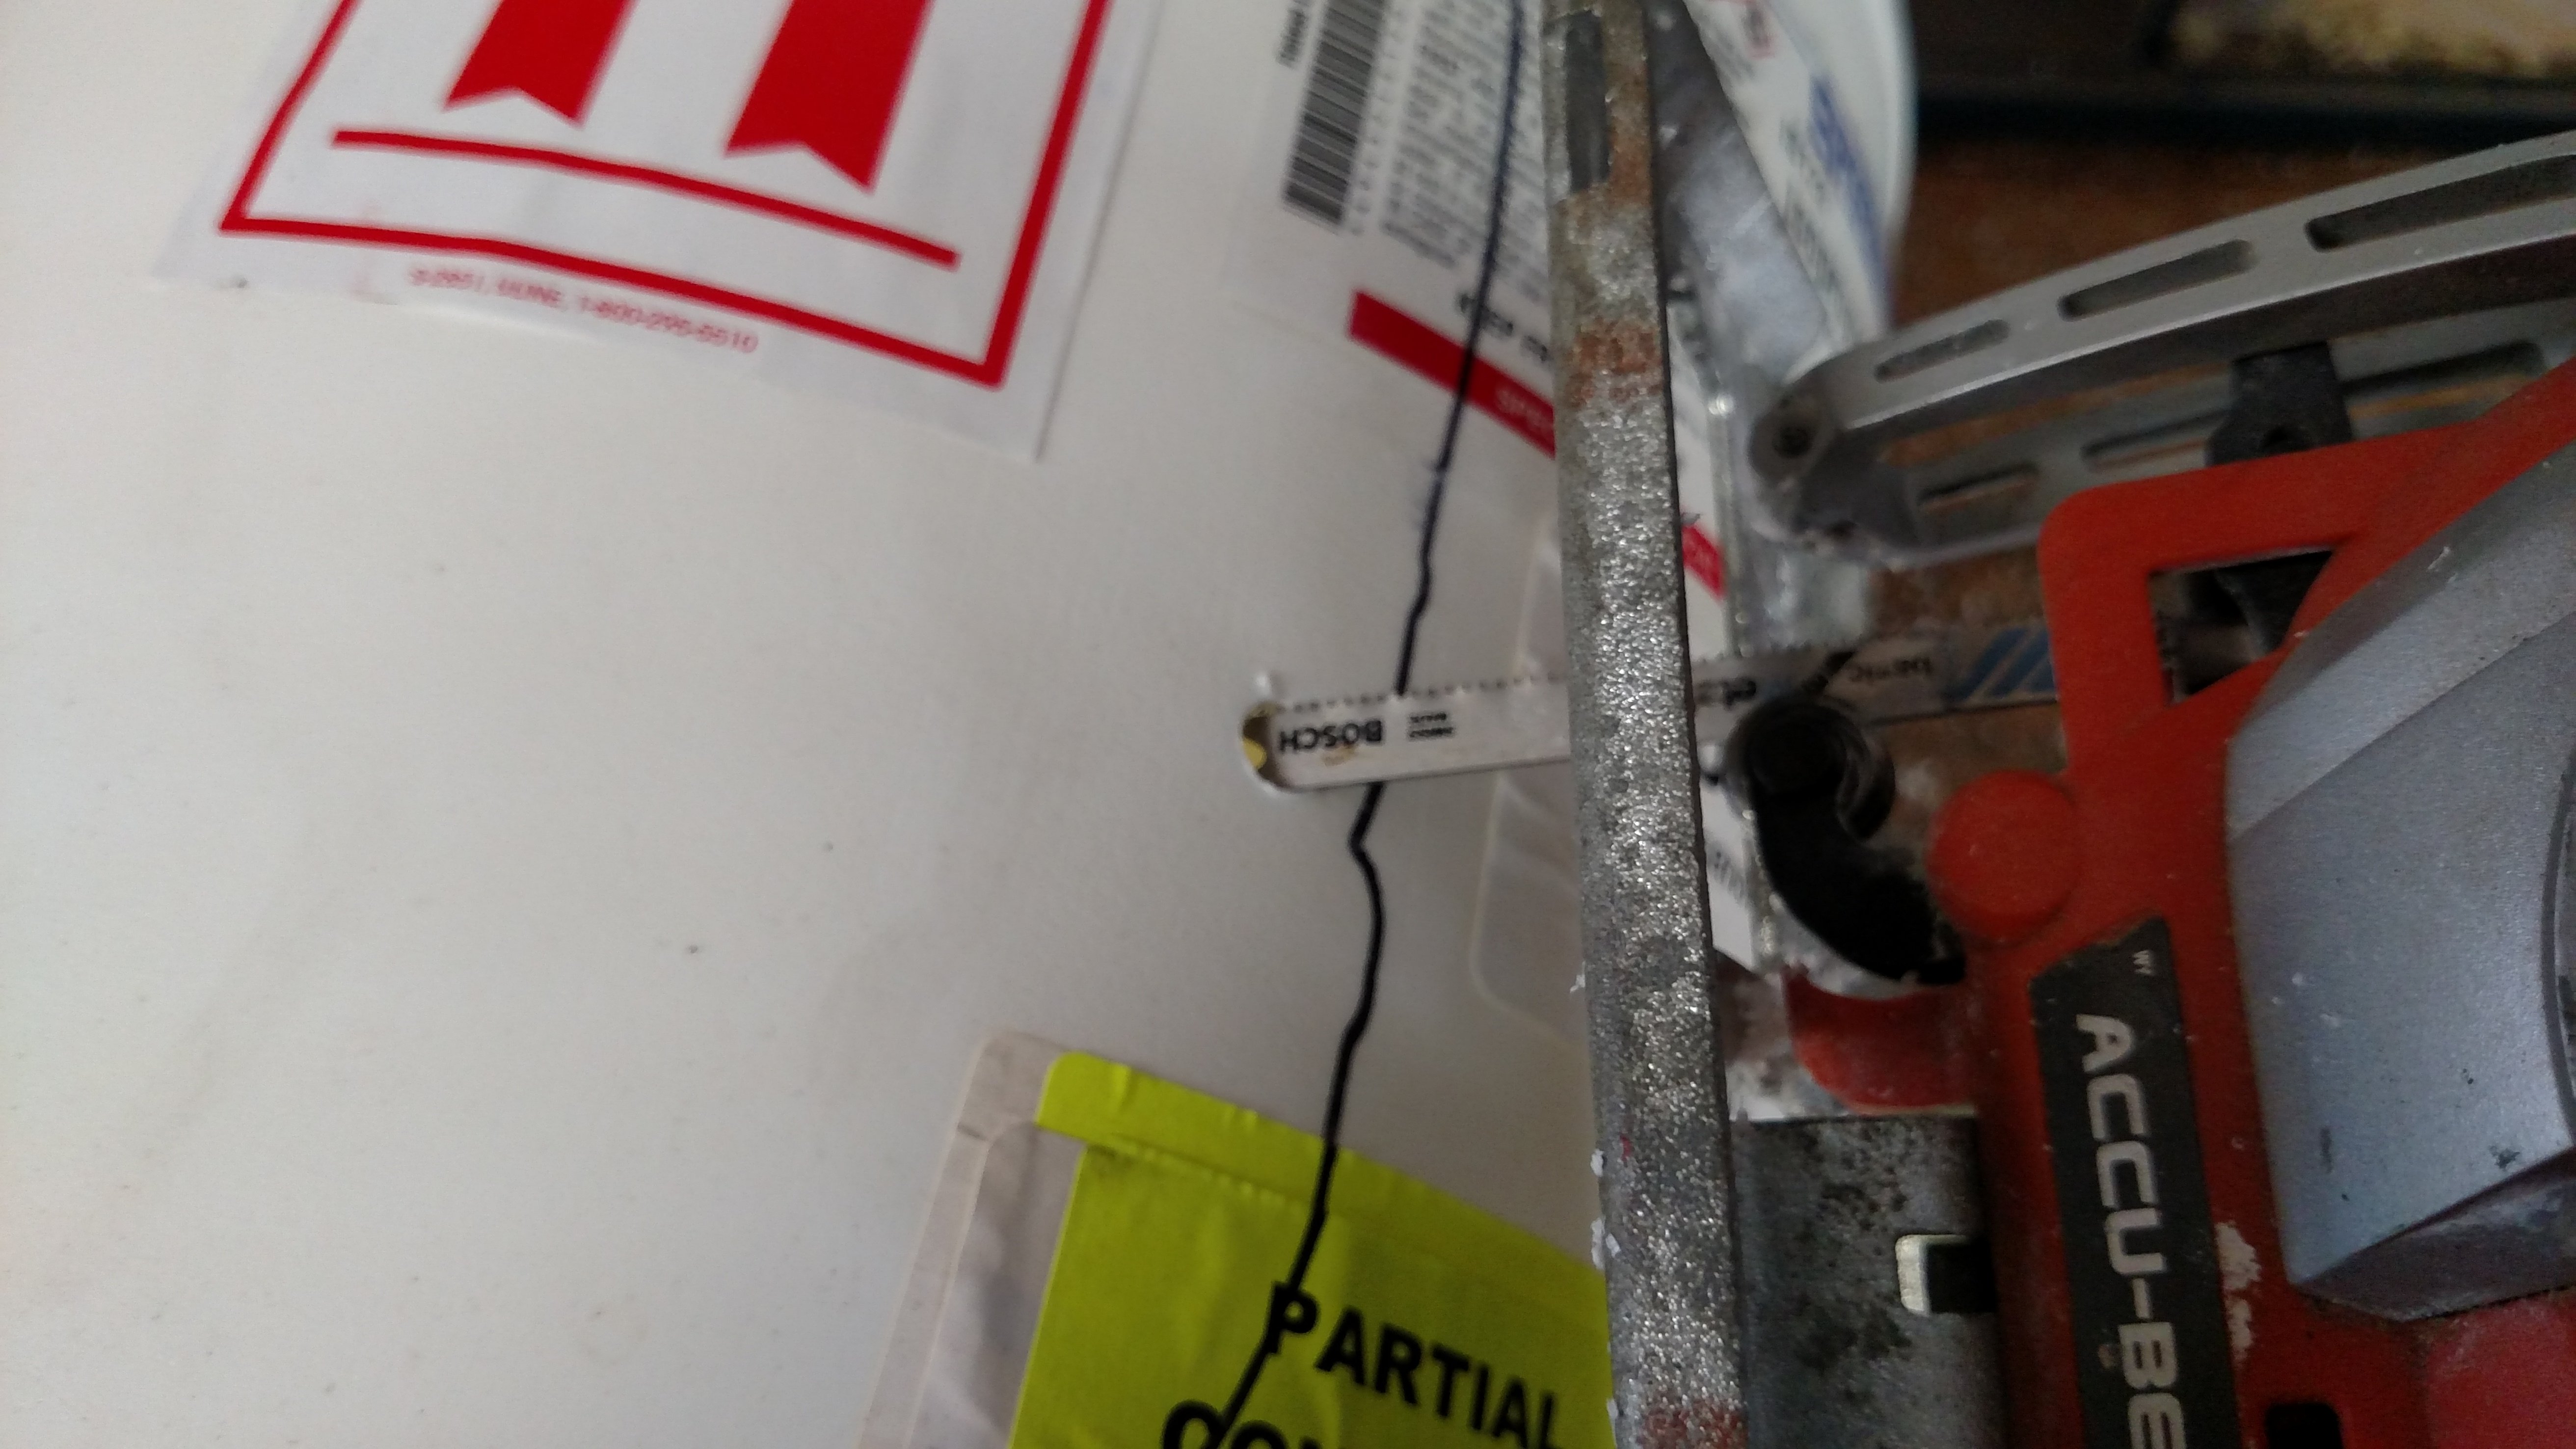

While perfection is not necessary the closer to your drawn line the better, again for uniformity to prevent preference. The hens can tend towards preferring a specific nest box to lay in and I try to dissuade this just so all the nest boxes are used.

The completed cuts look like this and can use a good scraping along the cut edge with a knife or blade to take off any of the burrs.
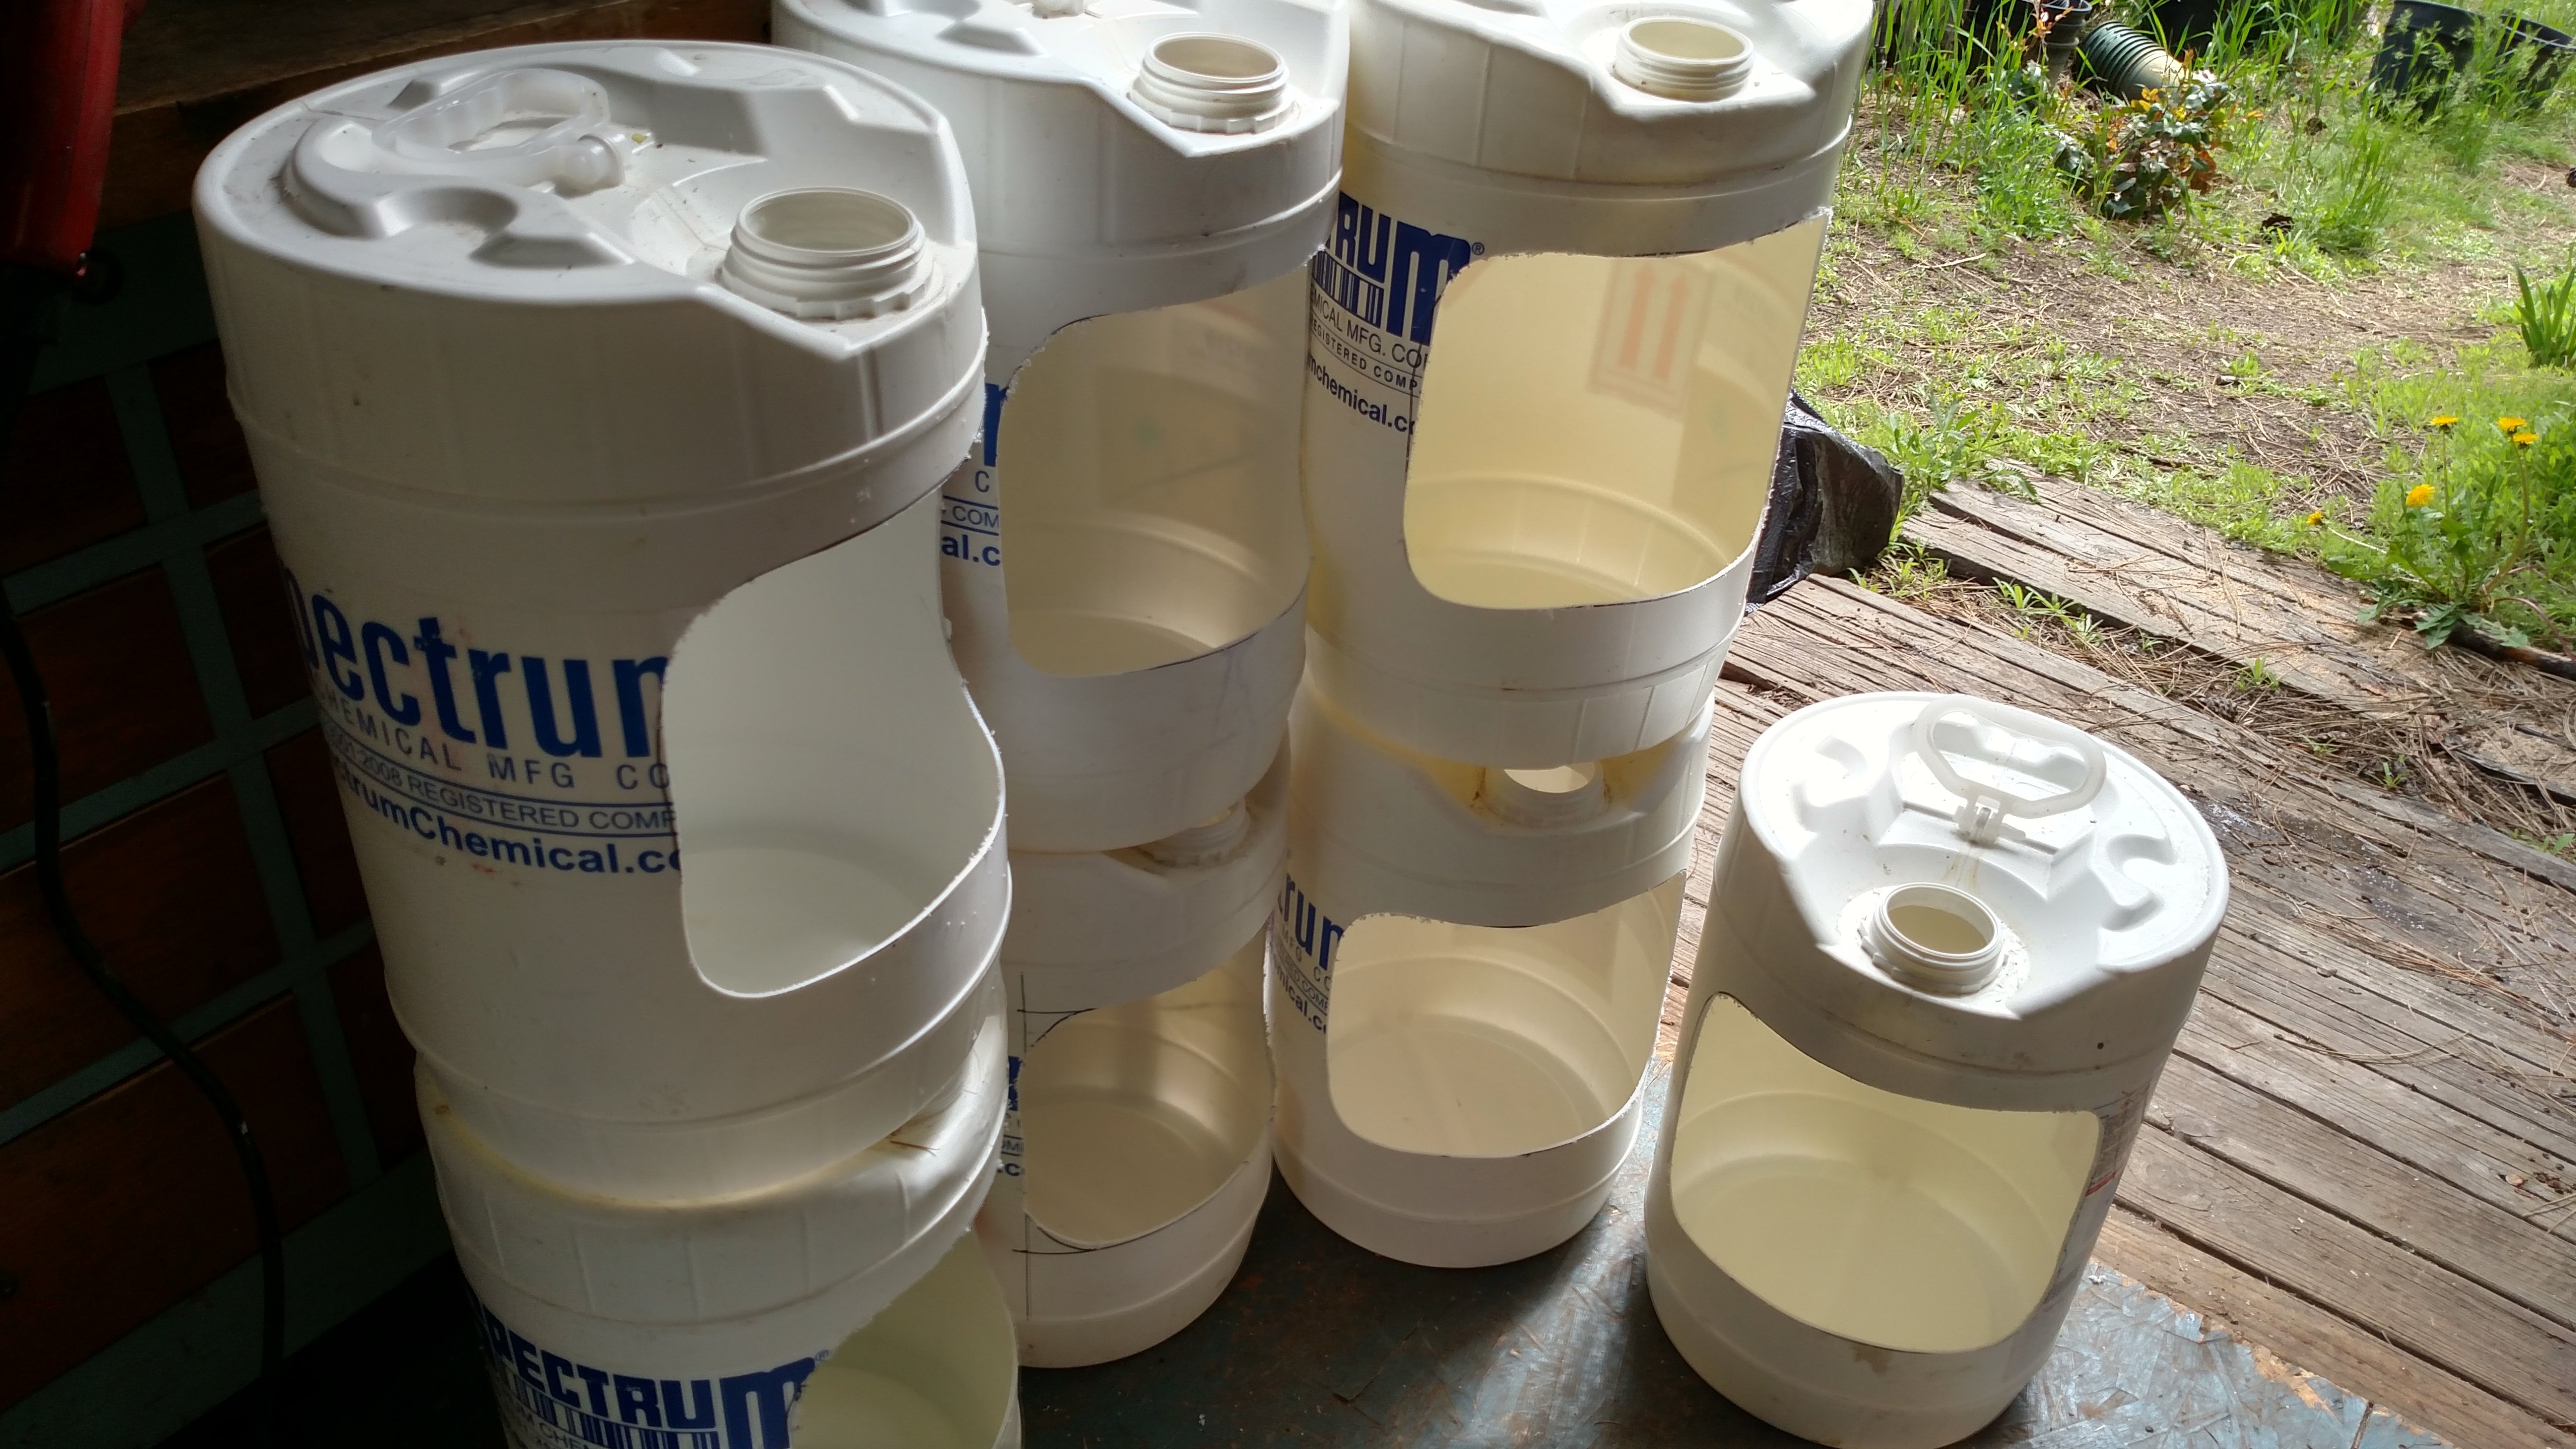
Just past halfway done with cutting the jugs.
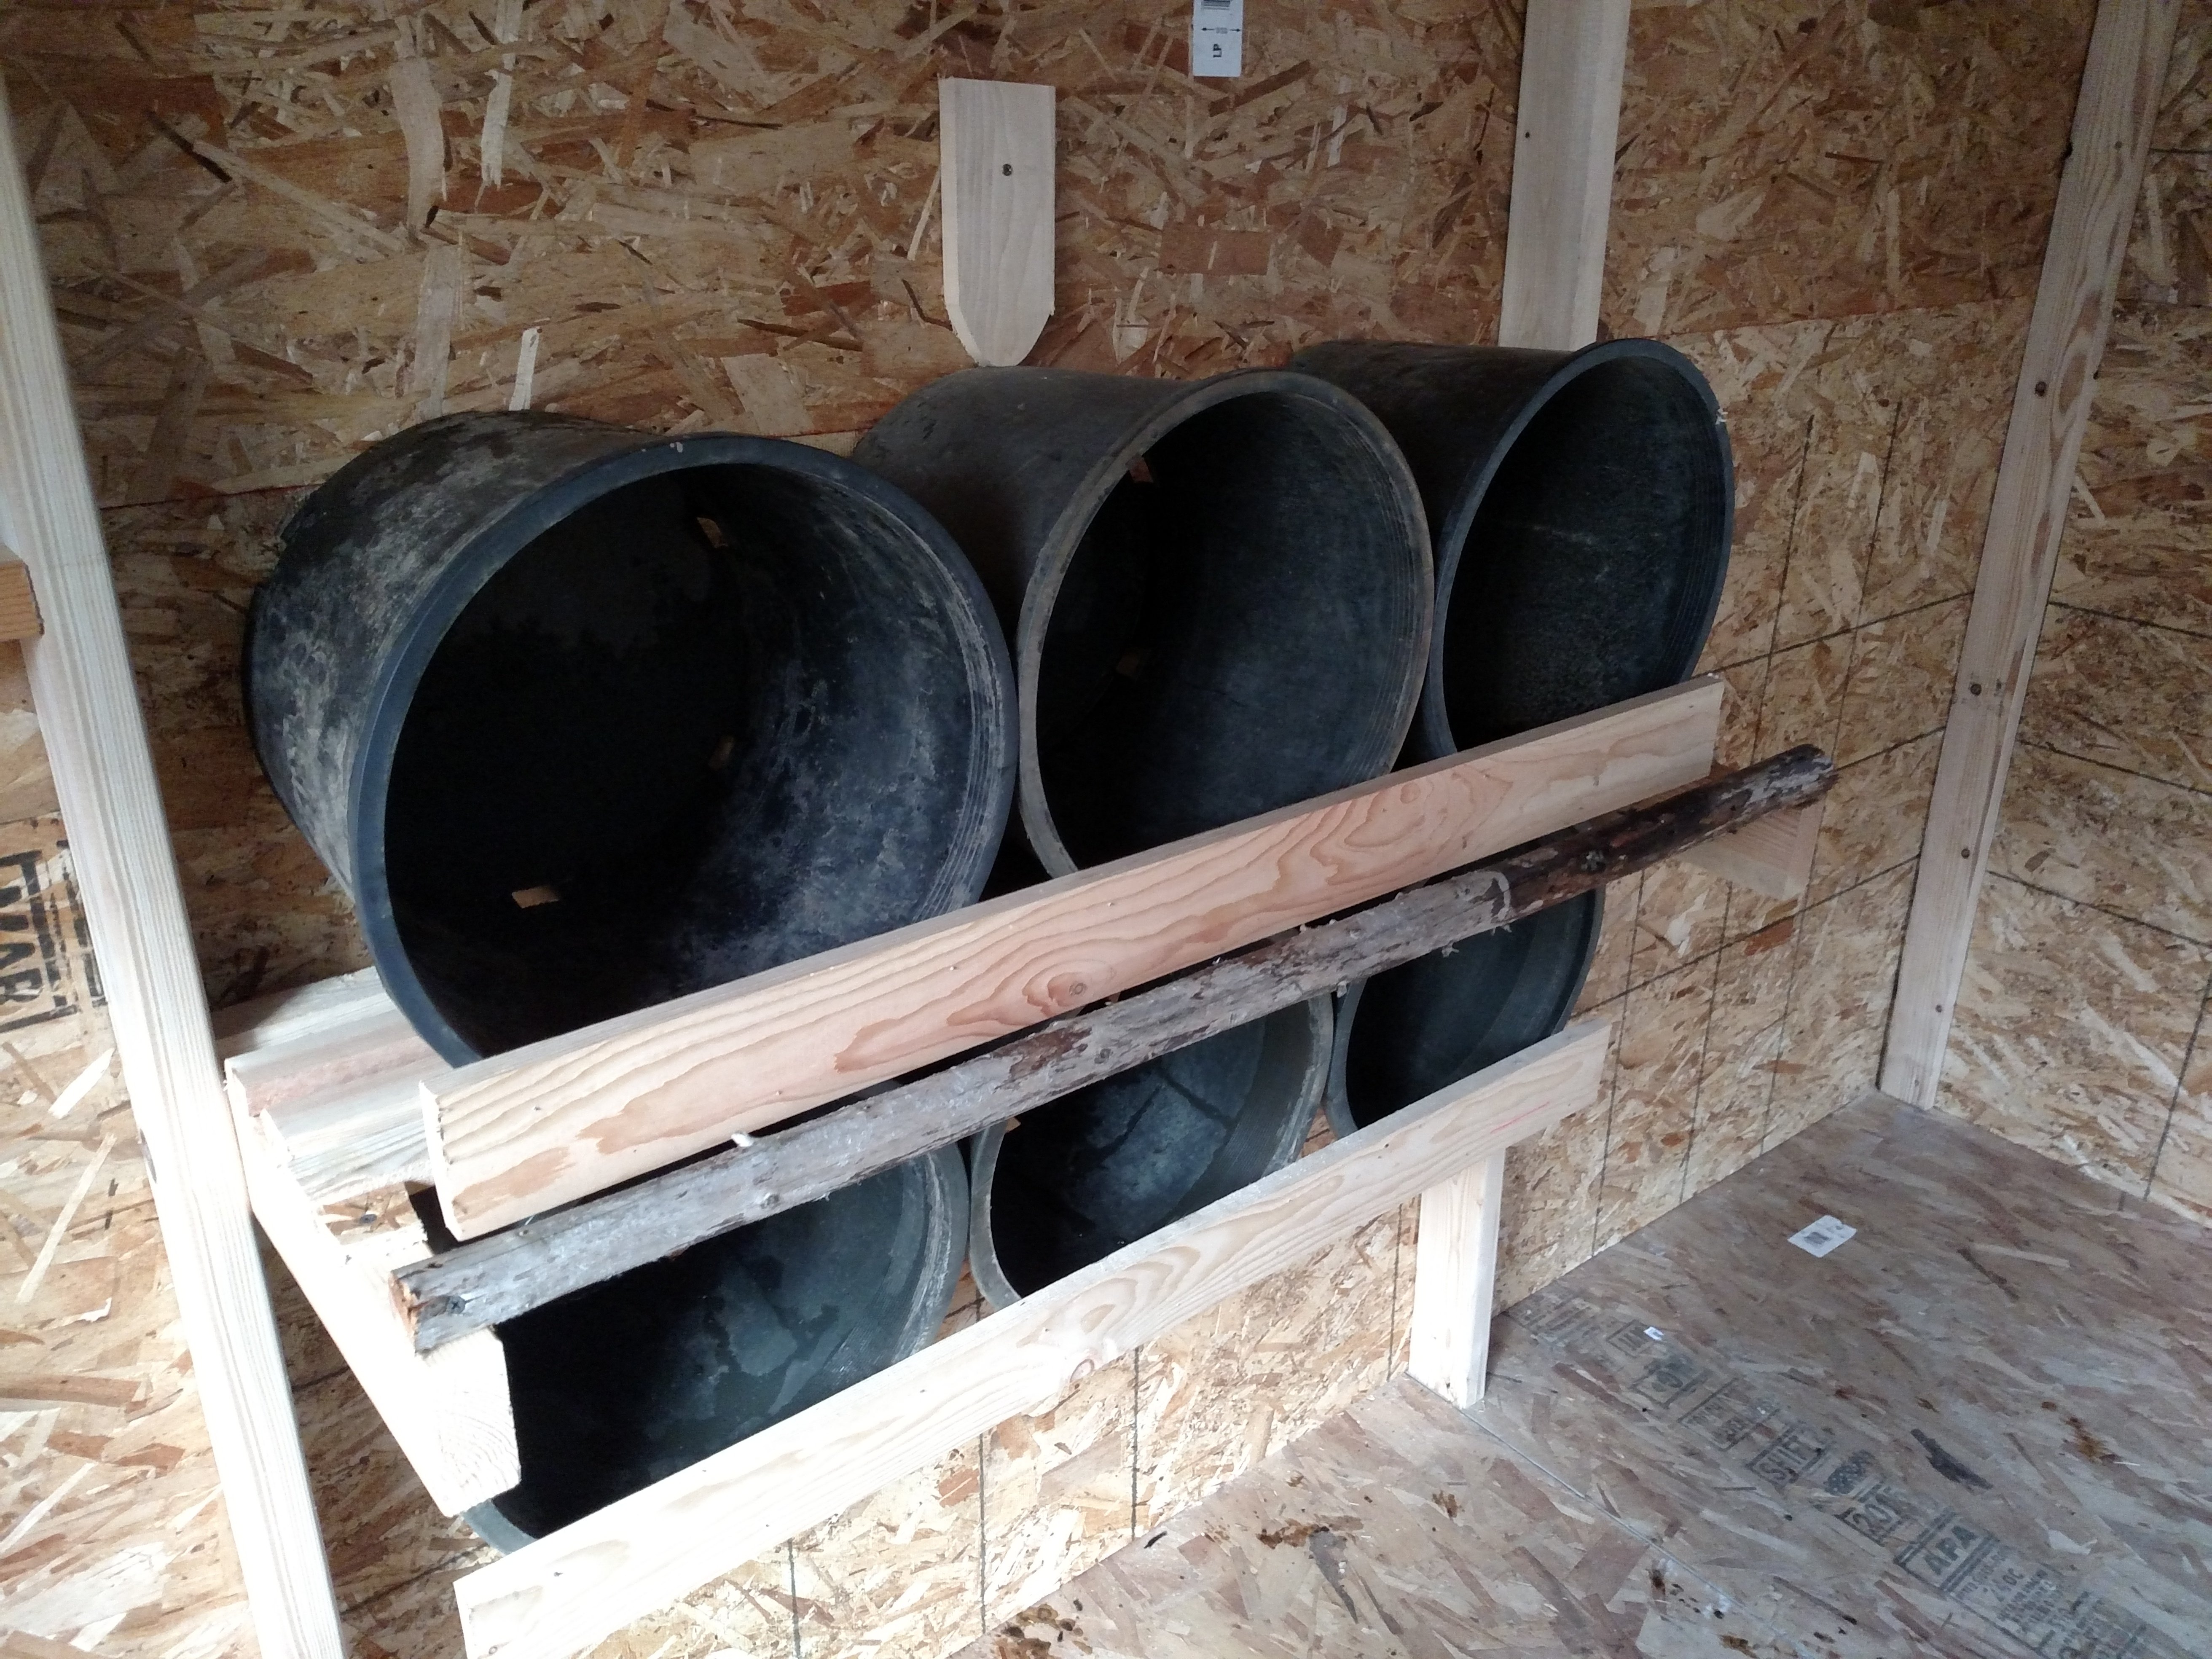
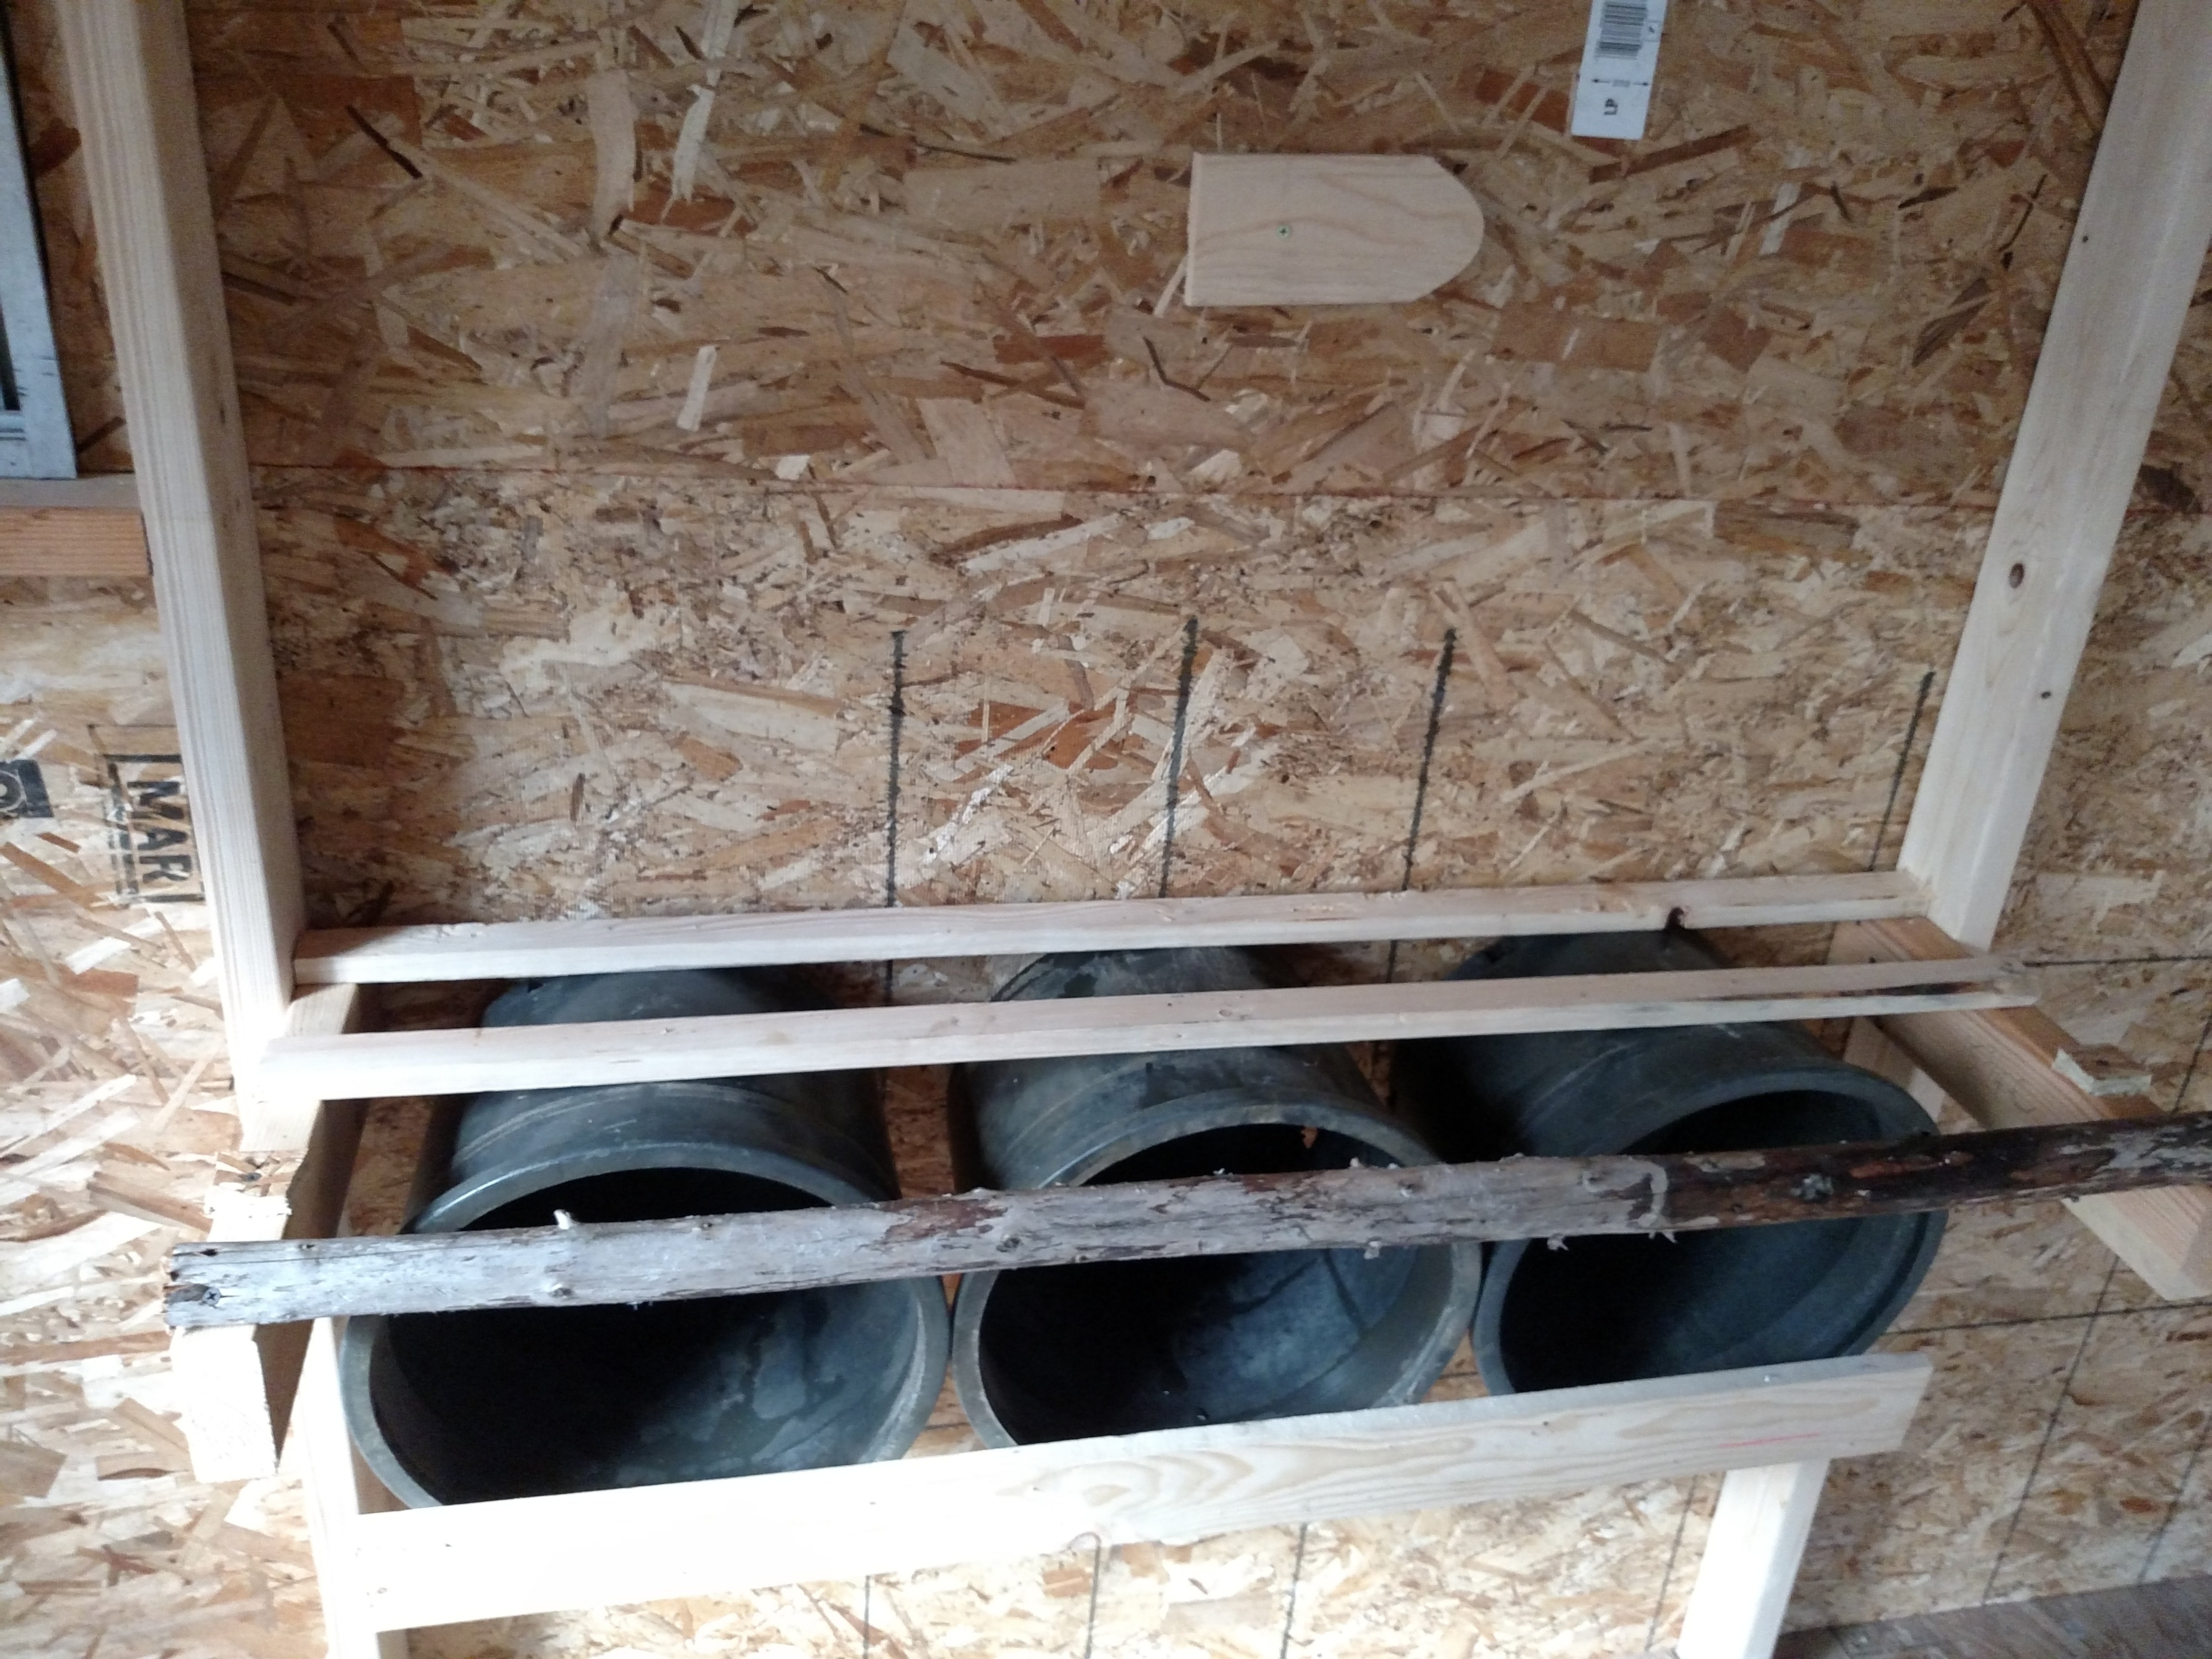
After finishing the cutting, It was just a matter installing them in the coop. I opted for elevating them off the floor to keep the hens from kicking the eggs onto the floor and the keep them from scratching poo into the nest boxes. I have a plethora of nursery planting pots so they worked perfect for my elevators (see them in the first picture of post). I screwed s single screw into the wall thru the back of each nest box to keep it up right. The wood across the top of the stack is to help keep the nest boxes in place as well as it is wedged tightly between the studs.
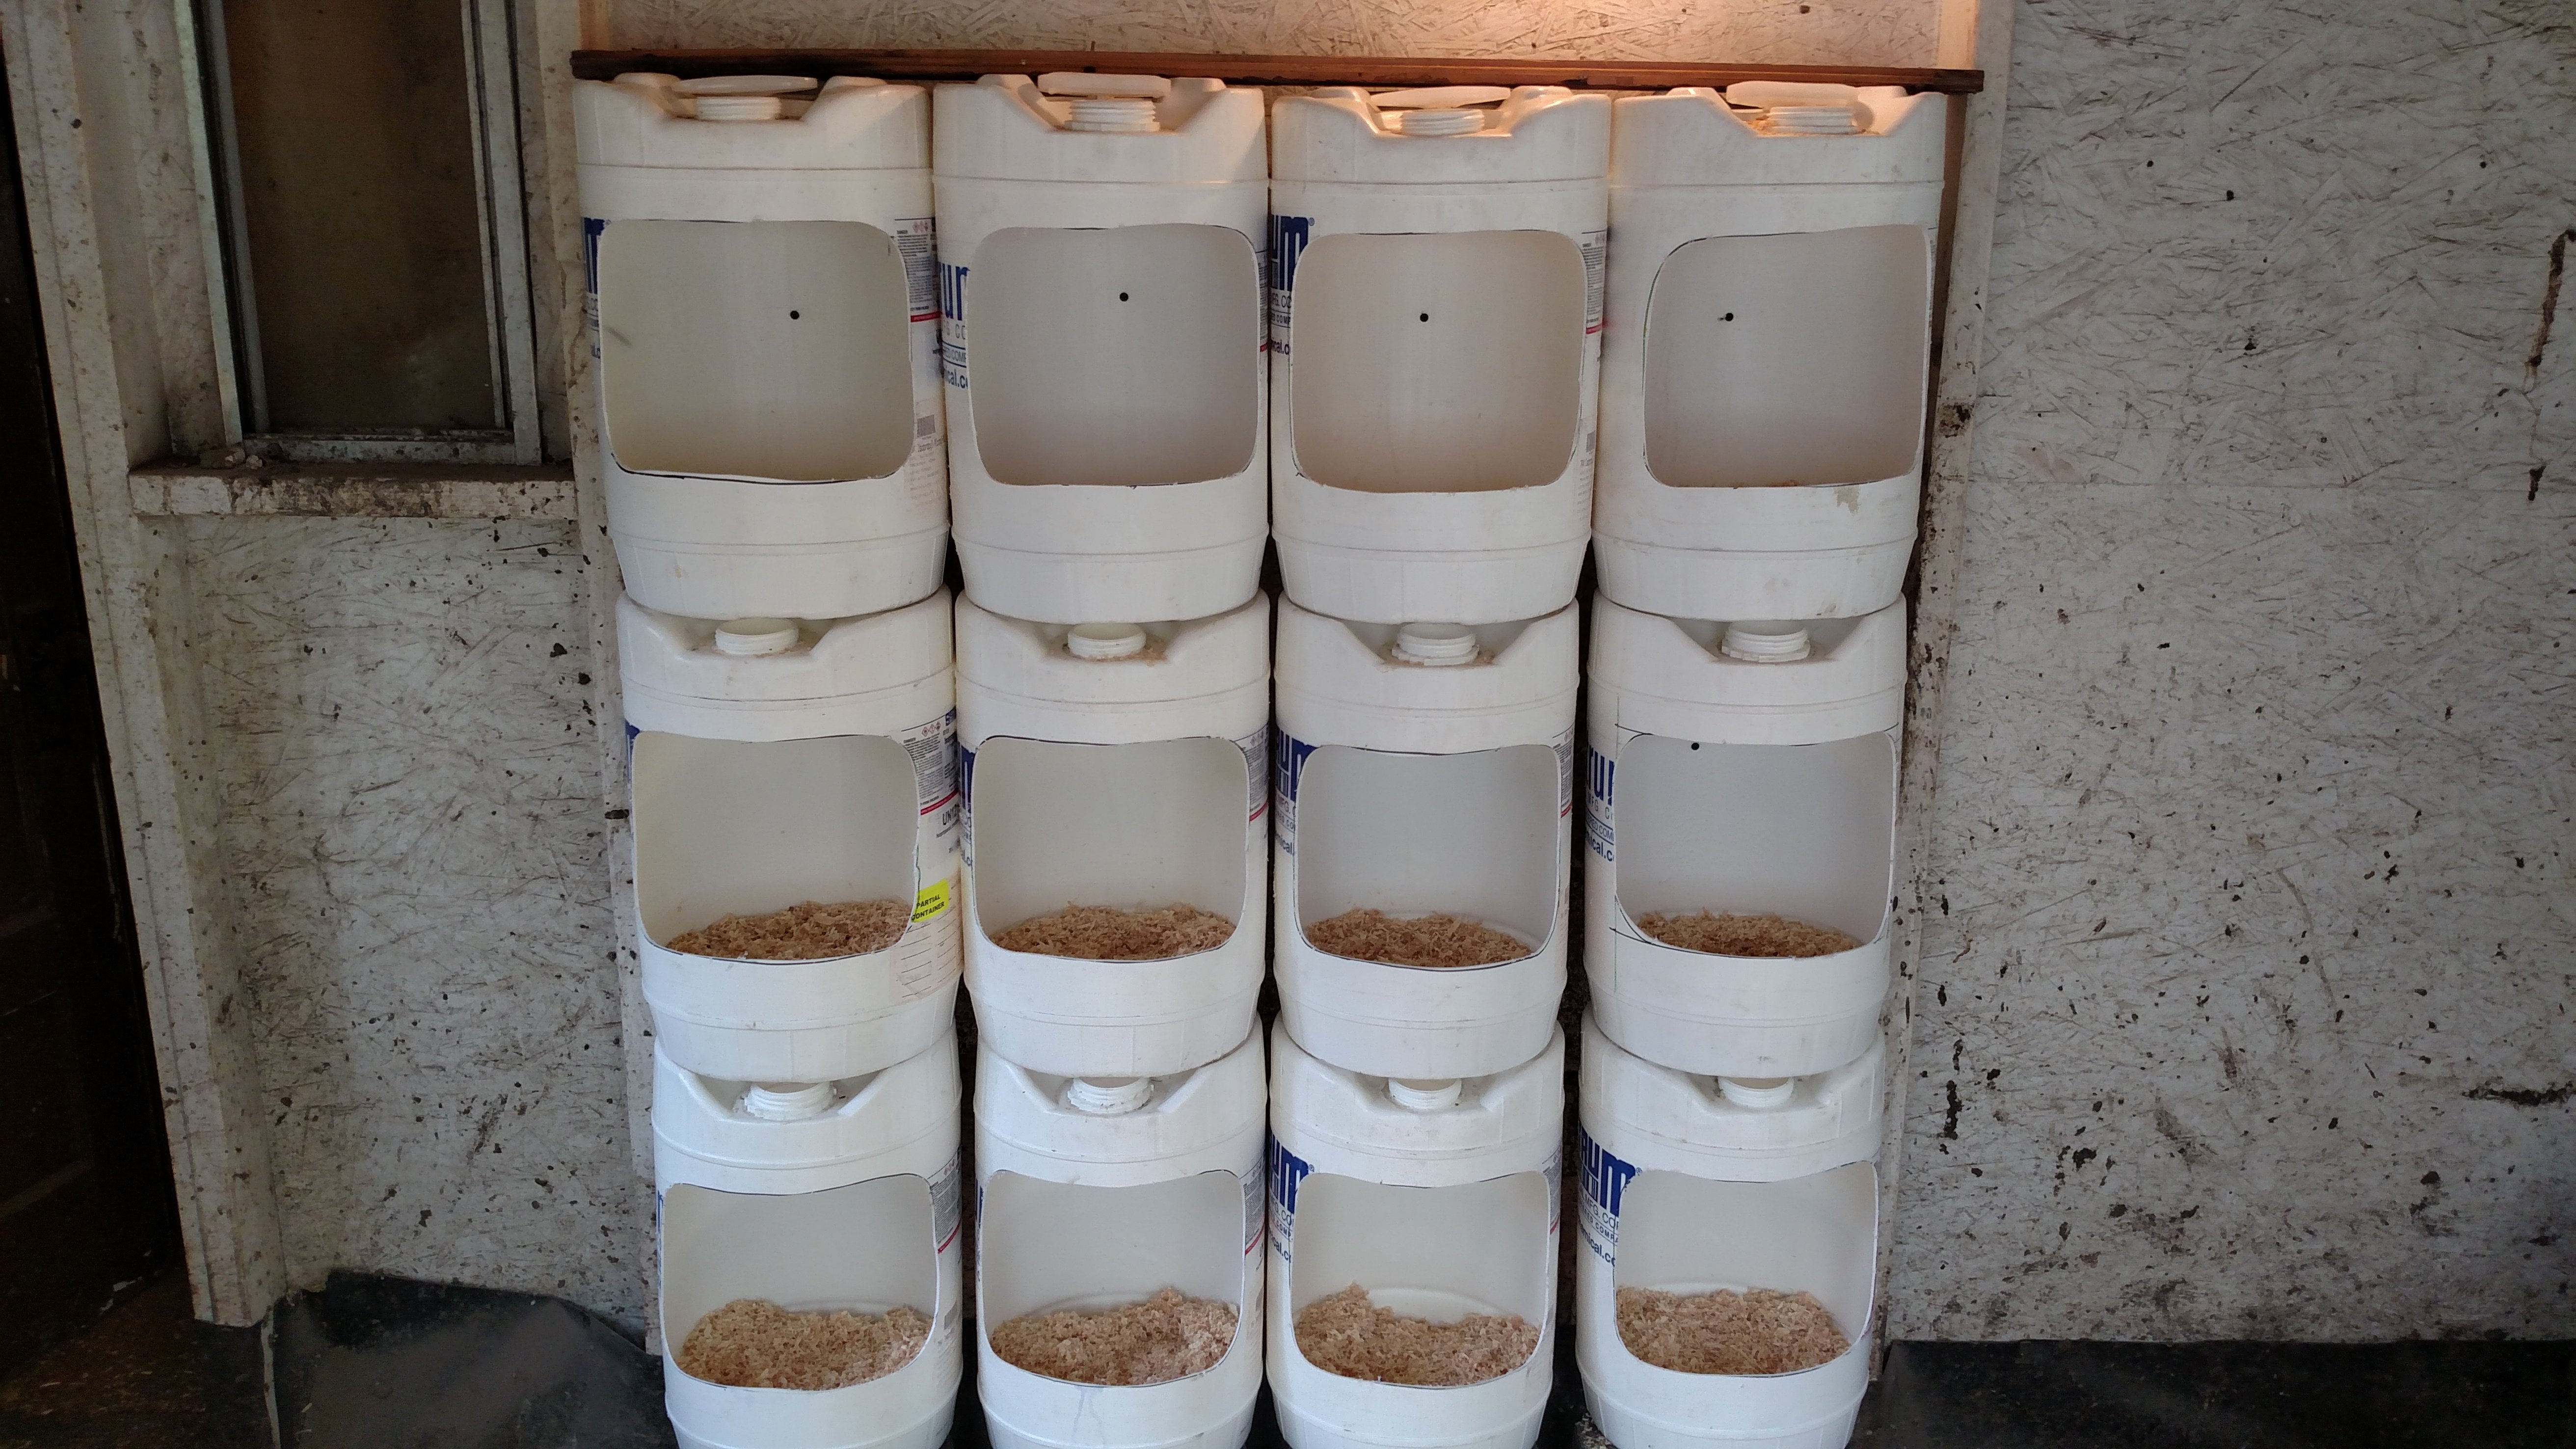
While the nest boxes are not the fastest to remove for cleaning, they have proven to be easy to scoop out and replace the bedding so far. Even with a few broken eggs in them the bedding took care of it. An important design consideration was the bottom lip of the nest boxes, it needs to be tall enough to keep the bedding and eggs in but low enough to allow for easy entry and exit.
I have been lazy and have refused to put in a perch for each level.... I am not sure why I am lagging on it so much... but this will allow for the hens to use all 12 of the nest boxes. Currently they have 2 nest boxes that are not used and are collecting dust, which is a far cry from 11 of 15 unused nest boxes in my 2011 chicken coop.
Please ask if you have any questions about the design or construction!

Check out my blog @flemingfarm
OR
You can read my blog series here:
| Time | #1.0 - Back Pain |
| Expectations | #2.0 - Weeds |
| Patience | #3.0 - Pests - Gophers |
Fleming Family Farm
FLEMING FAMILY FARM, LLC
Sustainable & Organic Methods | Heirloom Produce
All images are original works of Fleming Family Farm unless otherwise notated and credited.
If you find this post useful or entertaining, your support is greatly appreciated by upvoting, resteeming, & following!


Join the SteemitHomesteaders Slack Channel! Image is Invite Link.