Due to a different procedure from all the other social media platforms, newbie Steemians can find it hard to add profile picture. This tutorial will serve as a guide on how to add profile picture on Steemit for the times to come.
Note:- This post is purely for absolute beginners. Experienced Steemians may bookmark it to use as reference guide for the people they keep bringing to Steemit.
Image created using Canva.com which is an amazing online tool.
If you are new on Steemit then, first of all, I welcome you here. Adding a profile picture in Steemit is a bit different but it would be easy once you go through this post. Learn how to set up your profile picture by following the simple steps and start contributing to the community with a better profile that can be trusted and liked by community members.
How to Add Profile Picture on Steemit
To update profile picture, you will have to upload the image on the web first. After the image is uploaded on an image hosting website, its URL is then copied and pasted into the Settings. I am listing at least three ways, but 18 sites (options), to upload Steemit profile picture.
1. Upload Using Steemit
Yes, you can simple use Steemit to get your image link BUT not directly in settings page. The prerequisite of being able to upload an image and get its link is to use Mark Down editor. Here's how to do it. I am using @steempkrex account to make screenshots.
- Login to your Steemit account and click Post button.

- Make sure you are using Mark Down editor as shown below. (Learn about available Steemit editors here)
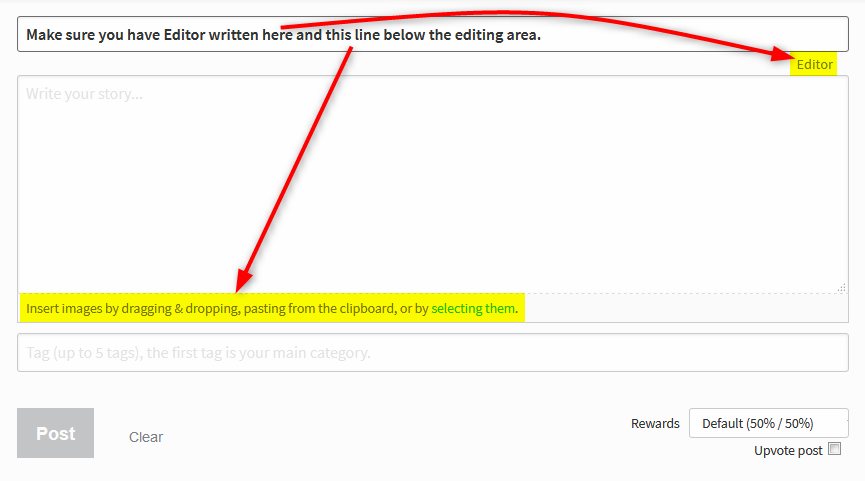
- Click selecting them as visible in the image above (it acts as an Upload button). You will be taken to your device's storage. Select the image you wish to upload. It will be uploaded in the following format, containing the .JPG or .PNG extension in the end.
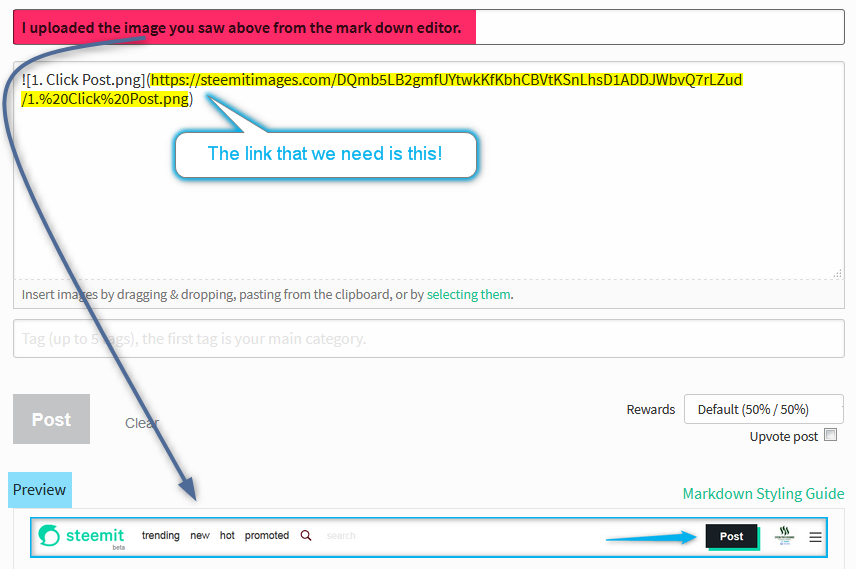
- Copy the link that I highlighted above without brackets.
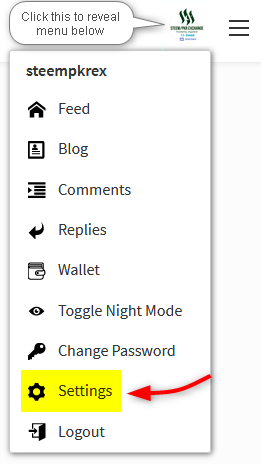
- Go to Settings page.
- Paste the link in Profile Picture URL box.
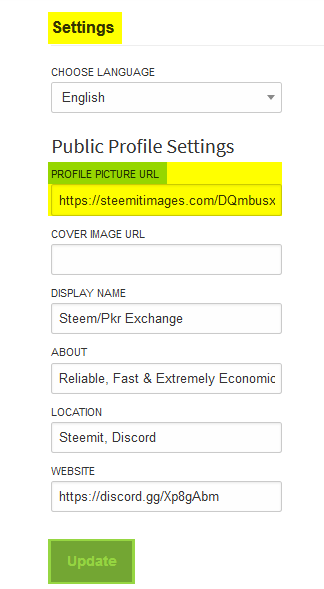
- Click the Update button to save. Refresh the page and your picture must be uploaded already.
For most people, the Steemit method should work. However, if you face problems, I am giving you alternative methods as well so that you do not have to search else where.
2. Upload Using Free Image Hosting Sites
Image hosting sites come in handy when we need a proper image URL. For image to work, the URL must contain the file extension (.jpg , .jpeg, .png, .git etc.). Otherwise, it won't show on Steemit despite opening in browser. Here's how to use image hosting sites.
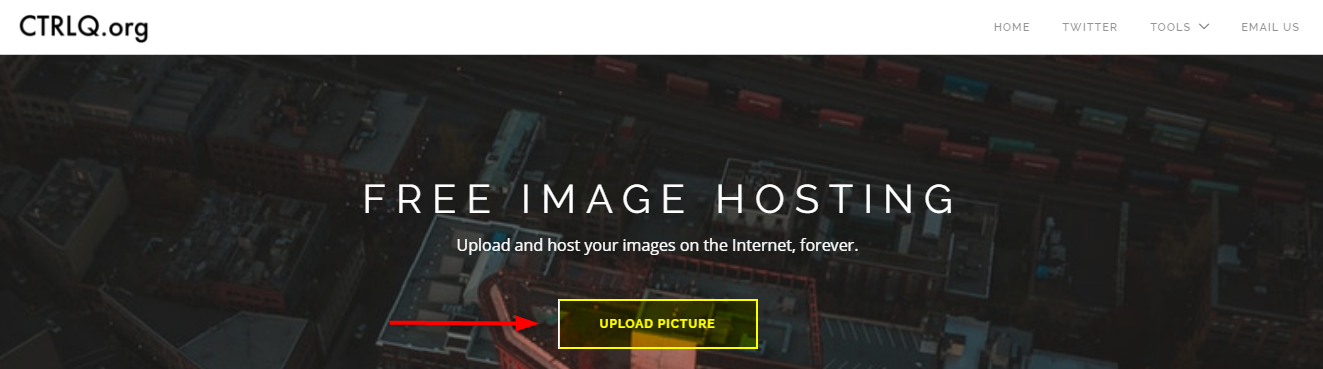
- Go to CTRLQ website. If the site doesn't work, try any of these 16 free image hosting sites.
- Click the Upload Picture button and select your profile picture from the storage.
- After some processing, image will be uploaded, and you will see its link (not the image itself.
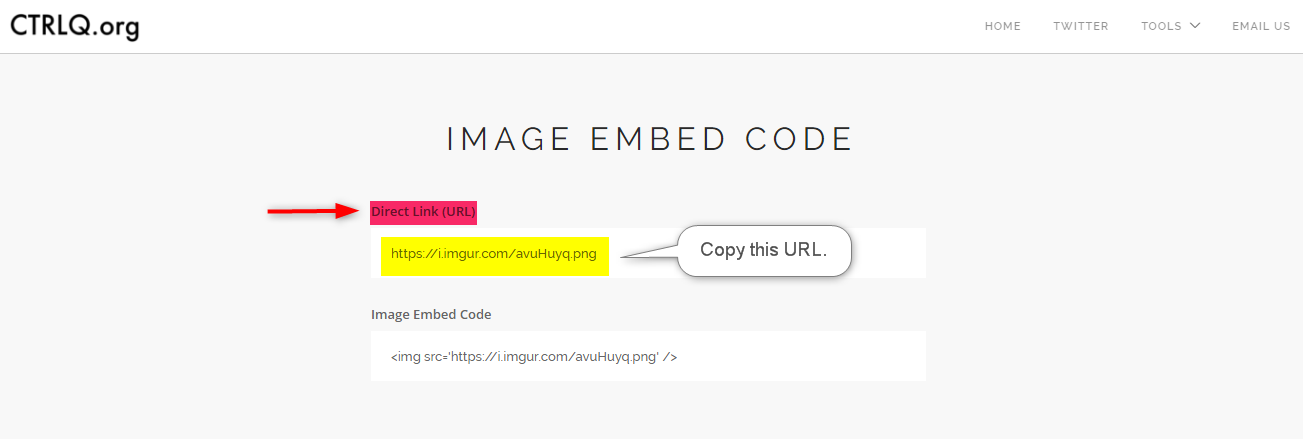
- Copy the URL (image link) as shown above.
- Paste it into the Profile / Cover Picture URL box in your settings page on Steemit.
Different websites have different layout and options but the process is same. You have to upload your image and copy its URL to save in settings. When more than one links are available, choose the one having file extension at the end.
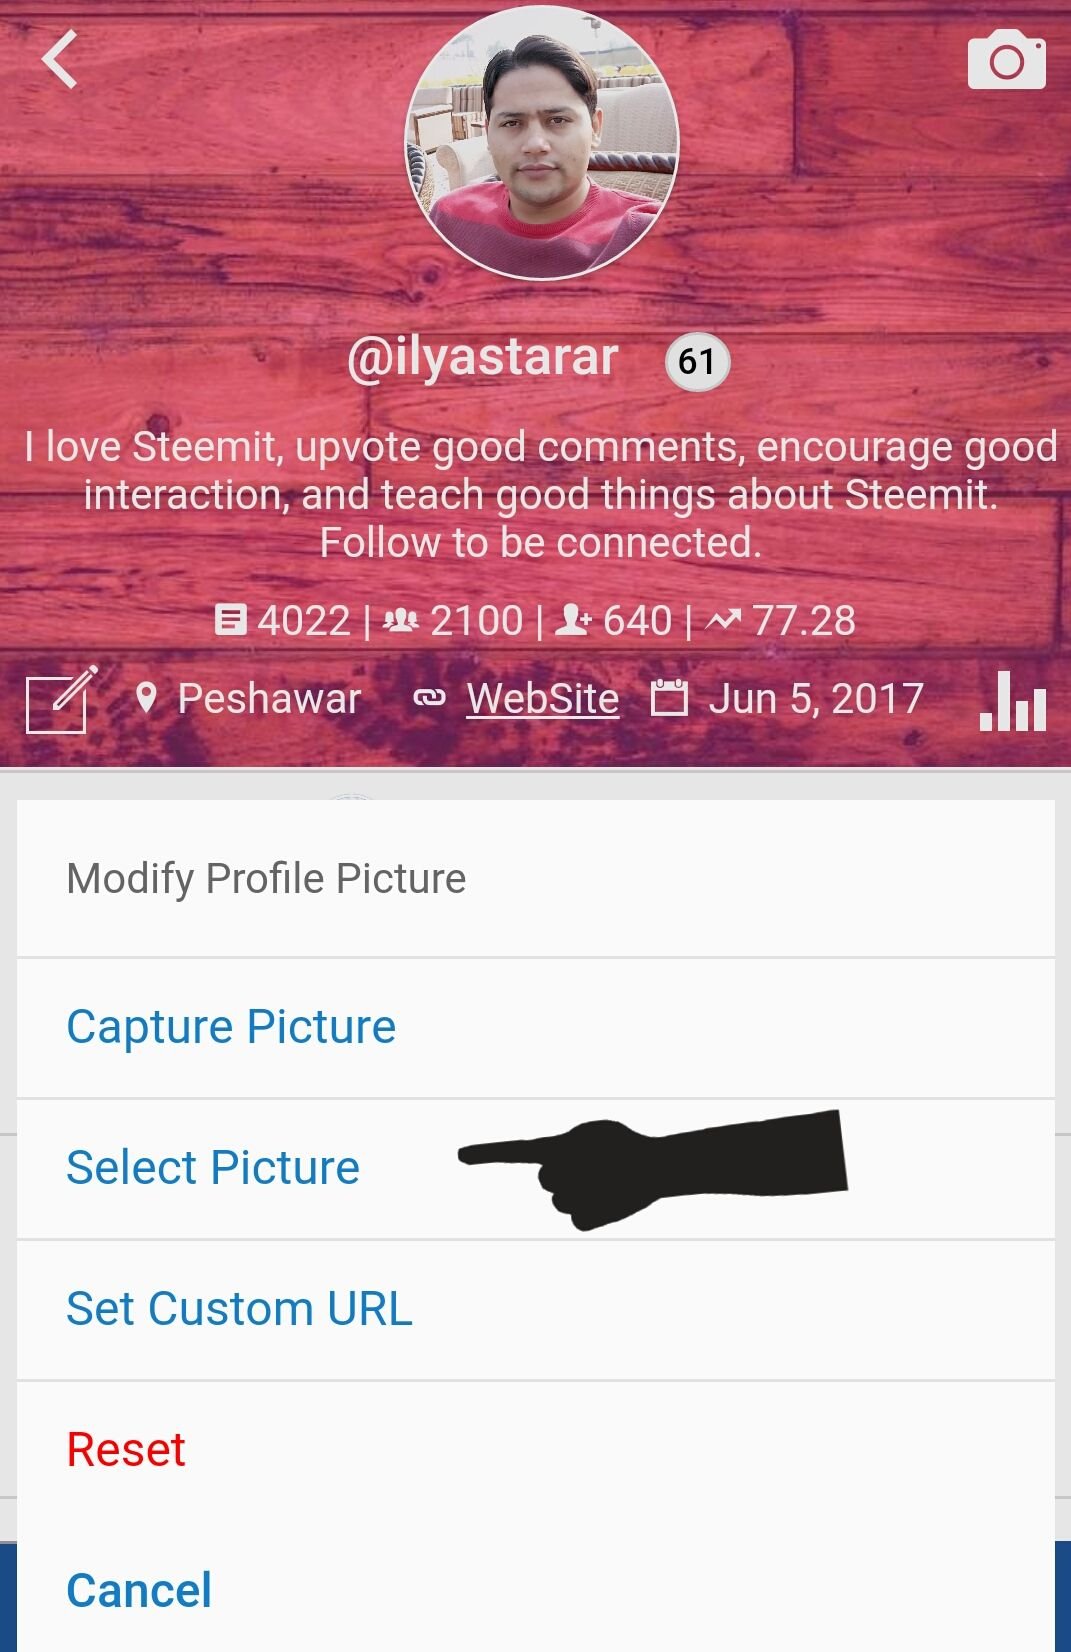
3. Use eSteem App to Upload Profile Picture
If you are using eSteem app (here is how to use it), you can use its intuitive, Facebook like interface to upload profile image. Uploading profile picture using the app is super simple.
- Go to your profile on eSteem app and click the blank space meant for profile picture.

- Select a picture from your phone and wait for it to upload.
That's it!
Conclusion
I hope that you will not face any problem and at least one of these methods will work for you. I published this updated guide because I keep receiving comments on my previous guides on the topic and some of the people report problems with the websites I mentioned there. But it has been viewed for close to 6000 times till now and still counting.

I have published this post to make the better and more accurate information available to anyone who joins Steemit. It will help newbies for times to come, like the previous guide which Please consider upvoting and resteeming this helpful post.