Things to do after your first login
If you are totally new and first-time access to Steemit website, you should read Newbie01 tutorial first. That post will give you a brief overview of the steemit website.
In this Newbie02 tutorial, you will learn the all the essential steps and information about your account. And some of the precautionary procedures to take in order to safeguard your steemit account.
These are the steps you must take if you log in to your account for the first time ( or never do this precautionary step before )
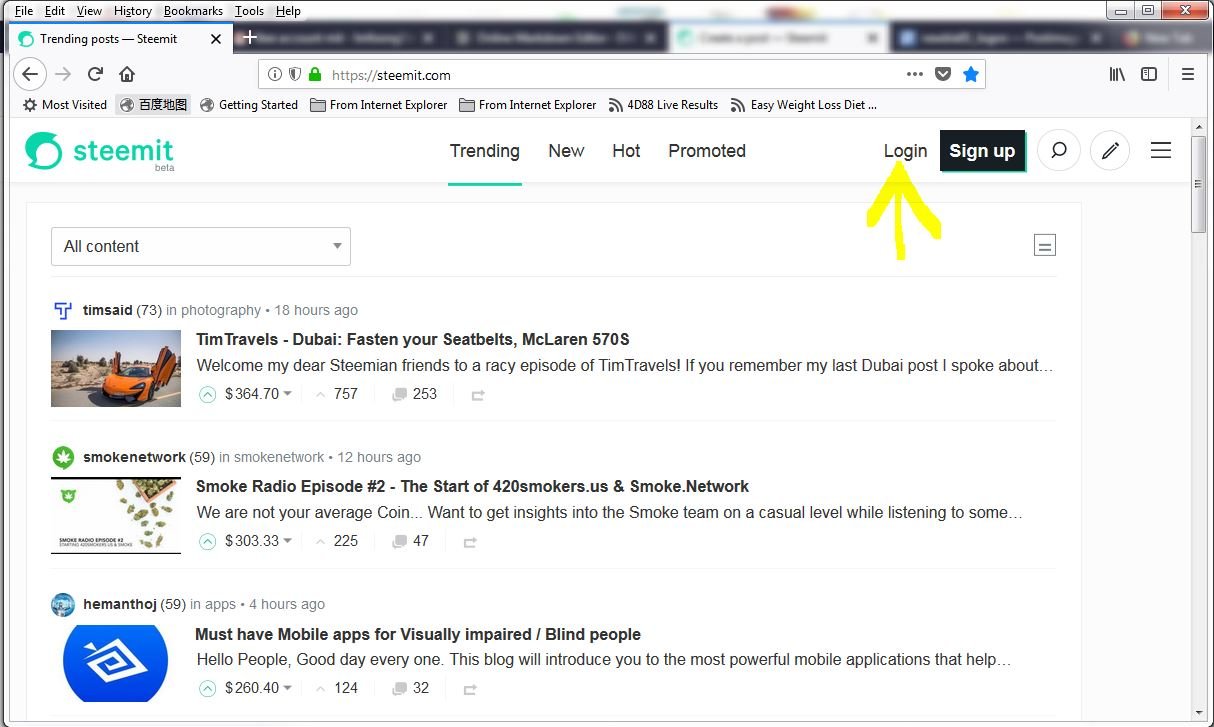
- With your favorite browser, go ahead to key in steemit.com in the address bar of your browser and press enter key. The in the default page, look for a login button and click on it once.
- Depends on your internet speed, you need to wait for the website to process until you see a login panel appear.
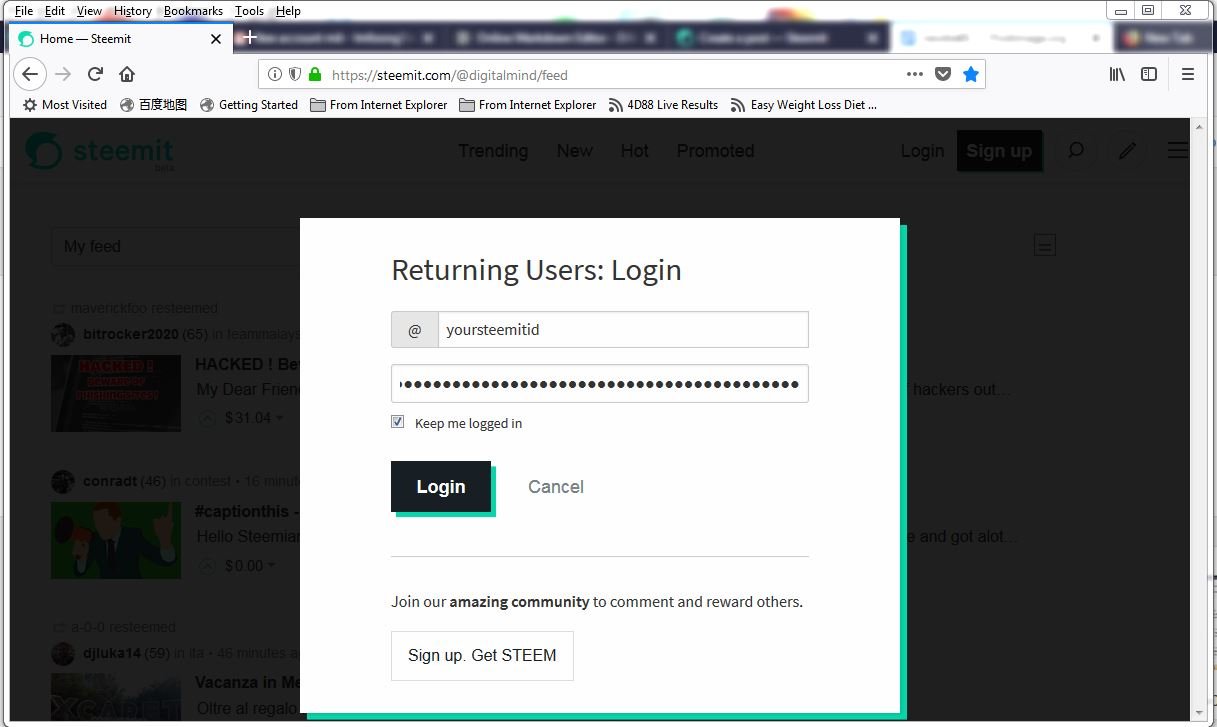
Type you Steemit ID and password sent by email from steemit.com, then click the Login button as indicated in the screenshot above.
After you have clicked the login button, a new page will appear. From this page, you will see a list of post and you may notice by default that the website URL is @yousteemitid/feed as indicated in the following screenshots.
At this stage, you need to look for the Avarta icon and click on it until a menu appear. Then locate the wallet and click on it. Then you will see this page with 3 menu tab on top Balances | Permission | Password. When you see this page, click on the "Permission" and look for the screenshot below:-
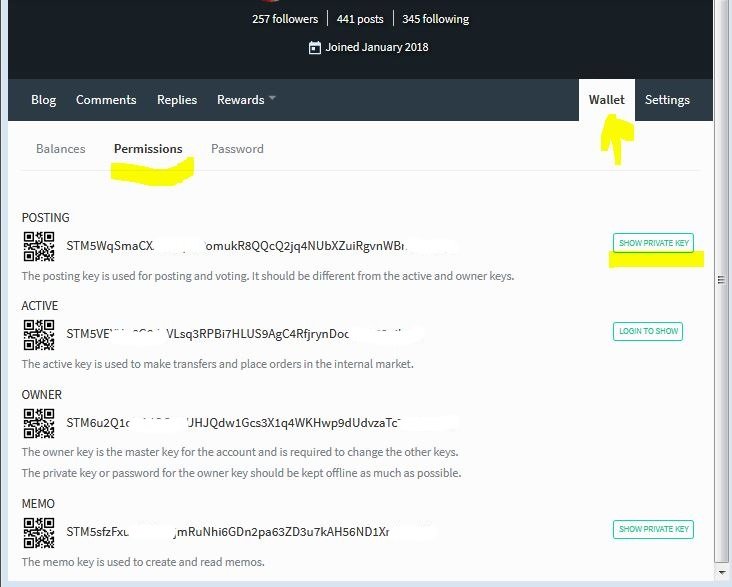
Important Step 1
On the right side of the Posting Key, there is a text stated "Show Private Key", Click on it and you will notice the key has changed to a new set of characters. Copy the entire string of characters and save it in a safe place. You need the posting key very ofter and therefore save it to a safe and convenient medium for you to copy and paste for future use.
Important Step 2
Now, click the Avatar icon to see the drop down menu, look for the logout text and click on it to logout. YOu are done with the posting key.
When you want to login again for the second time or any subsequent time, you can use the posting key as your password instead of the master password (send by Steemit.com) Therefore, whenever possible DO NOT use the master password.
Now that you have set a new login procedure for your Steemit account, you may read to understand the other keys as follows:-
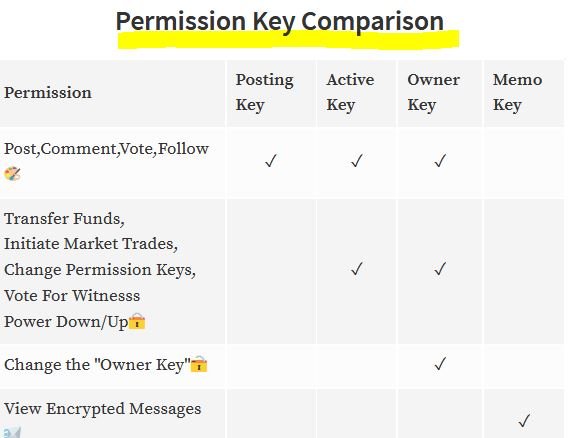
You may have noticed from the screenshot that there are Four (4) Type sof keys listed namely:-
Posting
The posting key is used for posting and voting. It should be different from the active and owner keys.Active
The active key is used to make transfers and place orders in the internal market.Owner
The owner key is the master key for the account and is required to change the other keys.
The private key or password for the owner key should be kept offline as much as possible.Memo
The memo key is used to create and read memos.
Reference Source
Reminder :
Please take note that all the four (4) keys contain a long series of characters. These long string of characters are the key or password. DO NOT disclose any of these keys to any authorized website. When you learn more about Steemit, you will learn when to allow the some of the key for a specific purpose. Again, NEVER give your master password ( email from Steemit)
For other uses of the keys, @steemitguide has posted Permission keys about various functions of the keys
This Tutorial is specially written to help newbie to get familiar with Steemit and clear some of the doulbt so that you can start Steemit right away.
My next tutorial will be on "How to Write Your First Post",
Link to @digitalmind Newbie Tutorial Post
Some Related Articles
Disclaimer:
- The screenshot taken is with my laptop and browser used. It may differ from what you get from your laptop or computer.
- The appearance may be different if you use a mobile device to read this post