What do you do with your old magazines? Throw them away? Send them for recycling?
How about turning some nicer colorful magazines into origami masterpieces?
@ivan-g and @gmatthe2 always have new origami ideas and tutorials that you can follow easily to turn your old magazines into beautiful stars and cubes and boxes 🙂 Just like what @macoolette did here in her Ulog #9: Omega stars shining on a Sunday.
Here are some of their current projects:
- @ivan-g's Origami Boat + Reward
- @ivan-g's Designing Modular Origami
- @gmatthe2's Spinable Picture Frame
- @gmatthe2's Origami Butterflies
Follow them to get the latest origami tutorials!
Another thing that you can try to do or even get your kids or nieces or nephews or students to try is to make:
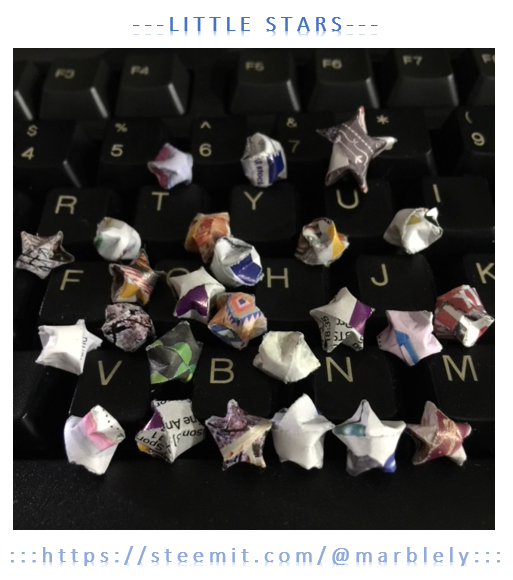
⭐ little stars ⭐
out of magazine strips.
Here's how you can fold this little star:
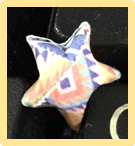
(1) Cut or shred the pages of magazines to strips of about 1cm width. You can choose a color of page that you like.
Tips:
- You just need to make sure the color that you like is at one end because the rest of it will be all wrapped up into a pentagon shape, hidden from the eyes.
- Using a paper shredder was a brilliant idea from @cryptocariad when we were playing @kristyglas' Random Games Week 5- Quilling challenge.
- However, if your paper shredder shreds the paper into 0.5cm or below, you will get really, really tiny stars. If you are just learning to do this, start with 1cm strips of paper.
- You can also make bigger ones if you use the middle spread of the magazine and cut out 1.5cm or 2cm strips - You will need enough length to wrap a sufficiently thick pentagon before you can shape it into a star.
- Follow @kristyglas for her weekly Random Games and amazing artwork! This week's random game is Color This!
- Follow @cryptocariad to learn new things from her informative and educational blogs!
(2) Make a knot at one end and (3) press it down to flatten. (4) You should get a pentagon shape.
- Be careful when you pull the ends to adjust. Do this slowly when you pull the ends.
- Keep the pentagon end short, leaving the rest of the strip for wrapping. Cut off any excess strip at the pentagon end.

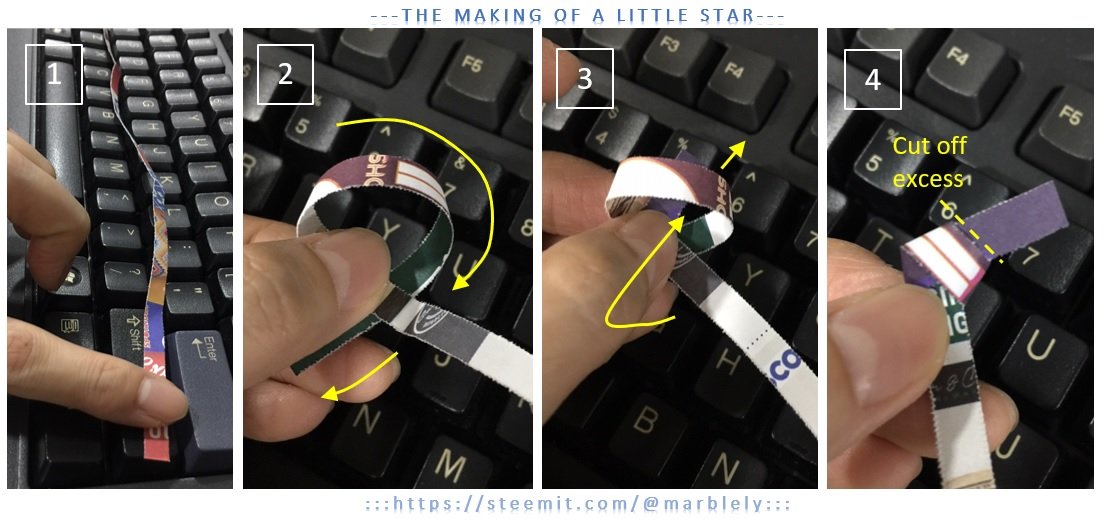
(5) Start wrapping the pentagon from side to side with the remaining long side of the strip of paper.
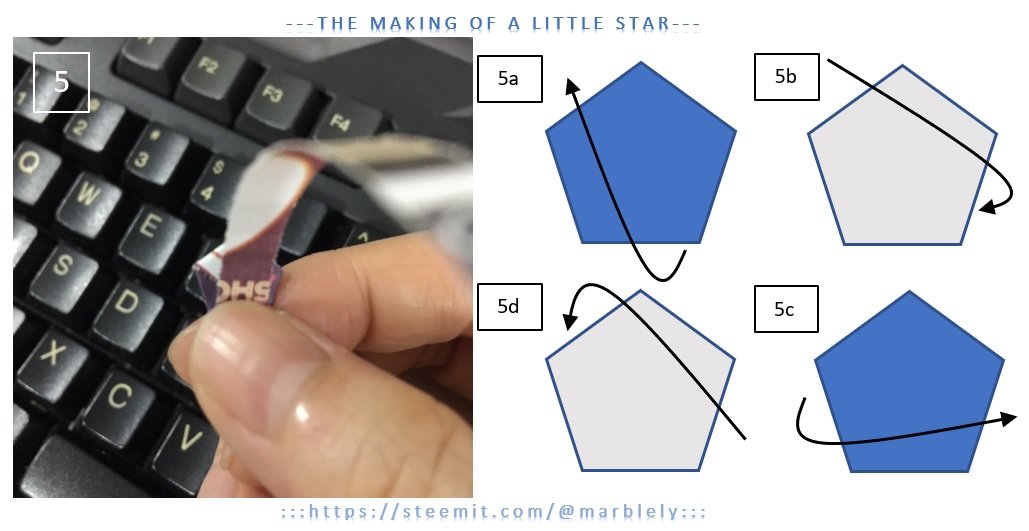
- When wrapping the pentagon, always wrap towards the opposite side, skipping the one side nearest to the strip, as shown in (5a), (5b), (5c) and (5d).
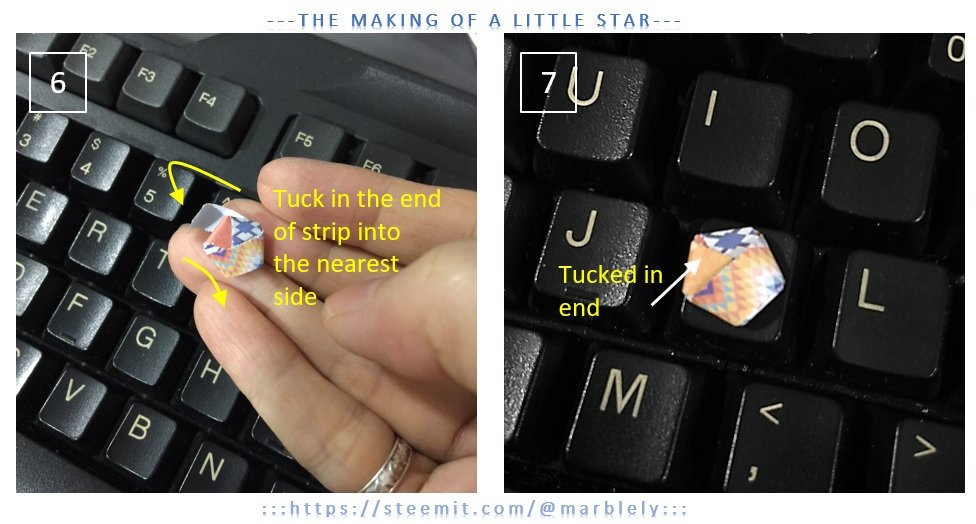
(6) Once you reach the end of the paper, tuck the end into the nearest side. (7) Cut off any excess strip remaining.
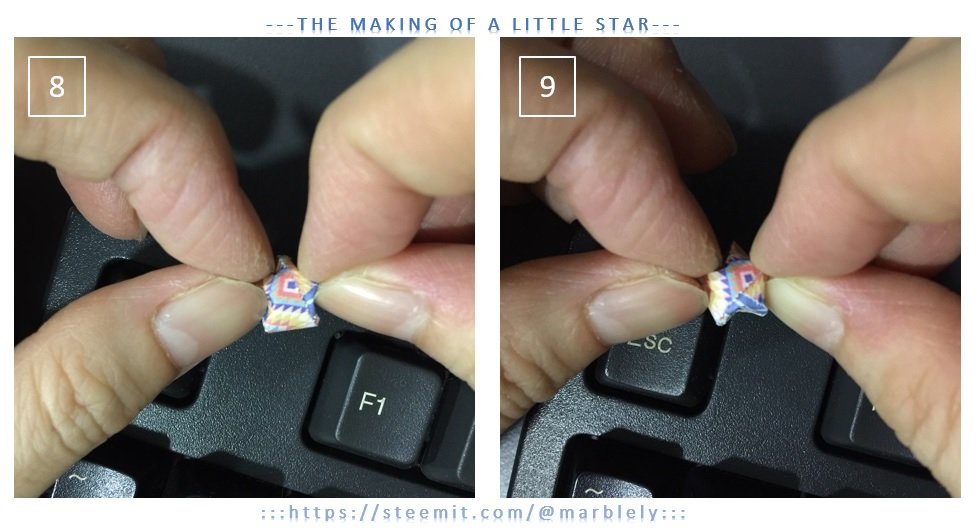
(8) With the thumb and index fingers from both hands, slowly press / squeeze the top 2 sides of the pentagon to form the star.
(9) Repeat step 8 until all 5 sides of the star have been pressed and formed.
- If the pentagon is too thin (i.e. strip of paper is not long enough to make a relatively thick pentagon), when you press to form the star, the middle might collapse. That is why, you need a thick enough pentagon to shape the star.
- If the pentagon is too thick, you may have to press harder to shape the star.
You can start making many little stars and gift them to someone special ⭐🎁.
I'll share with you on how we can do this in my next post 😊.
If you have any ideas, do share too!
That's it Steemians! Let me know if you have any questions!
