In Lesson 1 of Photography 101, I covered the different ways an image can have IMPACT!
This week I'm going to discuss The Rule Of Thirds, but please be aware that The Rule Of Thirds is not a rule at all – only a suggestion! Not every photograph needs to adhere to The Rule Of Thirds. In fact some images have more IMPACT when the subject matter is centered in the image or is very close to the edges!
For now I simply would like to explain The Rule Of Thirds, so that you can decide for yourself if you want to use it in your images or not. Please experiment to see what works for you.
There are those who absolutely hate the very mention of The Rule Of Thirds, saying it stifles creativity. I agree with them to a point. After all, if all you are thinking about when you are taking a photograph is where the subject matter should be placed, then you have missed the point. Many of you instinctively follow that “rule” without even knowing you are doing it. I certainly did – long before I attended art school and was introduced to The Rule Of Thirds! My own opinion is that it is very pleasing to the eye, but you may not agree, and that's OK!
So, in this lesson I hope to make you aware of this method of composing your subject matter. The rest is up to you. Remember, beauty is in the eye of the beholder, and not everyone sees the balance in an image that utilizes The Rule Of Thirds! What makes a good photograph is really very subjective. If an image has IMPACT for you for whatever reason, then it has succeeded in being a good photograph, regardless of whether The Rule Of Thirds has been implemented or not!
WHAT IS THE RULE OF THIRDS?
Think about your image as being broken up into nine equal parts, with two horizontal lines and two vertical lines like this:

HOW DO YOU USE THE RULE OF THIRDS?
The "rule" places important subject matter at (or close to) the lines or intersection points.
The simplest way of using the “rule”, is to use it in a landscape shot, placing the horizon either on the bottom or top horizontal line, or close to it. If you place the horizon right in the center, as beginners often do, you have succeeded in dividing the image exactly in half, so you are not sure if the land or the sky is meant to be the focus of the shot. On the other hand,if you wish to create tension for some reason, placing the horizon in the middle will certainly do that! In my own work, I have a tendency to place the horizon much closer to the upper or lower edges of the frame, because I believe it creates more interest.
In this image of Daytona Beach, Florida, the horizon is on the lower horizontal line, and the woman with the balloons is on the left vertical line.
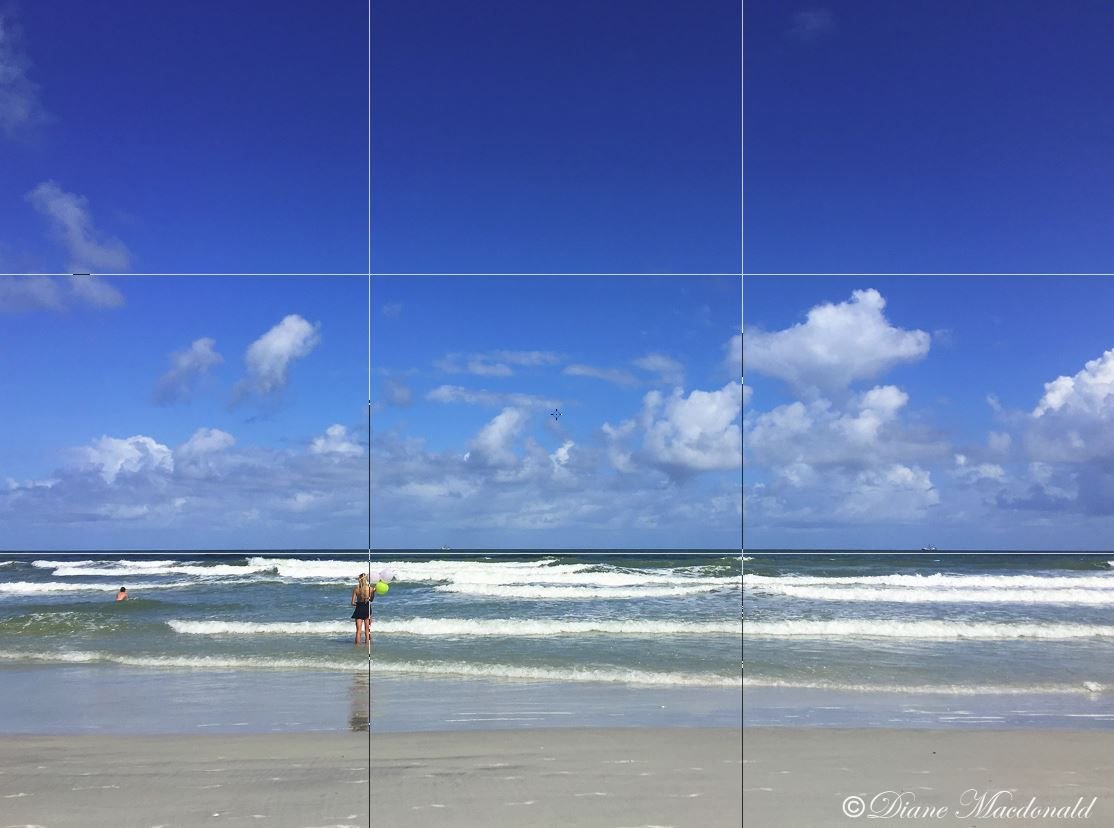
Image © Diane Macdonald. All Rights Reserved.
If you have one tall vertical subject matter in the shot, the idea is to place it on either the left or the right vertical line. If the subject is a person or animal, it is a good idea to have the person or animal looking into or moving into the largest part of the image. But again, you can create tension by breaking that “rule.”
The lifeguard station at Daytona Beach, Florida is placed on the left vertical line, and the horizon is pretty close to the lower horizontal line.
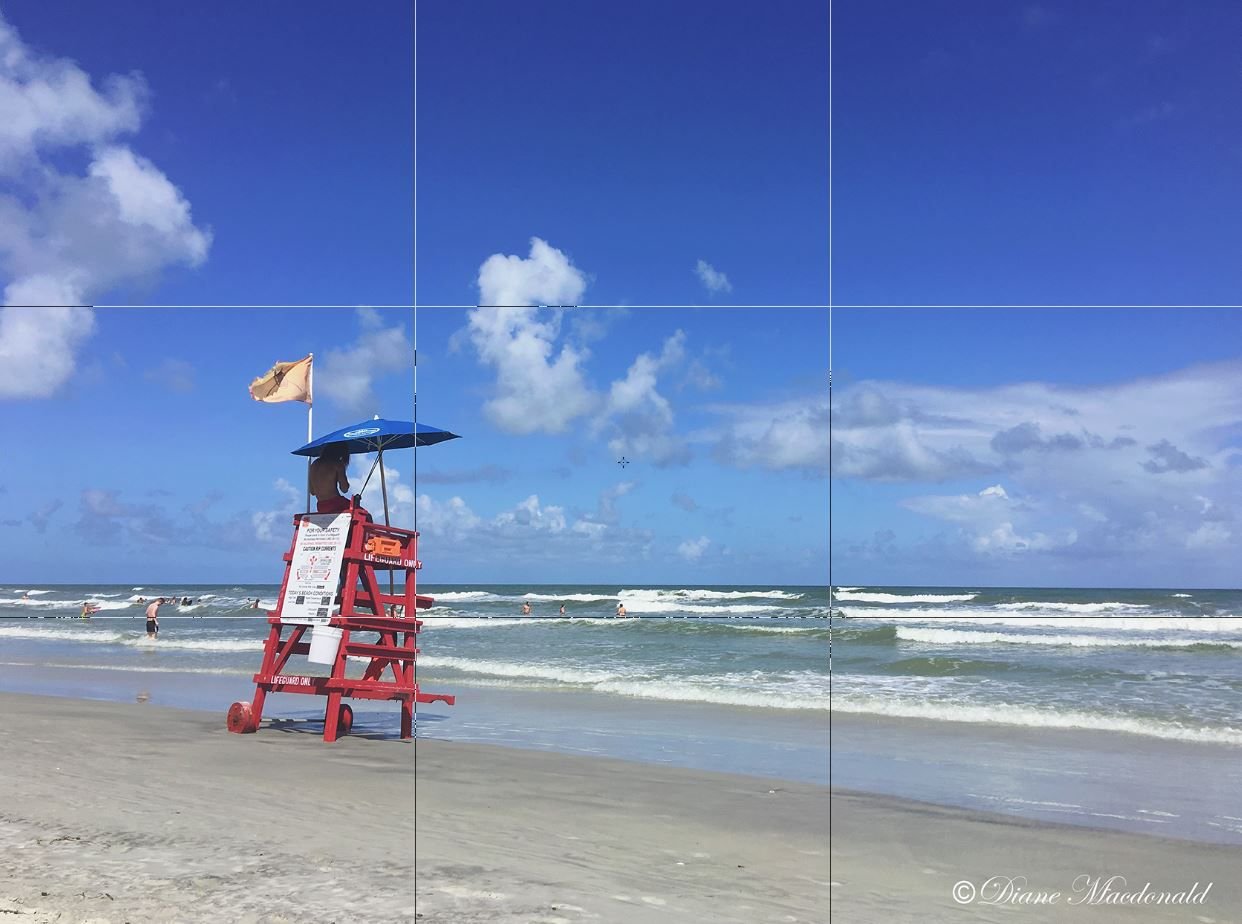
Image © Diane Macdonald. All Rights Reserved.
The horizon in this shot is closer to the upper edge of the image, but the palm tree which was uprooted and washed ashore by Hurricane Irma at Jacksonville Beach, Florida is at the upper right point of intersection.
The theory is that objects placed at the intersection of the lines create more balance in the image, as the eye naturally goes to those points of interest. For those of us who read from left to right, the line and two intersecting points on the left have the strongest impact, whereas the line and intersecting points on the right will have more impact for those who read from right to left! So, the idea is to place the subject matter at one of these points (or simply close to it.)
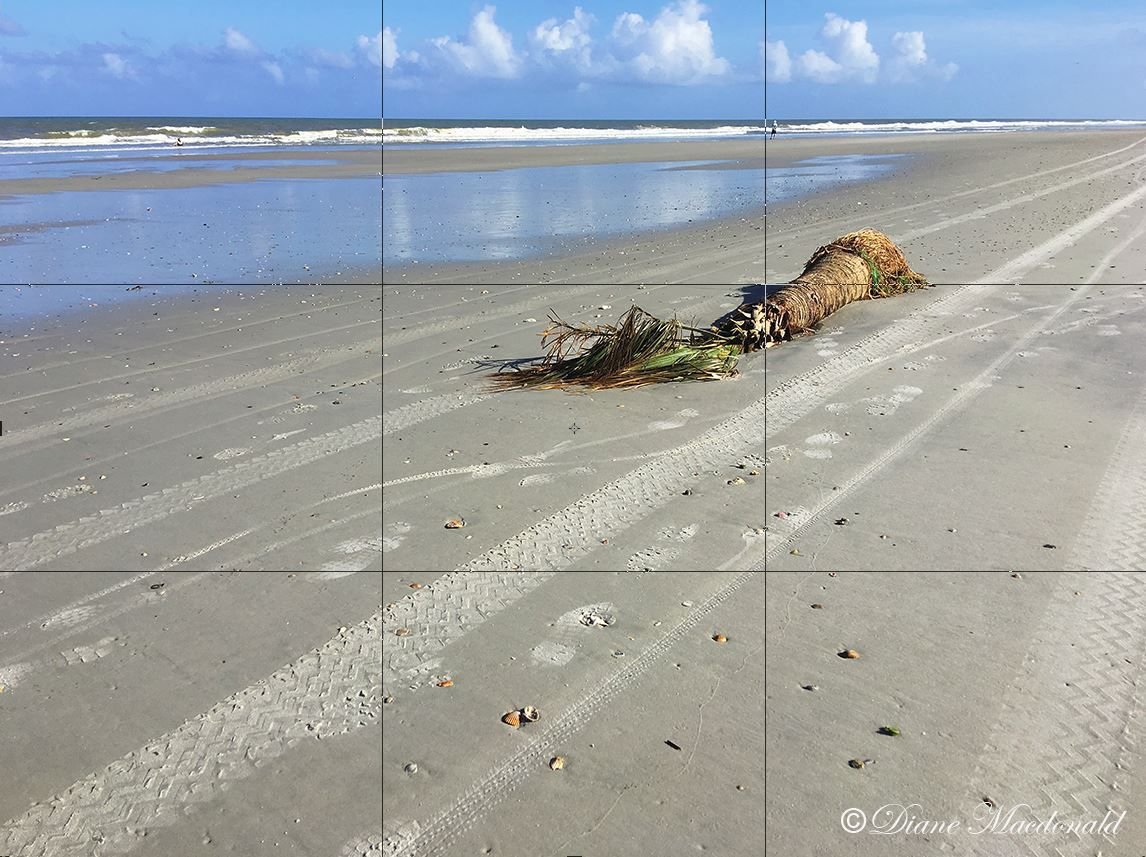
Image © Diane Macdonald. All Rights Reserved.
This great egret is walking into the ocean at Daytona Beach, Florida and it is placed on the right vertical line with its eyes close to the upper right intersection point.
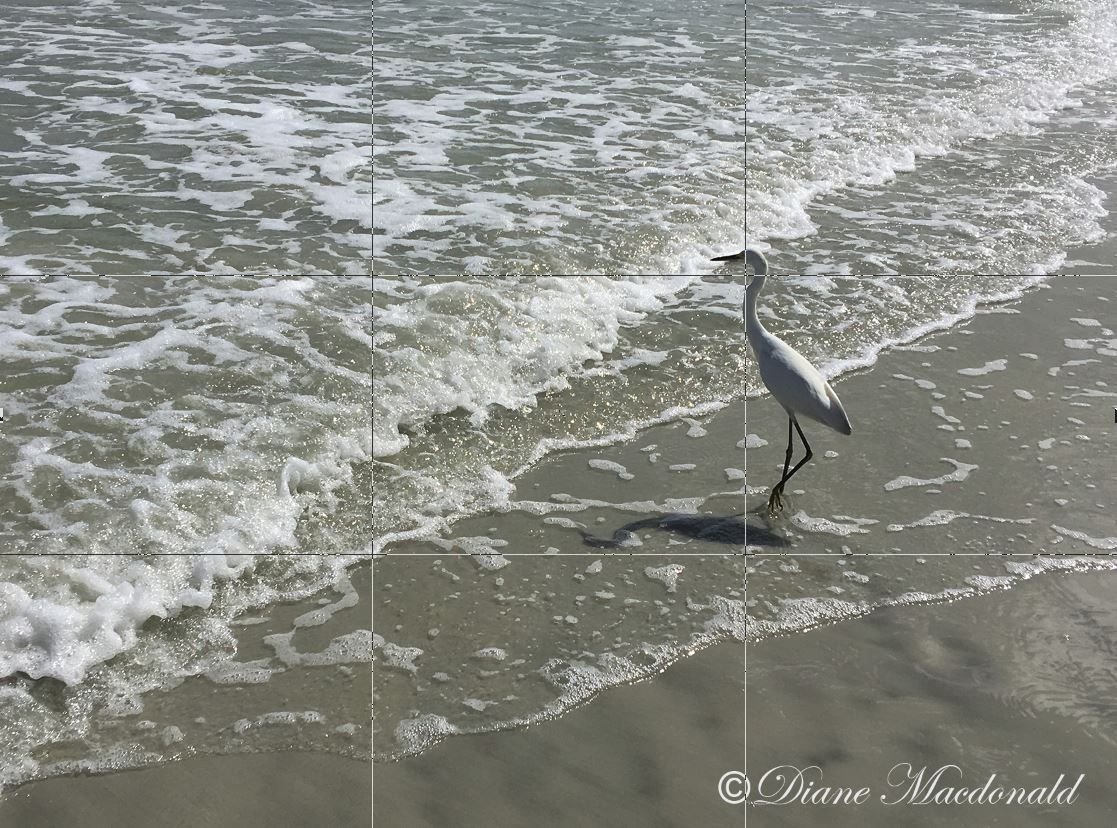
Image © Diane Macdonald. All Rights Reserved.
The great egret is now walking away from the ocean and is at the upper right intersection point and is walking right out of the shot. Does this work for you? Why, or why not?
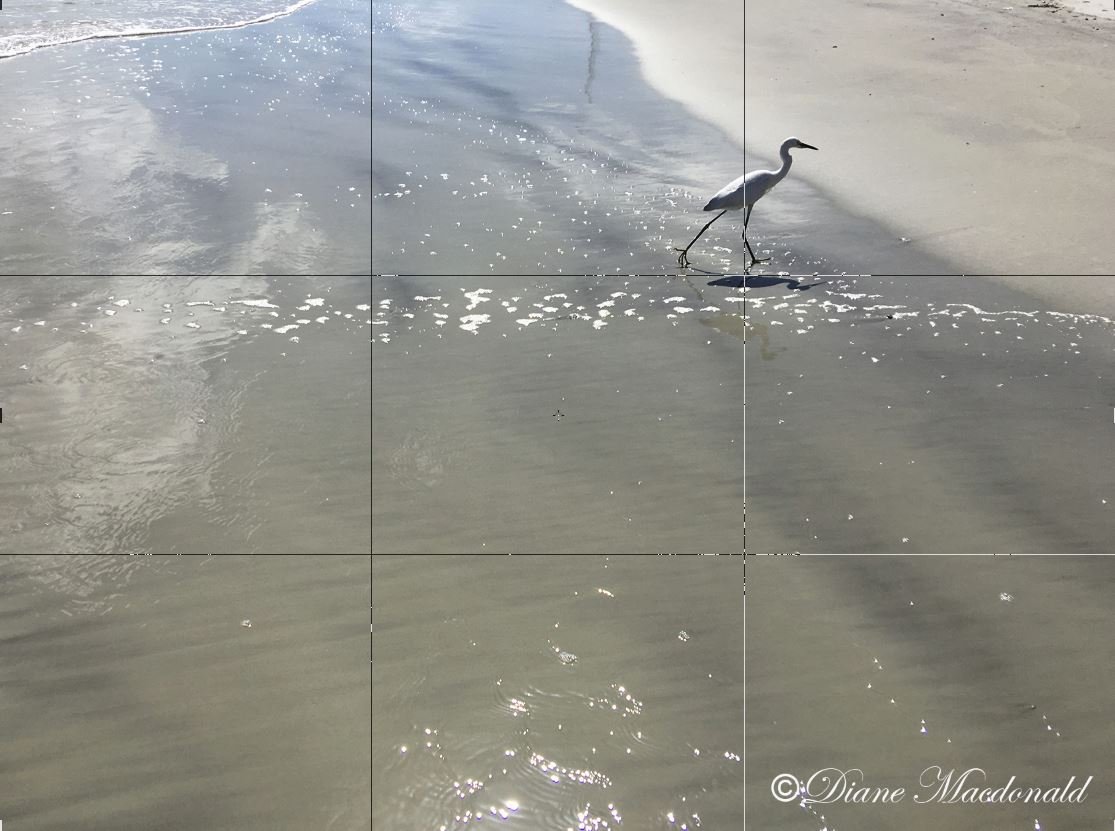
Image © Diane Macdonald. All Rights Reserved.
Which one of the great egret shots works best for you? Why?
So, there you have it - The Rule Of Thirds! The information is there for you to use as you wish! However, for this week's assignment, please use the The Rule Of Thirds in an image, so that others (including yourself if you wish) can determine whether or not it works for your image!
All photographs in this post were shot with my iPhone 6s Plus.
Lesson 2 Assignment: YOUR OWN image using The Rule Of Thirds!
Remember to add #photography101 as a tag, so that others can find and critique your work! You may post the link to your post here too if you wish, but it is not necessary. The The Rule Of Thirds challenge will finish next Sunday, October 22.
Other posts in this series:
Thanks for taking the time to read this! I appreciate it.

To find my blog posts, photography and designs on Steemit, please search on #dianemacphoto and to check out my art prints and stock images online, please visit my website.