Docker-Compose
Hay Steemers,
today we are going to amplify our Docker knowledge with one new tool, which is called Docker-Compose as you may have read in the title.
In the last part 5.3 we’ve discussed how the communication between Docker Container is working and what steps have to be done to use the internal Docker-DNS. Today we want to cover a new use case. Think back to the exmaple we’ve used in the last part: We’ve setup the communication between a SonarQube-Container and a MySQL-Container. Would it make sense to only start the SonarQube-Container without the MySQL-Container? No, it wouldn’t as SonarQube is unable to start without a database. So it would be nice to have a solution to start, stop and manage multiple Containers, with only one command. This solution is called Docker-Compose.

Installation
If you are working on a Windows or Mac machine, you are as lucky as me, because “Docker for Windows” and “Docker for Mac” already contain this tool by default. For those of you who want/have to install and use docker-compose on Linux, you just have to execute the following command in a terminal:
curl -L https://github.com/docker/compose/releases/download/1.9.0/docker-compose-`uname -s`-`uname -m` > /usr/local/bin/docker-compose
chmod +x /usr/local/bin/docker-compose
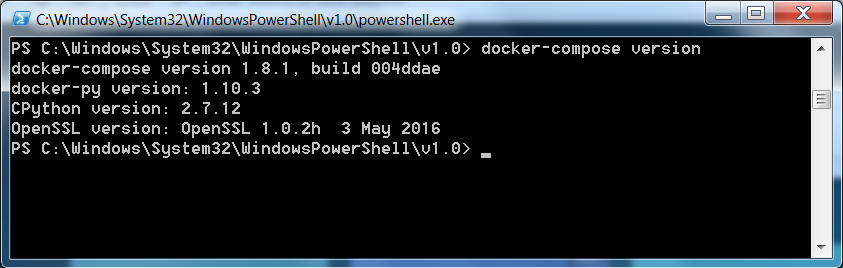
You can verify that Docker-Compose is working correctly by executing the following statement in a terminal or powershell session.
docker-compose version
This should result in something like this.
Define the Services
After you’ve successfully installed Docker-Compose, we can continue by defining our first Services. To do so, create a file called “docker-compose.yml” in a folder of your choice. And yes, according to the file extension, we have to define our Services by using a YAML-Syntax – Good to know!
We will start immediately by adding a single service into the docker-compose.yml file.
version: '2'

services:
    helloWorld:
        image: hello-world:latest
(Make sure to use spaces and no tabs, otherwise docker-compose will throw strange failure causes at you)
As you can see, creating a Docker-Compose file is no rocket-science and to be honest, it will not get much harder than this. The first line defines the Docker-Compose Version. Version 2 is the latest one at the moment so we are up to date. After that, you can see the ‘services’ tag which is shows Docker that the following lines are our service definitions. This is followed by the first and only service of this example called „helloWorld“ which is based on the latest version of the hello-world image.
Let‘s make things more complex and define to a docker-compose file, that we could use to setup a Continuous Deployment build environment like we need in Part 4 of this tutorial series. A CI-Environment needs a CI-Server like Jenkins and a tool to verify the code quality of our product like SonarQube. Those of you who’ve read part 5.3 of this series already know, that SonarQube needs a Database, so we have three components in total. The corresponding docker-compose file could look like this:
version: '2'

services:
  jenkins:
    image: jenkins:2.19.3
    ports:
      - 8080:8080
      - 50000:50000
    volumes:
      - {PATH_TO_LOCAL_FILESYSTEM}:/var/jenkins_home
    depends_on:
      - sonarqube
    links:
      - sonarqube
  sonarqube:
    image: sonarqube:6.1
    environment:
      - "SONARQUBE_JDBC_USERNAME=sonar"
      - "SONARQUBE_JDBC_PASSWORD=sonar"
      - "SONARQUBE_JDBC_URL=jdbc:mysql://mysql/sonar?useUnicode=true&characterEncoding=utf8"
    ports:
      - 9000:9000
      - 9092:9092
    depends_on:
      - mysql
    links:
      - mysql
  mysql:
    image: mysql:5.7.16
    environment:
      - MYSQL_USER=sonar
      - MYSQL_PASSWORD=sonar
      - MYSQL_DATABASE=sonar
      - MYSQL_ALLOW_EMPTY_PASSWORD=true
    volumes:
      - {PATH_TO_LOCAL_FILESYSTEM}:/var/lib/mysql
    ports:
      - 3306:3006
Take a look back to the older parts of this chapter. We’ve just take the things we have done so far and placed them in the new docker-compose file. Yes, the syntax is a little bit different as in a normal docker run command, but you should be able to understand it.
The attentive readers my have noticed the two new things here. The first one is the use of the “depdens_on” property, that defines which services have to be started before this Container will be launched. We use this property to make sure, that the MySQL-Server is already up when we launch the SonarQube Container. The other thing is the “link” property, which is necessary to access another Container from within this one. So for SonarQube we make sure it can connect to the Database and we also allow Jenkins to connect to the SonarQube-Server.
Enough theory – Let’s start our Services.
>docker-compose up
Launch the command above to run all Services at once. If you do not want to see the logs, you can also add the -d parameter to the call which will result in an output like this:

Cool isn’t it? And have you seen that Docker Compose automatically created a new network for our services? That’s pretty nice I guess. If you are done with your work and want to surf on steemit.com again, you can stop everything with only one command:
>docker-compose down

Which will remove everything, even the network, for you. Pretty awesome! At this point I just want to provide the link to the official documentation to you. Just take a look into it, if you have to do more fancy stuff like this. But I would say that this tutorial covers the most use cases.
Summary
Yeha – Just another part and a bunch of new docker knowledge gained. Today we‘ve seen a solution to start and stop multiple Containers at once and also had a look on how to build depdencies between those Containers. If you have problems or questions, feel free to ask in the comments. I will give my best to answer them.
You should also make sure to follow me, to never miss new content.
Thank you and Best regards!