Welcome to Lesson 6!
Creating accounts in Steemit has been one of the biggest issues why a lot of users tend to leave the platform even without starting to post. Their account signups took too long. Personally, it happens a lot here in our community in Cebu City, Philippines and the reason why we keep losing quality content writers.
Luckily I found this amazing service by @pharesim : Steeminvite where anyone can create account instantly. It only costs you 0.1 STEEM. Only that there's a required SP delegation of 14.5 Steem Power to make the account capable to post (bandwidth limit issues).
In case you missed my previous lessons, feel free to smash to links below :
Steemit Lesson 1 : The Best Way to Power-up Your SBDs
Steemit Lesson 2 : What are Cryptocurrencies? Blockchain?
Steemit Lesson 3 : How Do We Transfer Our Tokens from Our Wallet? A Guide to Account Transfers.
Steemit Lesson 4 : A Guide to Understanding Steemit's Different Passwords (Keys)
Steemit Lesson 5 : Withdraw your Earnings Using Blocktrades

Design credits : @rayhan97
In this lesson, I aim to provide you a Step-by-step process on how to create an account using Steeminvite, an amazing service run by @pharesim. From the word itself (invite), this will really be helpful when you invite a Steemian to join. The account will be created instantly once you have completed the process.
For you to create an account, you need to prepare the following :
- Steeminvite website
- Your Steemit account with atleast 0.1 Steem Balance
- The email address of a friend you want to invite.
Let's Start.
Visit Steeminvite website.
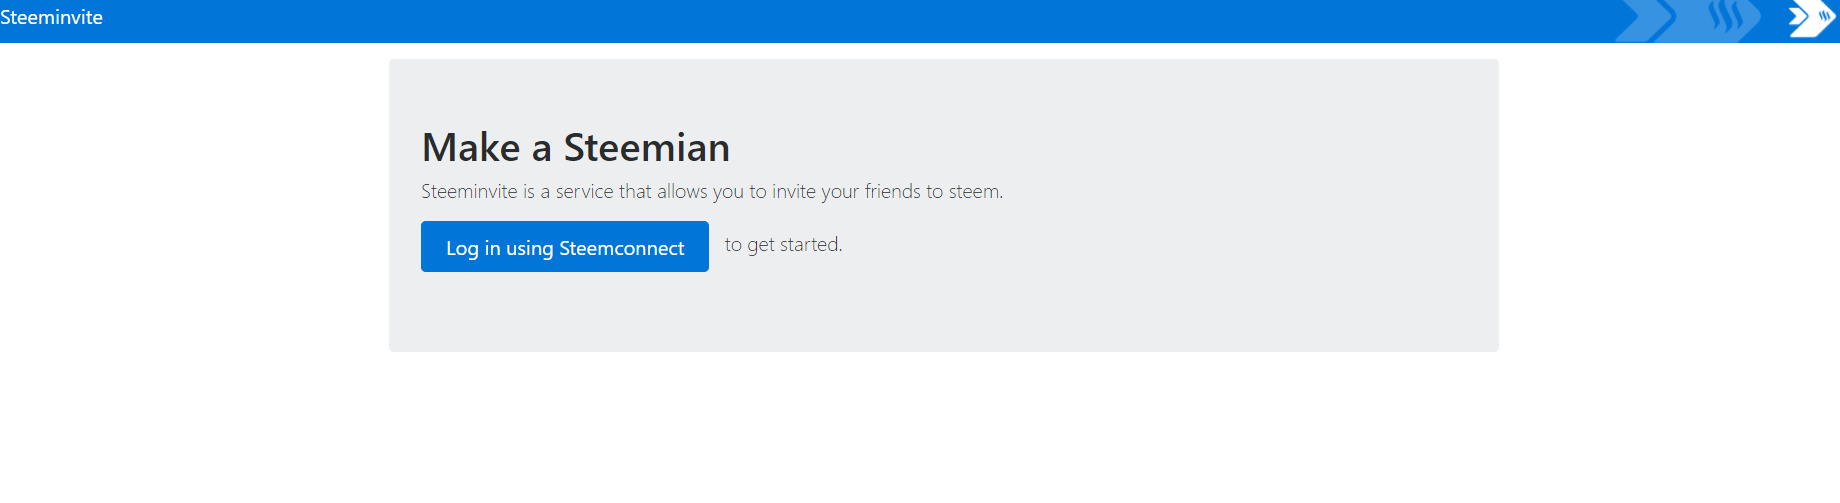
From the word itself, it lets you make a Steemian. Click on the blue button "Login using Steemconnect. Use your posting key in logging in. They need to have your posting key for them to be authorized to create an account and to get the 0.1 Steem as a service fee.
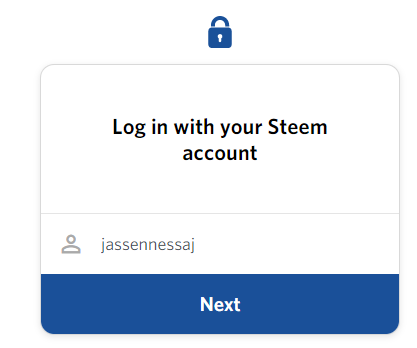
Enter your username, then you will be asked for your Posting WIF/Key, paste it to login.
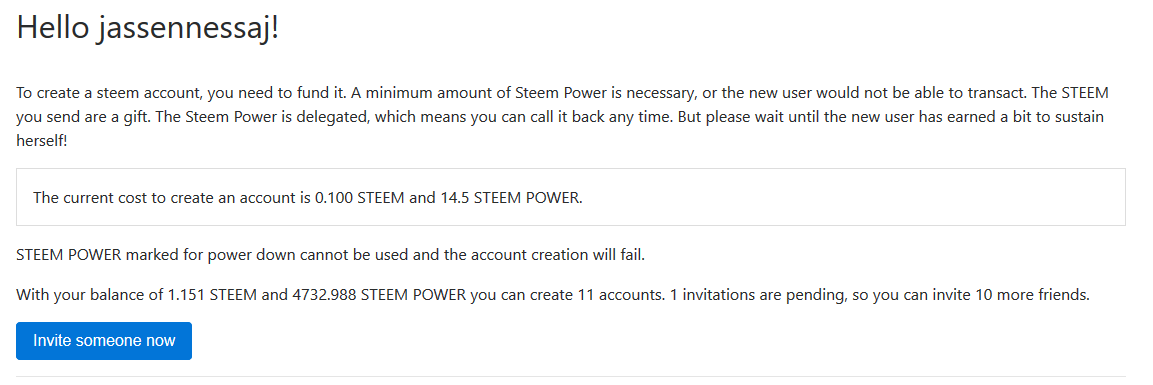
You will then be redirected to the main page. You will see how much Steem do you have and the number of friends you can invite based on your Steem balance and Steem Power on your account. Click the Invite someone now when you want to invite someone.
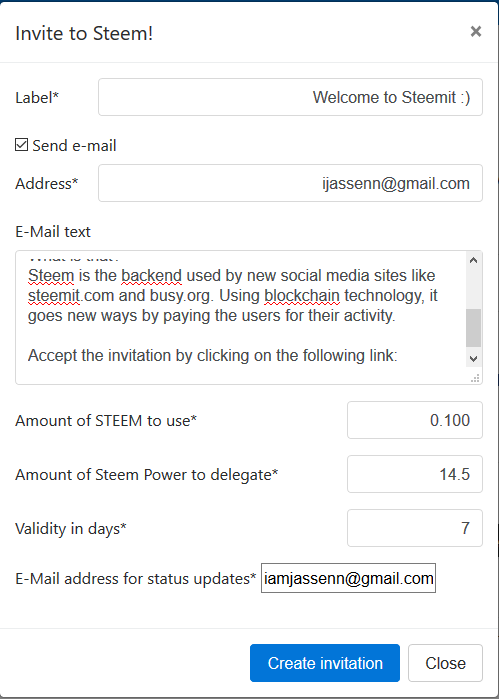
You will then be required to fill-in the required details to completely invite a Steemian. Let's tackle each labels required to fill-up.
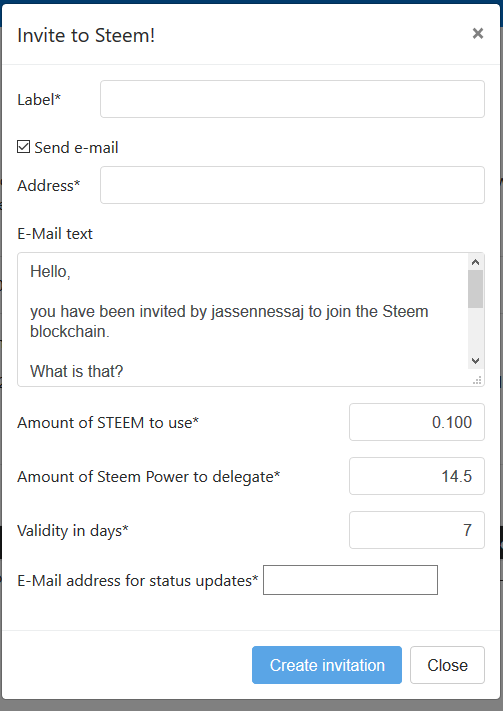
- LABEL - Is your message to your invited friend/user. This doesn't affect the signup. This is basically like a memo.
- Address - The email address of your invited Steemian. Place his/her email address for him to receive an Invitation link.
- Email Text - This will auto message. You can edit it if you want.
- Amount of STEEM to use : the minimum Steem is 0.1.
- Amount of Steem Power to delegate : The minimum Steem Power is 14.5 SP.
- Email Address for Status Updates - Your email address to be notified if someone accepts your invitation.
- Validity in days : The number of days your invitation will be valid.
Then click "Create Invitation". I have a sample filled-up copy of the invitation form
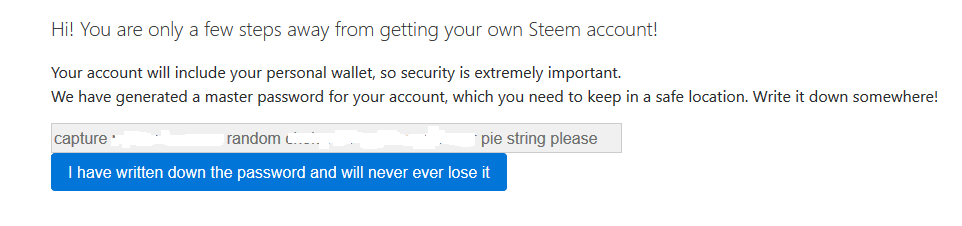
Wait for your friend to click the invitation link in the email. He needs to click the link.

HE NEEDS TO COPY the 12 Word Phrase
He needs to copy it because he will be required to input it on the next phase.
Input the Desired Username

Paste the 12 Word Phrase

The Account Registration is Done!
The invited user needs to copy all of the Keys/Provided by the website. Secure a copy of it, make sure you grabbed the copy and saved it to your most secured location. He will be provided four keys : The Owner , Active, Posting, and Memo Key. To understand what they are, I made a post about it. Feel free to click this link.
We have a New Steemian NOW :)
I hope this tutorial helped you in understanding the process of Steeminvite. Don't forget to Smash that Upvote and Resteem button!. Steem On :)
