When I switched from WordPress to Steemit, it took me a while to get used to the Markdown's formatting syntax. Then I looked into the styling guide a couple of times and made a list.
Here it is:
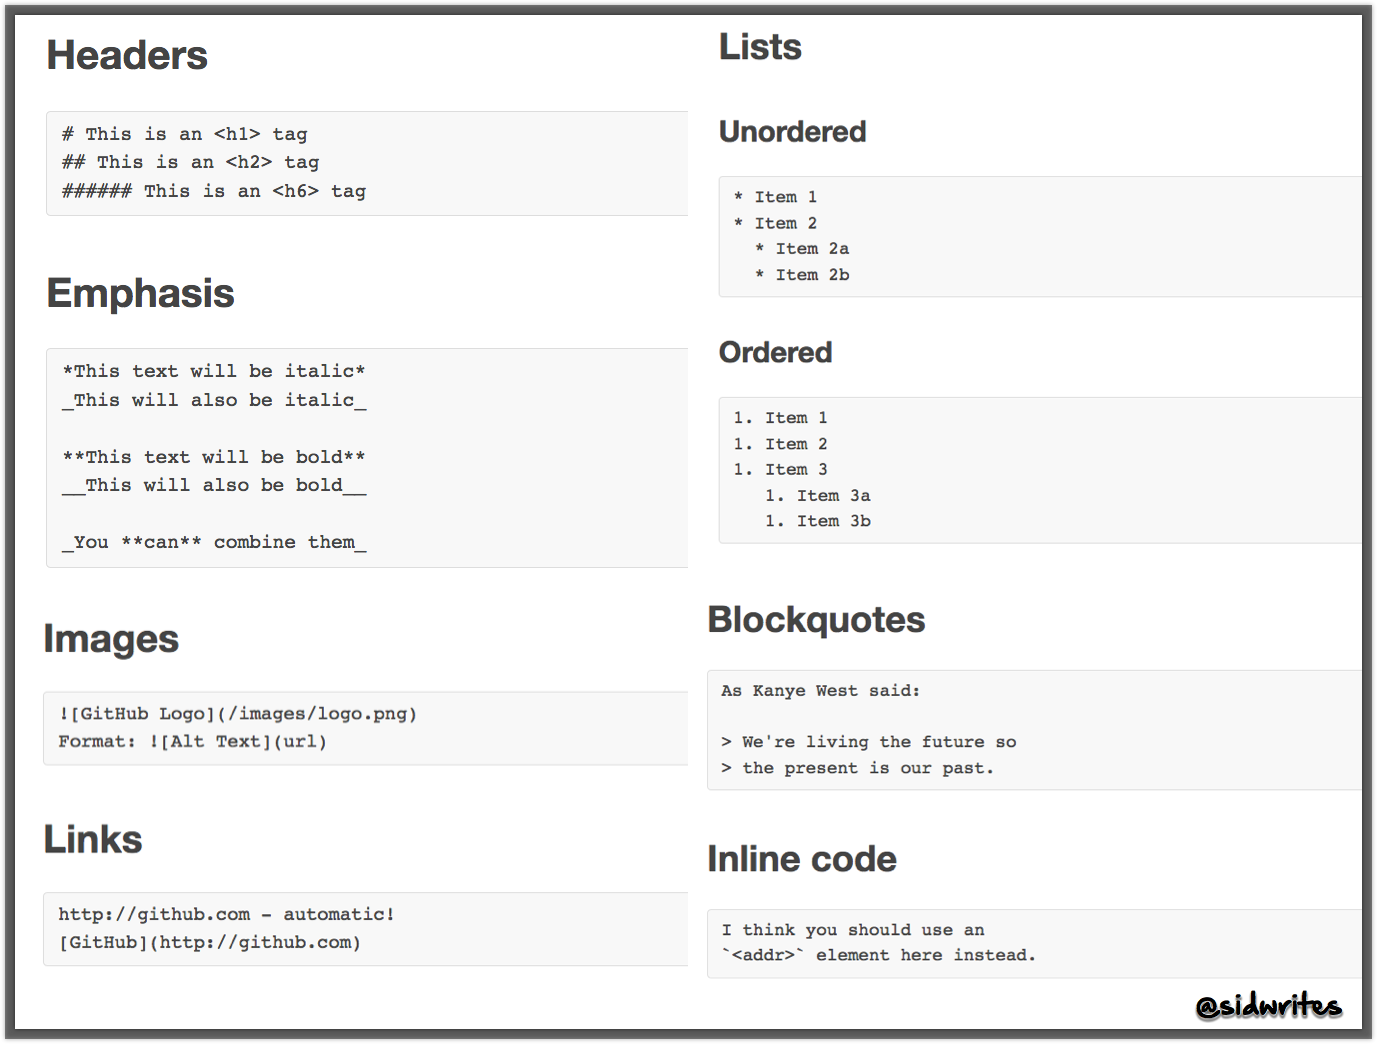
Note: You can save the image above for your future reference.
The above formatting list should be more than enough. Yet besides these, I have discovered 3 more tricks that are worth remembering.
And using them adds variety to your next post.
To start with:

By default, every image uploaded to Steemit's editor is positioned to the left. And you can change that — center it — using tags.
I first discovered this this trick last night through @razvanelulmarin.
How to do it:
- Upload the image to the Steemit editor.
- Type
<center>before the image. - Type
</center>after.
This way your image is centered. You can also center a sentence or a word using this trick.

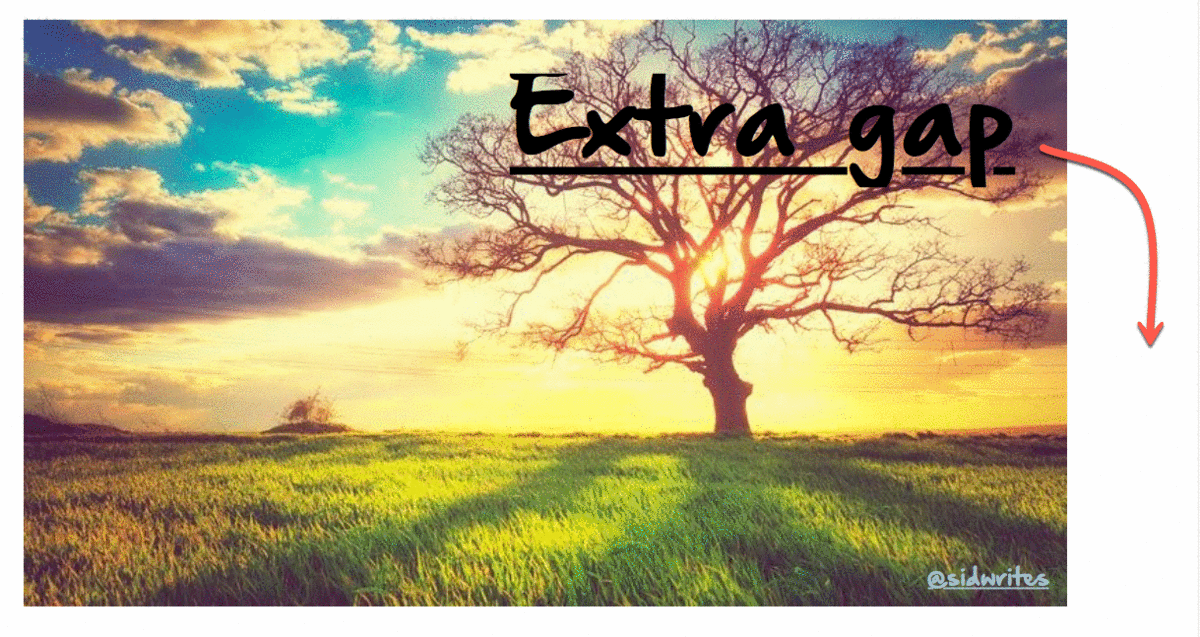
Why draw a line?
To make your article readable. Here is an example:
After the sub-heading, I have added a line. This necessary space makes reading easier. In HTML, this line is called Horizontal Rule.
How to do it:
- Open your Steemit editor
- Type
---anywhere
Three dashes is all it takes.
Update: As @marcusxman points out in the comment, you can also use *** or ___.

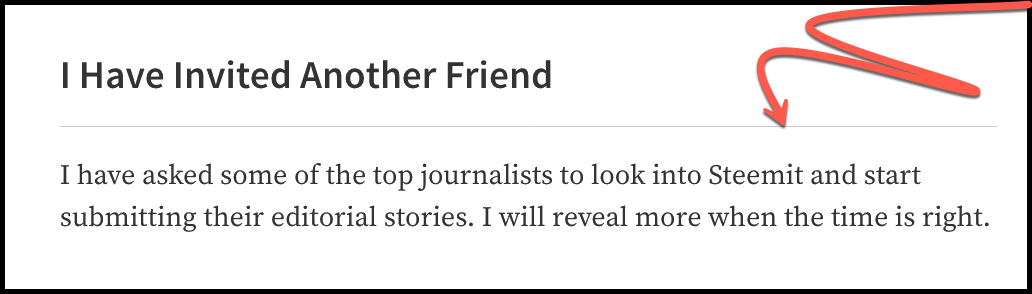
I do this occasionally. In fact, you may have seen me doing this in my previous post. Reason is simple: I like variety.
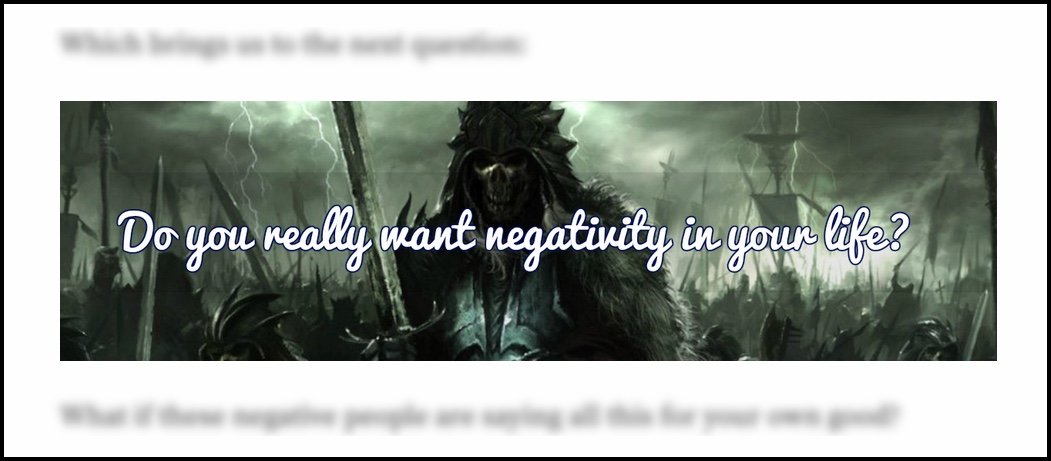
Because when our articles are longer, we may lose our reader. And that is why variety is important. Using image as a header is one useful choice, and certainly a great way to grab your reader's attention.
Throughout this post, as you may have noticed, I have used images as sub-headlines.
How to do it:
Method 1:
- Open Google Docs / Word / text editor
- Write and customize the text
- Capture and save the screenshot of this text
- Upload the screenshot to your Steemit editor
Method 2:
- Open any online image editing tool (I use BeFunky)
- Change the background image (optional)
- Write and customize the text
- Save the image on your computer
- Crop the image and upload to your Steemit editor
For the above image you see, I used Method 2.
There you have it...
Three simple formatting tricks you can use in your next post.
Hope it serves you well.
And I hope you found this tutorial useful. Let me know your thoughts through the comment section below.
And if you like this post, do consider upvoting and resteeming. Thank you!
Cheers,
Sid