Welcome steemit educators! This is the second next post in "Teaching Physics". Our topic is the air and how we can teach basic properties through safe and simple experiments that work perfect for primary school children.
In the first post we saw three experiments that prove that the air has volume and mass. In this post we're doing three experiments to prove that the air is a mixture and it contains water and Oxygen. My helpful trolls are giving me a hand as well, thank you trolls!
OBJECTIVES
Teach that the air is a mixture and it contains : a) water (Experiment 1), b) oxygen (Experiments 2 - 3).
As we've already mentioned, in primary school we don't want to overload our students with details and difficult to understand concepts. We aim to build strong basic concepts for the future and show them how an experimental process can be (although we might do it in a very simple and "primitive" way), we want to spread the seed of curiosity and make our children love science or at least make it interesting for them.
Children may find it hard to perceive the fact that the air we can't see or touch is basically something material, we can weigh it, trap it in any kind of container or use it even as fuel (remember the trolls' "air-fueled" car from the science fair entry?).
DETECTING FORMER KNOWLEDGE
We remind our students the conclusions from our last experiments, that the air: a) has weight, and b) has volume (takes up space).
Then it's time to pose our questions related to the new experiments we're doing, like:
-What's inside the air?
-Can you see it?
-Can you smell it?
-Can you taste it?
These are questions that based on their sensory experience, the children won't be able to answer properly. So, when you come to tell them that the air we breathe is a mixture and consists of many different substances like water and oxygen and these substances work for very specific processes to maintain life on earth the way we already know; the students' knowledge and experience will come to contradict our sayings.
But let the fun begin and start with the first experiment...
EXPERIMENT 1
The air has water even though we can't see, feel or drink it.
Materials:
- An empty glass bottle
- A freezer
- A dry towel
Procedure:
- We show the children the empty bottle (the cap must be on) and put it in the freezer for 15-20 minutes.
- We take it out, wipe it carefully with the towel and leave it on a table.
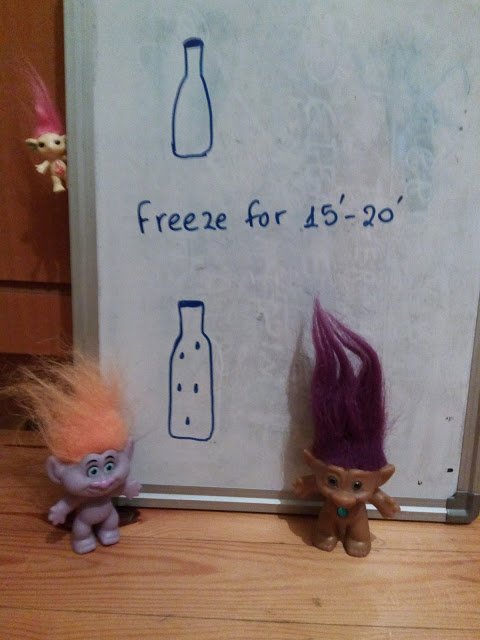
After a while (depending on the room temperature) we'll see drops of water forming on the outside walls of the bottle.
Conclusion: There is water in the air (in the form of vapor) which we cannot see or feel, but when it comes in touch with the cold bottle the water becomes liquid again.
Further reflection based on everyday life: a) This is what happens to our cold refreshments when we leave them outside of the fridge, it's not liquid that manages to escape our glass or can an drip off, it's the water in the air.
b) Why our home or car windows start dripping from the inside in winter? Because the outdoor temperature is very low and the indoor is higher, therefore the cold glass makes the water vapor in the air turn to liquid droplets.
EXPERIMENT 2
The air has oxygen, it's what keeps us alive and it's there even though we can't see or smell it.
Materials:
- a plate
- a transparent glass
- a candle
- a lighter or matches
- some play dough
- watercolor
Procedure:
- Use the play dough to make the candle stand on the plate (put it in the middle).
- Pour some water into the plate.
- Pour some watercolor in the water (we want the results to be clearly visible, that's why it's preferable the water to be colorful.
- Light the candle.
- Put the glass (upside down) over the candle (be careful not to put the flame out and use some play dough on the glass' rim so that it won't block water from getting in).
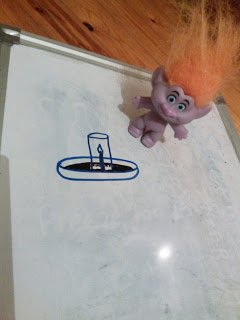
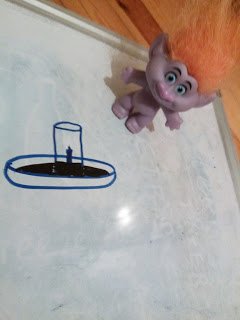
After a while the candle will go out and the water level in the glass will slightly rise.
Conclusion: There is oxygen in the air that is used to "fuel" the fire. During the burning process the oxygen in the glass is used up, the pressure inside the glass lowers and water gets inside pushed by the outside air pressure.
EXPERIMENT 3
The air has oxygen, it's what keeps us alive and it's there even though we can't see or smell it.
Materials:
- a plate
- a transparent glass
- tape
- steel wool pads (soap-less)
- water
Procedure:
- Dip the wool pad in the water and then drain it.
- Put it in the glass (fix it so that it won't fall off).
- Use some tape for extra hold.
- Fill the plate with water.
- Put the glass (upside down) in the plate.
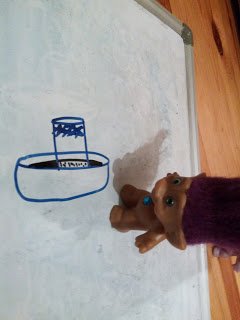
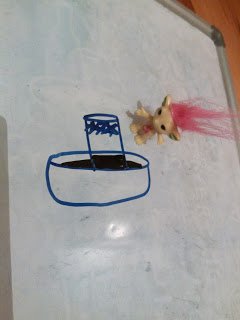
After a couple of days the steel wool pad will get rusty and the water level in the glass will get higher.
Conclusion: The oxygen in the air reacted with the pad and rust occurred. Since the oxygen was used up there was lower pressure in the glass. The water pushed by the higher outside air pressure got into the glass (it took up the oxygen's place).
References
Panagiotis Koumaras, "A guide to teaching physics through experiments" - Christodoulidis Editions (Thessaloniki 2005)
*All images by @ruth-girl

Thank you for reading my post, perhaps some of you will find it interesting and give those experiments a try. If you do so, please leave a comment on how they worked for you and your class. You may also want to suggest any other experiments or projects to make this lesson even better.
Perhaps you'd like to go through my blog and discover plenty of lesson plans along with my bizarre natural phenomena series.

Finally, for those of us engaging with education, @steemiteducation is here to join all steemian educators in their common cause of making our job easier, more effective and more fun, because...

(Original image credits: Nick Youngson - nyphotographic.com)
Thank you for your time and as I like to say,
Steem on and keep smiling, people! :)

