The Pommel type I designed , printed and cast in my previous post is an example of a design which was common in the late medieval period and in the renaissance. During the High middle-ages the ubiquitous wheel pommel was much more common.

Thus, for the second sword that I am working on at the moment I chose to make a wheel pommel. In its simplest form a wheel pommel is just a slice of round bar usually around 2 cm thick and 5 cm in diameter.
They can get a lot more elaborate than that but quite often they were not. They would often just be the basic wheel, sometimes with a bevel. I wanted something a little more elaborate and so decided to make a wheel pommel with a bronze inset.

The first thing i did was to take a favourite quote of mine and translate a slightly altered version of it into Latin. It is a quote attributed to the famous american gangster Al Capone who according to the internet said:
"Do not mistake my kindness for weakness .....". Whoever might have really said it I don't know ,but it is a nice quote and I have always thought that there is a great truth in this. For the Translation however I had to abbreviate it a bit, both to be able to fit it unto a fairly small area on the pommel and to make it sound better in Latin.
I went for "Misericordia non infirmitate", which translates to kindness is not weakness. It is brief and has a good ring to it I think.
I am not an expert in Latin so if any of you can spot an error in this I would be happy to hear about it, before I cast it in bronze and fit it to the pommel.
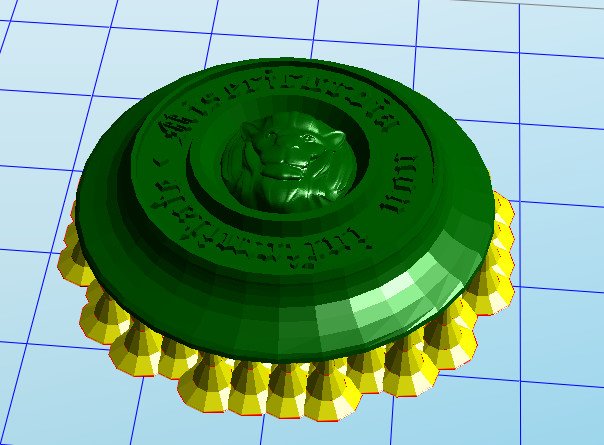
I used Inkscape to write the text, fit it to a round shape, and export it to svg which can be imported into blender

There I converted it to a meshobject, extruded it and fitted it to a cylinder which I then modelled using extrusions to have the desired shape.
I have discovered that blender has a feature for visualizing in the viewport with "fake" materials. It is located in the toolbar to the right of the 3d-window and is under shading. It is called matcap and is both nice because it gets easier to see whats happening, but also because it makes it possible to do nice visualizations without having to set up a render shot.
In this case I played around with the matte gold and silver material and the ambient occlusion modifier (located in the same space) to get these visualizations. (with a little postprocessing using Gimp )
I also added a small relief lion head that I made for something else earlier. That is one of the main advantages of 3d-modelling. The ability to change, resize and then reuse every single model as often as needed.
Then on to slicing. This would be my first print using my upgraded wanhao d7 and so it was a (very small) bit different from earlier. mainly the difference is that the slicing now takes a lot longer because it has to write every slice(in the form of an image) to disk, and it than has to be transferred to a usb-stick

Before I will show you the print, i have to show the other part of the pommel. It is just a thick disk of steel cut from an incredibly heavy and cumbersome piece of round-stock.
I do not have a steel chop-cutter (yet) so, when doing something like this I just use my trusty angle-grinder with a cutting disk. It is heavy going and takes some cleaning up afterwards but it is good enough for now.
I clean it up on my belt-grinder afterwards, and drill a round 6 mm hole through the middle.(I also do some forging to widen the hole to accept the tang but that is for a different post)

Then I was ready to start printing.
The first time was a failure because I had made the supports to thin, but second time, I got a very nice result. It is not perfect , but since it will be sandcast, the little imperfections are too small to be of any concern
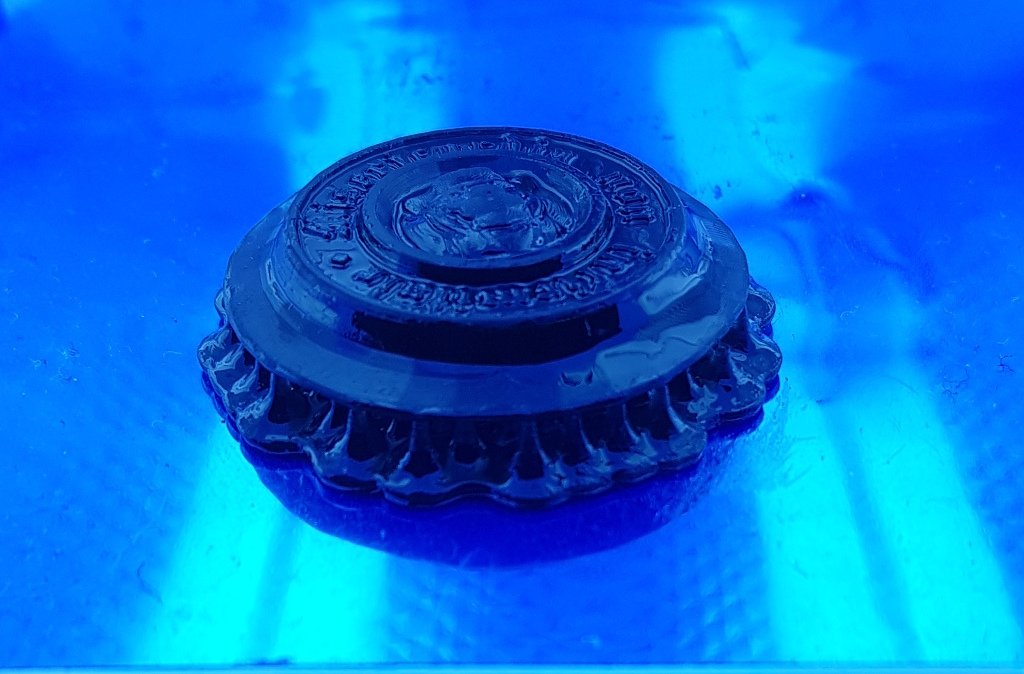
It was printed flat, but raised a bit from the built-plate to make it easier to remove without damaging it. I should have probably also slanted it a bit to make the resin escape from the surface easier. Maybe next time.
Then it went in the UV-oven, a fancy word for one of those lamps that are designed for curing UV-nailpolish. It is by far the cheapest way to get your hands on a UV-lamp, short of building your own. I actually suspect that the resin used in the 3d-printer is more or less the same as the one used for UV-nailpolish, there is a thought for all those makers :-)
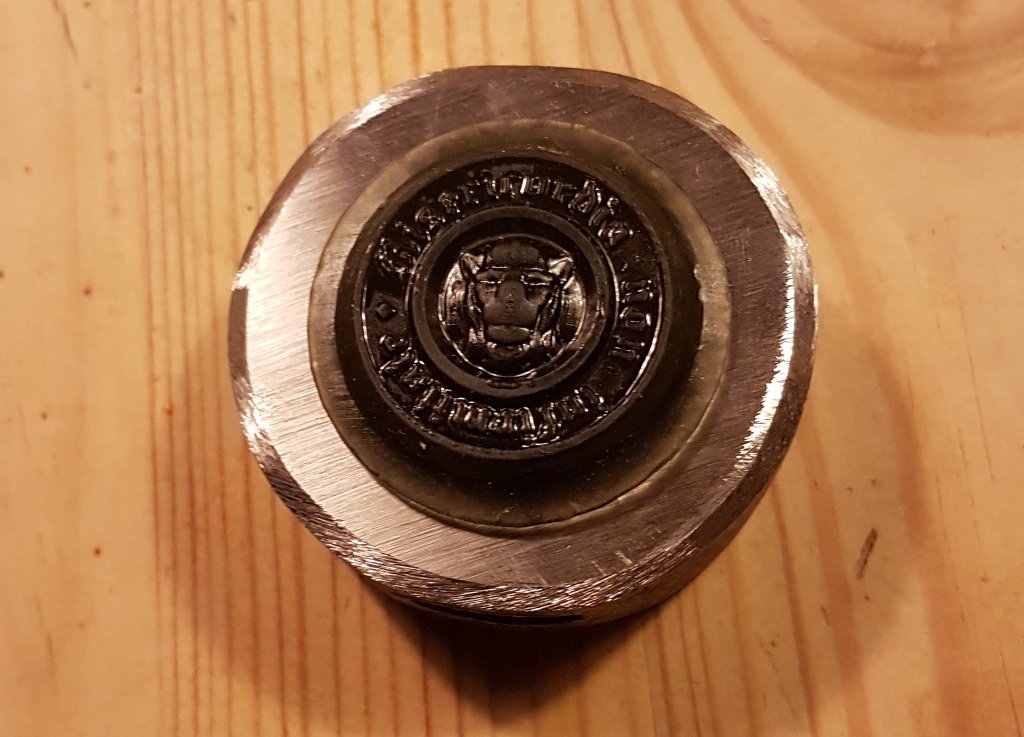
I dry fitted the plate to the pommel to see whether the size was right and it looks fine. Now I just have to think of a good way to mount it so it wont fall off during use.
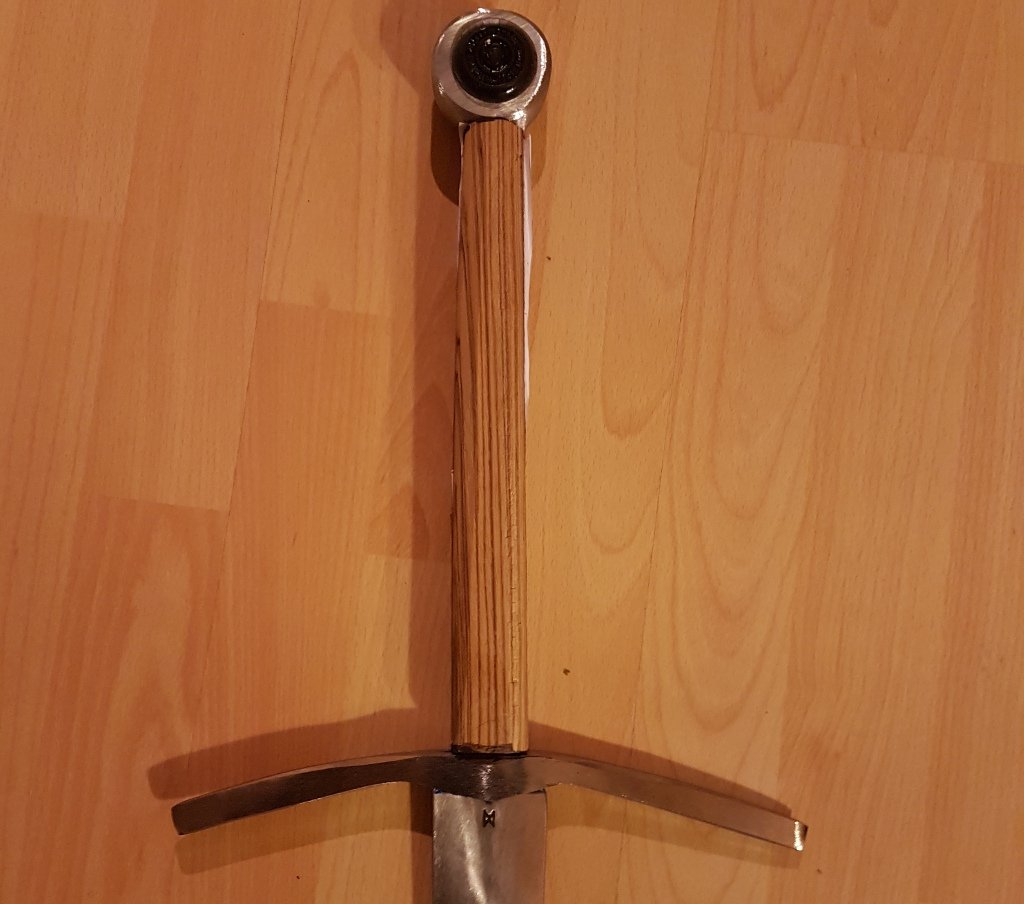
Lastly , an image of the pommel, mounted on the sword. I think this will look really good when made in bronze, and fitted permanently. What do you think?

Im EvilHippie, a compulsive creative and jack o' trades. If you want to know more about me, check out my introduction post here
If you like what you see, feel free to upvote, follow and resteem
or you can check out these recent posts
upgrade!
pommelcasting part 2
pommelcasting part 1
The grind
Male Model