----EZSTEEM 1.0-----
BACKGROUND
Continuing from my previous guides:
@omotherhen/omotherhen-s-one-click-script-for-easy-node-setup-on-a-linux-vm-support-the-backbone-of-your-community
@omotherhen/omotherhen-s-1-click-miner-scripts-for-no-effort-steem-linux-mining
I've decided to glue together all the bits and pieces of my previous scripts into one unified project, EZSTEEM. As a quickly growing project for an interactive all-in-one script, I and @gikitiki will now be working on EZSTEEM in tandem. EZSTEEM's objective is to simplify the deployment and operation of STEEM miners and STEEM nodes for any user, leveling the playing field to leave no STEEMIAN behind. Ongoing development will continue under the name of EZSTEEM, namely a simplified cli_wallet for all to use will be @gikitiki and my goal.
NOTICE
(If you already have Ubuntu 16.04 installed, skip to CHAPTER 2!)
WHAT YOU'LL BE USING
VMware Workstation 12.1.1 Player for Windows 64-bit operating systems
https://my.vmware.com/en/web/vmware/free#desktop_end_user_computing/vmware_workstation_player/12_0
Ubuntu 16.04 Server 64 Bit
http://releases.ubuntu.com/16.04/ubuntu-16.04-server-amd64.iso
A Windows 64-Bit Computer
CHAPTER ONE: SETUP A VM TO RUN THE MINING SOFTWARE
- Download and install VMWare Workstation Player
- Download Ubuntu 16.04 Server 64 Bit
- Open VMware Player
- Press Ctrl-N
- For Installer Disk Image File, browse to where you downloaded Ubuntu 16.04 and double click on that file.
- Click Next
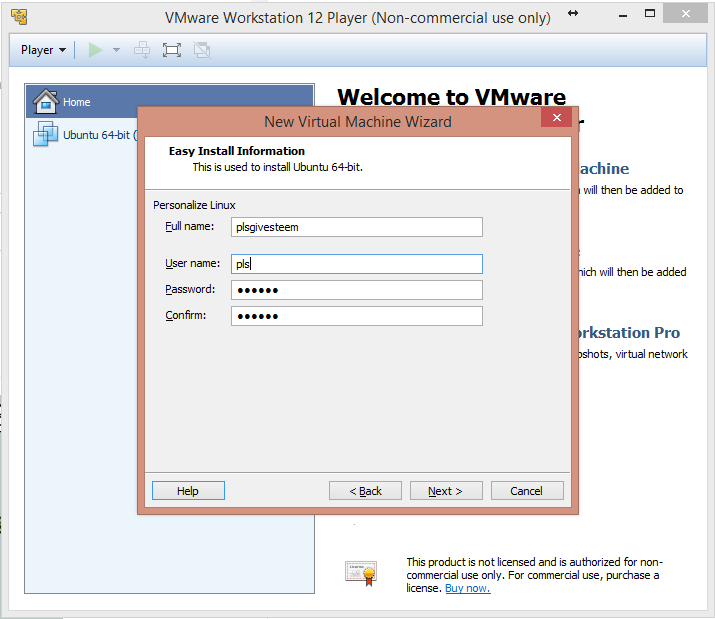
- Fill out the resulting boxes, the Username and Password will be used to log into Ubuntu.
- Click next twice
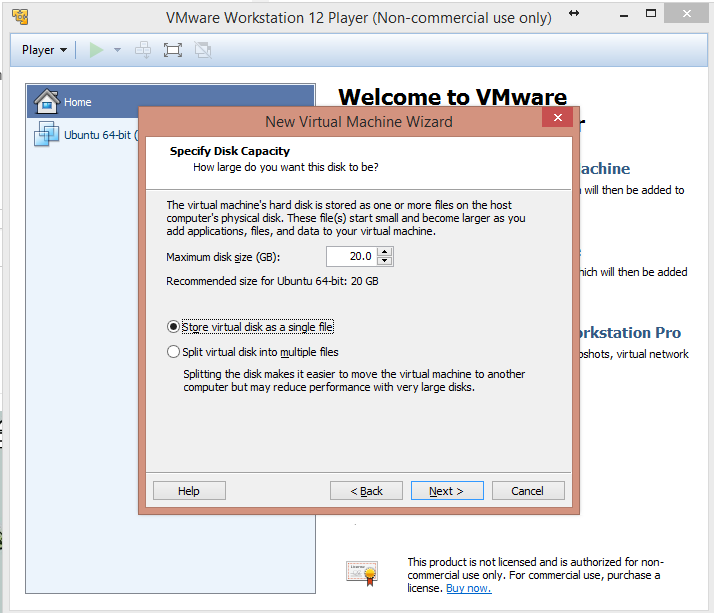
- Select "Store virtual disk as single file"
- Click next
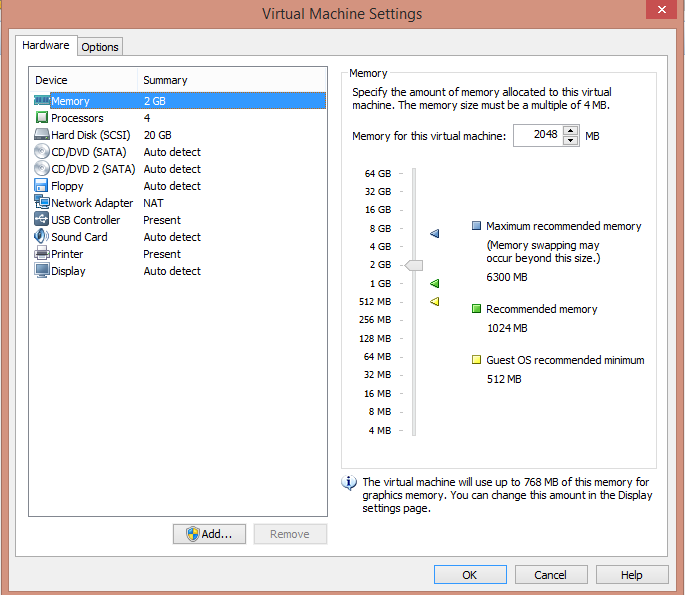
- Press Customize Hardware
- Make sure you enter at least 2GB of ram for the VM
 ]
] - Make sure you specify the amount of threads you want the VM to use. If you have a processor with hyperthreading, Ex (An i7), you will have twice as many threads than physical cores.

- Click Close
- Click Finish
- VMwarePlayer will do its thing for setting up your VM enviroment..
- Whenever it prompts you to install VMware-tools, click OK
- If it prompts you to update keyboard interrupt values, click OK
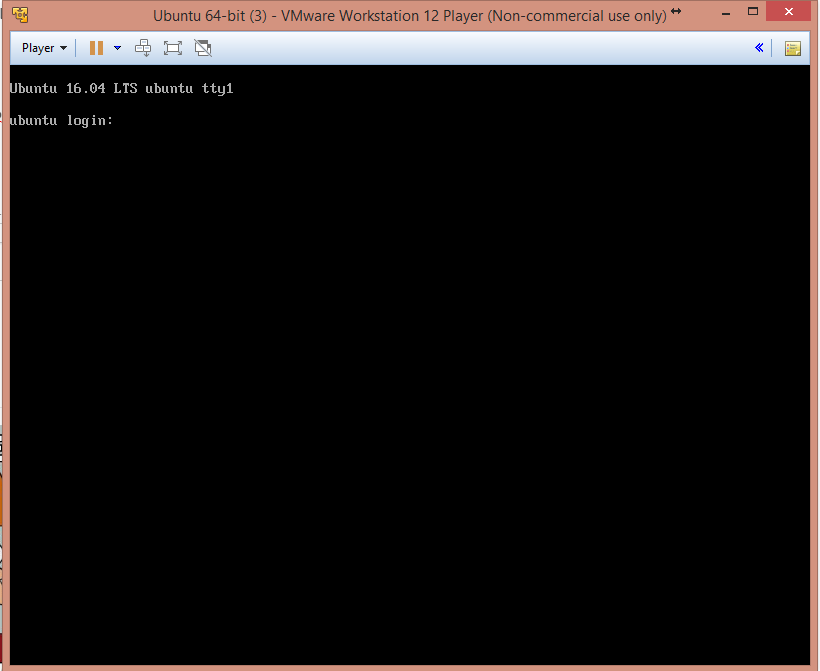
- Wait until you're greeted with a login prompt
CHAPTER TWO: RUN THE SCRIPTS AND WATCH THE MONEY FLOW
- Login with your previously setup Username/Password
- Brainlessly type (no copy paste!) in the commands below, you have better things to worry about!
- When prompted for a password, enter in the same password you used to login at first!
sudo apt-get -y install git
cd /var
sudo git clone https://github.com/omotherhen/EZSTEEM/
cd EZSTEEM
sudo bash EZSTEEM.sh
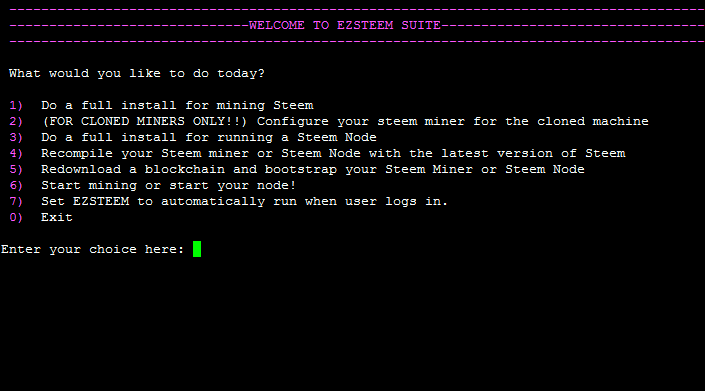
OPTION 1) Do a full install for mining Steem
- This option does a full install and setup of EZSTEEM Miner, an auto configured miner for those who have not mined before
- When asked for setting a directory, if you do not know just press ENTER, a default directory will be made
- After the install is finished, your STEEM Miner will launch automatically and begin mining STEEM for you!
- If the screen goes black, hit BACKSPACE. It's just a screensaver for command line!
- And now watch the fireworks until you're greeted with a prompt to enter in the number of mining threads.
- Enter in how many STEEM accounts you want to make, the more mining power you have, the more accounts you'll want so that you do not waste time waiting in queue. If you do not know, 4 accounts is a good start.
- Enter in the names you'd like for each account
- That's it! The script will do the rest of the work for you. You're done setting up your first Linux miner in a VM!
OPTION 2) (FOR CLONED MINERS ONLY!!) Configure your steem miner for the cloned machine
- Use this option when in CHAPTER 3
OPTION 3) Do a full install for running a Steem Node
- Choose this option if you want to setup a Steem node in one click!
- When asked for setting a directory, if you do not know just press ENTER, a default directory will be made
- After installation, your Steem node will automatically run!
OPTION 4) Recompile your Steem miner or Steem Node with the latest version of Steem
- Use this option if you have cloned a machine in CHAPTER 3 and the miner is not running properly.
- Use this option if a new steem update rolls out, and you want to recompile your miner/node to the latest stable version
OPTION 5) Redownload a blockchain and bootstrap your Steem Miner or Steem Node
- Use this option after option 4 if your miner/node does not sync properly with the blockchain
OPTION 6) Start mining or start your node
- After a reboot/recompile/shutting down steem, use this option to start up your node/miner again
OPTION 7) Set EZSTEEM to automatically run when user logs in
- Use this option if you want to run EZSTEEM on reboot, strongly recommended!
OPTION 0) Exit the script
- Exits EZSTEEM
CHAPTER 3: DEPLOY YOUR IMAGE ACROSS MULTIPLE COMPUTERS
ON THE SOURCE COMPUTER
- Back on windows, open up File Explorer
- Enter this into the explorer bar and hit Enter C:\Users%USERNAME%\Documents\Virtual Machines

- Copy the Ubuntu 64-bit folder to a USB device to transfer it on another computer
ON THE DESTINATION COMPUTER
- Put the Ubuntu 64-bit folder that you copied earlier on the computer
- Download and install VMware Player on the computer
- Open VMware Player
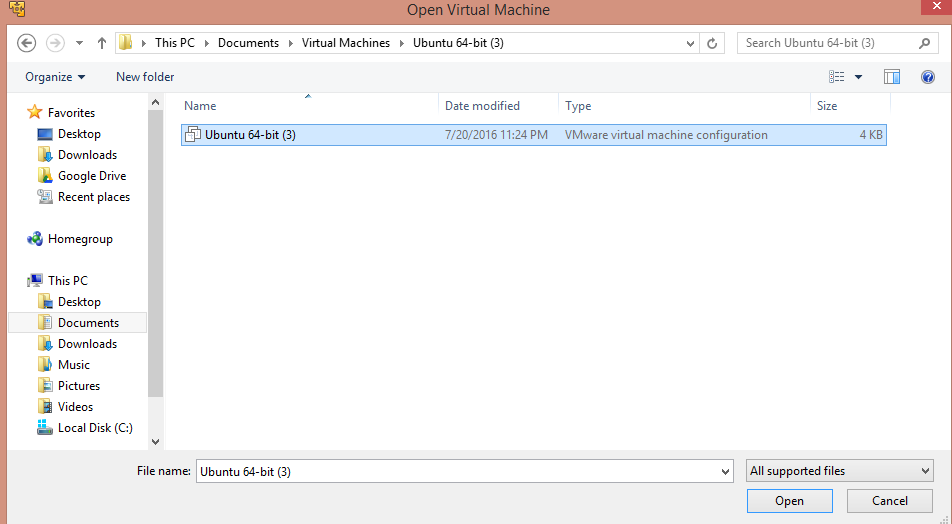
- Press CTRL+O
- Navigate to the folder you copied the Ubuntu 64-bit folder to and double click on the resulting file
- Right click on the following VM that pops up and click on settings
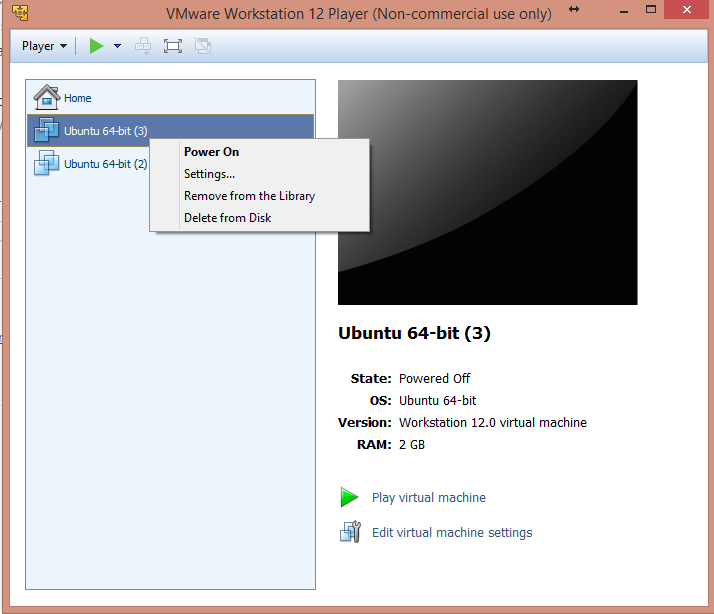
- Set the memory and processors to the desired values for this computer just like before
- Click OK
- Start the VM by double clicking on the name of it
- Enter in the following command
cd /var/EZSTEEM && sudo bash EZSTEEM.sh - Choose option 2!
- Enter in how many threads you set the VM to, and you're done!
- Keep repeating Chapter 3 to however many computers you'd like
- If the CPU in the cloned computer is much different, the miner may not work
- In case, you will have to recompile the miner and possibly refresh the blockchain
NOTE
- Whenever you power down a VM, shutdown the mining software within it first by pressing CTRL-C and waiting for it to finish
- Then you can click 'X' on the VM window and shutdown
- To startup EZSTEEM again, enter in this command : cd /var/EZSTEEM && sudo bash EZSTEEM.sh
- Then you're off the races once again!
AND FINALLY.....
Please leave feedback in the comments, I'll be happy to update my scripts/guide for more functionality based on your feedback!
If this guide helped you, please vote for me as a witness and follow me on Steemit! Have any problems/questions? Ask in the comment section or in the Steem Slack! #steem #linux #ezsteem #vm #steemit #guide #miner #allinone #node #script #opensource #github #ui #cli #easy #steemithelp