Saludos mis queridos amigos de Steem Kids. 💜🎨
Me complace presentarles mi séptima publicación en la comunidad como Tutora de Dibujo Digital. Mediante mis lecciones de dibujo, les estaré enseñando y guiando en el maravilloso mundo de colores, en base a todo lo que he aprendido autodidácticamente. ¡Espero que sea de su agrado mi trabajo y que aprendan mucho!

¿Eres nuevo en el dibujo o ya tienes experiencia? Mi querido estudiante, igual puedes participar en esta lección y aprender cada día mas, porque “No necesitas ser un experto para ser un gran artista” – Rui Torres.
Hoy les presento mi sexta lección, relacionada con la Aplicación de Dibujo Ibis Paint X, la que estaré utilizando para las lecciones y será la mayor protagonista de las mismas. Puedes descargarla mediante el siguiente link: Ibis PaintX

En la lección anterior tuve la oportunidad de leer, apoyar, comentar y dar la respectiva retroalimentación, a la tarea para el hogar de la siguiente alumna:
| Estudiante | Link de la Tarea del Hogar | @madilyn02 | Publicación |
Mi alumna elaboró un hermoso dibujo digital muy colorido utilizando las herramientas de reglas explicadas. Te invito a ver y apoyar su hermosa publicación. 💜🎨
¡Ahora sí! Comencemos con esta lección.

Herramienta "Regla de Simetria"
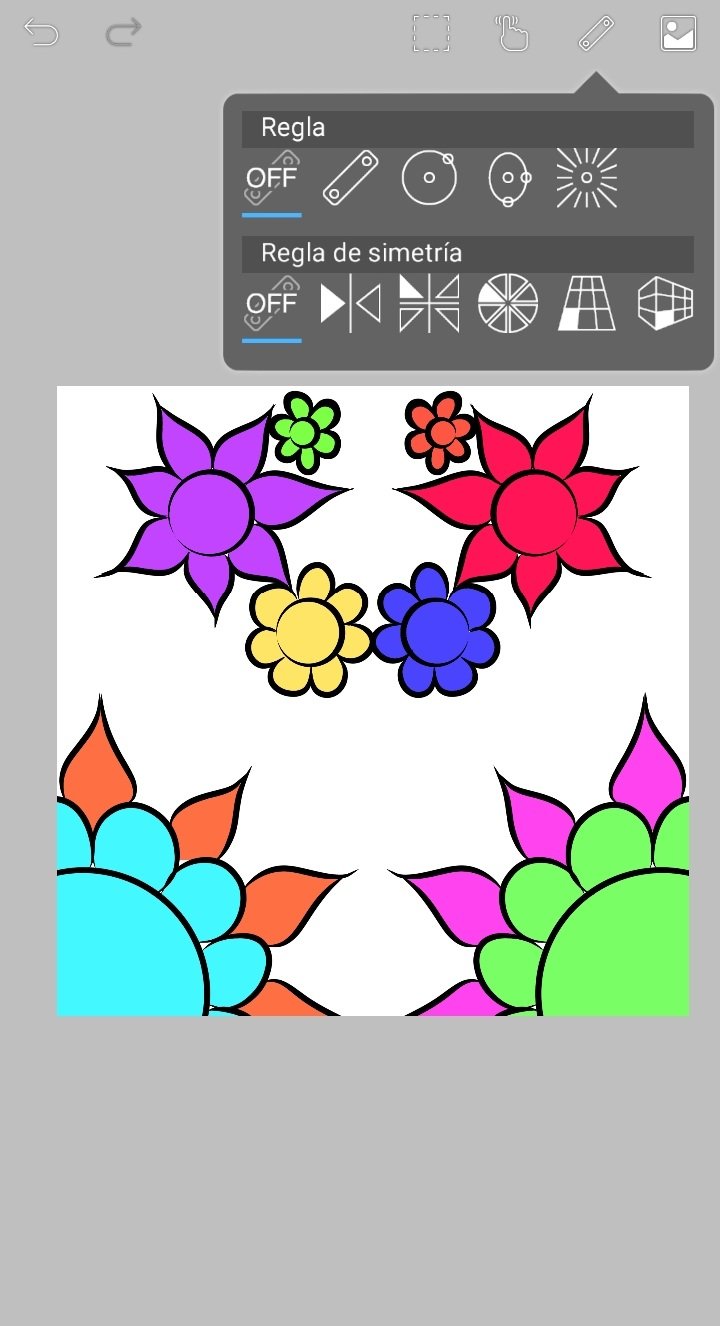
Son un conjunto de reglas o plantillas que nos permiten elaborar dibujos simétricos en el mismo lienzo, es decir, dibujos exactamente iguales en determinadas zonas de nuestra hoja de dibujo. En Ibis Paint X esta herramienta está ubicada en la parte superior del lienzo, representada por una regla:
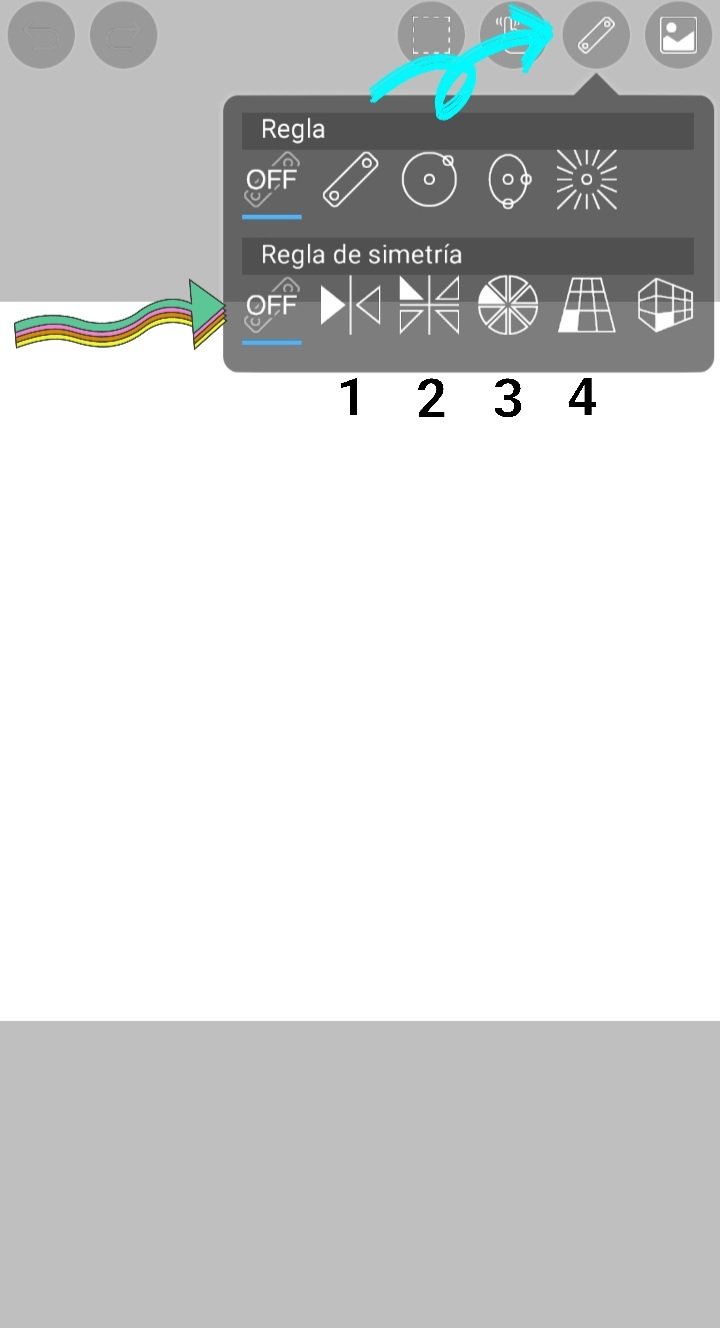
Al hacer clic en el mencionado ícono, aparecerá un menú en donde nos enfocaremos en las opciones de la parte de abajo titulada "Regla de simetria". Las herramientas que se encuentran arriba ya las explicamos en la lección pasada. A continuación defino cada una de las opciones enumeradas:
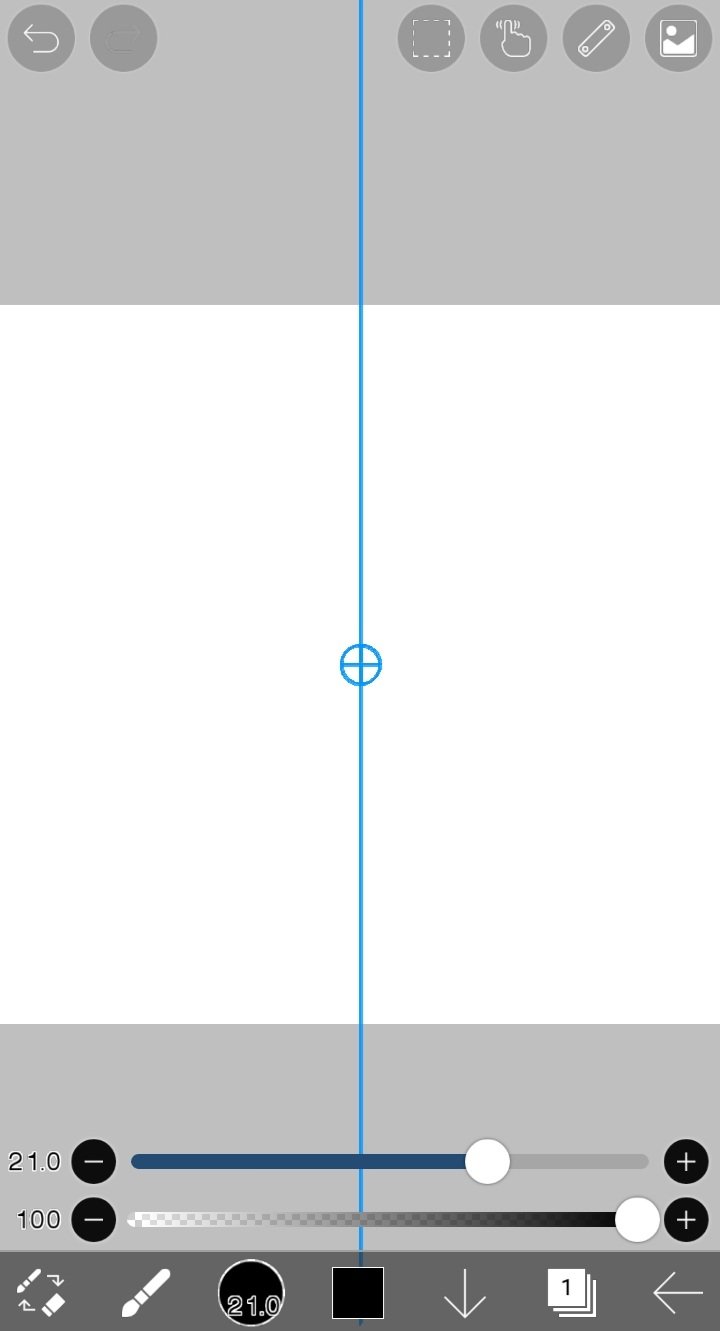
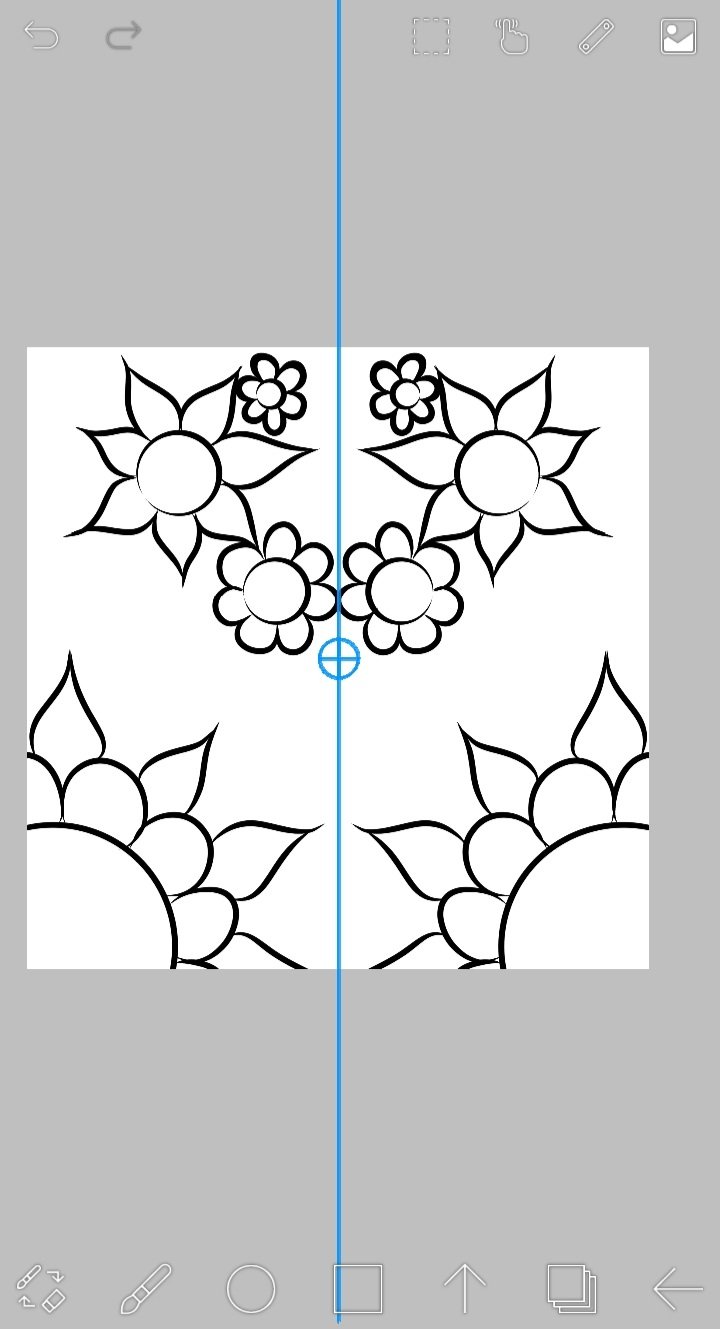
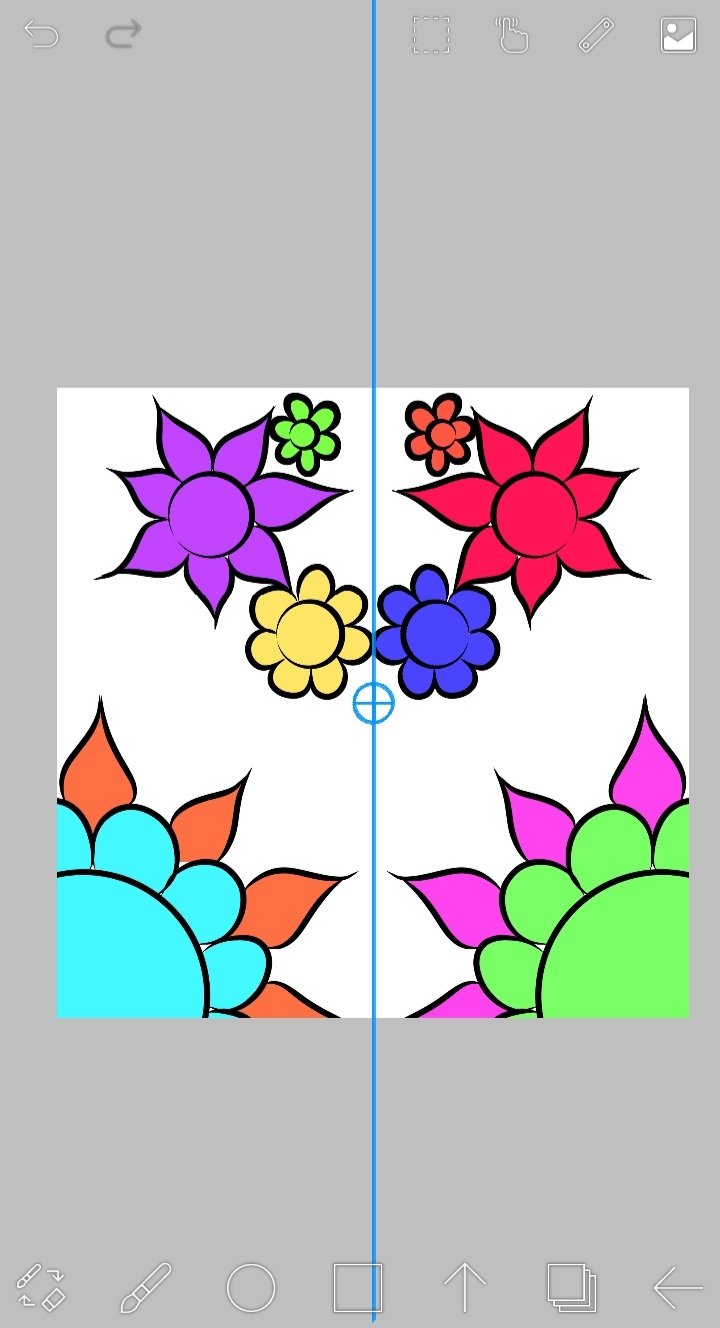
1. Regla de espejo: Al hacer clic en esta opción se habilitará en el lienzo una regla azul que divide el espacio en dos. Y cuando dibujes en un lado del lienzo, se repetirá el mismo dibujo del otro lado, simulando un espejo. A continuación te presento un ejemplo de su uso :
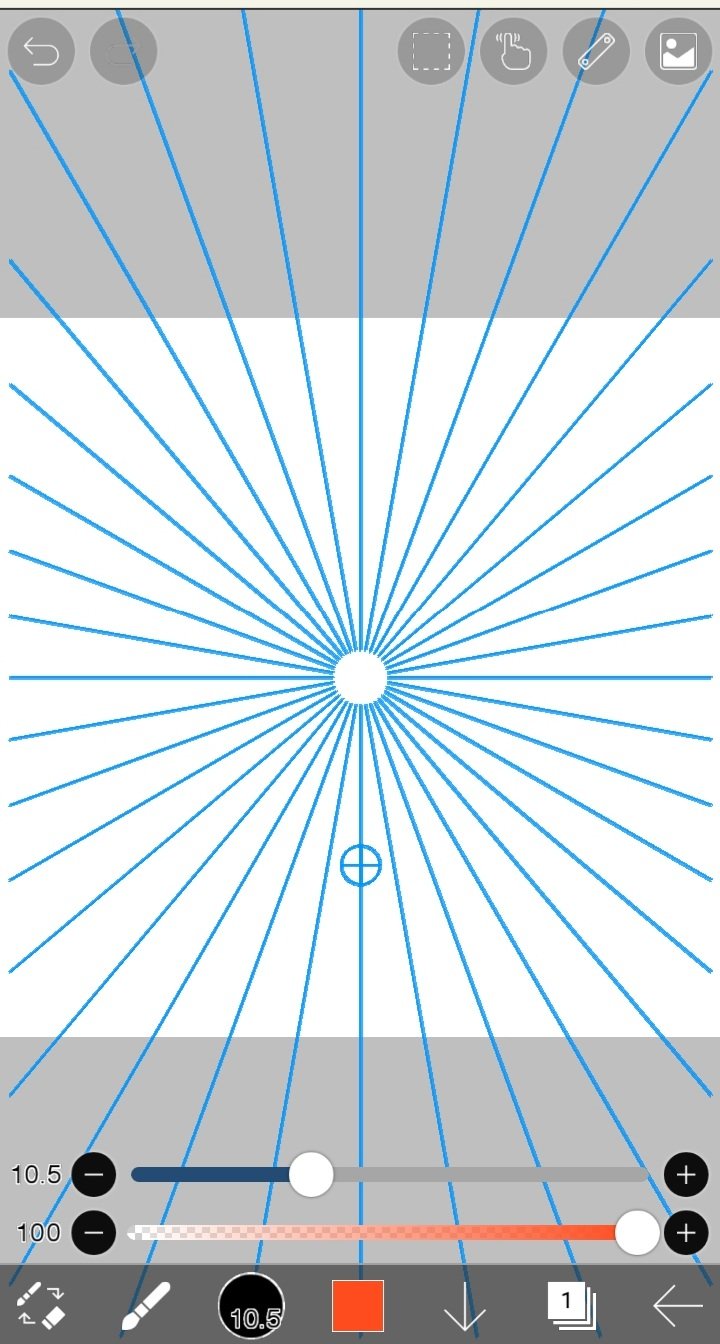
2. Regla de caledoscopio: Funciona igual que la regla anterior, solo que en vez de dibujar en modo espejo, presenta varias líneas tipo caledoscopio que repiten lo mismo que dibujes en cada pequeña parte del dibujo.
Puedes mover esta regla de la mismo forma que la anterior, y también es posible que juntes o separes más las líneas entre ellas, seleccionando el grado deseado en la barra "División".
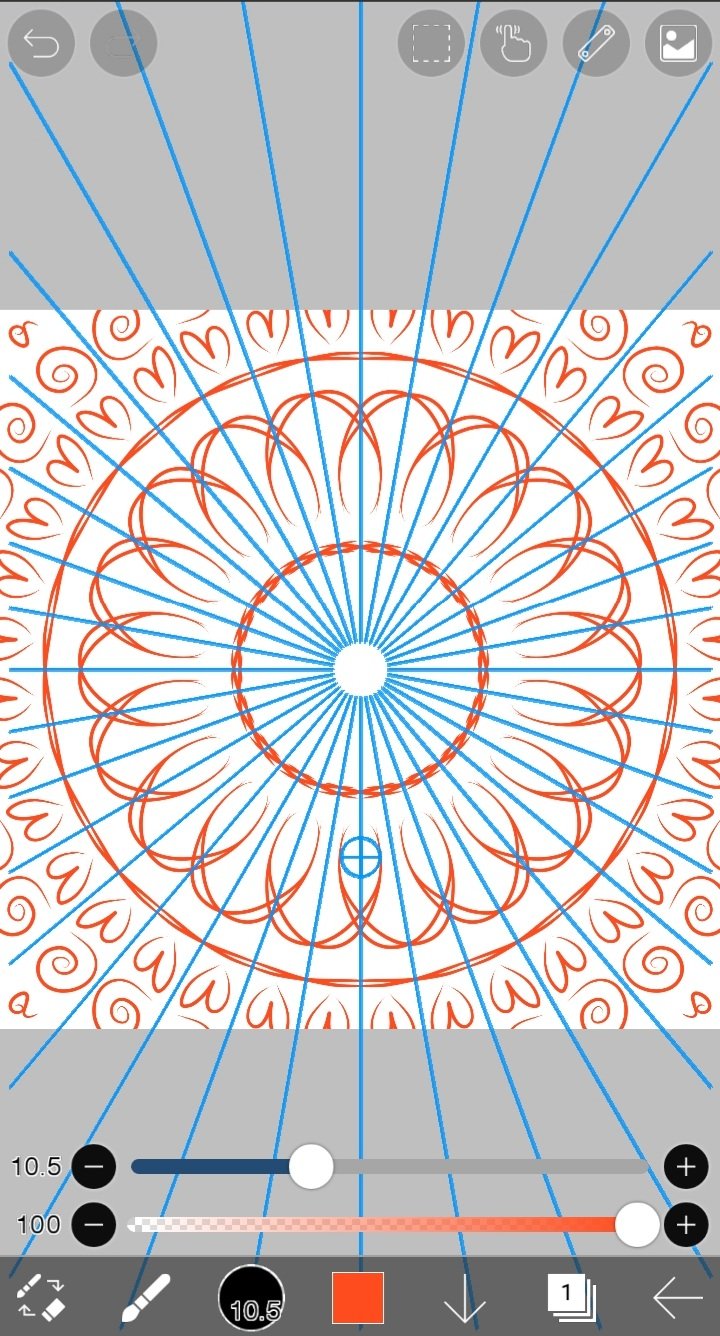
A continuación te presento un ejemplo de su uso :
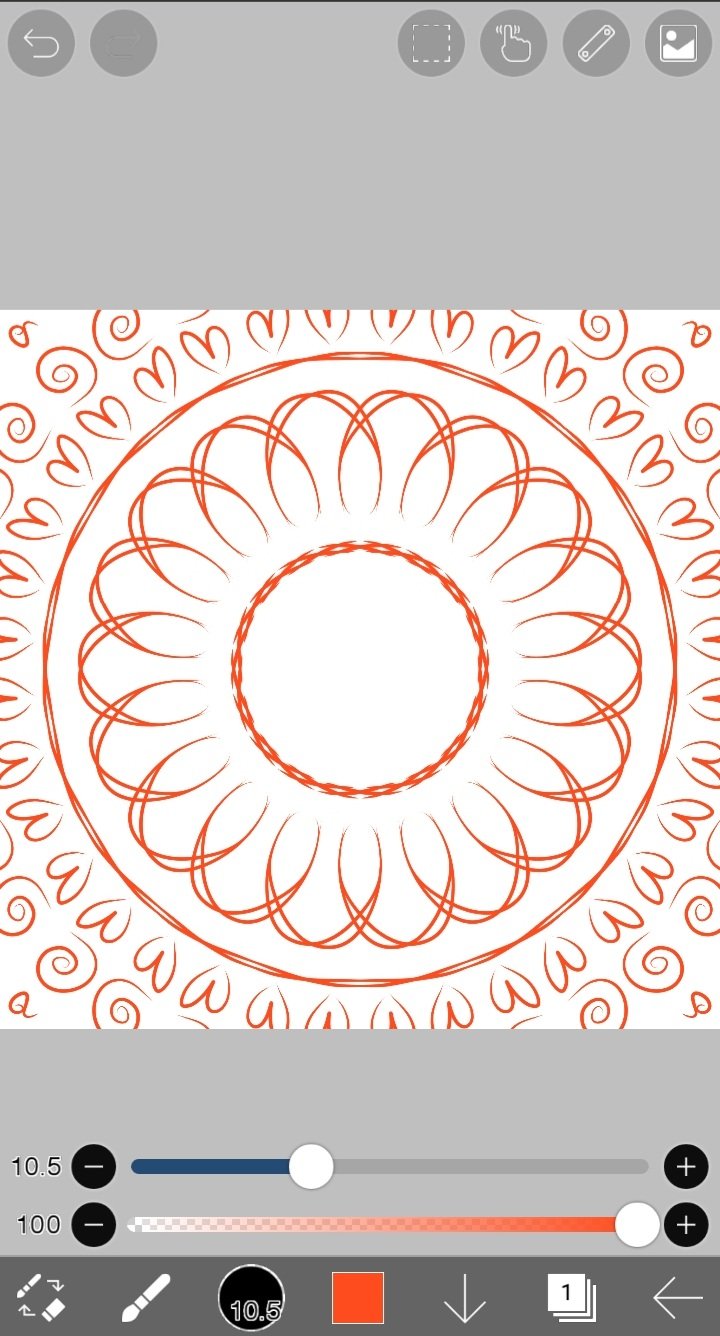
3. Regla rotatoria: Funciona igual que la regla anterior, pero elabora el patrón de forma diferente.
Puedes mover esta regla de la misma forma que la anterior, y también es posible que juntes o separes más las líneas entre ellas, seleccionando el grado deseado en la barra "División"
Esta regla al igual que la anterior, permite dibujar hermosos patrones circulares de una forma extremadamente fácil, ya que con hacer un pequeño trazo el mismo se repite en toda el área del dibujo armoniosamente. Es genial para fondos de dibujos o lo que desees.
A continuación te presento un ejemplo de su uso :
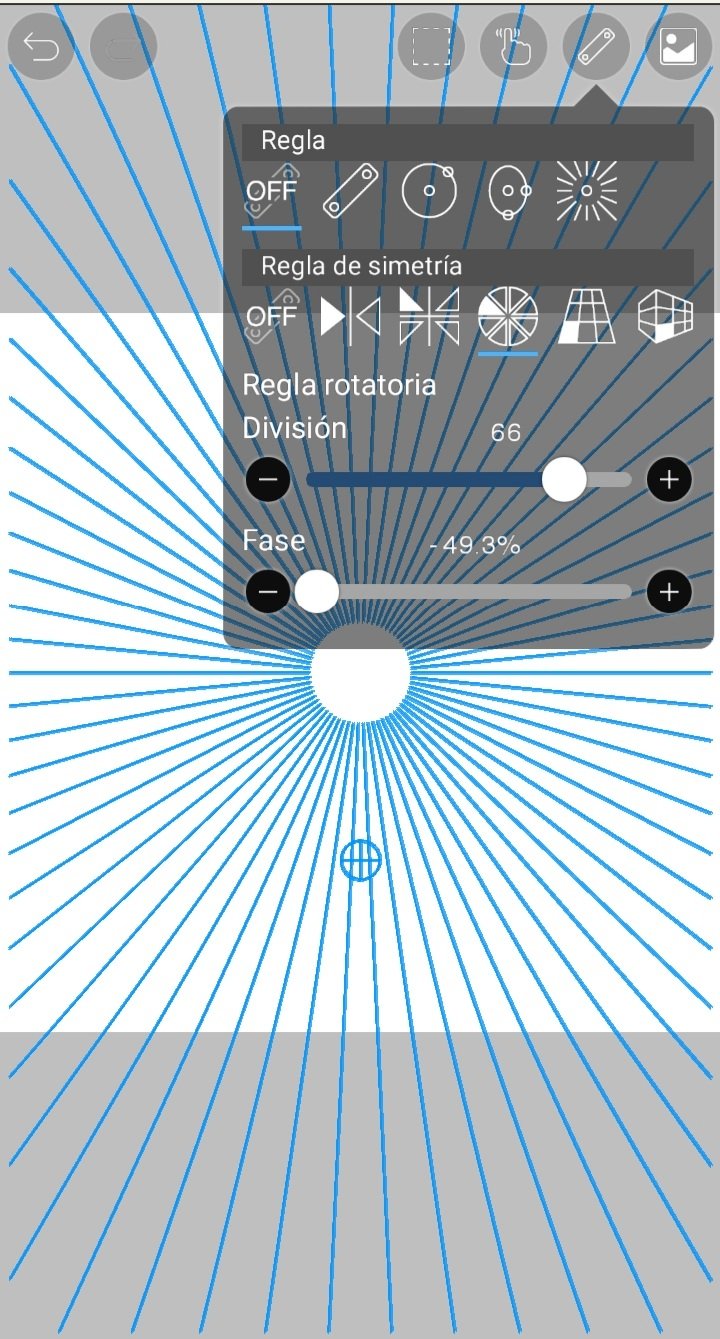
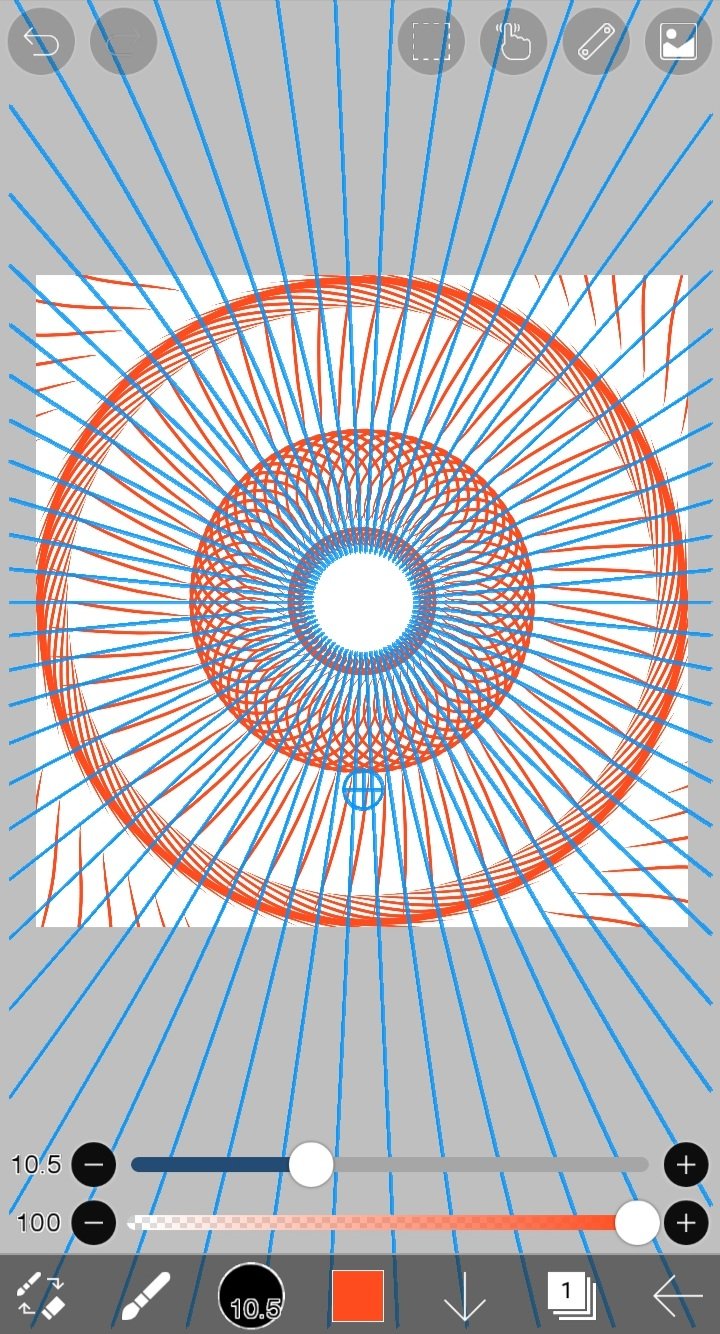
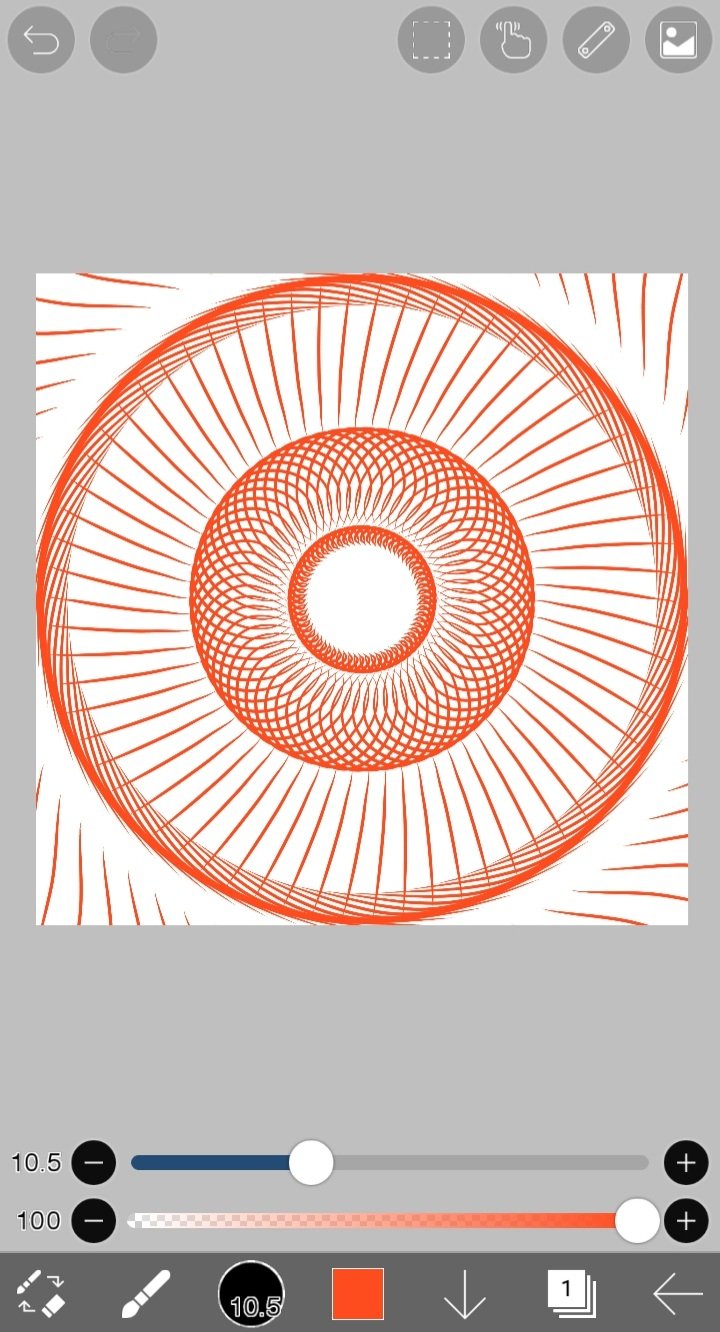
4. Regla de matriz: Es similar a la regla de espejo, con la diferencia de que repite el dibujo variadas veces en el lienzo, según el tipo de matriz que deseas usar, desde 1x1 hasta 10x10.
Para definir la matriz debes seleccionar la cantidad de cuadros que deseas que tenga, para lo cual utilizas las barras señaladas en la siguiente imagen "División en X" y "División en Y".
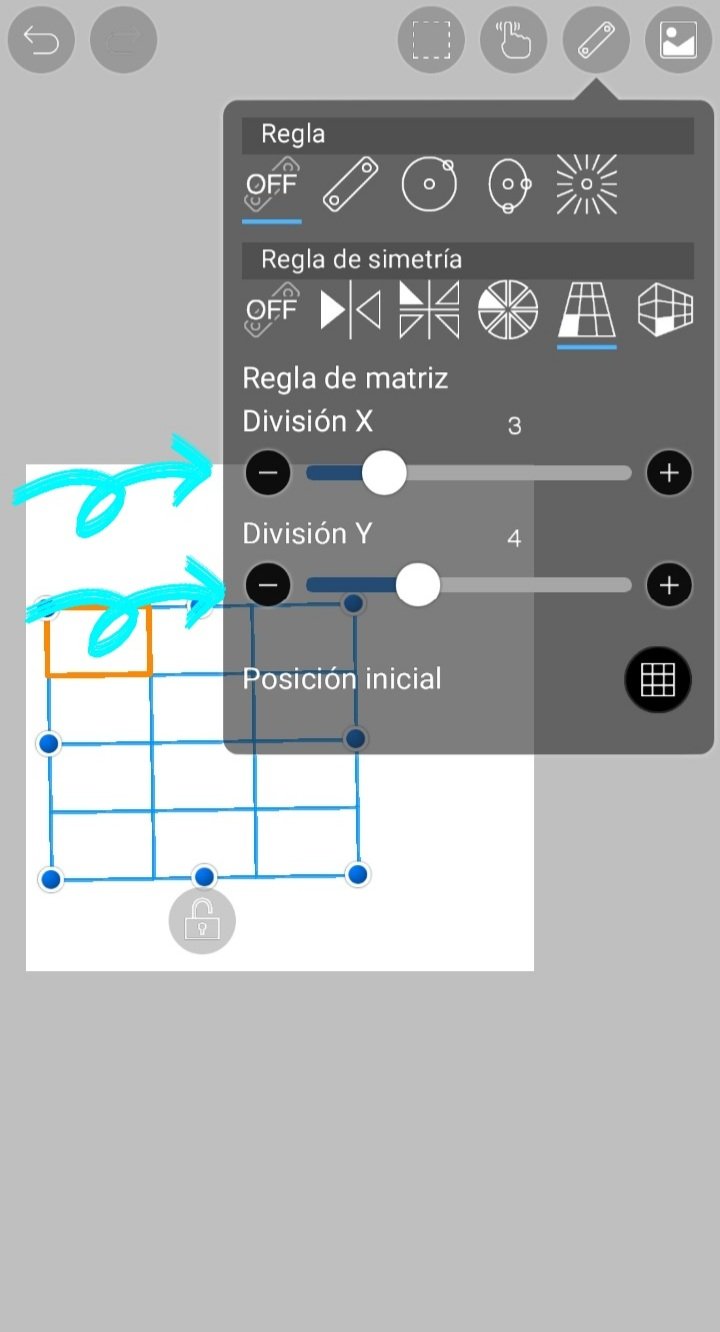
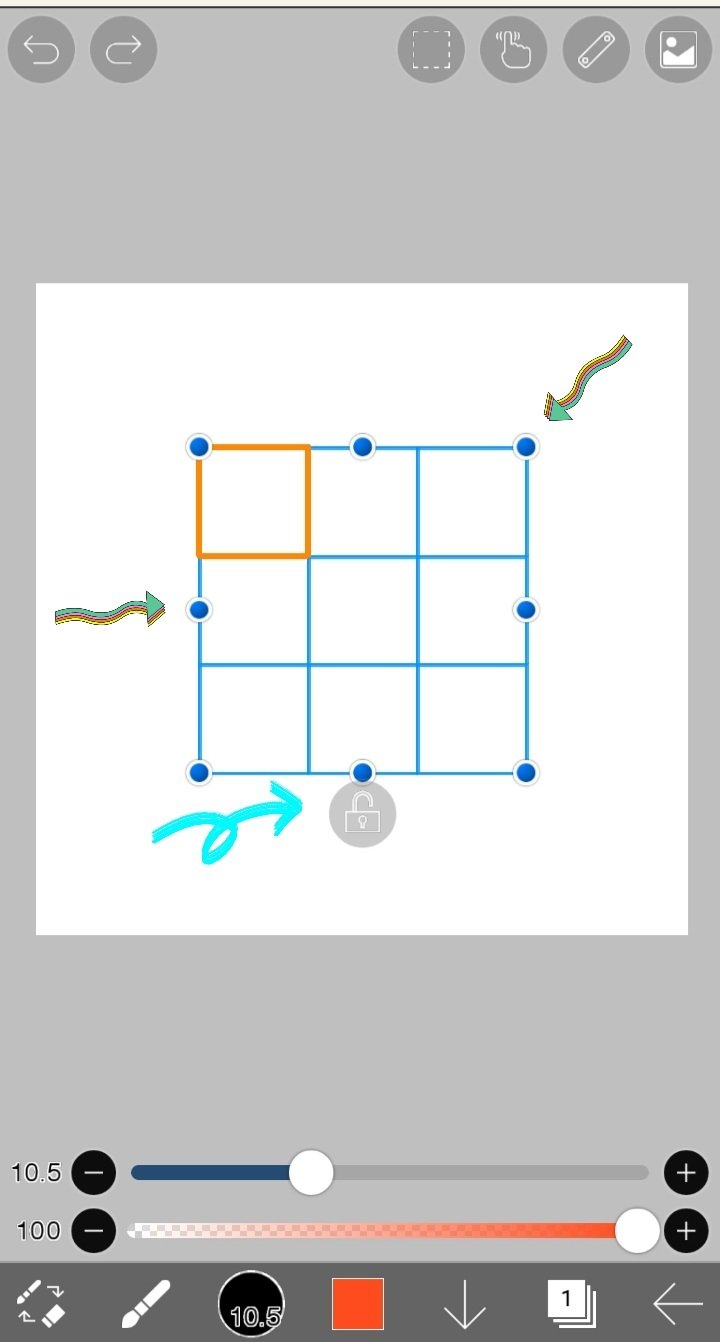
Una vez que hayas definido el tamaño de tu matriz, puedes ampliarla moviendo los pequeños círculos azules ubicados en su alrededor, los cuales señalé con dos pequeñas flechas. Cuando ya estés a gusto con la estructura de tu matriz, debes fijarla haciendo clic en el candado que señalo con la flecha en azul:
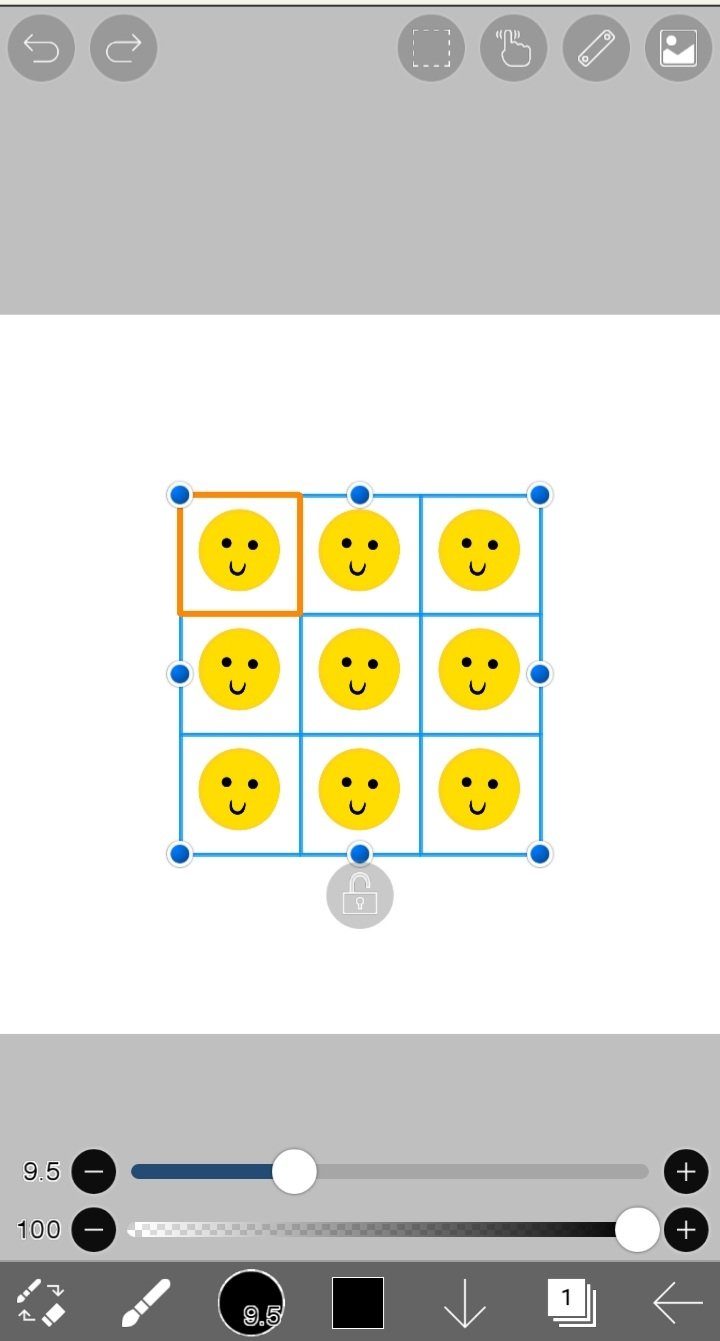
A continuación te presento un ejemplo de su uso :
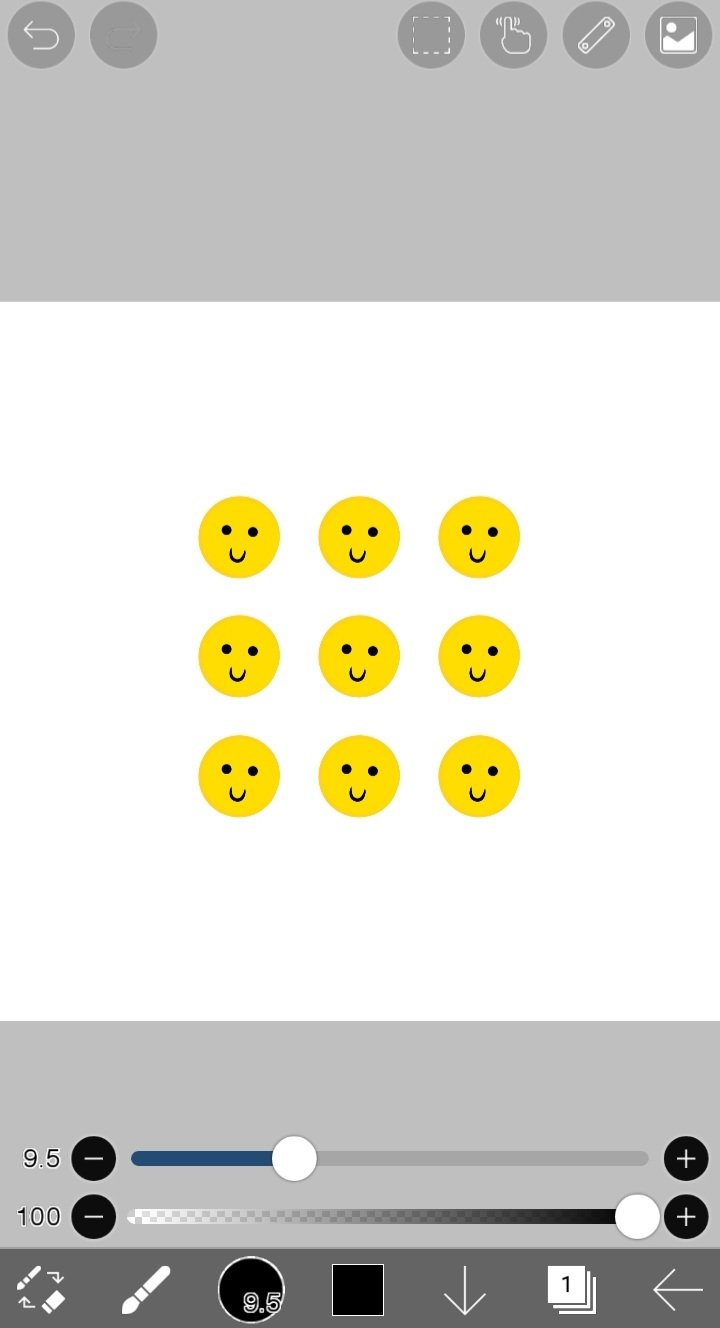

Es importante que consideres que puedes girar la regla como desees a cualquier ángulo, moviendo el círculo azul ubicado en el medio de ella. Para desactivar la regla, debes hacer clic en la opción "OFF", de lo contrario, tendrás problemas para dibujar con otras herramientas.
Estas reglas son muy buenas para llevar a cabo un dibujo de patrones, formas o fondos de los dibujos. Todo queda en base a tu imaginación.

Tarea para la Casa:
Ingresa a la Aplicación Ibis Paint x, y elabora un dibujo digital libre y a tu preferencia, donde utilices alguna de las reglas explicadas en esta lección, para crear un dibujo creativo. Puedes usar las reglas que desees. Presenta el paso a paso de tu lindo dibujo como desees, por ejemplo: mediante capturas de pantalla desde la aplicación.
Puedes dibujar algo sencillo, tal como yo hice en cada ejemplo que di en la presente lección. Te doy algunas ideas: patrones, mándalas, dibujos minimalistas...Todo queda de parte de tu imaginación para hacer este dibujo.

Contenido de Ayuda: Recopilación de mis Lecciones:
🎨Lección 1: LINK
🎨Lección 2: LINK
🎨Lección 3: LINK
🎨Lección 4: LINK
🎨Lección 5: LINK
🎨Lección 6: LINK

Reglas para hacer tu tarea:
1- Debes ser un niño verificado por la comunidad.
2- Debes realizar tu publicación en la comunidad Steem Kids y dejar el enlace de tu entrada en esta publicación, en la sección de comentarios.
3- Debes pertenecer al club5050, club75 o club100.
4. Tu publicación debe contar con mínimo 300 palabras y los tags adecuados; siendo esencial # steemexclusive.
5. Tu contenido debe ser de autoría propia. Si utilizas información de un tercero, indica las fuentes correctamente para evitar el plagio y sus consecuencias en la plataforma.
6. Utiliza los tags en tu publicación correctamente.

Recomendaciones para hacer tu Tarea:
1. Haz resteem a esta publicación para que más niños puedan unirse a la lección.
2. Si tienes alguna duda, déjamela en los comentarios de esta publicación. ¡Con gusto te responderé!
3. Diviértete y aprende ¡Haz tu publicación sin miedo alguno! Te voy a calificar y corregir con amor y respeto.
Se aceptan las tareas para la casa hasta el vencimiento de esta publicación.

10 % de las recompensas de esta publicación son para la cuenta comunitaria @steemkidss
CC: @patjewell, @ngoenyi

Greetings my dear friends of Steem Kids. 💜🎨
I am pleased to present my seventh publication in the community as a Digital Drawing Tutor. Through my drawing lessons, I will be teaching and guiding you in the wonderful world of colors, based on everything I have learned self-taught. I hope you like my work and that you learn a lot!


Are you new to drawing or already experienced? My dear kid you can still participate in this lesson and learn more every day, because “You don't need to be an expert to be a great artist” – Rui Torres.
Today I present to you my seventh lesson, related to the Ibis Paint X Drawing Application, which I will be using for the lessons and will be the main protagonist of them. You can download it through the following link: Ibis PaintX

In the previous lesson I had the opportunity to read, support, comment and give the respective feedback, to the homework of the following student:
| Student | Homework Link | @madilyn02 | Post |
My student created a beautiful and colorful digital drawing using the ruler tools explained. I invite you to see and support her beautiful publication. 💜🎨
Now yes! Let's start with this lesson.

"Symmetry Ruler" Tool
They are a set of rules or templates that allow us to make symmetrical drawings on the same canvas, that is, exactly the same drawings in certain areas of our drawing sheet. In Ibis Paint X this tool is located at the top of the canvas, represented by a ruler:

Clicking on the aforementioned icon will bring up a menu where we will focus on the options below titled "Symmetry Ruler". The tools above are already explained in the last lesson. I define each of the listed options below:
1. Mirror Ruler: Clicking this option will enable a blue ruler on the canvas that divides the space in two. And when you draw on one side of the canvas, the same drawing will be repeated on the other side, simulating a mirror. Here is an example of its use:


2. Kaleedoscope ruler: It works the same as the previous ruler, only instead of drawing in mirror mode, it presents several kaleoscope-like lines that repeat the same thing you draw in each small part of the drawing.
You can move this ruler in the same way as the previous one, and it is also possible to move the lines between them closer together or further apart, selecting the desired degree in the "Division" bar.
Here is an example of its use:


3. Rotating rule: Works the same as the previous rule, but builds the pattern differently.
You can move this ruler in the same way as the previous one, and it is also possible to move the lines between them closer together or further apart, selecting the desired degree in the "Division" bar.
This rule, like the previous one, allows you to draw beautiful circular patterns in an extremely easy way, since by making a small stroke it is repeated harmoniously throughout the drawing area . It's great for drawing backgrounds or whatever you want.
Here is an example of its use:


4. Matrix ruler: This is similar to the mirror ruler, except that it repeats the drawing several times on the canvas, depending on the type of matrix you want to use, from 1x1 to 10x10.
To define the matrix you must select the number of frames you want it to have, for which you use the bars indicated in the following image "Division in X" and "Division in Y" .

Once you have defined the size of your matrix, you can enlarge it by moving the small blue circles around it, which I have indicated with two small arrows. When you are comfortable with the structure of your matrix, you must fix it by clicking on the lock that I indicate with the arrow in blue:

Here is an example of its use:


It is important that you consider that you can rotate the ruler as you wish to any angle, by moving the blue circle located in the middle of it. To disable the ruler, you need to click the "OFF" option, otherwise you will have trouble drawing with other tools.
These rulers are very good for drawing patterns, shapes or backgrounds of drawings. Everything is based on your imagination.

Homework:
Enter the Ibis Paint x Application, and make a free digital drawing of your choice, where you use any of the rules explained in this lesson, to create a creative drawing. You can use any rules you want. Present the step by step of your cute drawing as you wish, for example: through screenshots from the application.
You can draw something simple, just like I did in every example I gave in this lesson. I'll give you some ideas: patterns, mandalas, minimalist drawings... Everything is up to your imagination to make this drawing.

Help Content: Compilation of my Lessons:
🎨Lesson 1: LINK
🎨Lesson 2: LINK
🎨Lesson 3: LINK
🎨Lesson 4: LINK
🎨Lesson 5: LINK
🎨Lesson 6: LINK

Rules for doing your homework:
1- You must be a community verified child.
2- You must make your publication in the Steem Kids community and leave the link of your entry in this publication, in the comments section.
3- You must belong to club5050, club75 or club100.
4. Your publication must have a minimum of 300 words and the appropriate tags; being essential # steemexclusive.
5. Your content must be your own. If you use information from a third party, indicate the sources correctly to avoid plagiarism and its consequences on the platform.
6. Use the tags in your publication correctly.

Recommendations for doing your Homework:
1. Please resteem this post so more kids can join the lesson.
2. If you have any questions, leave them in the comments of this post. I will gladly answer you!
3. Have fun and learn Make your publication without any fear! I will grade and correct you with love and respect.
Homework is accepted until the expiration of this publication.

10% of rewards from this post go to the @steemkidss community account
CC: @patjewell, @ngoenyi
