Public Domain
Hi everyone and welcome back to my blog for the third part of the guide on how to use Discord.
Before reading this post, I suggest you take a look at the previous ones [PART 1] [PART 2].
You may need them because in my guide, I tried to follow a gradual order both in terms of actions and difficulties.
Now, reconnecting to the last written post, I want to list the topics that will be covered in this one.
In this post we will talk about:
how to invite other users to join a server
how to set notifications
how to see pinned messages
how to use markdown in your chat bar
INVITE OTHER USERS TO JOIN A SERVER
To invite a friend, you must be on the server you want him/her to join.
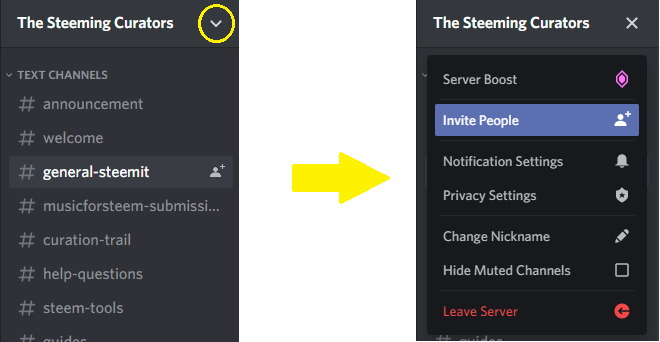
At the top left of your screen, next to the server name, you will find an arrow pointing downwards. Click on it and a window will open with a list of functions.
Among them, select Invite people
At this point, a bar will appear with a link to share inside. Be careful, though, because this is almost always a temporary invitation link and only lasts 24 hours.
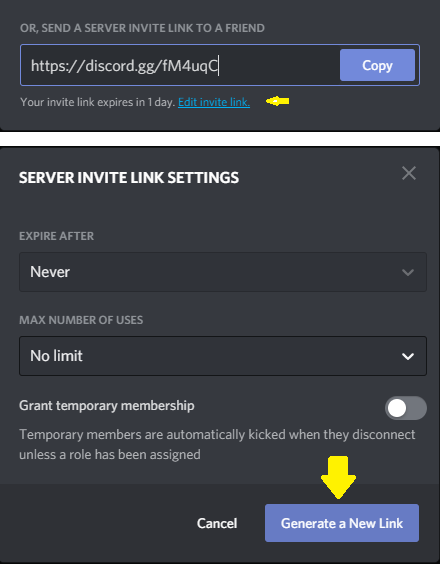
To generate one with unlimited validity, select Edit invite link
In the Expire after bar, choose Never
In the Max number of uses bar, choose No limit
Then, you just have to generate your link and send it to the user or users you want to enter in the server.
SET NOTIFICATIONS
When you log into a server for the first time, notifications are set up so that you get a warning for every message that is written, even if you are not tagged.
If you want to change this setting, you can do it from the same tab we used before to invite a user.
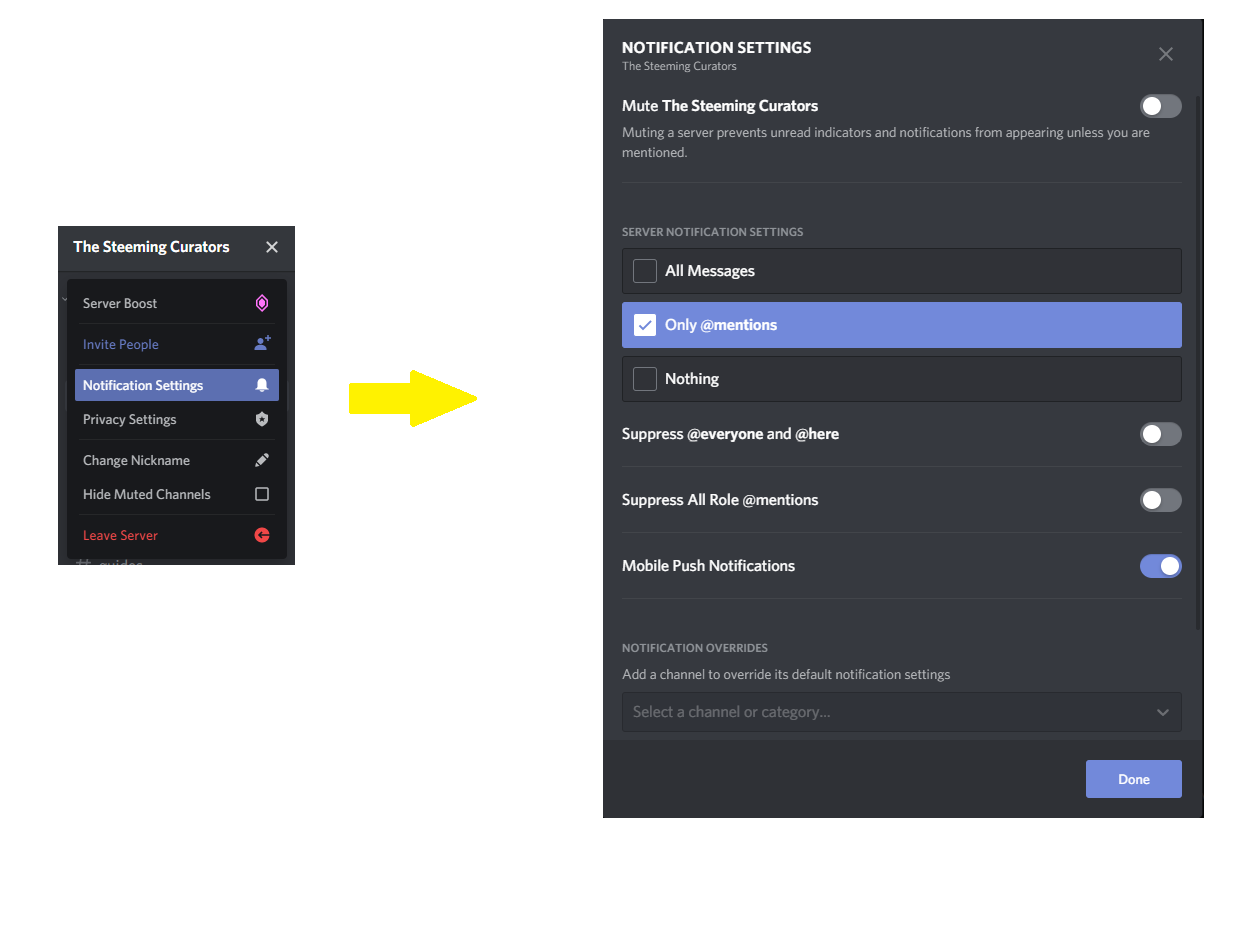
Click on the arrow and select Notifications Settings, a panel will open with all the available options.
First, you can decide to mute the server. In this case, you will no longer receive any notices.
Then you can select the option you like most, including getting notifications for all messages, when you are mentioned or never.
Another possibility that the app offers is to manage the @everyone, @here and role tags.
You can choose whether to receive a notification when mentioned with other users belonging to the same category, or not.
Furthermore, in the last bar, you can decide to set different options from the default ones for one or more channels of the server.
SEE PINNED MESSAGES
Another useful function of Discord is that which concerns pinned messages.
Both within a direct chat with another user and in the channels of a server, it's possible to fix one or more messages so that they can be found faster in the future.
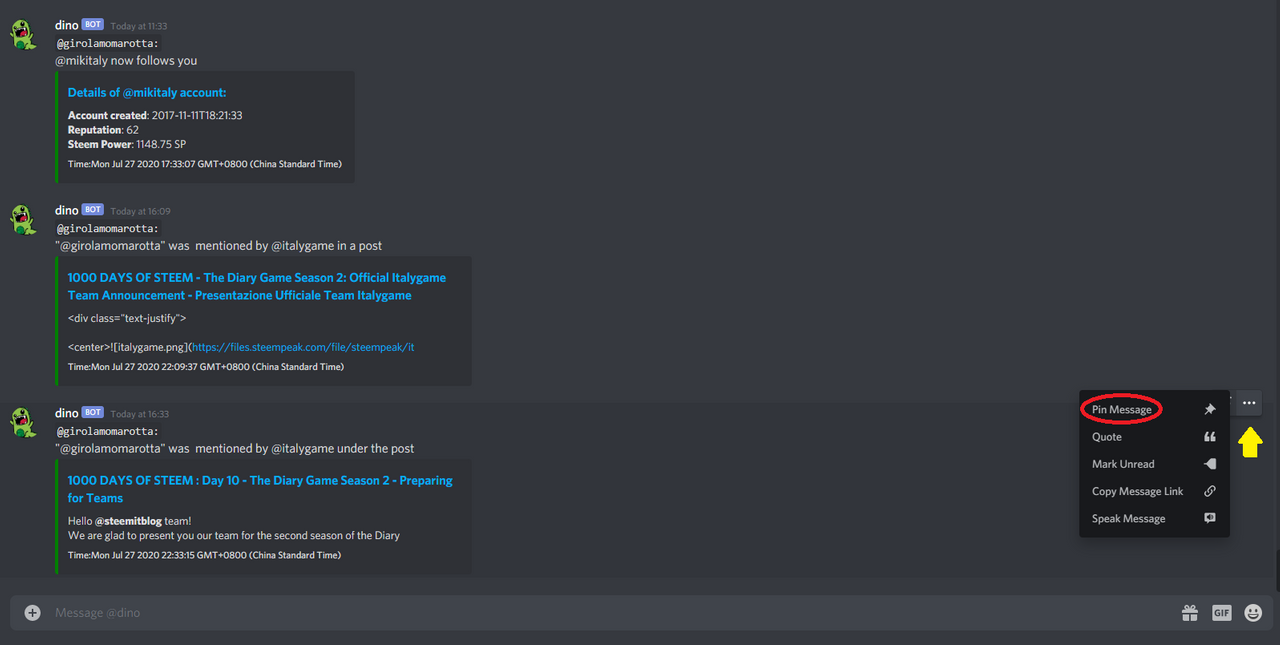
Pinning a message is really simple: click on the three dots located to the right of the message you want to fix and select Pin a message
In direct messages, all participants of the chat have the possibility to perform this action, while in a server channel not everyone has the permissions to do it, depending on the directives established by the server's admin.
To find a pinned message, just click on the corresponding symbol located at the top right, both in direct chat and in a server channel (everyone can do this).

If there are multiple pinned messages, just scroll, find what you are looking for and select it.
You will immediately be taken back to the chat history and you will be able to consult (everyone can), use or modify (only those who have permissions can) your message.
USE MARKDOWN IN THE CHAT BAR
And finally, a small treat...
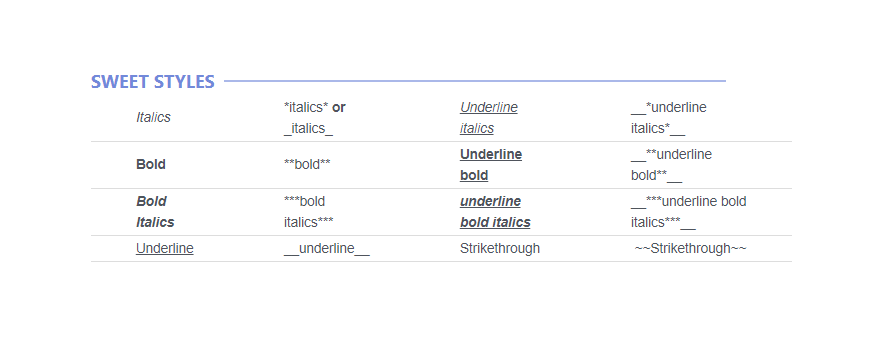
Just as in your posts, even on Discord you can use the markdown to make your messages more accurate and particular.
Here you can find all the codes to be applied to obtain the styles you want.
Have fun using them!

Well, for now my Discord tutorial series ends here.
As specified also in the previous posts, if you have any doubts or specific requests, please let me know and I will try to help you.
I hope you found the guides useful, if so, I am very happy.
Thanks a lot to everyone for the appreciation and support, in particular to the Steemit Team @steemitblog and @steemcurator01, to the @steemingcurators team, to my good friend @cryptokannon and to the Steem Greeters group, who are doing an excellent job in welcoming and training new users.
See you soon!
GM
The images in this post are screenshots made by me.


