Hello Everyone, this is Haidermehdi, Country Representative of Pakistan. I hope you all are well aware of it and present my heartiest greetings to all of you. This perhaps is my first post In this community.
Last week we saw a goodwill gesture of increasing interactions between two well-established and well-run communities of Pakistanis on Steem by @cryptokraze. Thus it's obligatory on me to extend my hands of friendship towards the leadership and members of this community. Also being a Country Representative, I decided that I should keep visiting all of you who are working hard on this amazing platform, working so that we become independent; the ultimate goal of ours and the Steemit Team!
With this being said, I have come into this community with a compilation of all my lectures post that I have been making in the Steemit Pakistan Community where I operate normally and I hope that it'd be beneficial for all of us whether here in SIZ or in SP In shaa Allah.

I started the series of Graphic Designing lectures as I was exploring Adobe Illustrator. Thus I decided to share my work with all other steemians just so that they could learn some skills through this amazing platform which is already giving them so much <3
I have so far completed 8 days of exploration in this series and I am looking to dive deeper into this exploration!
| Serial No | Link to Lecture Post |
|---|---|
| 1 | Lecture # 1 |
| 2 | Lecture # 2 |
| 3 | Lecture # 3 |
| 4 | Lecture # 4 |
| 5 | Lecture # 5 |
| 6 | Lecture # 6 |
| 7 | Lecture # 7 |
| 8 | Lecture # 8 |

Above are all the lectures that I have made to date in the Steemit Pakistan Community. It is a pleasure for me to make the day # 9 exploration post in the Community. We would be learning a few new things in this post. We would be learning about the rotation tool and the anchor point tool. This will help us in making a leaf as we are going to make a flower today!
- Anchor Point Tool.
- Rotation Tool.

First of all, we will use the shift Control P Buttons to place an image on the art box, this image is just for practice so we will tick the template option while placing the image. Or we can lock the layer from the property menu later on.
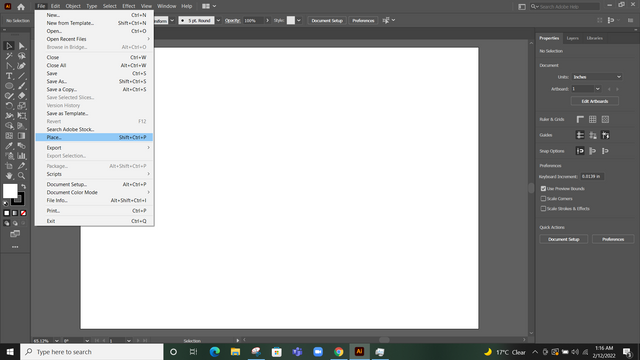
With this being done, we will now do the following steps:
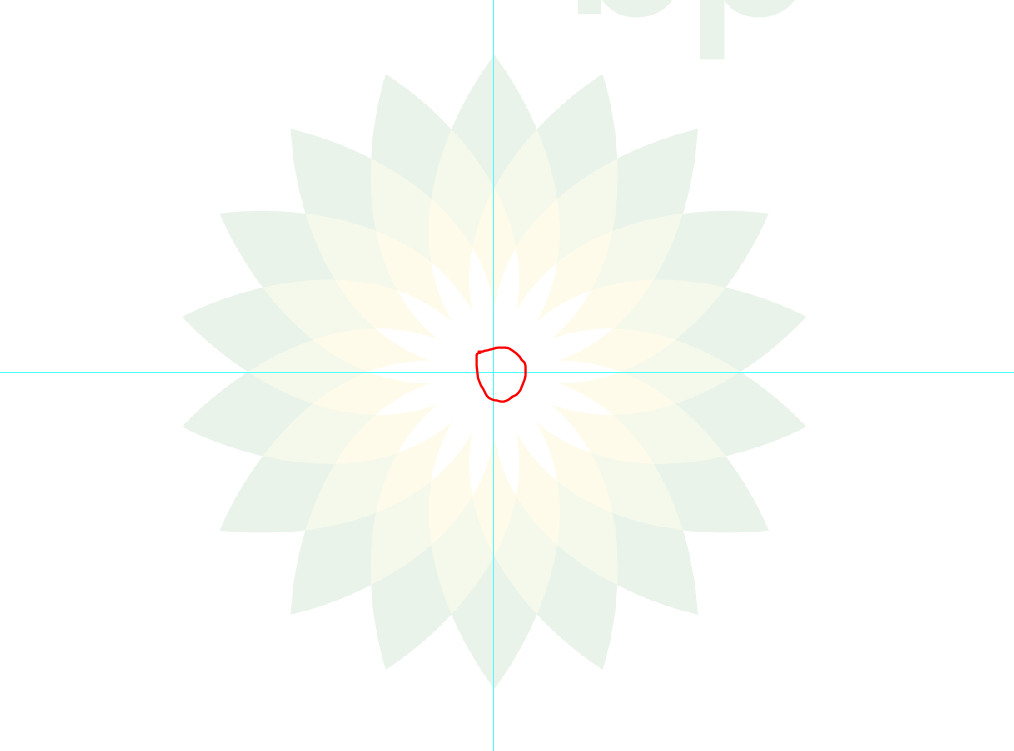
In the property panel, click on the first options in the rulers. It will show a Scale on the edges of the art box. This will help us in finding the center point of the art box where we can draw the flower. You will understand this later in the lecture.[1]
Use the rulers to find the center point of the practice image(flower)
Anchor Point Tool
It is very simple to use. In the image below:
- We will draw an ellipse using the ellipse shape tool.
- Now right-click on the pen tool and choose the anchor point.
- The ellipse will show us what points we can delete from the shape.
- Click on the top and bottom points to anchor them and we will then see a leaf on our art box.
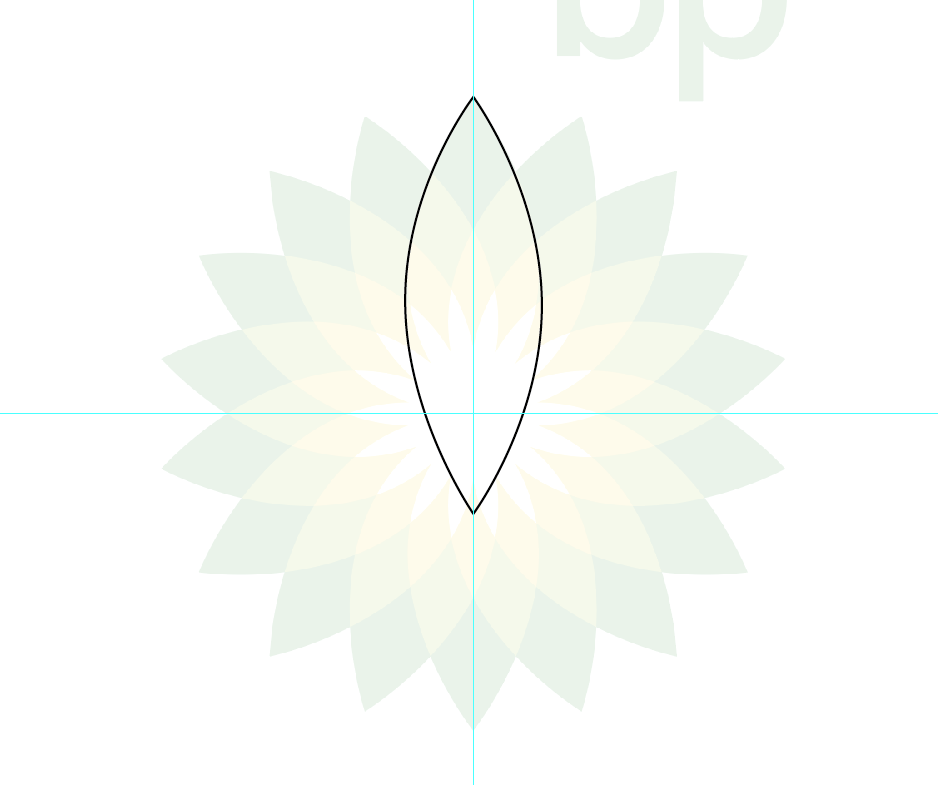

Now what? The first leaf is here. So are we going to make all the leaves in this way? Surely it's gonna take a whole day or perhaps more than that :p Because it would get complicated ahead.
This is where my favorite part of Graphics Designing comes into play, The Mathematics.


Good that we are done with the maths, it looks so possible verbally but how are we going to implement this? Simple.
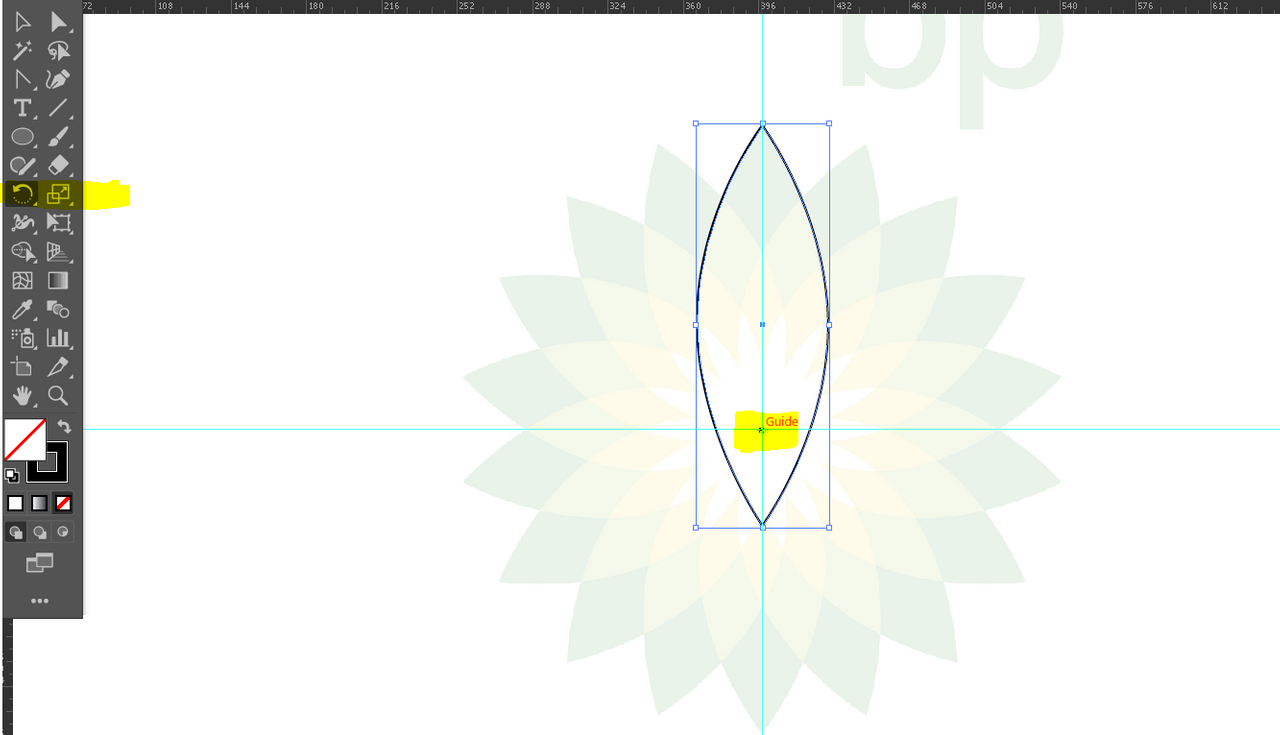
- Select the Ellipse(leaf).
- Choose the rotation tool that I will highlight in the image below.
- Then press alt and select the rotation point, the center point that we found using the rulers.[1]
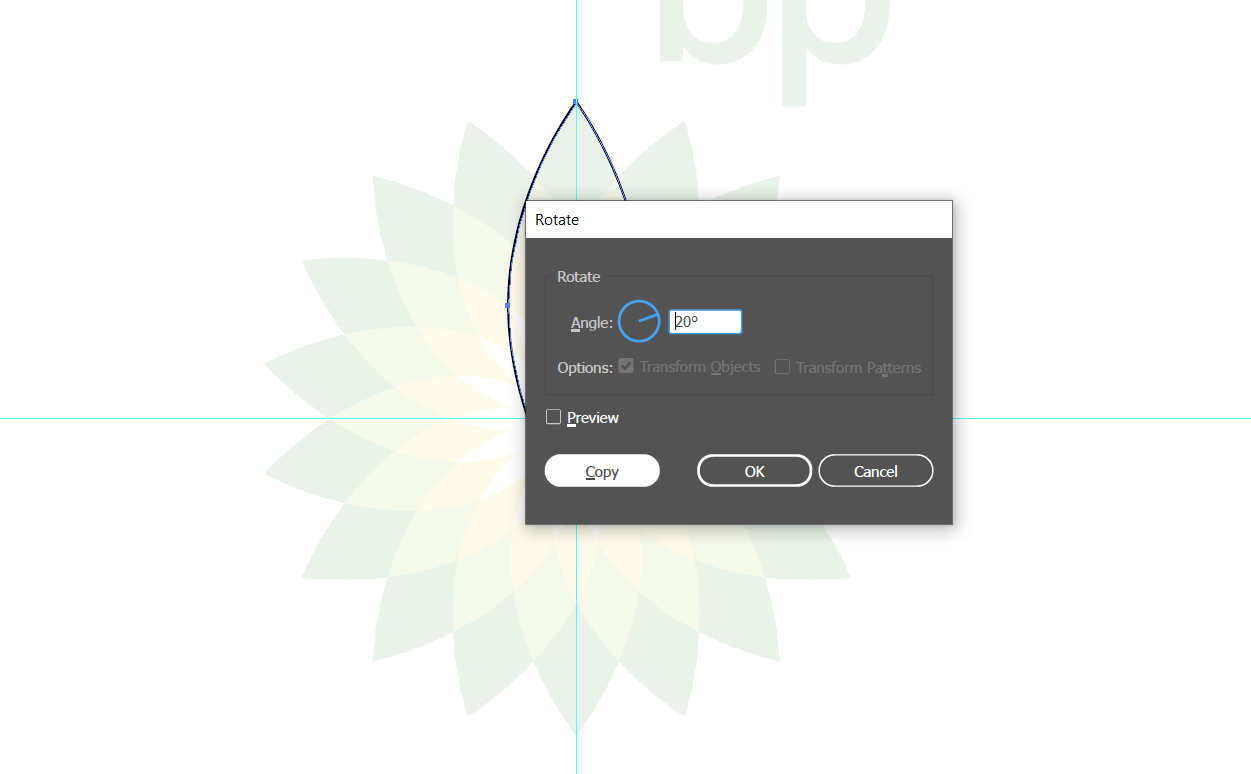
- just when we do this, we see a popup window in front of us which demands us a few things. In this window, we will write 360/18(number of leaves we want) and press copy. Remember, don't press Ok, we have to press copy.
- it will copy it for once and then we can continue copying using Control + d button
Below is how it works.


After doing this, we just have to press Ctrl D and see what happens below..
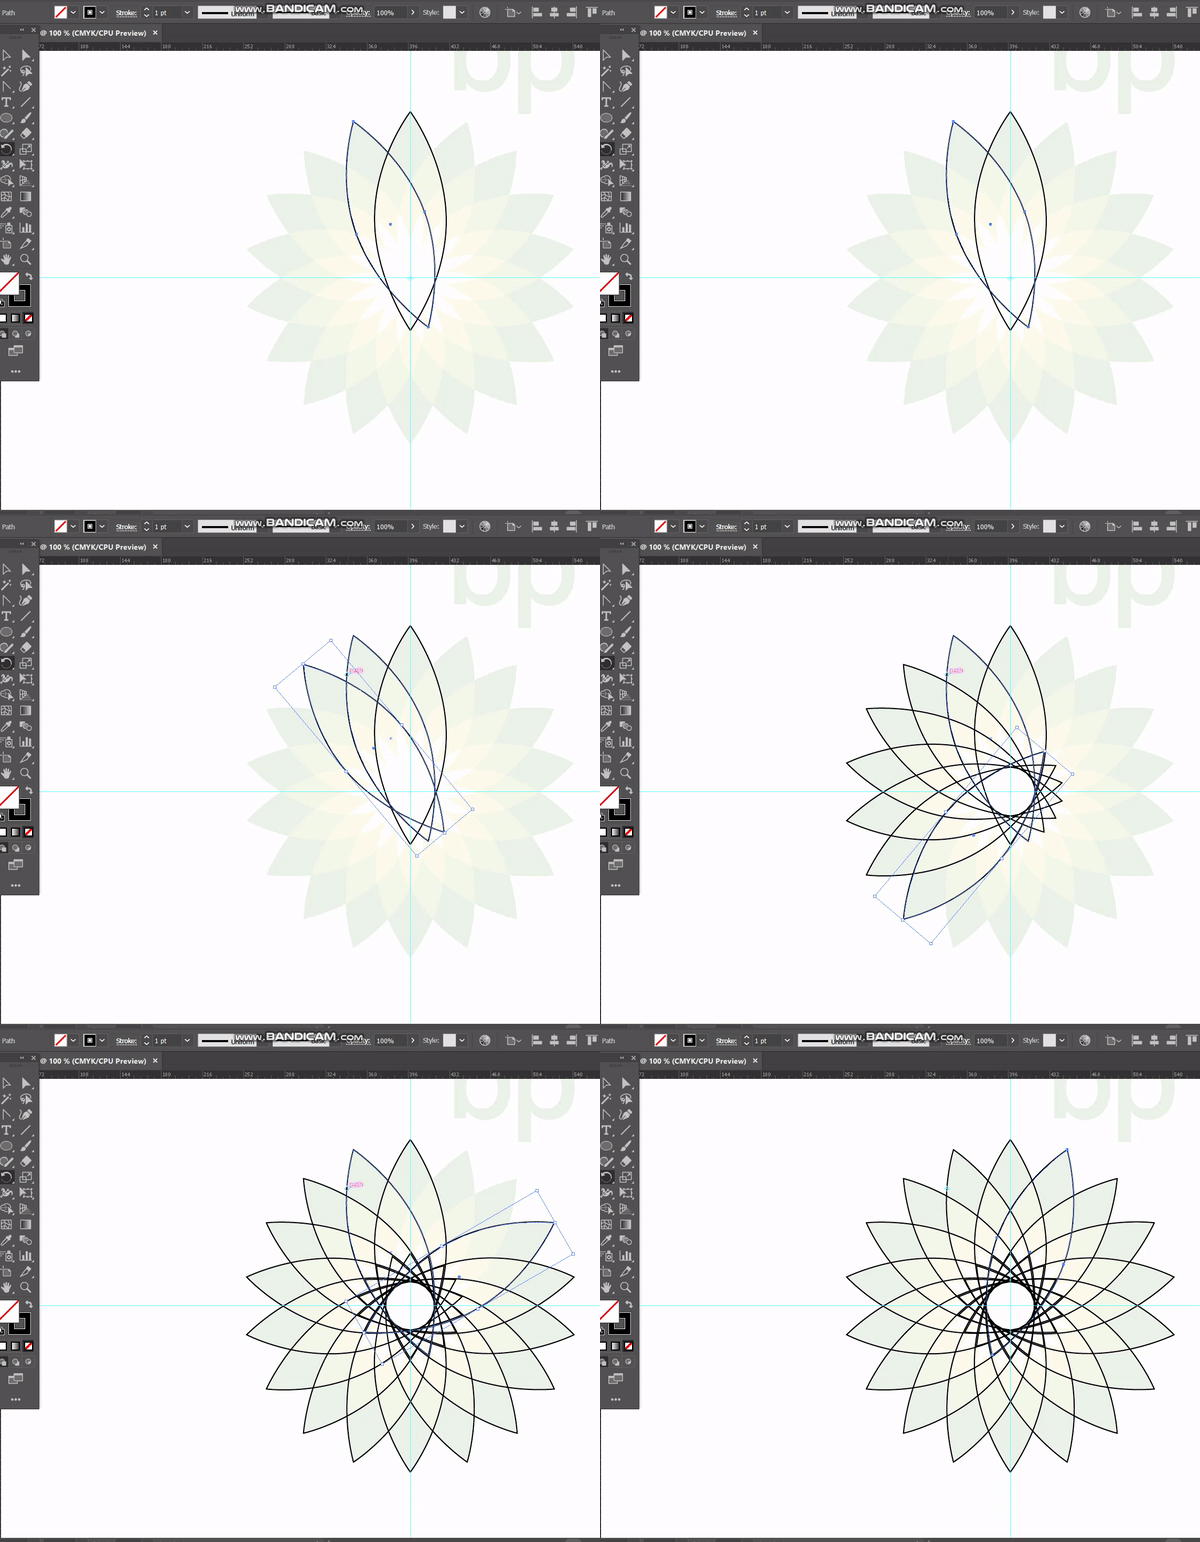.gif)
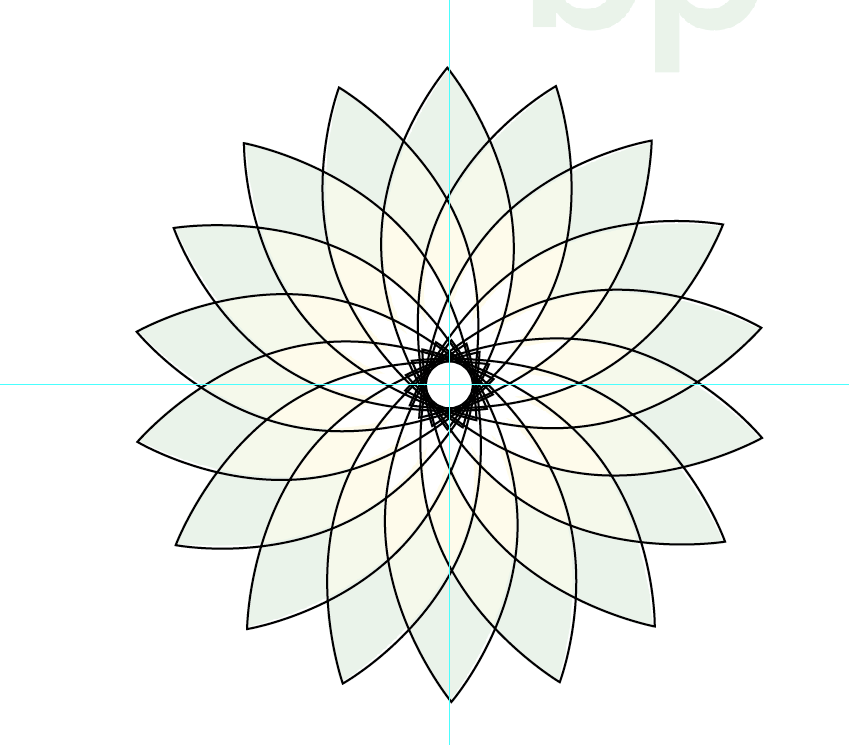

Now we are ready with our first ever flower and day # 9 exploration. Rest of the work will be done using the Shape Builder Tools and Dropper to steal the color. The final output will be as under:


I am ending this day # 9 post here with the hope that you guys will follow the lectures and we will be looking at some good designs made by you all In shaa Allah
We will meet again with a new lecture soon IA. Till then goodbye and take care. If you are interested in this one and have followed me, I would love to see your homework on doing this task :p Any problems, feel free to ask and we will solve them together :)
Powerup Commitment:
| Date From | Date Today | Amount Powered Up | Amount Transferred |
|---|---|---|---|
| 20-10-2021 | 20-02-2022 | 8478 | 0 |
Yours, Haidermehdi.
Country Representative Pakistan.
Steem On!
#CLUB100
