Hi there!
When I was a kid, my grandma used to make homemade glue (more specifically, she was using it to stiffen the bedsheets and clothes to keep them wrinkle free longer after they were ironed). But my brother and I would take a bit of the starch in a bowl, sit on the floor with newspapers and a pail of water. We would tear the newspapers and threw them into the pail of water. Then, we would slab the wet newspaper pieces and brushed homemade glue on them at the back of a plate and bowl. We would then wait for the newspaper and glue to dry before removing them from our "mould" to see a solid bowl formed.
I remembered how much fun it was to do this. You get to play with water, glue and make a huge mess 😆. AND you get to reuse, recycle and repurpose old newspapers! How awesome is that??
So here I am, reliving my childhood once again, to share with you this simple activity (the easiest I think, among most newspaper bowl making projects) that you can certainly have fun doing with your family and friends.
I know I did, even untill today 😄.
The steps that I will be sharing is for a bowl that I like (specifically the shape that I like). If you prefer to do this on a plate, you can too.
Step 1
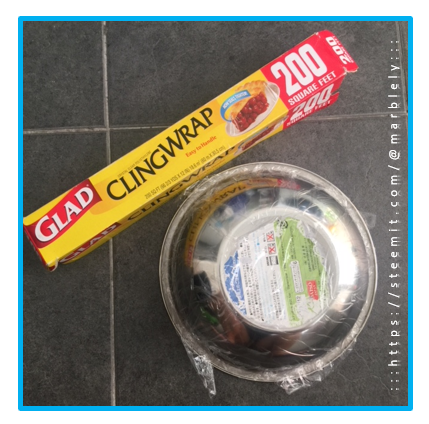
Choose your favourite bowl shape and cover the back of the bowl with ClingWrap.
This is to prevent the newspapers from sticking to the back of the bowl, making it hard to remove when the newspaper dries. Some people use vaseline or oil to do this but I'm not sure what is the effect it has onto the newspaper bowl later but it is something you can try.
Put the bowl with ClingWrap aside while we prepare the homemade glue.
Step 2
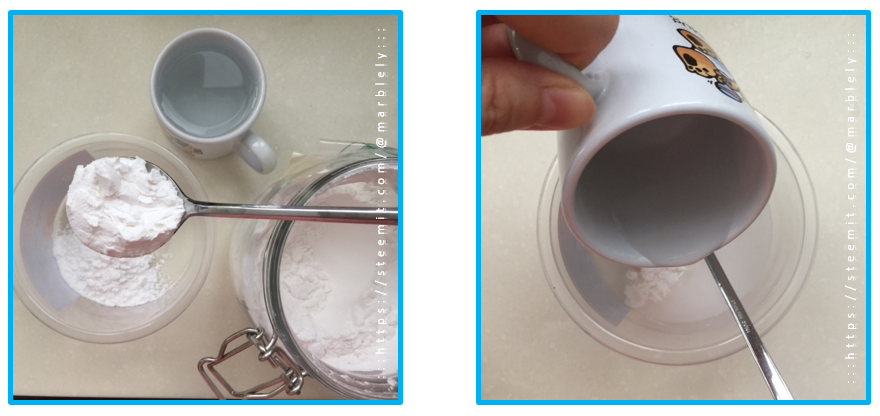
Prepare the glue with a cup of water, mixed with 2 tablespoons of tapioca starch flour or corn starch flour.
Step 3
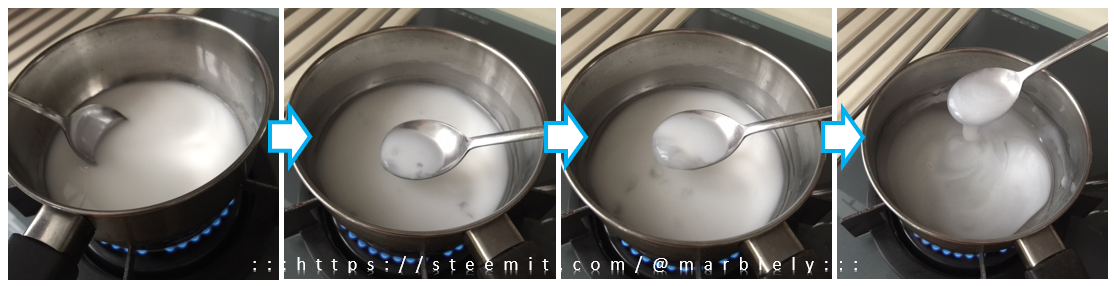
Heat up the flour and water mixture in a little pot. Keep stirring for about 5 to 10 minutes until you see translucent lumps forming in the mixture.
Cornstarch is made up of many molecules of glucose, specifically amylopectin and amylase. When starch is heated with water, the starch granules swell and burst, causing them to break down and release the glucose molecules into the water. Consequently, the starch molecules interact with more water, increasing the randomness of the solution. This process is known as gelatinization. When the heated solution of cornstarch and water cools down, the amylase molecules can bind each other again to create a molecular mesh. The more amylase molecules there are, the firmer, or more viscous, the mesh will be. Source
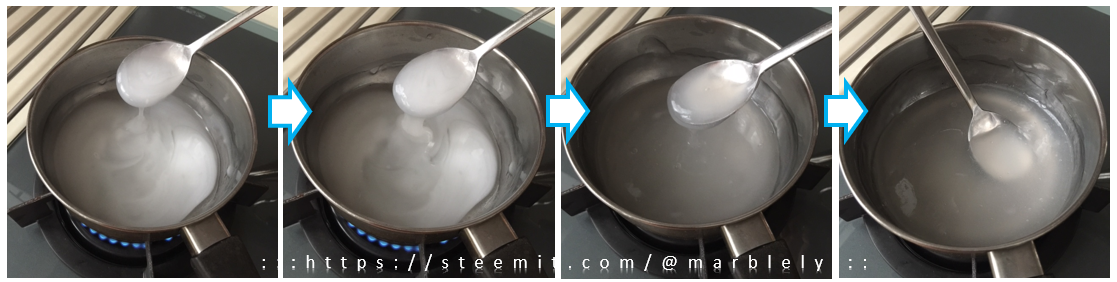
As you stir, you will start noticing that the mixture turn into a translucent liquid glue texture. Once the mixture in pot is fully translucent, set the glue aside to cool down.
- The more water you use, the glue will be more dilute and easier to spread.
- Some also add a bit of salt to keep the glue from molding.
- The glue can be kept in fridge for a few days when not used but you may need to add water and mix the glue again, each time you want to use because the glue may solidify (depending on how thick it was before placing them into the fridge - the thicker it is, the more solid it becomes).
Step 4
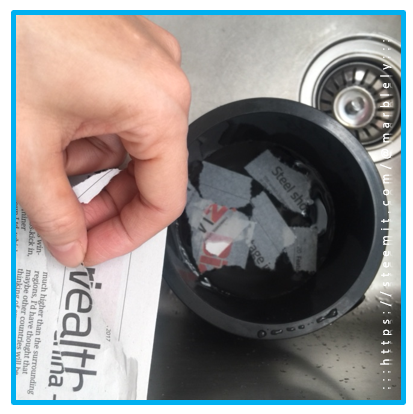
While the glue is cooling down, you may start the fun of tearing newspapers into a pail of water. This step is quite therapeutic.
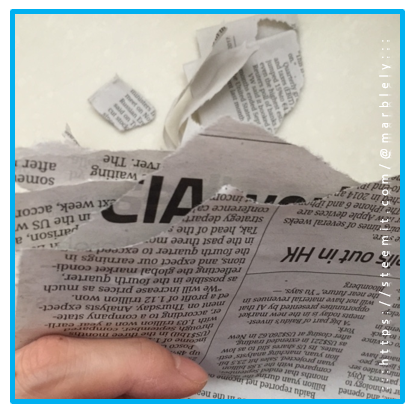
If you want to speed up the process, you can tear a few pages together, like the picture above.

Step 5
Get ready the bowl and a brush.
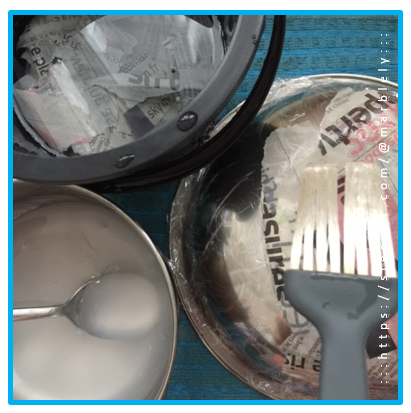
Step 6
Place a few pieces of the wet newspaper onto the back of the bowl and as you add more layers, brush the glue all over the wet newspaper pieces.
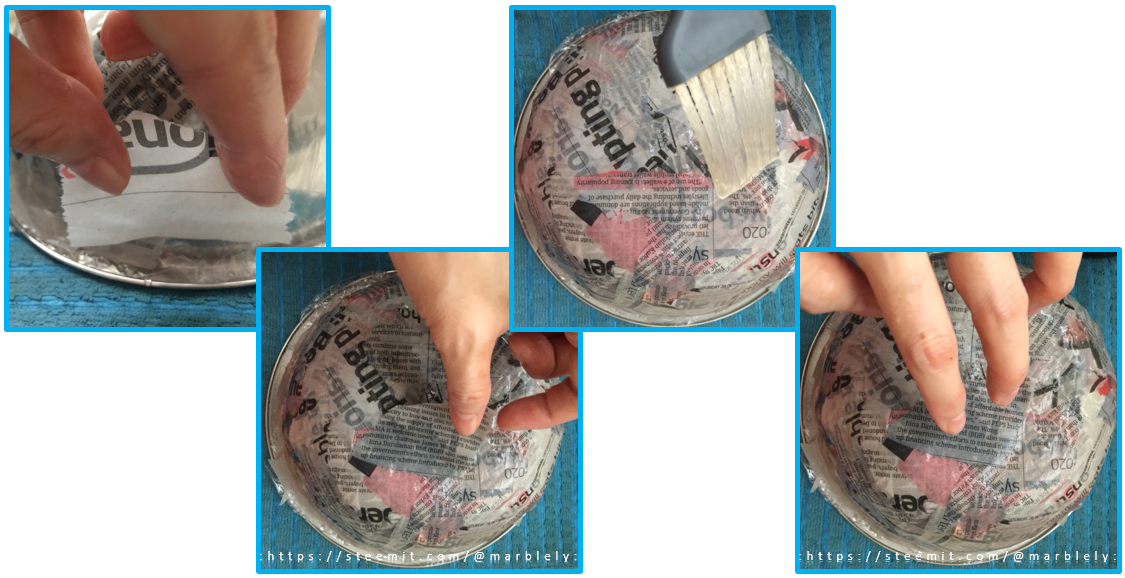
Step 7
Keep adding the wet newspaper pieces and "stick" them onto the back of the bowl while brushing the glue all over.
Do this slowly to ensure you have glue brushed all over for "full coverage". You may be tempted to put more newspaper pieces at one go but remember that once it dries, they will not stick without the glue layers in between.
Press the newspaper layers down with your fingers.
Personally, I find this step of adding newspaper layers very therapeutic.
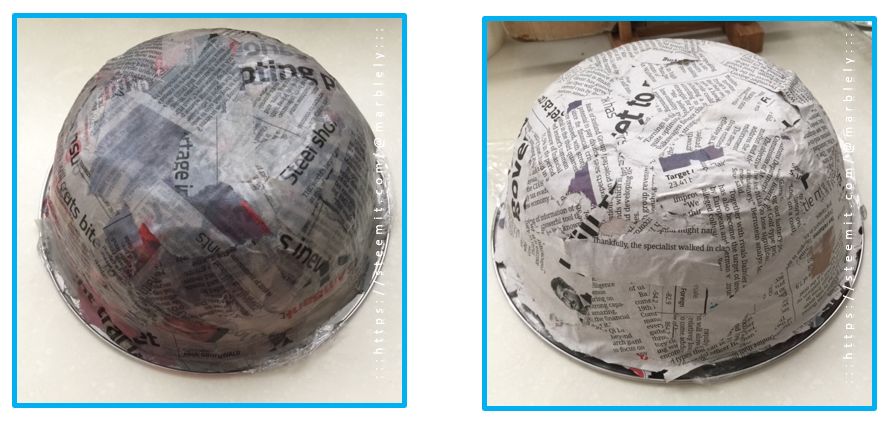
Step 8
Once the bowl is fully covered with wet newspaper pieces and glue, leave it to dry. This might take a day or two or three, depending on wind and sun availability.
Repeat Steps 6, 7 and 8 until you are happy with the thickness.
The more layers you add, the sturdier the bowl will become when it dries.
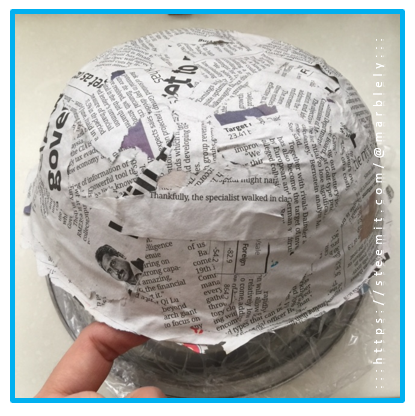
Step 9
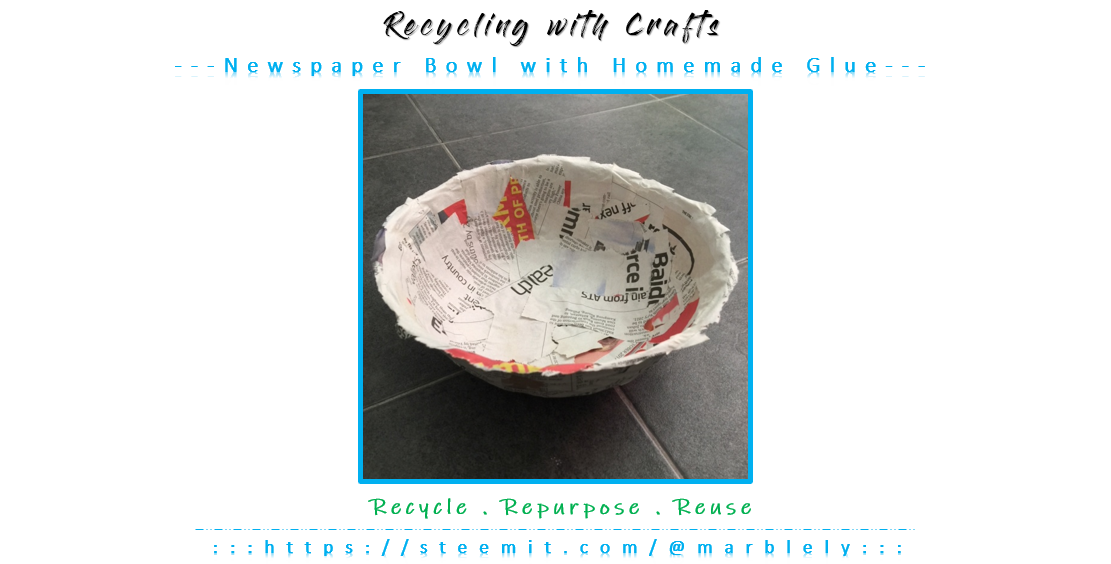
Once the newspaper layers are dried, you can remove the newspaper from the bowl. It should remove easily because of the ClingWrap.
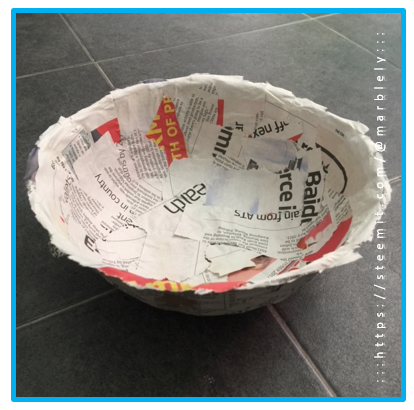
Ta-da!! Your very own newspaper bowl! You can finish it any way you like with paint, lacquer, stickers, etc.
What can you use the bowl for? You can use it for decoration, for storing your keys, yarns, coins, anything that is dry .
For me, this bowl is not finished yet. I am going to add more layers (this process will take maybe a week) and in my next post, I hope to share with you my finishing choice.
This is also my entry to @phoenixwren's Upcycling Contest. Come, join us! :)
Here are some previous posts on #RecyclingWithCrafts, for you to try:
- #RecyclingWithCraft :: The making of a little star
- #RecyclingWithCraft :: Reusing empty bottles as gifts
- #RecyclingWithCraft :: Weaving a Basket with Magazines
I wish you a great day and week there, wherever you are!
