"It takes the black keys and the white keys both, to make perfect harmony."
- Benny Goodman -
Greetings, enthusiastic piano students!
Thanks so much for your positive feedback!
I really want this to be fun and exciting for you, and so I hope we'll be able to "cut to the chase" and have you playing "Amazing Grace" in no time. Here's my nefarious plan:
Baby steps.
We'll go for the minimum number of lessons to get you playing Amazing Grace, complete with chords, A.S.A.P.
While I'll mention a little theory here and there, lessons will be mostly "hands-on."
So let's talk about chords!
We only have to learn three chords. A "chord" is simply three notes sounded at the same time.

Playing On The Black Keys
Photo courtesy of Anja and http://pixabay.com
The Braille Piano Method - Lesson Two
If you've done your homework, you should by now be able to play the melody to Amazing Grace.
If not, just go back to Lesson One and practice a little while longer, until it "sounds like" Amazing Grace.
If you aren't already familiar enough with "Amazing Grace," listen to this YouTube video a few times until you begin to hear and remember how it sounds.
Don't worry if you're not familiar with "standard music notation" as shown in the video... The point of listening is to begin hearing and remembering what the timing and the melody sound like.
In this lesson, we'll add some chords to the mix.
There are three major chords in every key. They are "built" on the #1, #4, and #5 notes in the scale, and so we will refer to them in that way - i.e. I will add #1, #4, and #5 to the sequence of notes for Amazing Grace.
If you are using a full-sized 88-key keyboard, this image will help you figure out where to place your left and right hands.

Notice that Chord #1, Chord #4, and Chord #5 are to the left of the part of the keyboard where you play the melody. For "instant gratification," we'll play these chords with our left hand, in Octave W, while playing the melody with our right hand in Octave X and Octave Y.
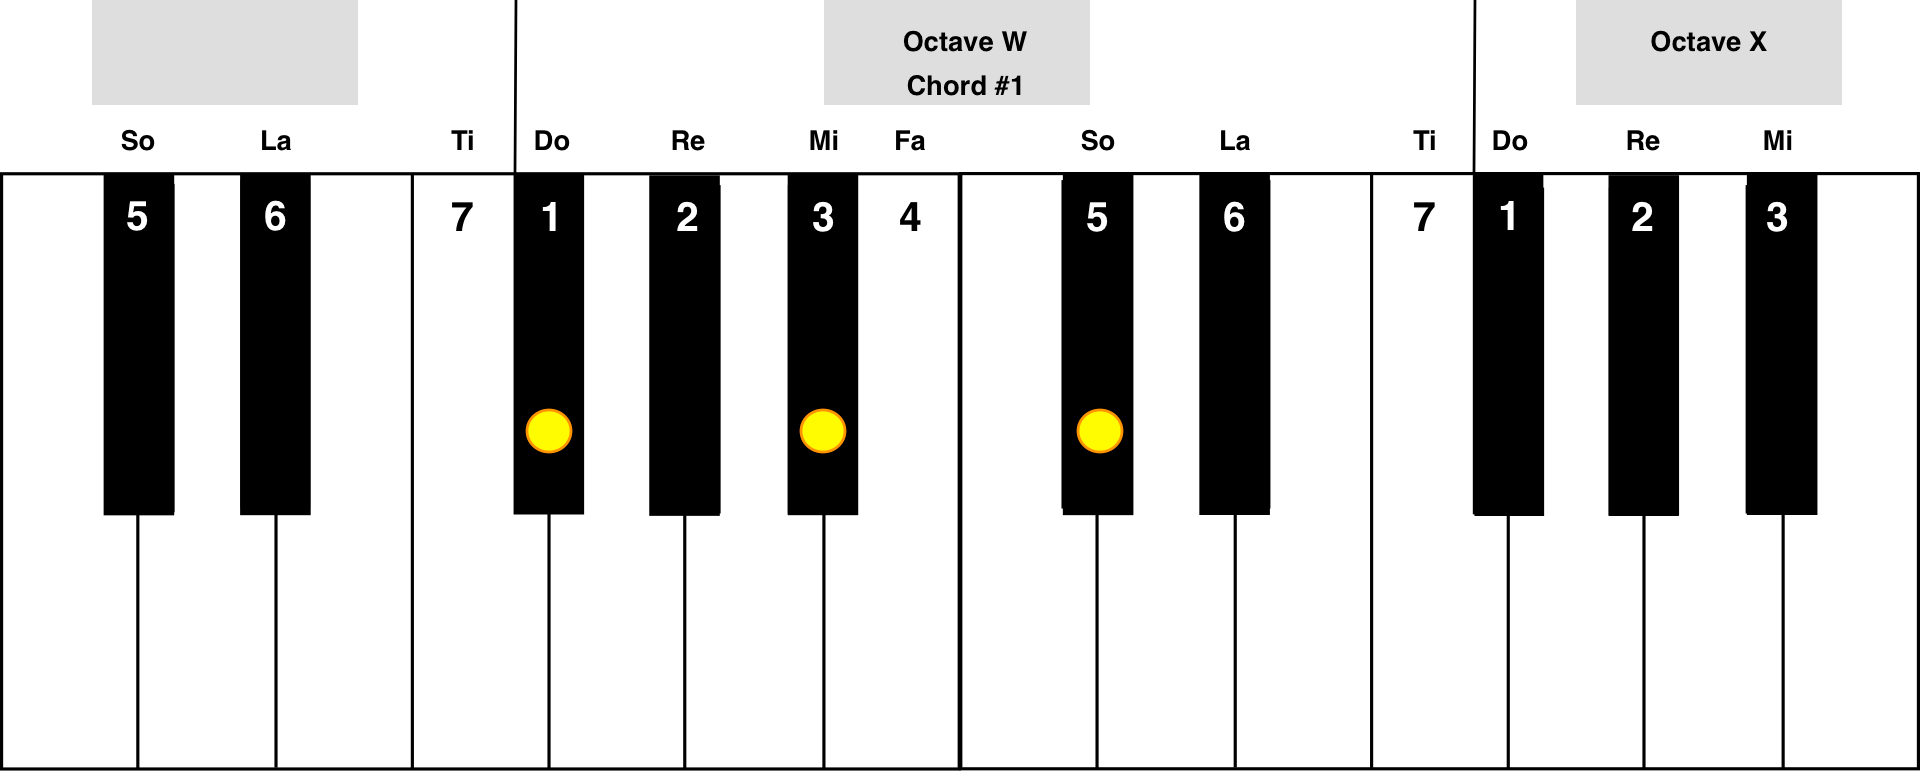
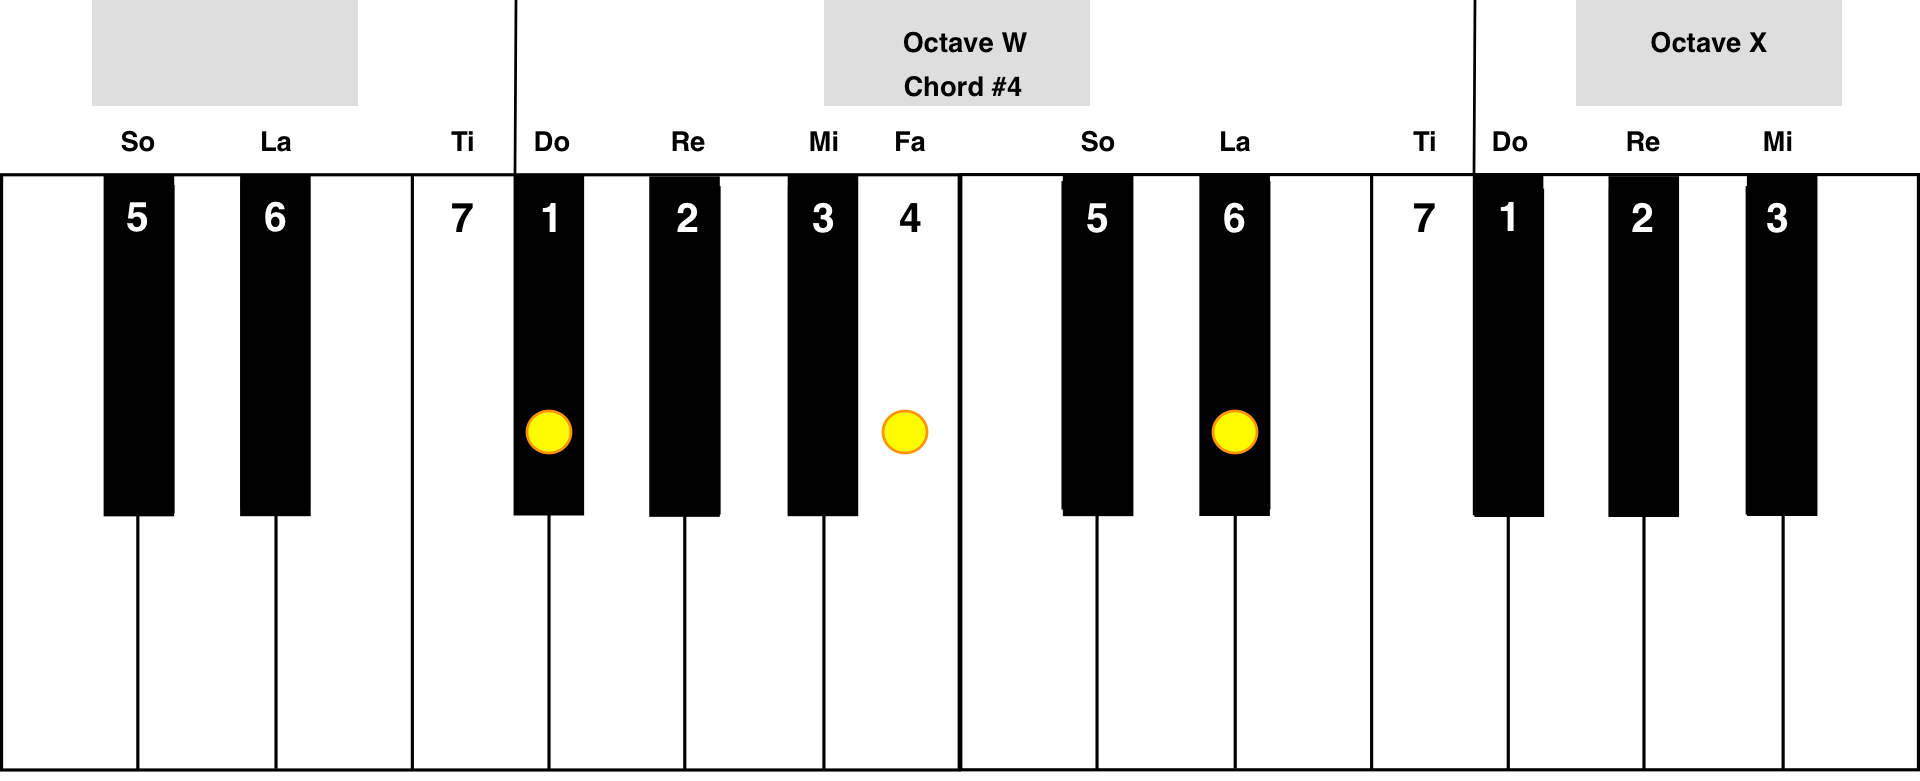
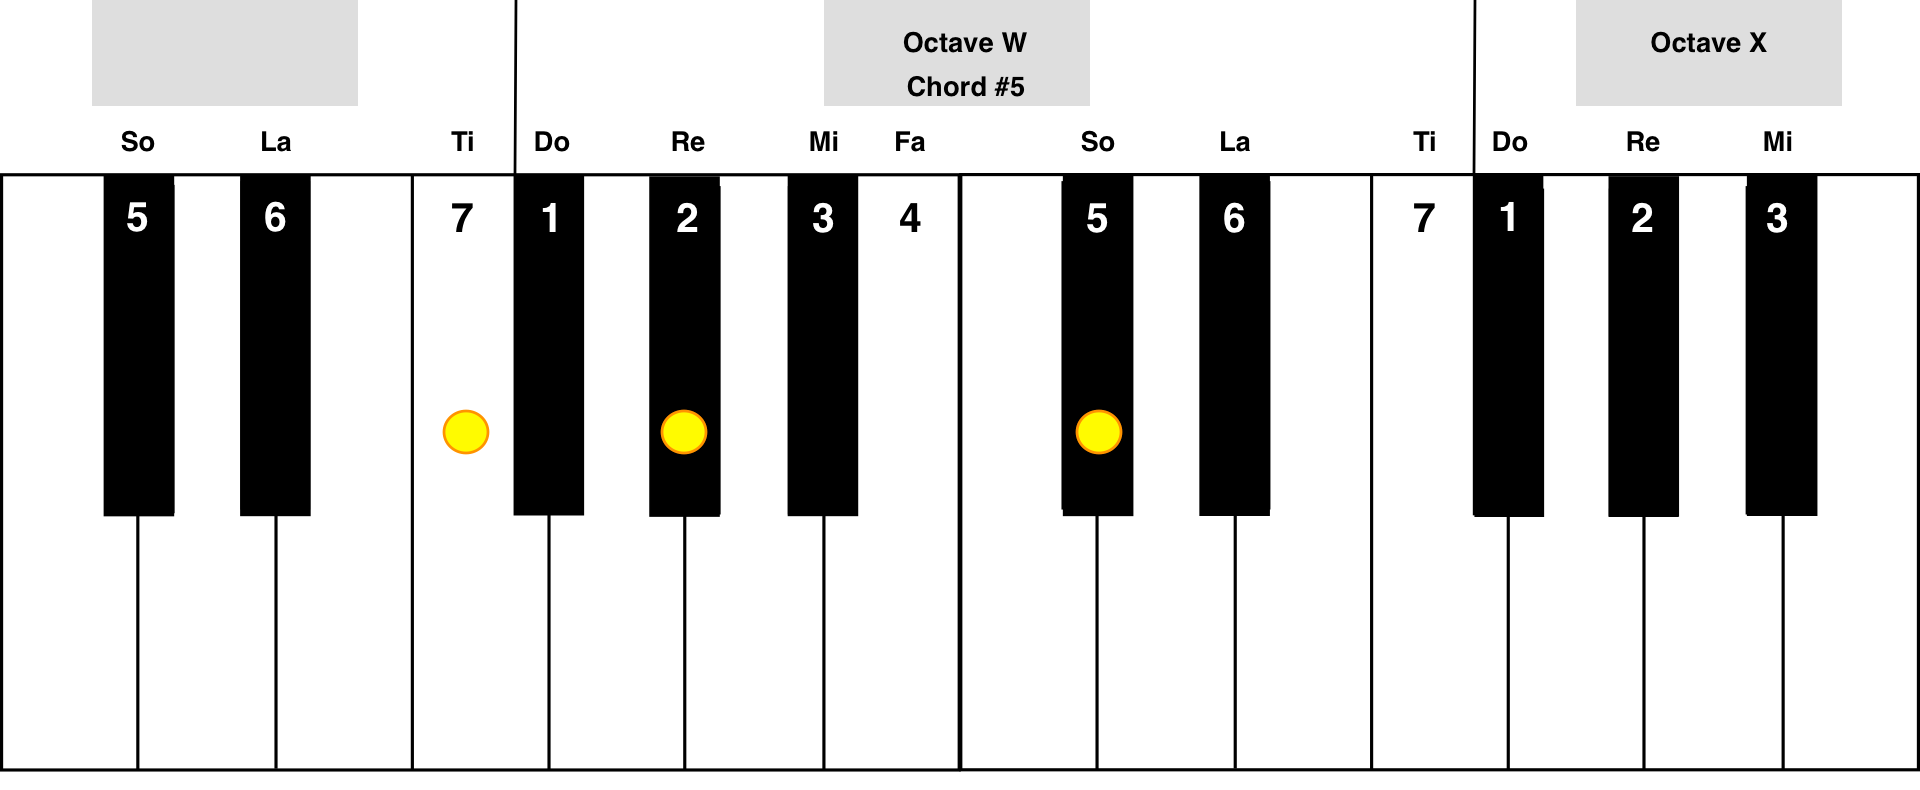
In the following illustrations, the keys to press with three fingers of your left hand are highlighted with yellow circles.
Try playing the chords by themselves.
Start with Chord #1. Play it with your pinky, index finger, and thumb of your left hand, on Note 1, Note 3, and Note 5 respectively. Sound all three notes together by pressing the three keys down at the same time.

Next, move to Chord #4 by keeping your pinky touching Note 1, and moving your index finger and thumb to notes 4 and 6. Sound Chord #4. Then move back to Chord #1 and sound it again.

Finally, move to Chord #5 by keeping your thumb in place on Note 3 and moving your pinky to Note 7 and your index finger to Note 2.

Practice switching between and sounding the chords until you can "feel" each chord and move to any of the three chords without looking.
Now we're ready to put it all together.
For this lesson, I've re-arranged the melody sequence so you will know when to switch between chords. Each line in the "score" below has the chord that goes with it at the beginning of the line. That chord will remain the same all the way through the line.

Here's the melody sequence again, with chords:
CHORD    NOTES              LYRICS
#1   X5-1-3-1-3-2      "a-MA-zing GRACE, how"
#4   1-X6              "SWEET the"
#1   X5-X5-1-3-1-3-2-3 "SOUND that SAVED a WRETCH like"
#5   5-3               "ME. i"
#1   5-3-5-3-1-X5      "ONCE was LOST, but"
#4   X6-1-1-X6         "NOW i'm"
#1   X5-X5-1-3-1       "FOUND, was BLIND, but"
#5   3-2               "NOW i"
#1   1                 "SEE."
Begin by playing note X5 of the melody all by itself, before sounding the chord.
Then, sound the chord when you get to each syllable that I have CAPitalized.
When you sound each chord, press down and keep holding all three notes while you continue the melody with your right hand. Then, release and sound the chord again at the next capitalized syllable.
Notice that some lines may have one, two, or three capitalized syllables. Just re-strike the chord for each capitalized syllable.
Remember, the timing is up to your "ear." Just make it "sound right."
The sustain pedal is your friend.
If your playing sounds "choppy," try using your foot on the sustain pedal. On a typical piano, this is the right-most pedal on the floor. It allows the sound to continue even after you remove your fingers from the keyboard.
For extra credit,
if you "get it" and are happy with the way your performance sounds while playing the chords and the melody together, try this variation:
Instead of sounding all three notes in the chord together at the same time, sound them one after the other. Begin with the lowest note (your pinky finger) and then play the other two notes. This variation is more like the example YouTube video above.
Any questions?
In our next lesson, we'll learn about "chord inversions." No big deal, just a term for playing the same chord with the same three notes in different positions on the keyboard.
Homework?
Practice changing chords without looking, and matching the chords with the melody until it "sounds right." Practice the variation sounding the three notes in each chord separately.
Your memory is your best tool for helping you make this sound the way it ought to sound.
How are you doing? I would love to hear about your progress. Leave a comment below.
Enjoy!
List of Braille Piano Method Posts
The Braille Piano Method - Playing On The Black Keys 🎹
The Braille Piano Method - Lesson One 🎹 Melody
The Braille Piano Method - Lesson Two Chords
The Braille Piano Method - Lesson Three Inversions
FIN
LOOK! Check out our amazing product:
>>CLICK HERE!<<
You are why I'm here on Steemit!
I have very eclectic interests and hope, over time, to write about them all.
⬇️To Check Out @creatr's World⬇️CLICK Each Image Below⬇️

|

|

|

