It's been a while since I have updated everyone on the food forest. Here I talked about what trees were ordered if you'd like to go take a look. It took a few weeks to get everything planted. The truth is they are still not totally finished. They are in the ground and not dead yet, although there are issues with the trees that I will have to go into more detail about in another post. In this post I will be going over the planning, prepping, and planting of those trees. These trees were purchased and planted by the end of April, 2018.

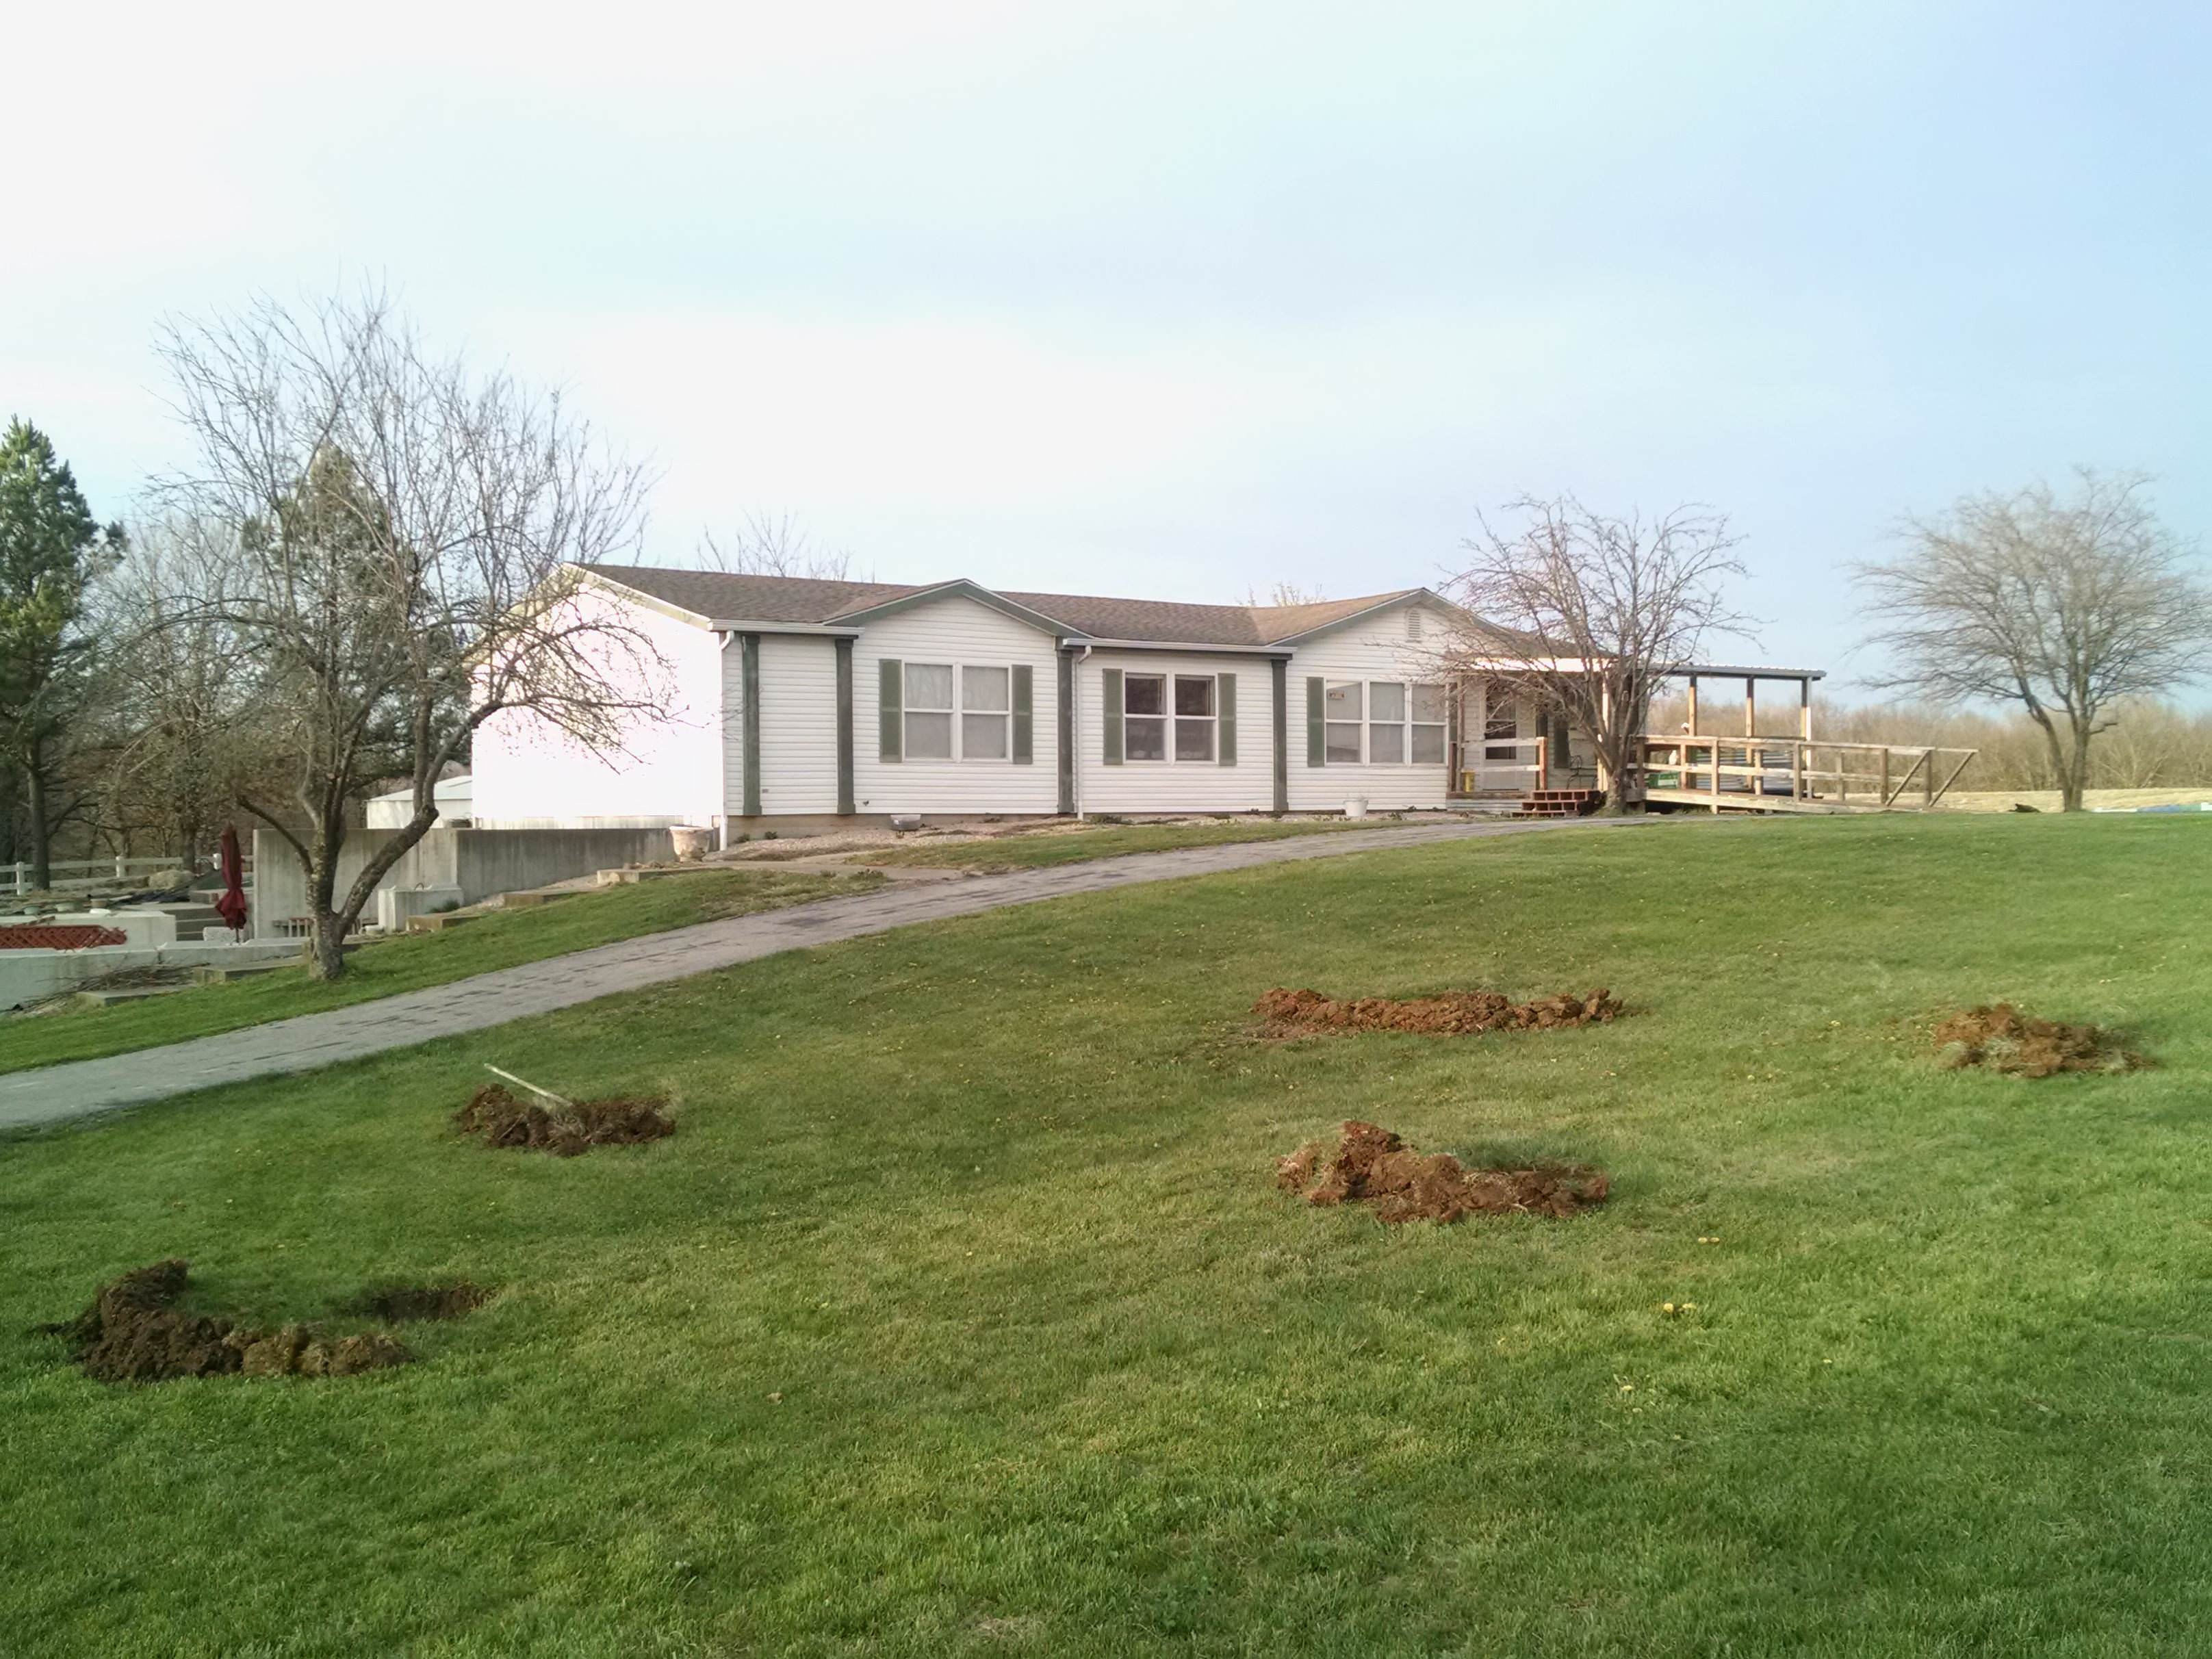
Although it's faint, if you look closely you will see a couple of white circles that I sprayed on the ground to mark the overall diameter of the trees when they'll be fully grown. I added a foot or two on the measurement to account for the next plants in the succession to go in, perennial bushes and shrubs. These will be a couple kinds of grapes, blackberries, kiwi, strawberries, asparagus, lavender, native flowers, etc... I also added abbreviations to designate which trees were to go in each place.

What I did was mark the approximate center of the hole with spray paint. Then I used the tape measurer sort of like a compass to spray the outside diameter. In the above picture the abbreviation 2/1 C means this was the hole where the custom grafted 2 in 1 semi Dwarf sweet cherry tree was to go.

All together 10 trees were ordered. 5 of the fruit trees were to go here in this section of the property. The semi dwarf 2 in 1 Cherry (sweet red and sweet yellow), semi dwarf 2 in 1 Apple (red delicious and yellow delicious), another sweet red dwarf cherry, and two dwarf peaches. There was a dwarf asian pear which was to go in the back yard by the other two pre-existing pear trees. The other 4 newly purchased trees (2 types of hazelnuts and 2 types of pawpaw because both need cross pollinated), were going on the other side of the front yard primarily because the water line from the meter to the house runs straight down the middle of the front yard, effectively splitting the planting area into two sections. Because the two front yard sections will be a food forest the closest and most frequented, they are zone 1 in this permaculture design.
In the above photo you can see that this area for the 5 fruit trees is on a downward slope. These will require more water than the second section where the hazelnut and pawpaw trees are. The pawpaw and hazelnut trees are native to Missouri, so once fully established will grow with little to no maintenance regarding watering, as they are already suited to our climate. The IDEA is to put in a gravity fed watering system, ideally with trenches and swales. Designing it won't really be the hard part. Doing the labor is the hard part.
I can assure you this area looks much less upkept now then it does in this picture lol. This is a nice overall shot of the holes after being dug and berms put in place. These holes were about 2 feet deep and wide, as suggested by the planting instructions from STARK BROS Nursery. Winter wasn't quite done with us but the lawn was beginning to green up as nature began providing more light and warmer temps. (To be little whiny, I'm still disappointed we had virtually no spring this year. Yep, still whining about it in early July. Went from sub temperatures to the dog days of summer in a matter of about a week)
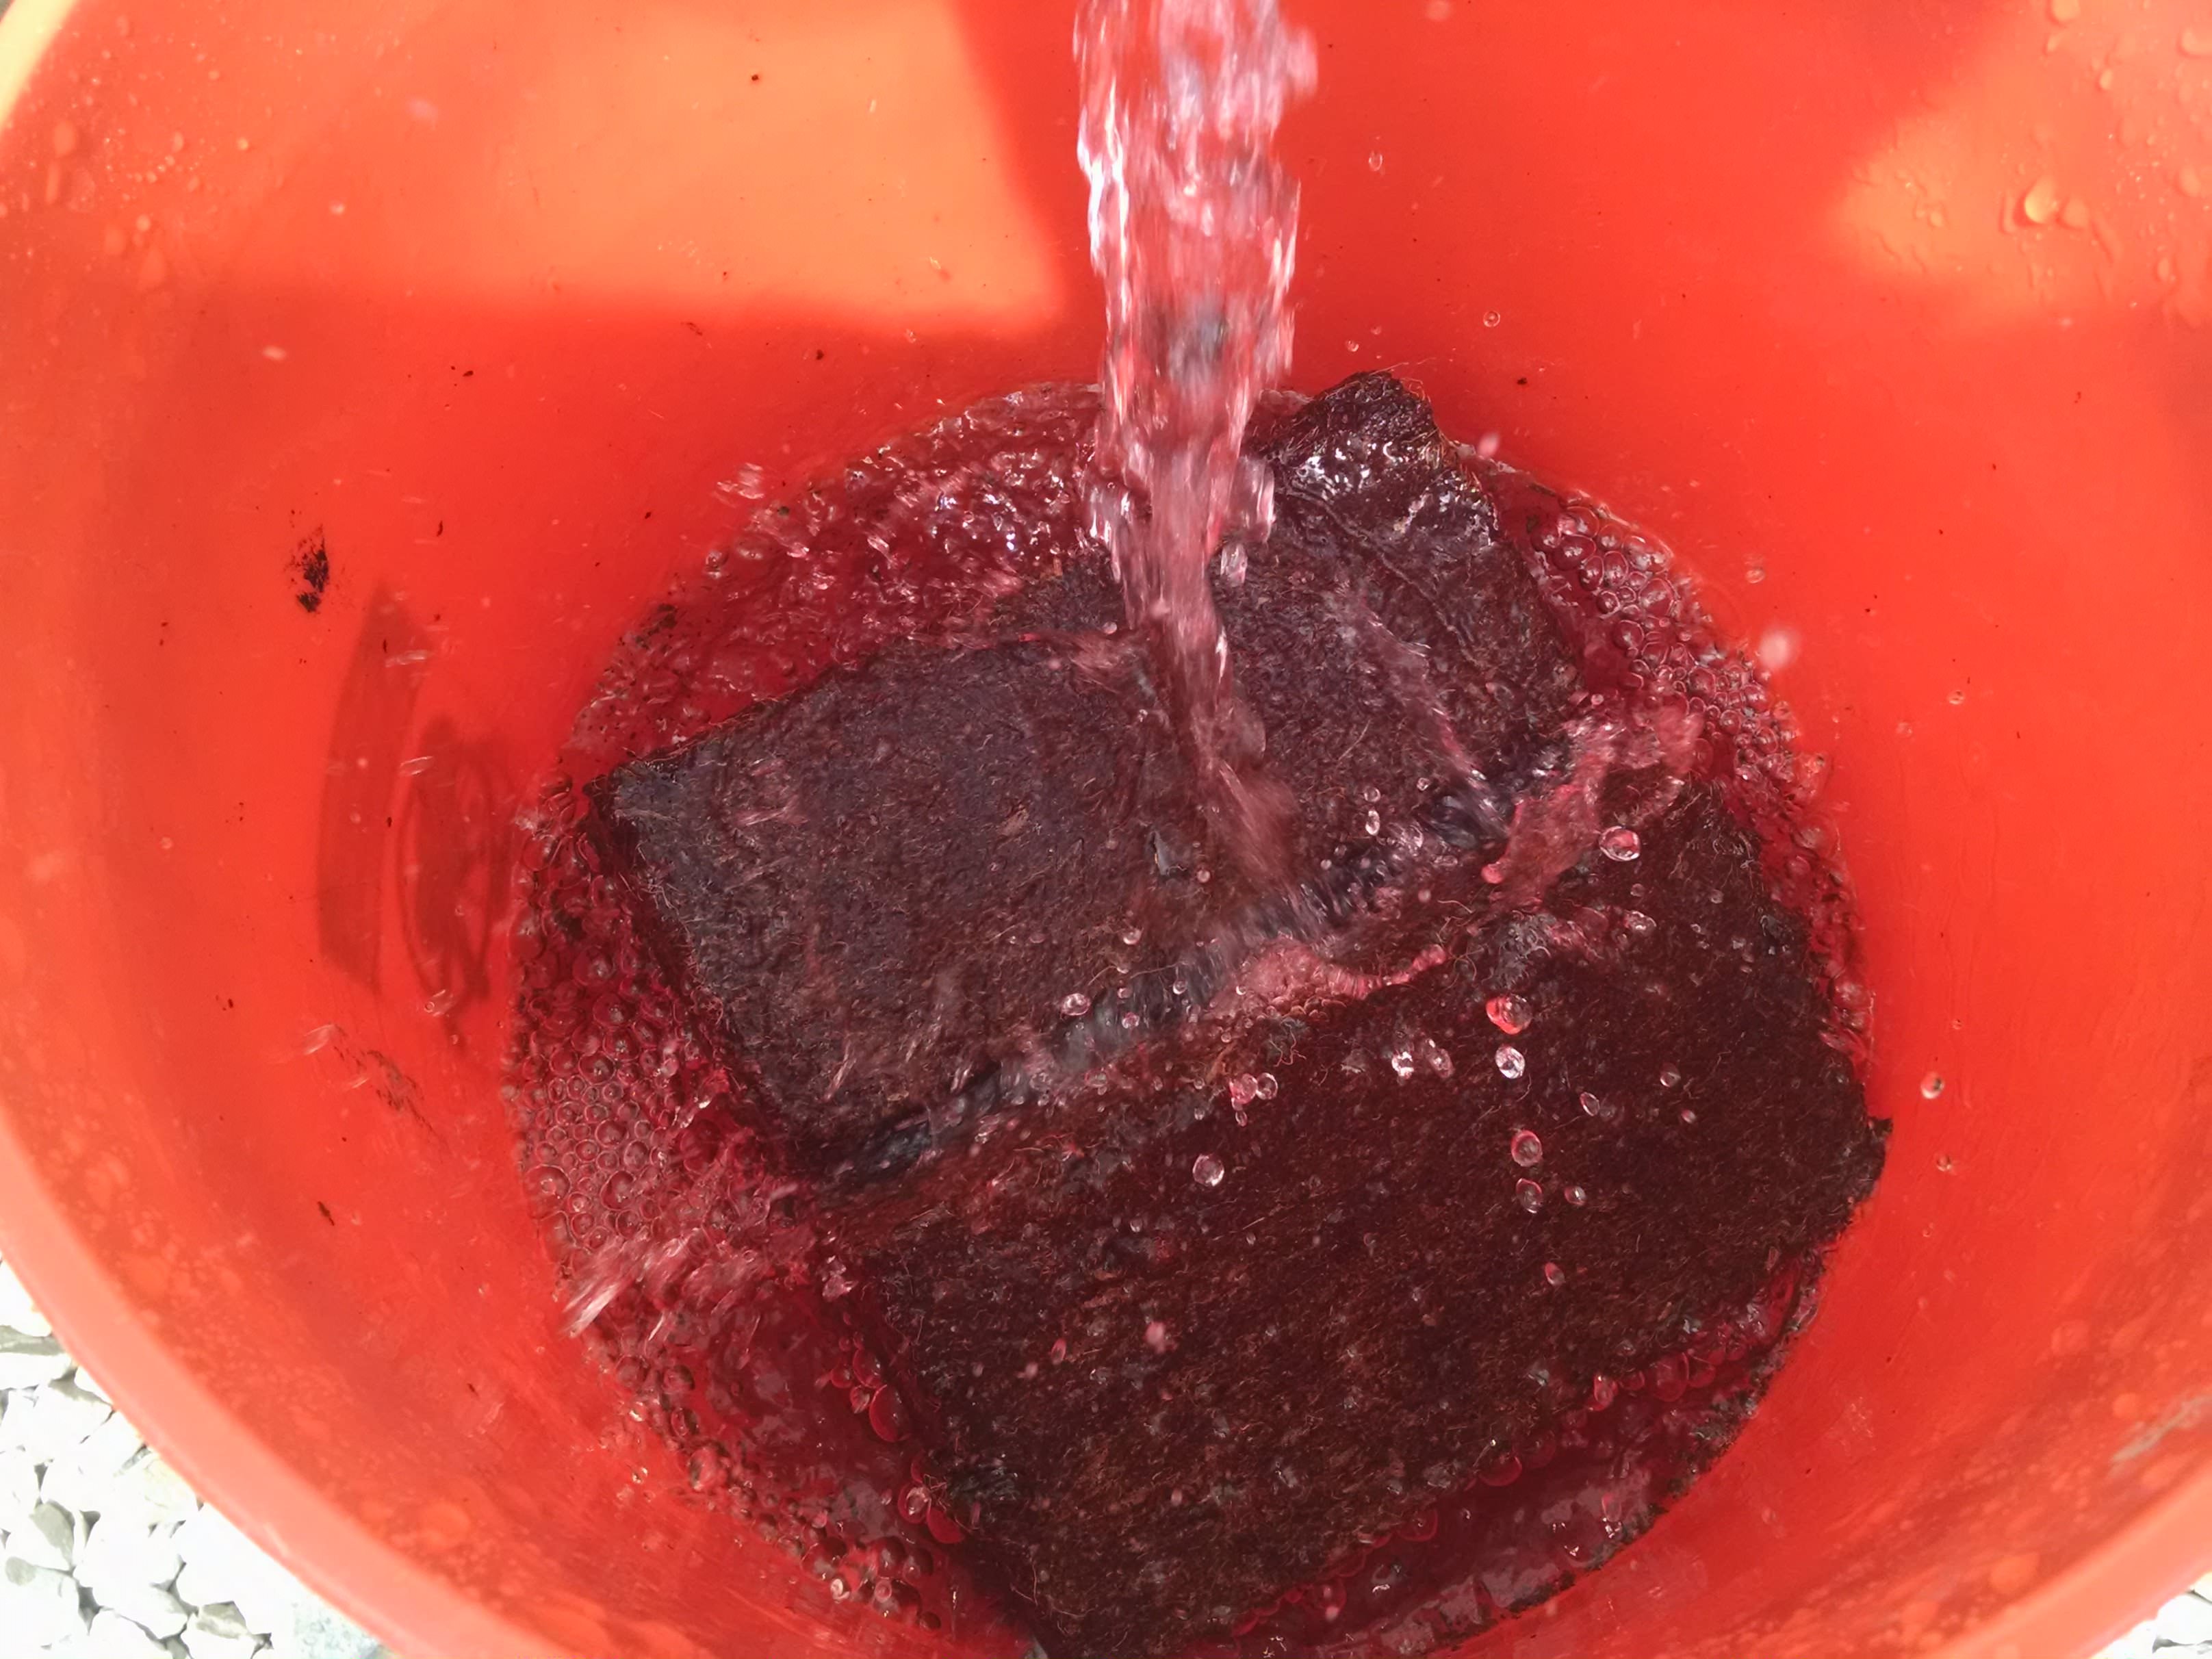
Once all of the holes were dug it was time to get the soil amendments, stakes, and mulching together. Trust me, it's much easier to do a project like this when you have ALL of your supplies easily accessible. Because 6 of the new trees were bareroot grafts the roots needed to soak in water for a few hours. Ideally they needed to go into the ground before they came out of dormancy to reduce the risk of transplant shock. Unfortunately, the weather went all wonky so the trees started forming buds. I needed to get these trees in fast to avoid having to acclimate them. I took a risk not acclimating them, but it seems to have worked out fine in that regard.
I must say, I was pretty stressed about this whole planting phase because these trees aren't cheap. I've never planted trees like this before and was quite nervous they were all gonna die. The other 4 trees were in root trainer pots so their roots were more established and protected. They also woke up sooner then expected so I had to acclimate them over the course of a couple of weeks until the sub temperatures subsided. My hope is that they will all survive until the fall when they go dormant. That should be a good indication that they will survive.

A bale of straw, the soaking coconut coir, and aged compost are patiently waiting to be used. I had mixed a bit of worm castings and micronutrients in with the coconut coir.
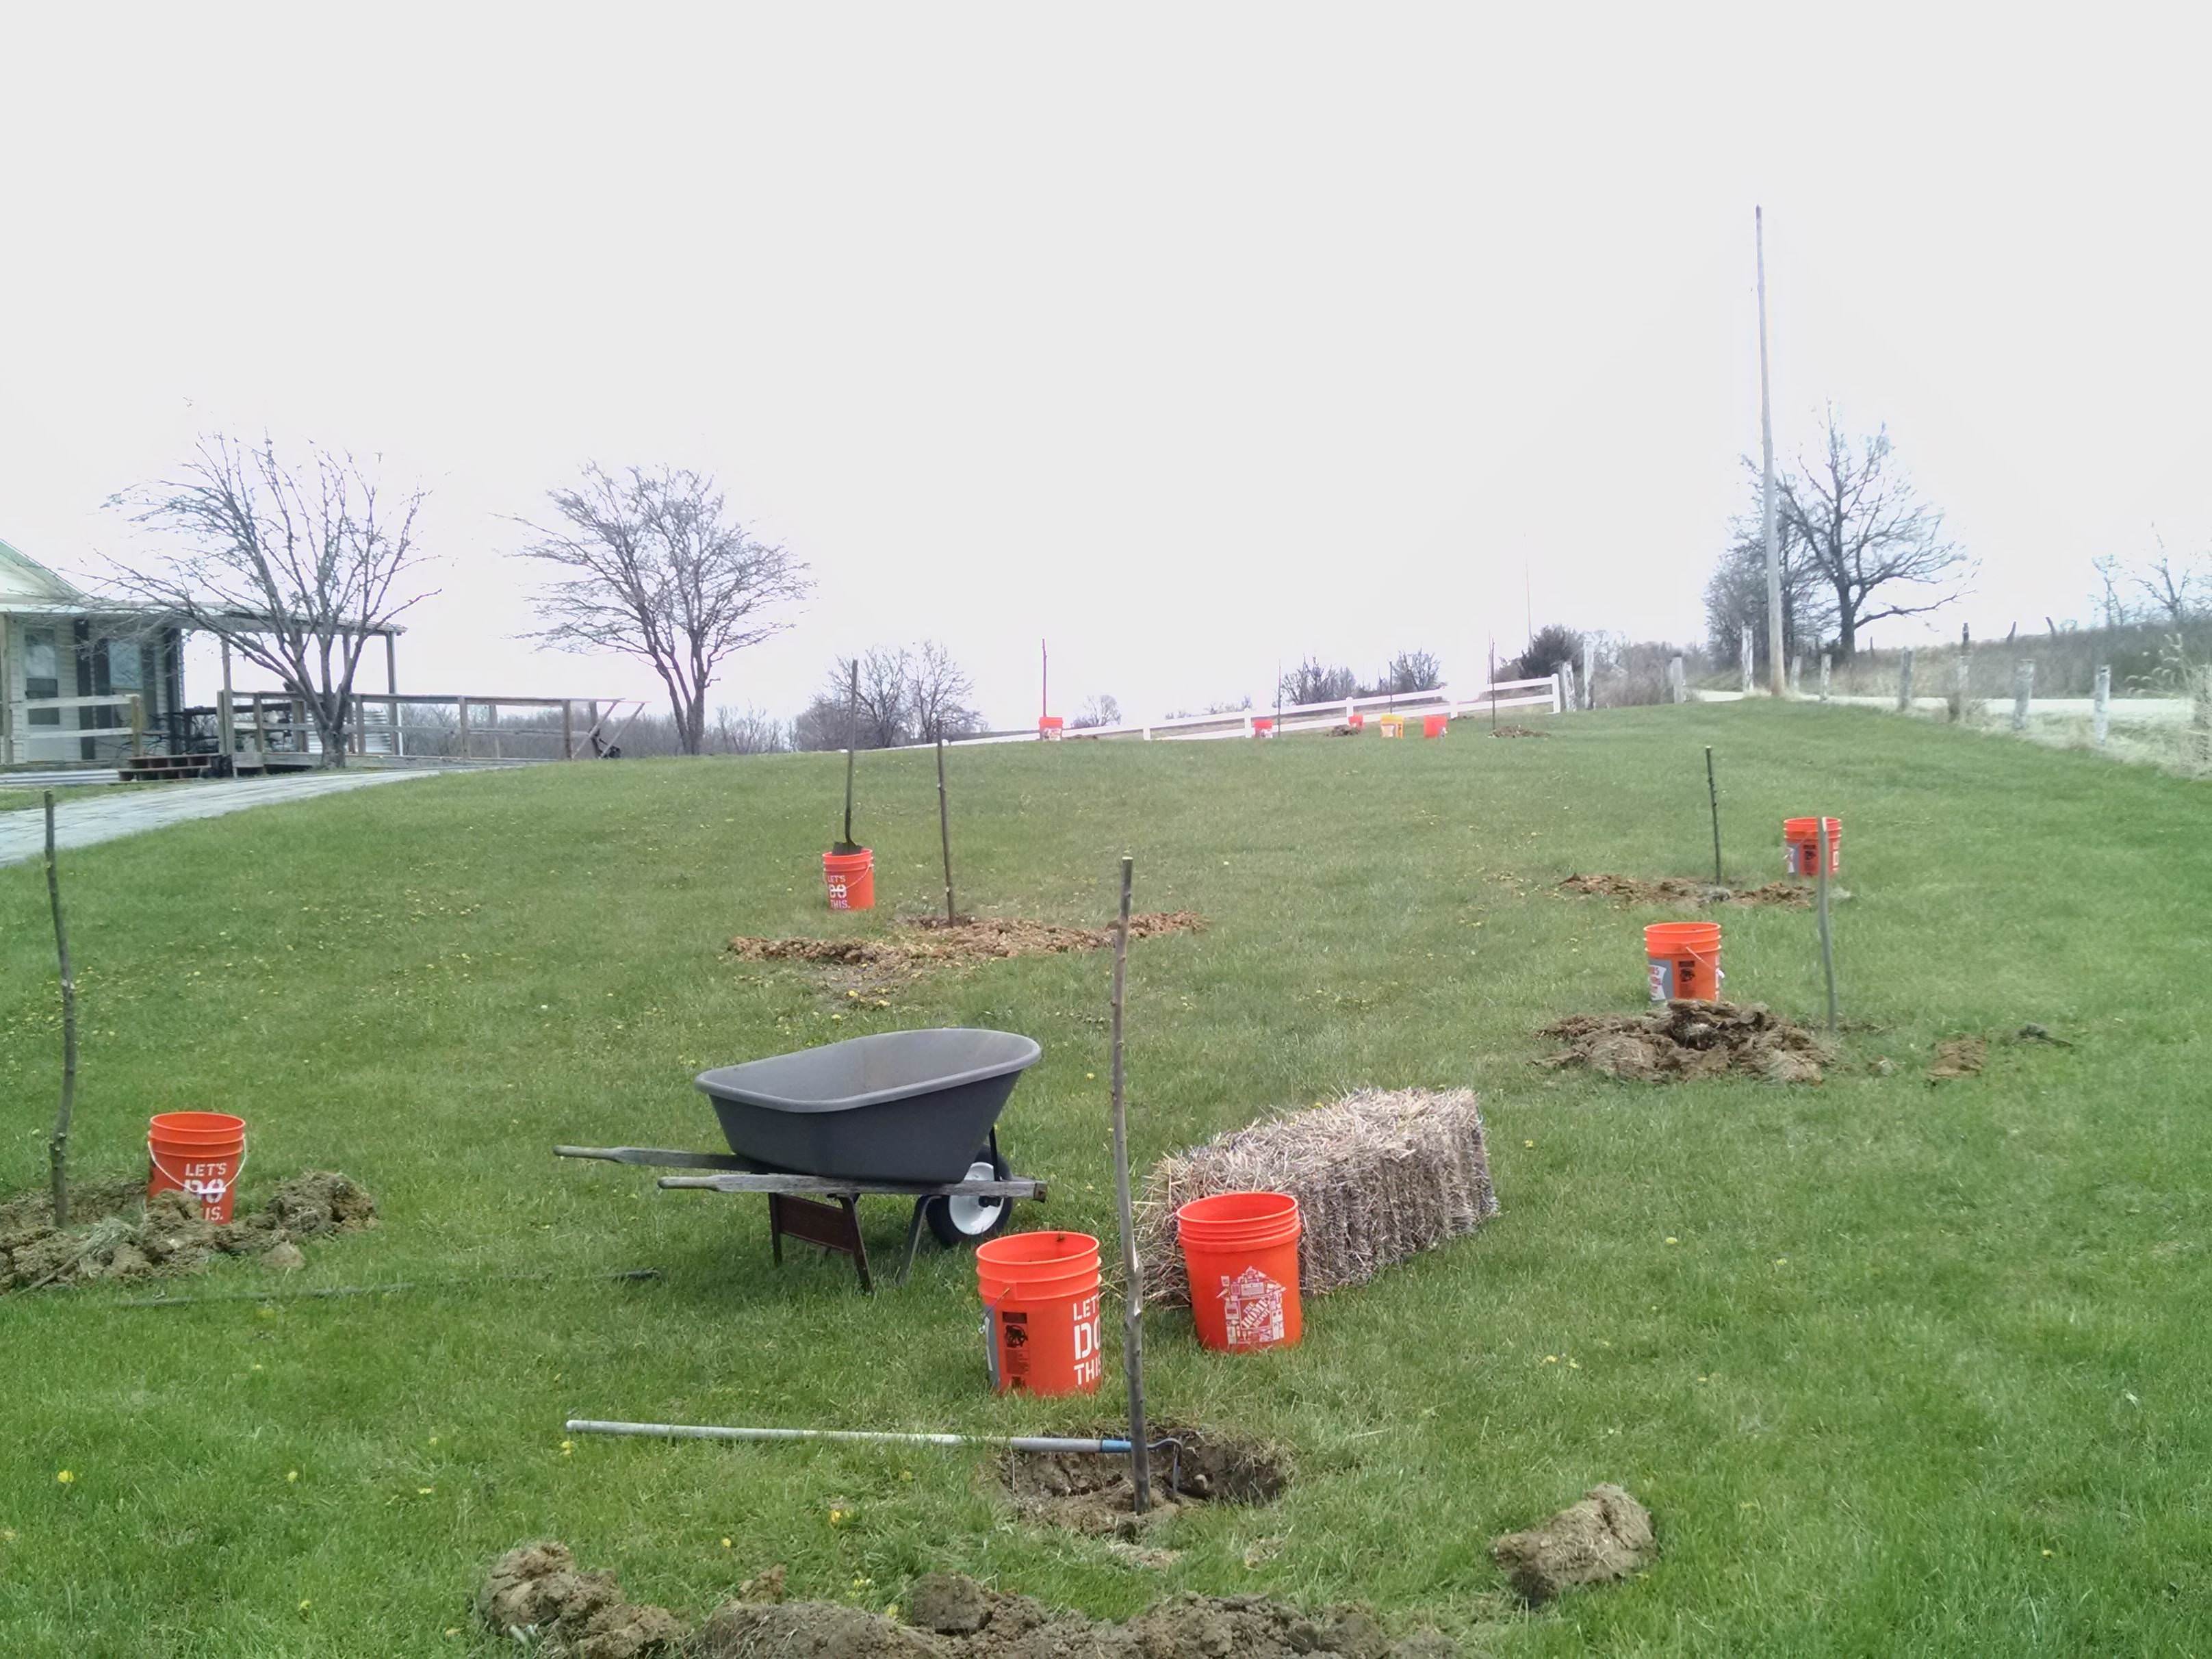
The tree stakes being used are branches from the wild choke cherry tree. Sturdy branches that were mostly straight. They seem to be holding up well, even though a couple of them are starting to lightly crack in places.

I don't think I've mentioned yet that our soil is mostly clay. I did want to amend the soil to make sure the trees get enough nutrition. However, I wanted to make sure I did not over amend the soil so that the roots will be more likely to grow into the clay rather than avoid it.
The method I used was as follows:
After digging the holes I added about 2 gallons of water to the holes and waited for the clay to soak it up.
I mixed peat moss, coconut coir, rock dust, worm castings, bone and blood meal, being sure to alternate a third of that mixture, a third of well rotted compost, and a third the native clay in the hole in layers. I started with a layer of clay and worked my way up to eventually just compost, hoping that would help ease the roots into the clay. Of course, I did all of this while holding the tree in place as straight as possible, backfilling these ingredients.
First a couple tablespoons of rock dust, blood meal, and bone meal were added to the damp clay. Just a touch of each.
Next In the holes went lose chunks of clay. On top of that went a light layer of the compost then smaller bits of clay.
A thicker layer of compost was added, followed by a light layer of worm castings, rock dust, and coconut coir.
The hole was then filled with about 10 gallons of water. It was absorbed quickly because of the mixture inside the holes.
After that was done, a mixture of the rest of the small loose clay and compost was added in a slight mound, with another layer of the coconut coir mixture on top of that.
As per the instructions, I put pressure around the soil with the flat part of a garden hoe to slightly compact the top down to push out some of the air trapped below. I did not use my foot because I didn't want to over compact it with the wet clay that turns rock hard when dry.
Finally, the holes were topped off with a mound of a couple inches of compost.
About a month after planting everything, organic fruit/nut tree fertilizing granules were sprinkled about a foot outside of the perimter of the holes. Usually it should be placed at the edge of the canopy. Because there was no canopy yet I thought putting it a little farther out would help encourage the roots to reach for it. You can over fertilize young plants so I though putting it farther away would help reduce that possibility. Over time I have been thickly mulching with old straw and hay around the bases of the trees.
All seem to be doing reasonably well so far. They certainly could be doing better but they are still growing, forming new branches and leaves. It was suggested to me by @sagescrub and @mountainjewel to make uneven gouges in the sides of the holes prior to planting in order for the tree roots to have a better time growing into the clay, so as not to effectively become root bound. I had already planted most of the trees before I read that great advice. Since planting we have had a mole problem around the base of the trees which I have talked myself into thinking has been a benefit by doing this task for me, saving me from having to dig the trees up and replant.
I am not very happy to have a mole tunneling around the roots of the trees, but after more research have learned they eat the worms at the roots, not the roots themselves. I can always add more worms or wait for them to repopulate. This is probably why the trees did not die after I found the tunnels going from one tree to the next.

The first tree to get completed was the dwarf sweet cherry. It's not very easy to tell but the soil is mounded up slightly above the level of the grass. I didn't make it a very high since these plants are on a slope. Even though the soil will (has) settled the water will flow downhill making it less likely for a water logged situation. It has been so dry here on my homestead this year that I am having to water every 2 to 3 days right now. About double the frequency that would regularly be needed according to the instructions.

As I said in the original post discussing the trees that were ordered, the 2 in 1 grafted sweet cherry came broke at upper graft. Because of that, the company replaced it with another tree. I have to say I am very impressed with Stark Bros. We have that first tree still but have no idea which type of cherry graft is the one remaining on the dwarf root stock. We also didn't plan for an 11th tree because the design already covered all of the area in our yard. Because of this we have temporarily planted it in one of the large pots I originally used in California for the potted dwarf citrus garden.
Although there are a lot of leaves and nice branches developing on most of the trees, they're starting to yellow a bit and get pests and fungal diseases. For the potted 2 n 1 cherry I believe it's due to the soil drying out too easily from the heat and humidity. There's a bit of transplant shock even after the acclimation, although a lot less shock than I was expecting. It's getting some pest pressure. Probably because it's already under a lot of stress. I have been feeding them every couple of weeks with a fish emulsion and aloe vera mixture which does seem to make the plants happier, but it's probably easily washing away when the plants are watered because of the watering frequency. I don't want to over fertilize because these trees are so young. It's also a very hot spell and sometimes the fertilizing in these conditions can stress the plants out.
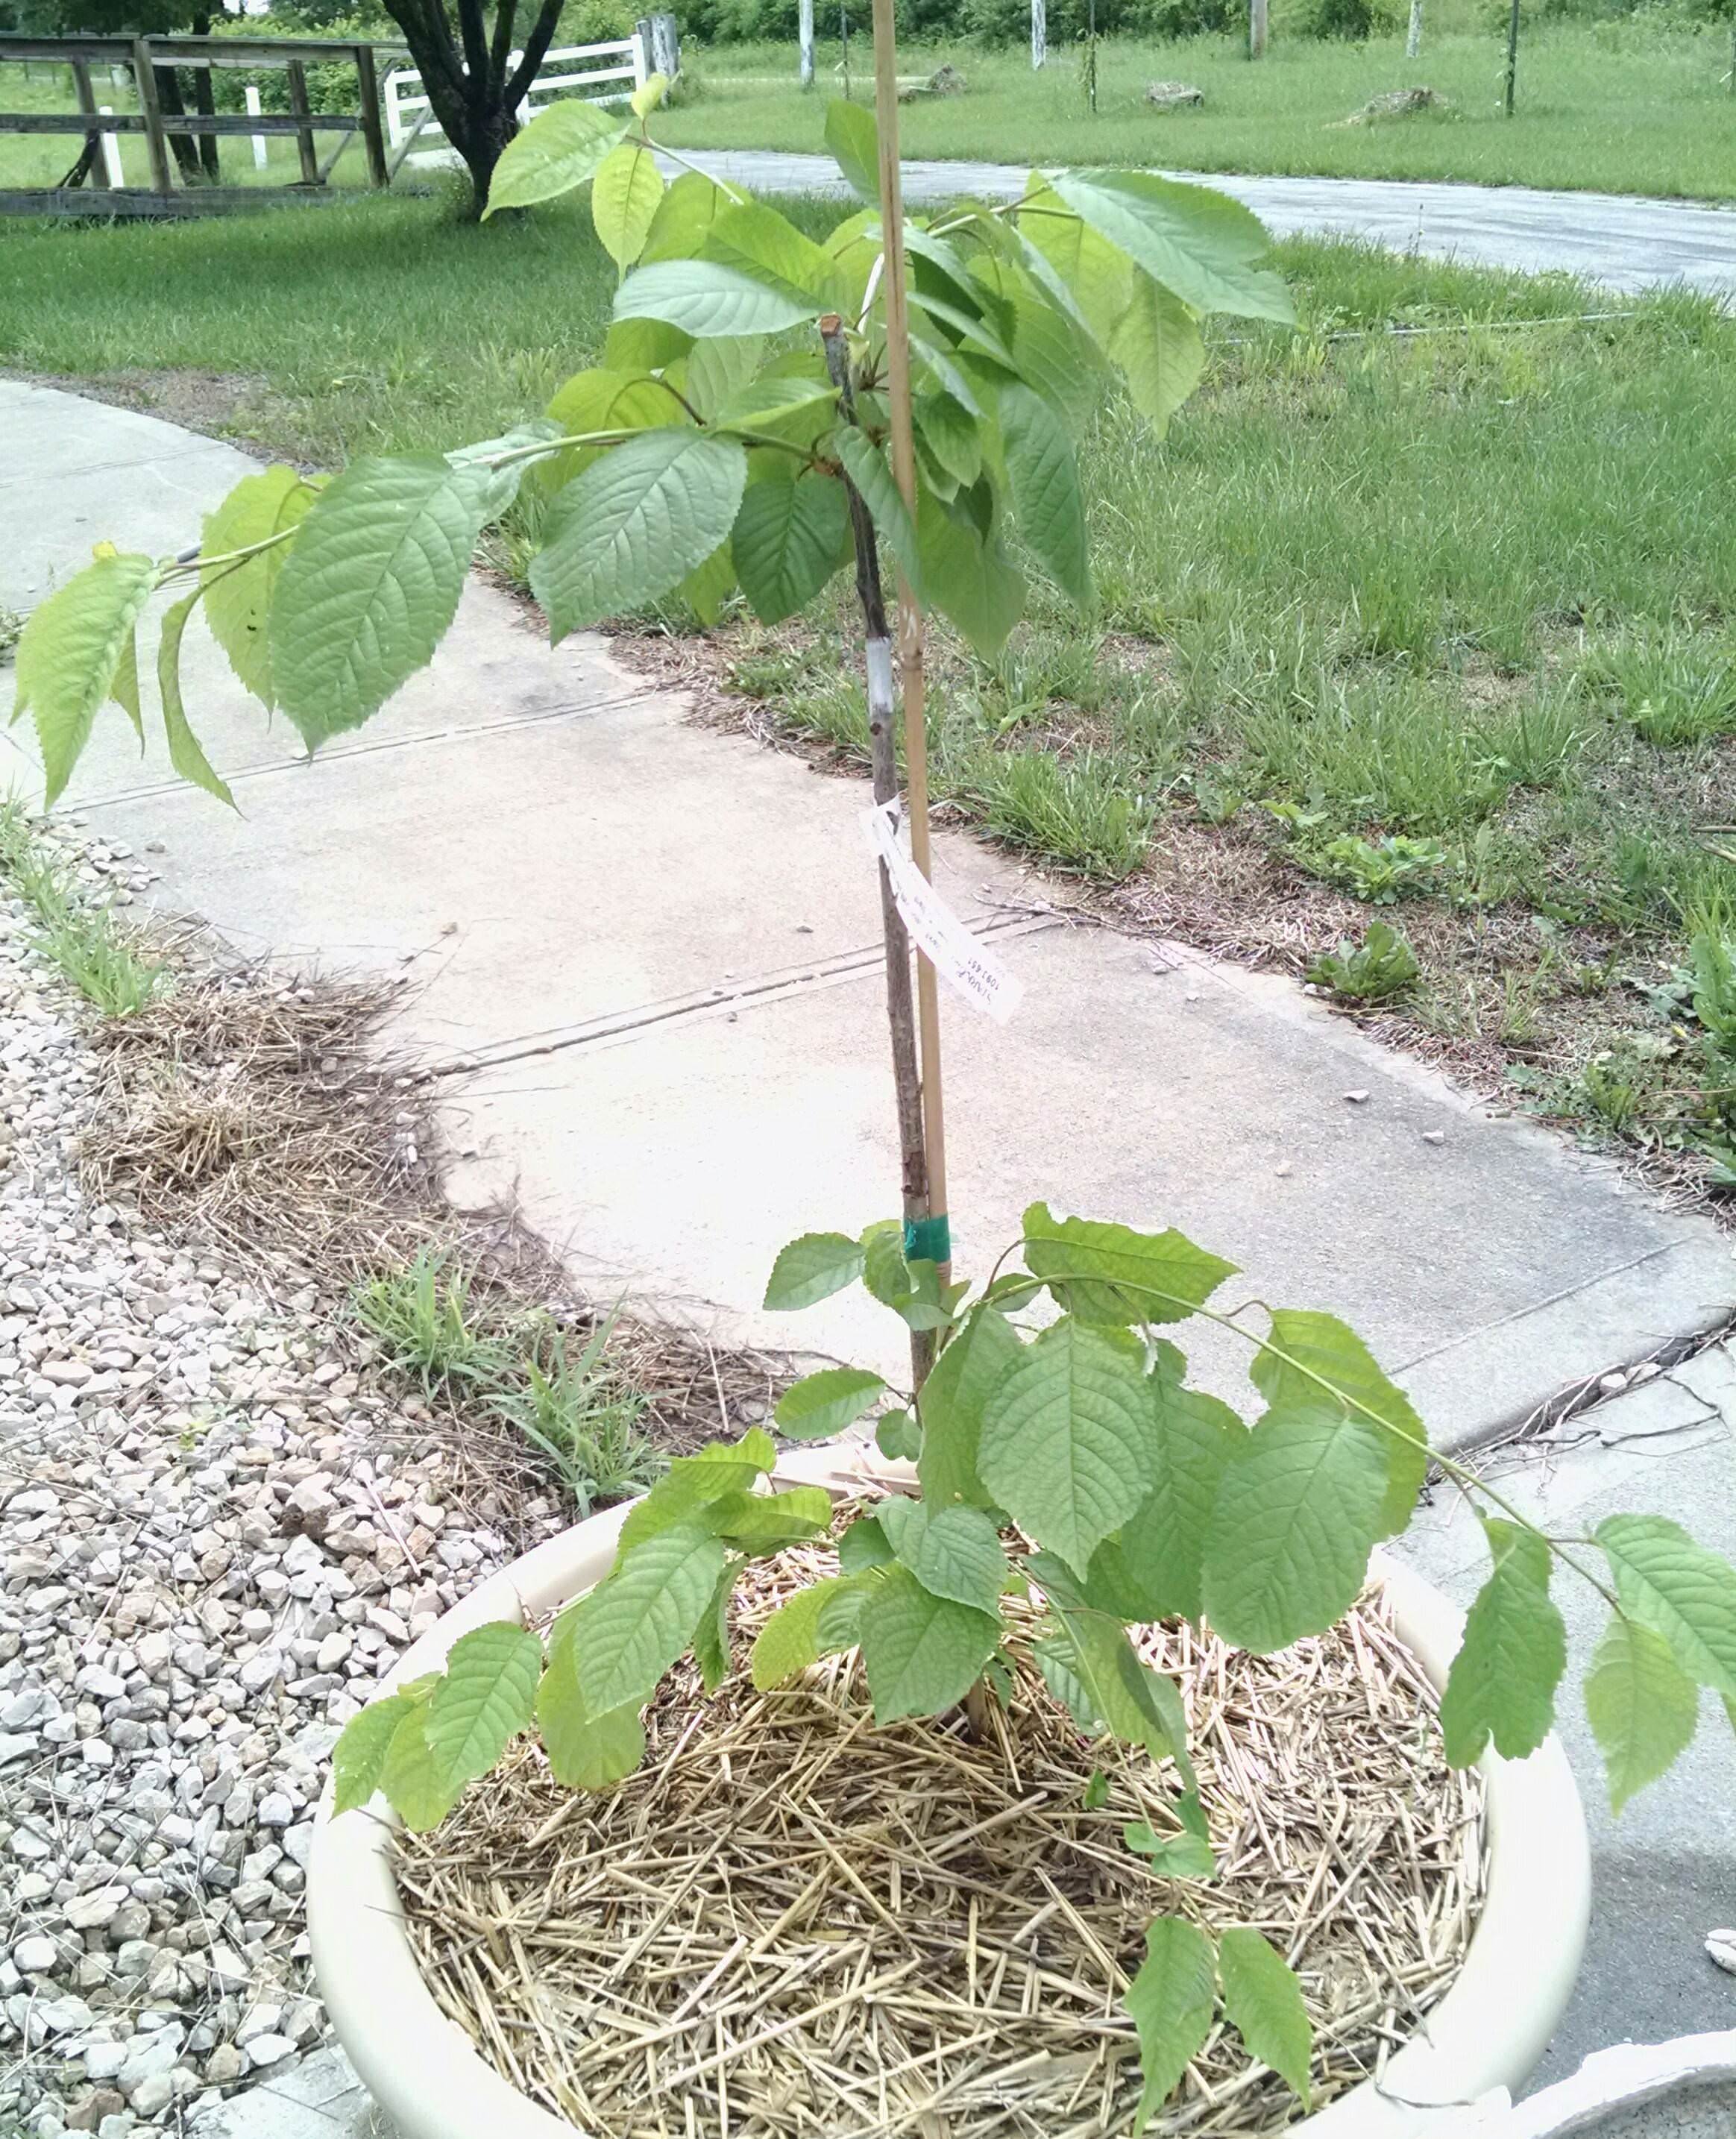
I recently learned from a YouTube channel called ART AND BRI, homesteaders who post short little 10 minute videos, that you can plant more than one tree in a hole if you feed them and prune them correctly. I'm not sure how established the in ground 2 in 1 cherry roots are currently. I'm considering digging a hole close, within a foot or two, for the original mystery cherry tree. It's not super happy in the pot. We have no where else to plant it, either.
That's all for now. Until the next update. I'm quite a bit behind with posting and interacting on steemit at the moment. Best I can say about that is I'm an easily preoccupied person with a tendency to get overwhelmed... If you found this post enjoyable, please consider upvoting, resteeming, following, and commenting! Thank you kindly for reading...
ALL IMAGES ARE COPYRIGHT 2018 BY ME, @phedizzle. Hope you enjoyed them!
Here are previous posts of mine:
STORIES:
BAREFOOT IN THE BOONIES: EXPOSING MY ROOTS (introduction post)
BAREFOOT IN THE BOONIES: Chapter 1
BAREFOOT IN THE BOONIES: FAMILY OWNED: Chapter 1 Section 2
BAREFOOT IN THE BOONIES: ABANDONED BASEMENT: Chapter 1 Section 2
BAREFOOT IN THE BOONIES: REWIND: GROWING UP WITH TURNTABLES
2011 GARDEN:
2011: DESIGN AND BUILD
2011 BACKYARD TRELLIS, PERIMETER, & VOLUNTEER
2011 TIRE PORTION OF THE GARDEN
2011 BRASSICAS-TIRE GARDEN
2011 DWARF ORCHARD
RECIPES:
SANTA DELIVERED SHROOMS-SHITAKE OYSTER SCRAMBLE
SWEET CINNAMON POPCORN
MOCK ALMOND JOY--CHEAPER AND HEALTHIER
HANGRY TERIYAKI
RASHES--WHY I SWITCHED TO THIS COMMON DIY LAUNDRY SOAP AND HOW I MAKE IT
SCRAMBLED EGGS WITH FORAGED FINDS: FIRST FOOD FORAGE OF 2018
POEMS:
WATCHING THE SPRING WAKE UP
SHE IS DYING
WEEPING WILLOW
PLANTS AND ANIMALS-EDUCATIONAL:
GRASS IS OUR FRIEND
LITTLE BLUESTEM--BENEFICIAL AND BEAUTIFUL
BEHOLD THE BEAUTY OF THE FALSE INDIGO BUSH
WALK ALONG WITH ME:
WALK ALONG WITH ME 1
WALK ALONG WITH ME 2--WINTER 2017/2018
2018:
WILD TURKEY TAIL AND REISHI MUSHROOMS
HUGELKULTUR BED STARTED BUT THERE IS A LOGISTICAL OBSTACLE.
2018 CURRENT HAPPENINGS: FOOD FOREST EXPANSION
WILD EDIBLES AROUND THE HOMESTEAD
GRANNY SMITH APPLE FINALLY GOT SOME LOVE
PICKED MY FIRST PINT OF WILD NATIVE BLACK RASPBERRIES
TRANSPLANTING WILD PURPLE GARLIC PART 1
CONTESTS/REVIEWS
Chronic and Coffee MSP Review--25 SBD contest for the best MSPWAVES Radio Reviews
VOICES FROM THE MOUNTAINS Review--25 SBD contest for the best MSPWAVES Radio Reviews

Phedizzle signature created by @bembelmaniac

(Created by @soulturtle)


So come say hello in the following Discord chat rooms: