Hello steemit educators! Welcome to the third post of "Teaching Physics". Our topic is the air and how we can teach basic properties through safe and simple experiments that work perfect for primary school children.
The first post was about three experiments that prove that the air has volume and mass. The second one was about another set of three experiments to prove that the air is a mixture and contains water and oxygen. In this post we are trying out three experiments to prove that the air, like all matter, can apply pressure on any other object that comes in touch with it.
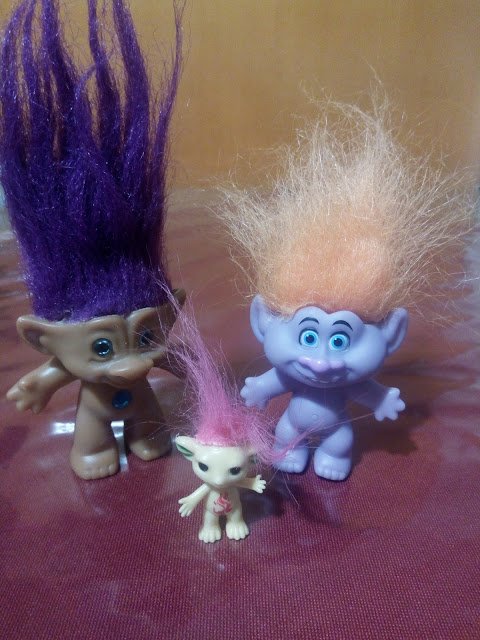
The troll team is here to help me once again! Hello trolls!!
OBJECTIVES
Teach that the air can apply pressure: The air consists of matter in the form of molecules. Therefore, the air has volume and weight (we talked about it in part 1) and today we're going to show that it can apply pressure, just like any other object.
As we have said many times before, children in primary school don't need further details and intricate ideas. Our purpose is to "wake up" their curiosity and get them to show more interest in learning physics.
Since the air is a weird state of matter, children may find it hard to understand that it is still material and has weight and mass, and for this reason it can apply pressure on any other object.
DETECTING FORMER KNOWLEDGE
We remind our students the conclusions from our last experiments, that the air: a) has weight, b) it has volume (takes up space), c) is a mixture and contains water and oxygen.
After that, we ask these questions:
-Can air apply pressure on objects?
-Can you feel it?
The children might start doubting their beliefs, because during the last experiments their knowledge was proven wrong. So now they might be suspicious and intrigued to see our next experiments. No need to wait, guys! Let's get those trolls to work!
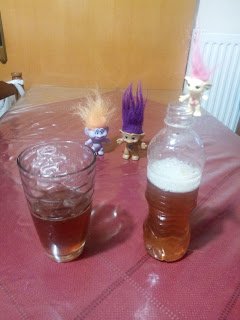
EXPERIMENT 1
The air can apply pressure to objects.
Materials:
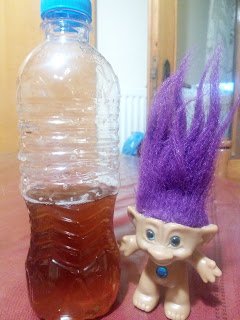
- a glass
- a plastic bottle (I used a small one)
- water
- paint (I used some coffee to color the water to make it more visible in the photos)
Process:
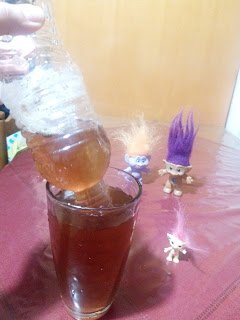
- Fill the bottle with the colored water (up to the middle).
- Pour some colored water in the glass (up to the middle).
- Carefully turn the bottle upside down into the glass and try not to move it as we don't want air to get in the bottle.
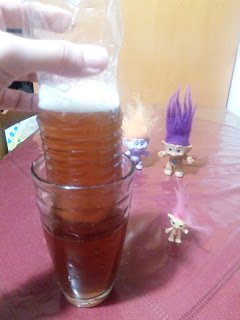
Some water escapes into the glass but not all of it can get out of the bottle.
Conclusion: At the point where the bottle's "mouth" meets the water's surface in the glass, the outside air pressure equals the total pressure of water and air inside the bottle.
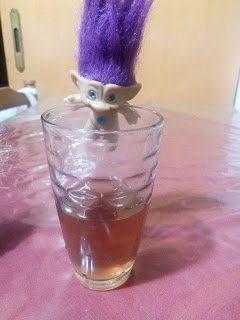
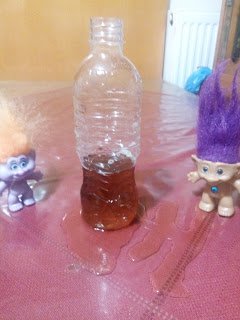
Let's see what happens if we slightly move the bottle and air starts getting in...
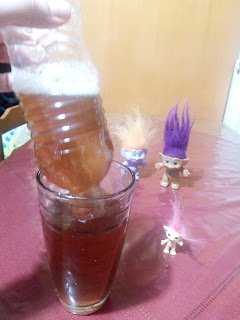
The water spills out and fills the glass.
Conclusion: The air that gets into the bottle increases the pressure in it, pushing the water out.
EXPERIMENT 2
The air can apply pressure to objects.
Materials:
- a glass
- water
- a piece of paper/carton
Process:
- Fill the glass almost up to the middle (in a variation you can fill it up to its rim - it's easier to successfully perform the experiment that way).
- Place the carton over the glass.
- Turn the glass upside down.
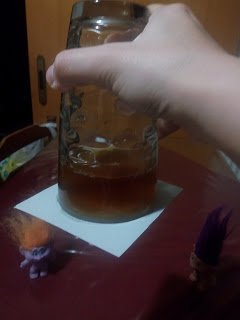
The water doesn't fall out, only a few drops spill out.
Conclusion: When we turn the glass upside down (second picture above) and hold the carton in place the pressure inside the glass (from the air and the water) will be higher than the outside air pressure, meaning that a few drops will be pushed out. When the inside-the-glass pressure becomes equal to the outside-air pressure, the carton will stay in place and we'll be able to remove our hand without making any mess.
The experiment would be easier if we had filled the glass to the rim, because there would not be any air in the glass applying extra pressure, therefore no water would run out and the air would hold the carton in place right away.
EXPERIMENT 3
The air can apply pressure to objects.
Materials:
- a bottle
- a screwdriver
- water
Process:
- Use the screwdriver to open a hole in the bottle (I did it near the bottom).
- Fill the bottle with water and quickly place the cap.
- Then, remove the cap.
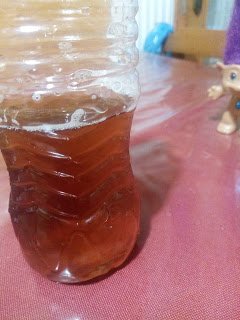
When the cap is on, the water cannot get out, just a few drops. When you remove the cap, water starts dribbling.
Conclusion: When the cap is on (first and second picture above) the air pressure in the bottle equals the pressure of the air outside. But around the inside of the hole the pressure is greater because there is water in the bottle that applies pressure too. A few drops of water will be pushed out due to the greater inner pressure. After a short while there will be a balance of the inside and outside pressure and water will stop dripping. If we open the cap (third picture above), air will get in, increasing the pressure over the water and leading it out of the bottle.
References
Panagiotis Koumaras, "A guide to teaching physics through experiments" - Christodoulidis Editions (Thessaloniki 2005)
*All images by @ruth-girl

Thank you for being here and reading my post, perhaps some of you will find it interesting and give those experiments a try. If you do so, please leave a comment on how they worked for you and your class. You may also want to suggest any other experiments or projects to make this lesson even better. It would make me even happier if you were a parent and tried those simple experiments with your child/children, they are so simple, you can easily do them at home.
Perhaps you'd like to go through my blog, @ruth-girl, and discover plenty of lesson plans along with my bizarre natural phenomena series.
Finally, for those of us engaging with education, @steemiteducation is here to join all steemian educators in their common cause of making our job easier, more effective and more fun, because...
Thank you for your time and as I like to say,
Steem on and keep smiling, people! :)
