These posts are not for foraging. They are intended for entertainment and intellectual satisfaction only. These posts are not a field guide nor comprehensive in any way - their accuracy is not assured in any way. Do not eat wild mushrooms unless you are a professional, have substantial professional assistance or have a wealth of personal experience with a specific species. Do not make any foraging decisions based on these posts. To do so could be dangerous or life threatening.
These Posts Contains No Information Regarding Edibility Or Toxicity
Edit: After speaking to @huitemae about the margin of error, he pointed out that even my observed margin of error is quite possibly less than the reality. First, my own line drawing skills are definitely off and, second, the calibration slide itself is not independently certified, so the .07 micrometer diameter circle could be off by a few hundredths of a micrometer.
To compensate for this unknowability, I have increased the estimated margin of error to +/- .03 microns per micrometer. This should account for most errors, and, as I explain in the post, should have no measurable affect on the sort of mycological features I will be searching for.
Let's start with the final product:
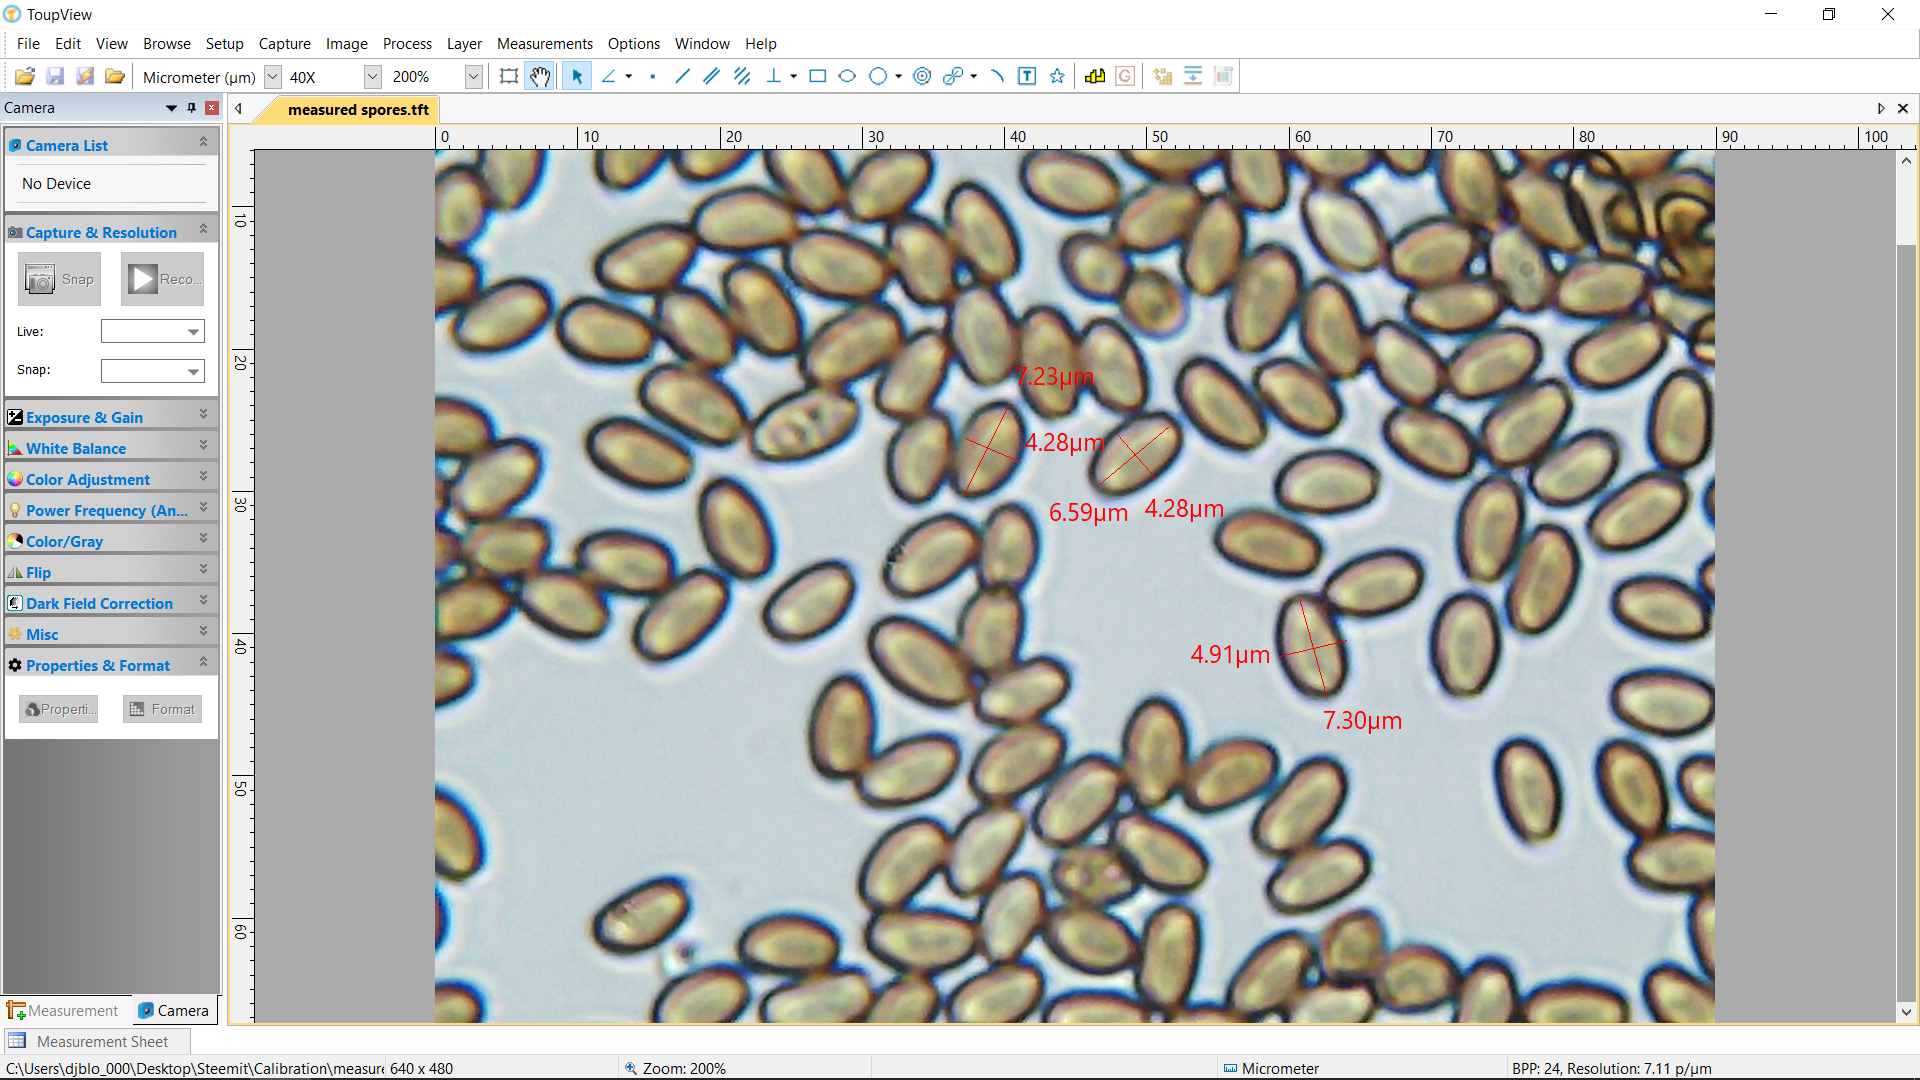
Measured spores at roughly 400x magnification, accurate to within +/- .03 microns per micrometer.
I spent a chunk of the weekend finally sitting down, deep cleaning, and then calibrating my sh$@ty starter microscope! It was super edifying and should add accurate micrometer measurements to my future observations!
In this post, I just used some left over coprinoid spores I had laying around the house as a final proof of concept. (Yes, I seriously had spores just lying around the house...).
But on Thursday we will run a full "field" analysis, including confirmatory microscopy, using a known mycological sample - the best control mushroom in America in fact - Agaricus bisporus.
However, although a controlled "field test" is forthcoming, I can already be quite sure of the accuracy of the calibration because of the calibration slide I used.
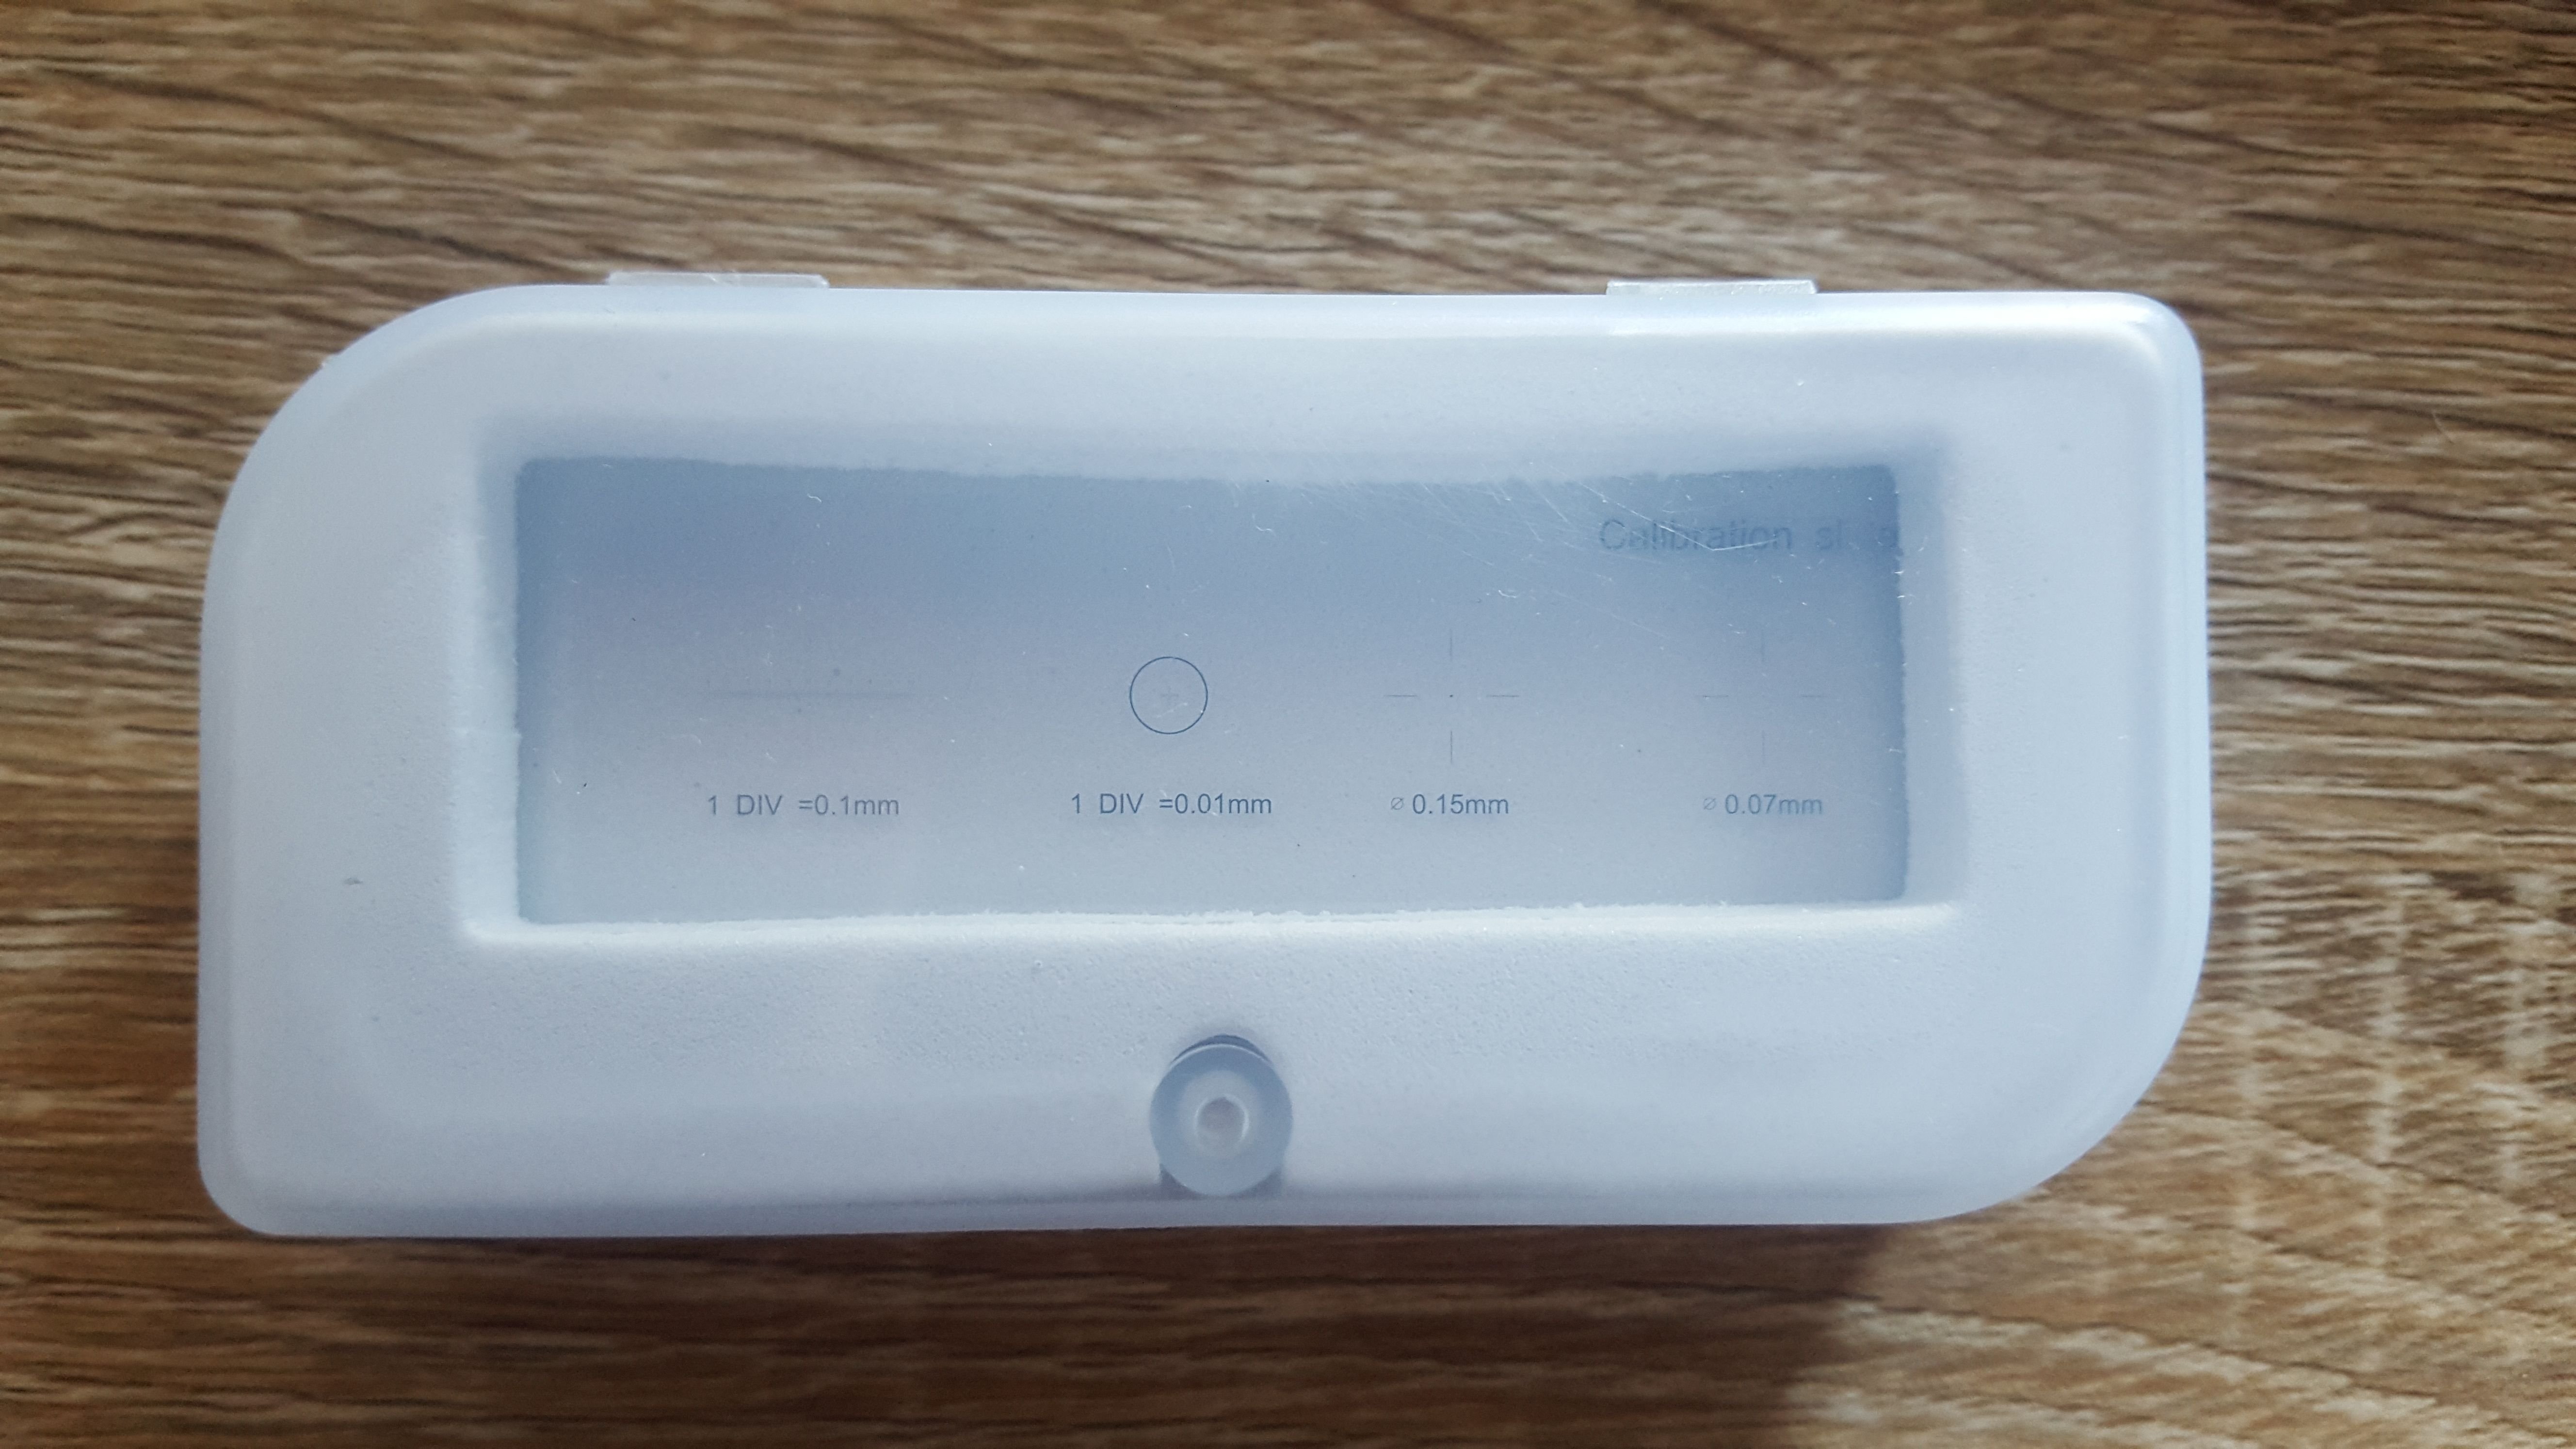
Using the pre-measured scales on this calibration slide, I as able to calibrate even my crappy microscope, and its crappier camera.

But, before I could begin calibrating the scope, I needed to give it a thorough cleaning. The last few times I've used it, my microscope was picking up a ton of microscopic detritus, at basically all layers of the process. To fix that problem, I bought some basic cleaning implements - Kimtech "delicate task wipes" and some Dust Off from costco.
Additionally, I found that my fingers were leaving greasy smudges everywhere, so I decided to get some gloves as well.
First thing I dusted off basically every part of the microscope to get rid of larger particulate using the canned air. Then I set in with the Kimwipes. Some of the lenses were easy enough to get to, so I gave them a bit of breath and then a thorough wiping. For the more difficult to reach places, I decided against unscrewing any of the parts of the microscope, on the off chance I couldn't put it back together. So I reached those ares using a Q-tip as a plunger of sorts with a kimwipe on the end. Then, after every lens was wiped, I gave everything a final canned dusting.
After the lenses were all cleaned, its time to start calibrating.

OK, take another look at the calibration slide.
The premise behind the slide is very straight forward, but wasn't super obvious to me initially. In fact, the whole idea of having to calibrate the microscope in the first place was not intuitive. Somehow, illogically, I just figured the scope's digital camera program would just be calibrated from the start.
Of course, that's ridiculous. In order to make a microscopic measurement, you need a known quantity to work off of at a given magnification. That is what the calibration slide provides.
See those tiny markings on the calibration slide? Let's zoom in 40x.
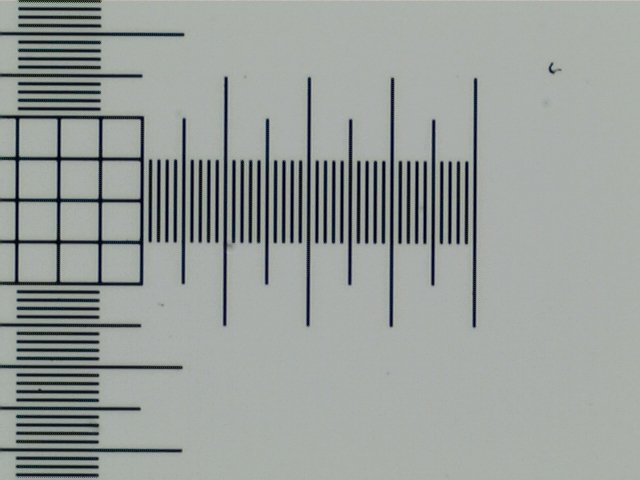
I should have known this was coming, but seeing this was when things really clicked in my head.
Those four tiny bits of writing on the calibration slide you see in the macroscopic picture above are four different pre-measured sections. The Picture here is a portion of a crosshair that is 1 millimeter across horizontally and vertically. The space between each line is 1/100th of a millimeter("div = .01mm"). The squares in the center are .05 x .05mm each.
Calibrating the measurements consists of indicating the aperture size, choosing the unit of measurement, and then placing a measuring line between two points on the image that amounts to a known quantity.
Let me explain in more detail at roughly 100x magnification of the same 1mm crosshair
Of course that is the same crosshair as before, but zoomed in on substantially
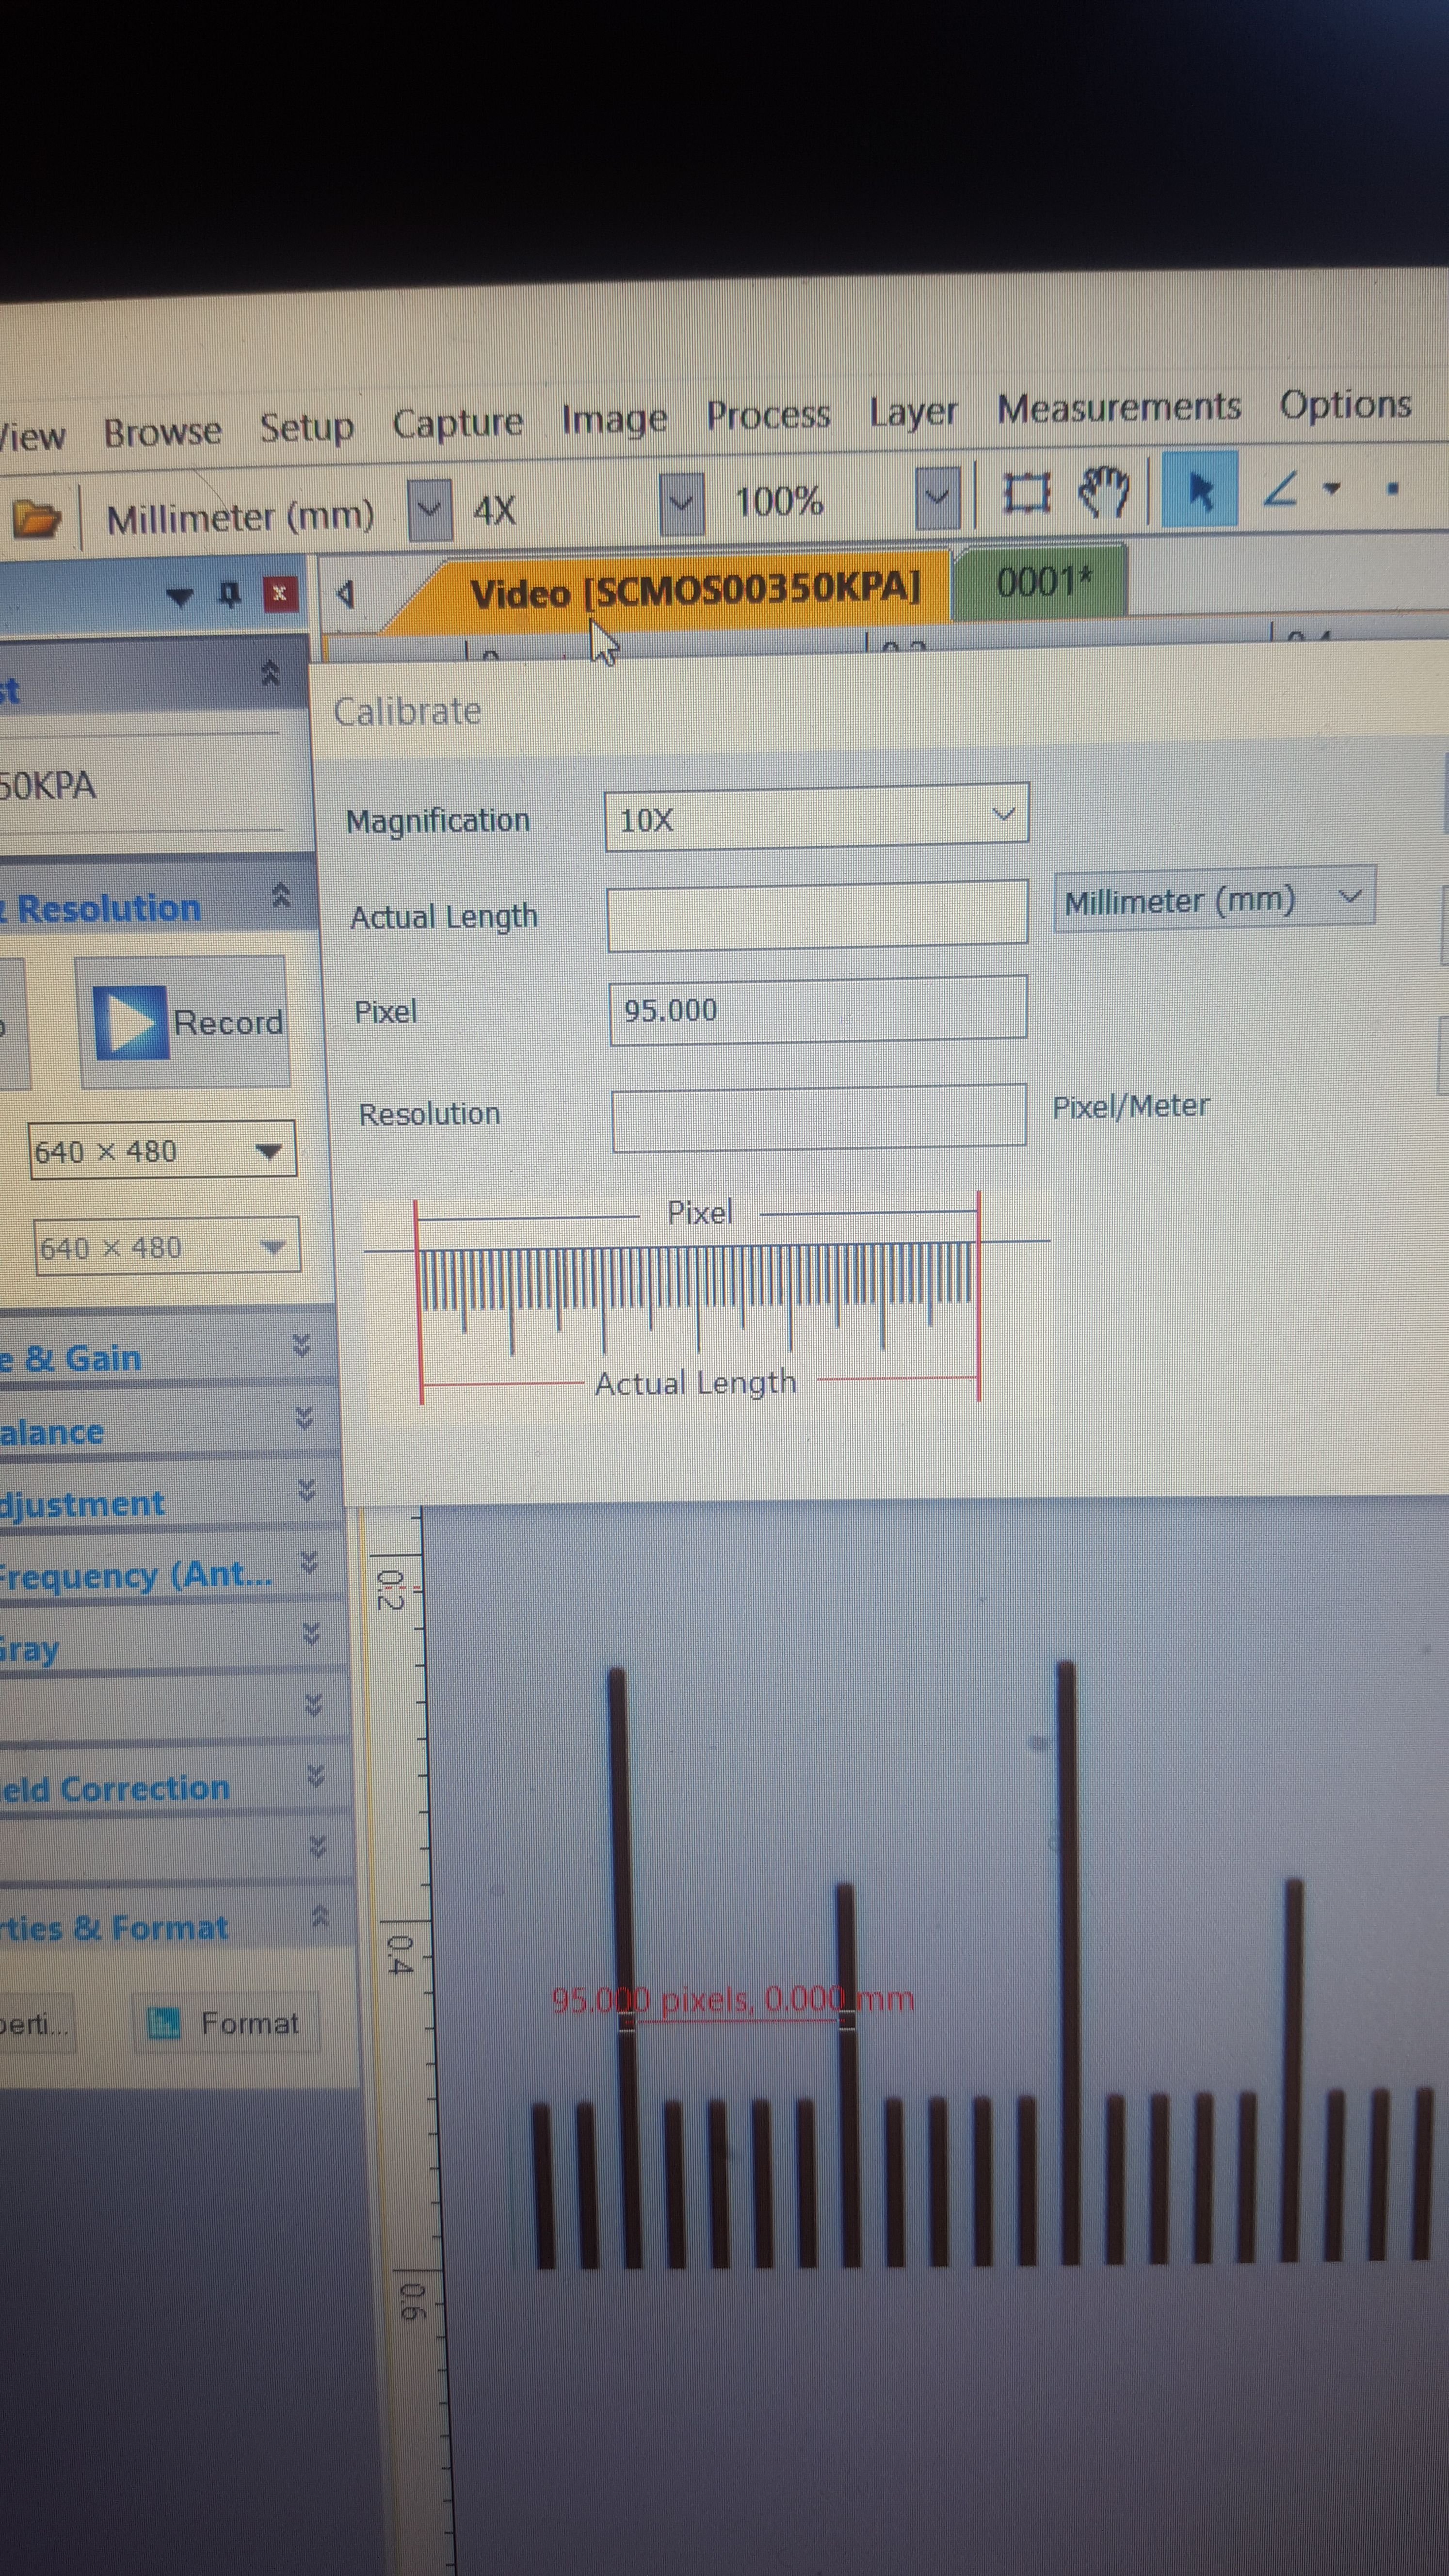
Here, I've opened up the calibration window. I am using the 10x lens. I have selected millimeters as my unit of measurement, because that is what the calibration slide uses. Although most measurements I take will be in micrometers, it's OK to calibrate in millimeters - once the program is calibrated, it will automatically convert from unit to another.
The final step is to pick two points, which causes the program to draw an arbitrary line between them. Make sure the line is as straight as possible. In this case, I drew a line that measures out to .05mm in length. On the very low res camera I have, that amounts to 95 pixels. Finally, I input the known distance - .05mm - and press save
Now the program understands that using the 10x magnification aperture with this camera lens, .05mm = 95 pixels of distance. I'm not good at math, and so I could not do much with that information, even with a great deal of time. But for this computer program, that equivalence is the key to accurate measurements at this magnification level. Using that basic understanding, the program can now measure any distance within the viewing area at this magnification, using any unit of measurement it is programmed to convert from millimeters, within a fair degree of accuracy.
Once the program is calibrated, you can test it against another known quantity at that magnification level.
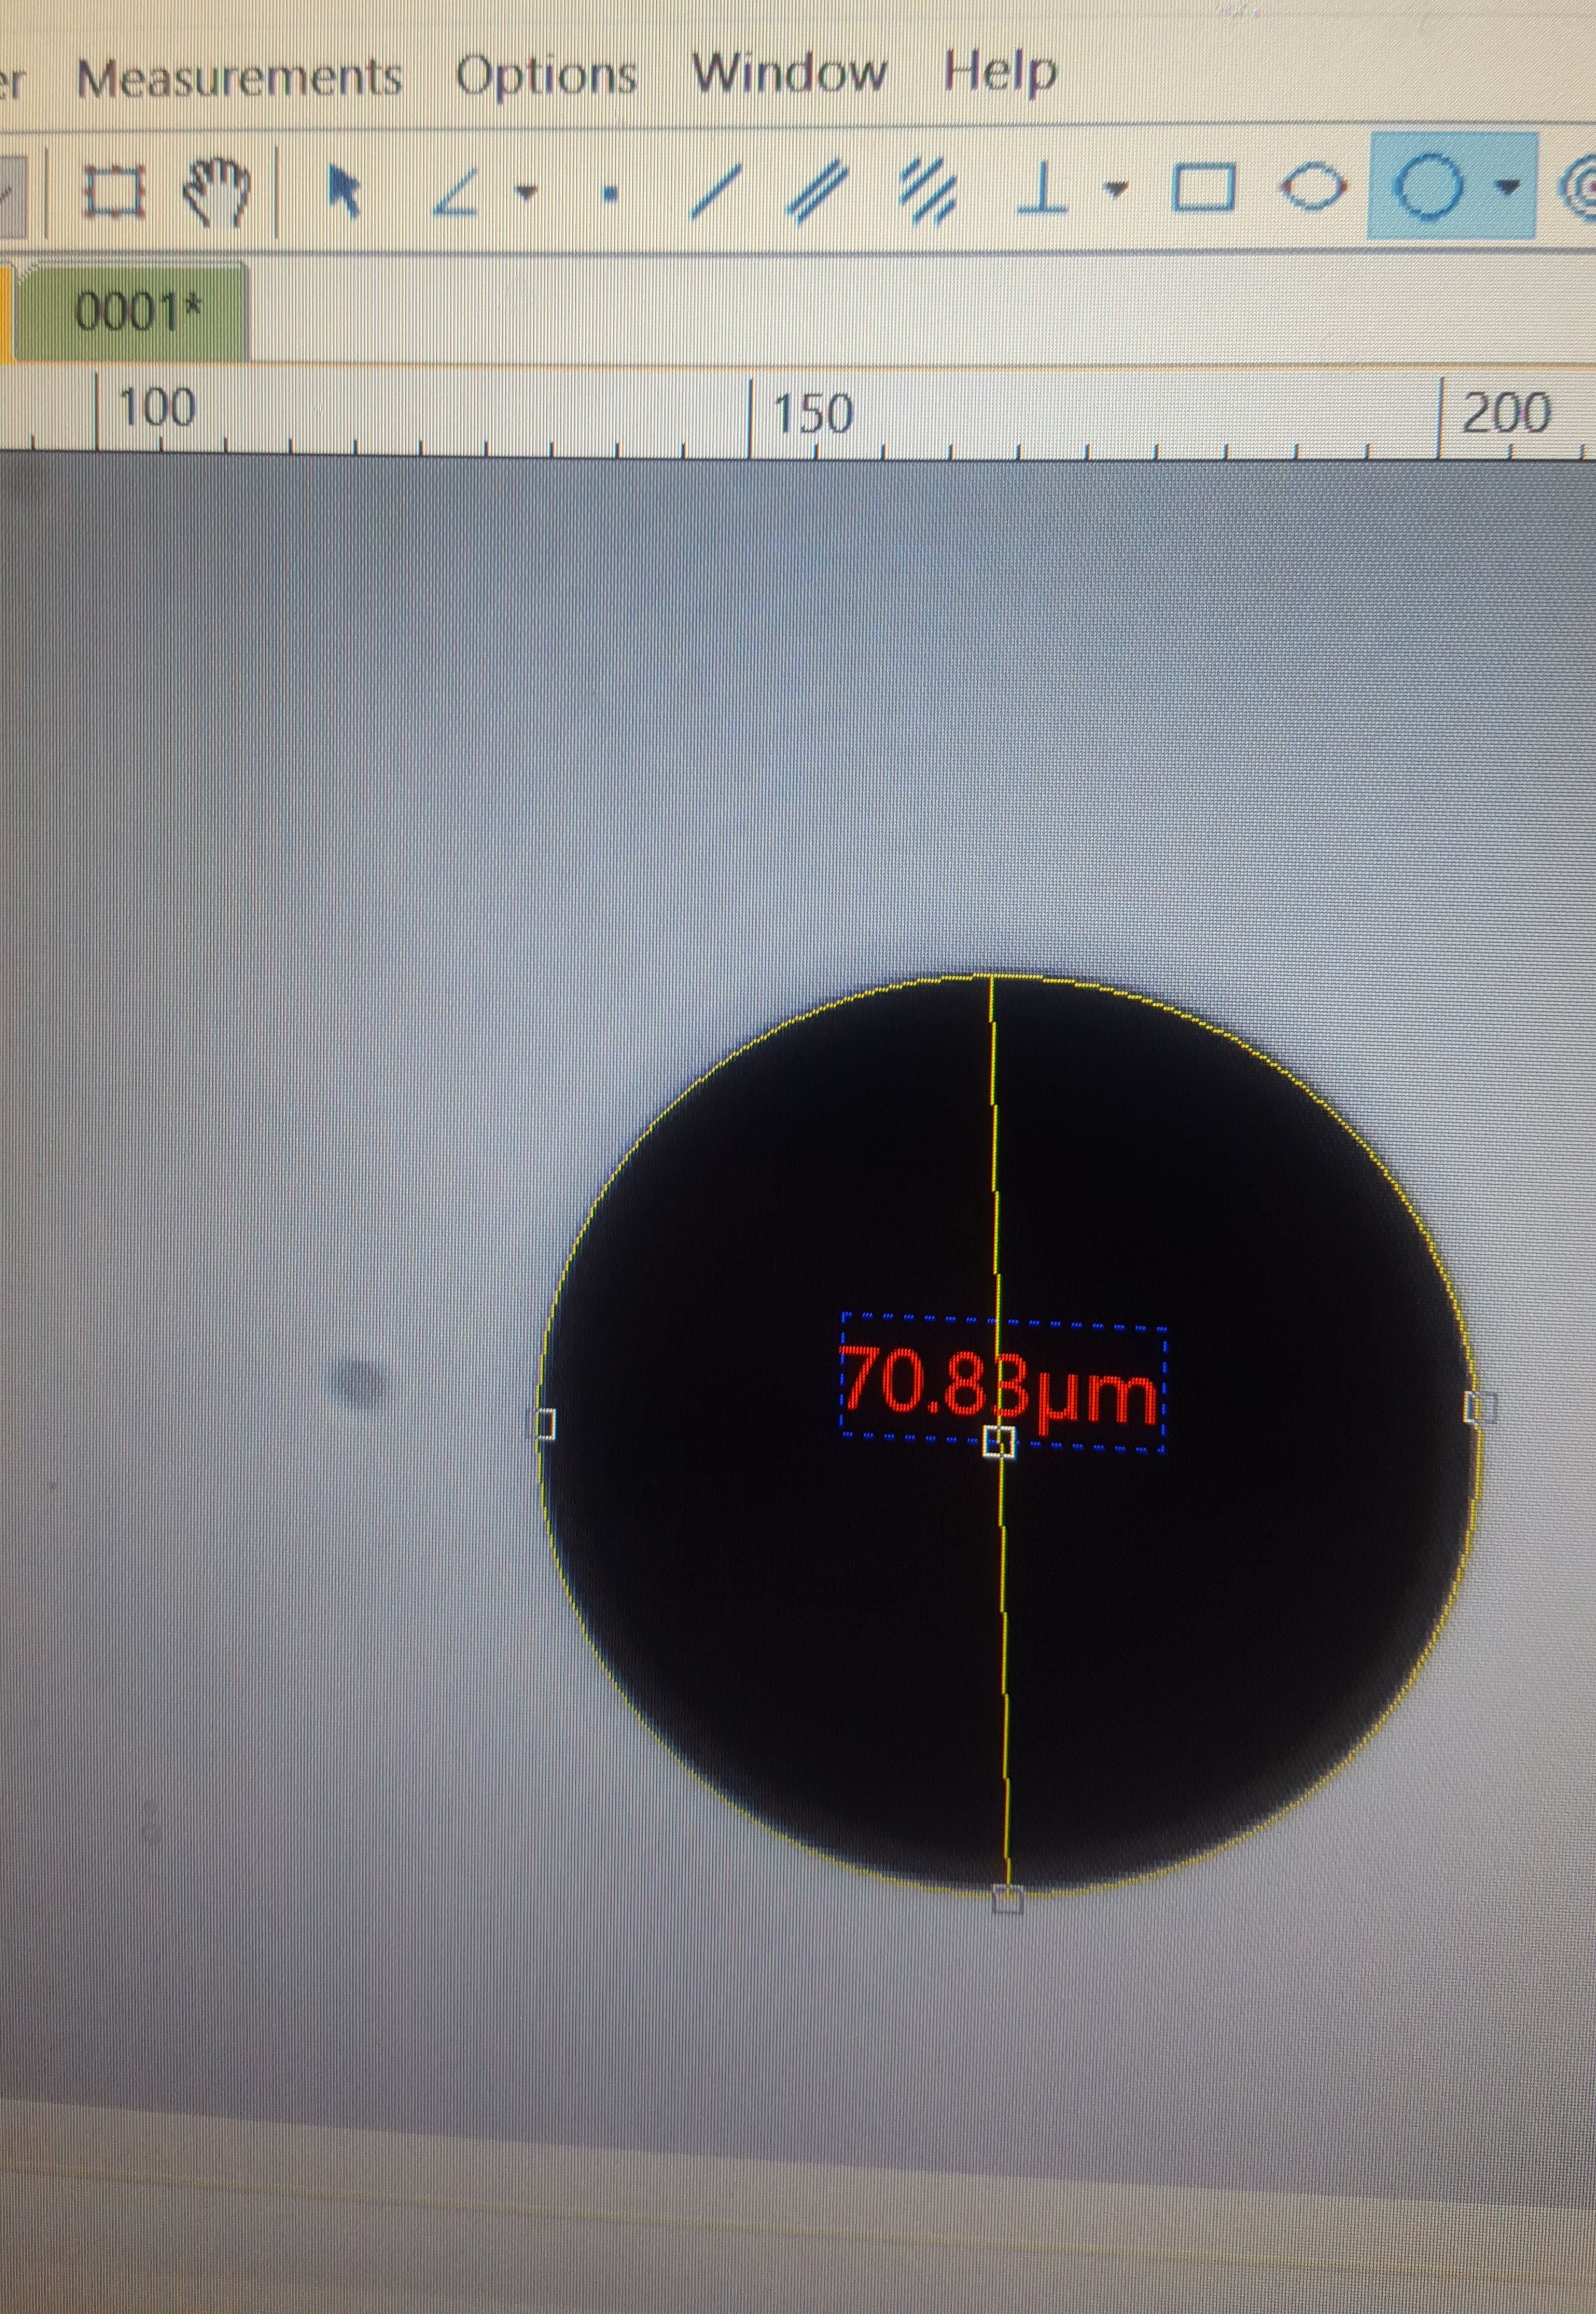
For that I used the .07mm diameter circle
The program had a very handy circular measurement tool that relies on either a measurement from the center, two points on the edge, or three points on the edge. I used the three point tool on the .07 circle, and measured in micrometers.
The results is...mostly correct. 1 millimeter is 1000 micrometers, and there are 10 micrometers in every hundredth of a millimeter. The circle has a .07 millimeter diameter - but it measured out as 70.83 micrometers instead of 70. Extrapolating this out to a percentage of error, I think its accurate to within +.012 microns per micrometer.
This is not perfect and, if I worked in a biology lab, we would add that margin of error to the 10,000 other things I've done wrong and declare the whole thing FUBAR. But, for my purposes, it isn't bad. Plus, the margin of error for the much more important 40x lens measurements is even better.
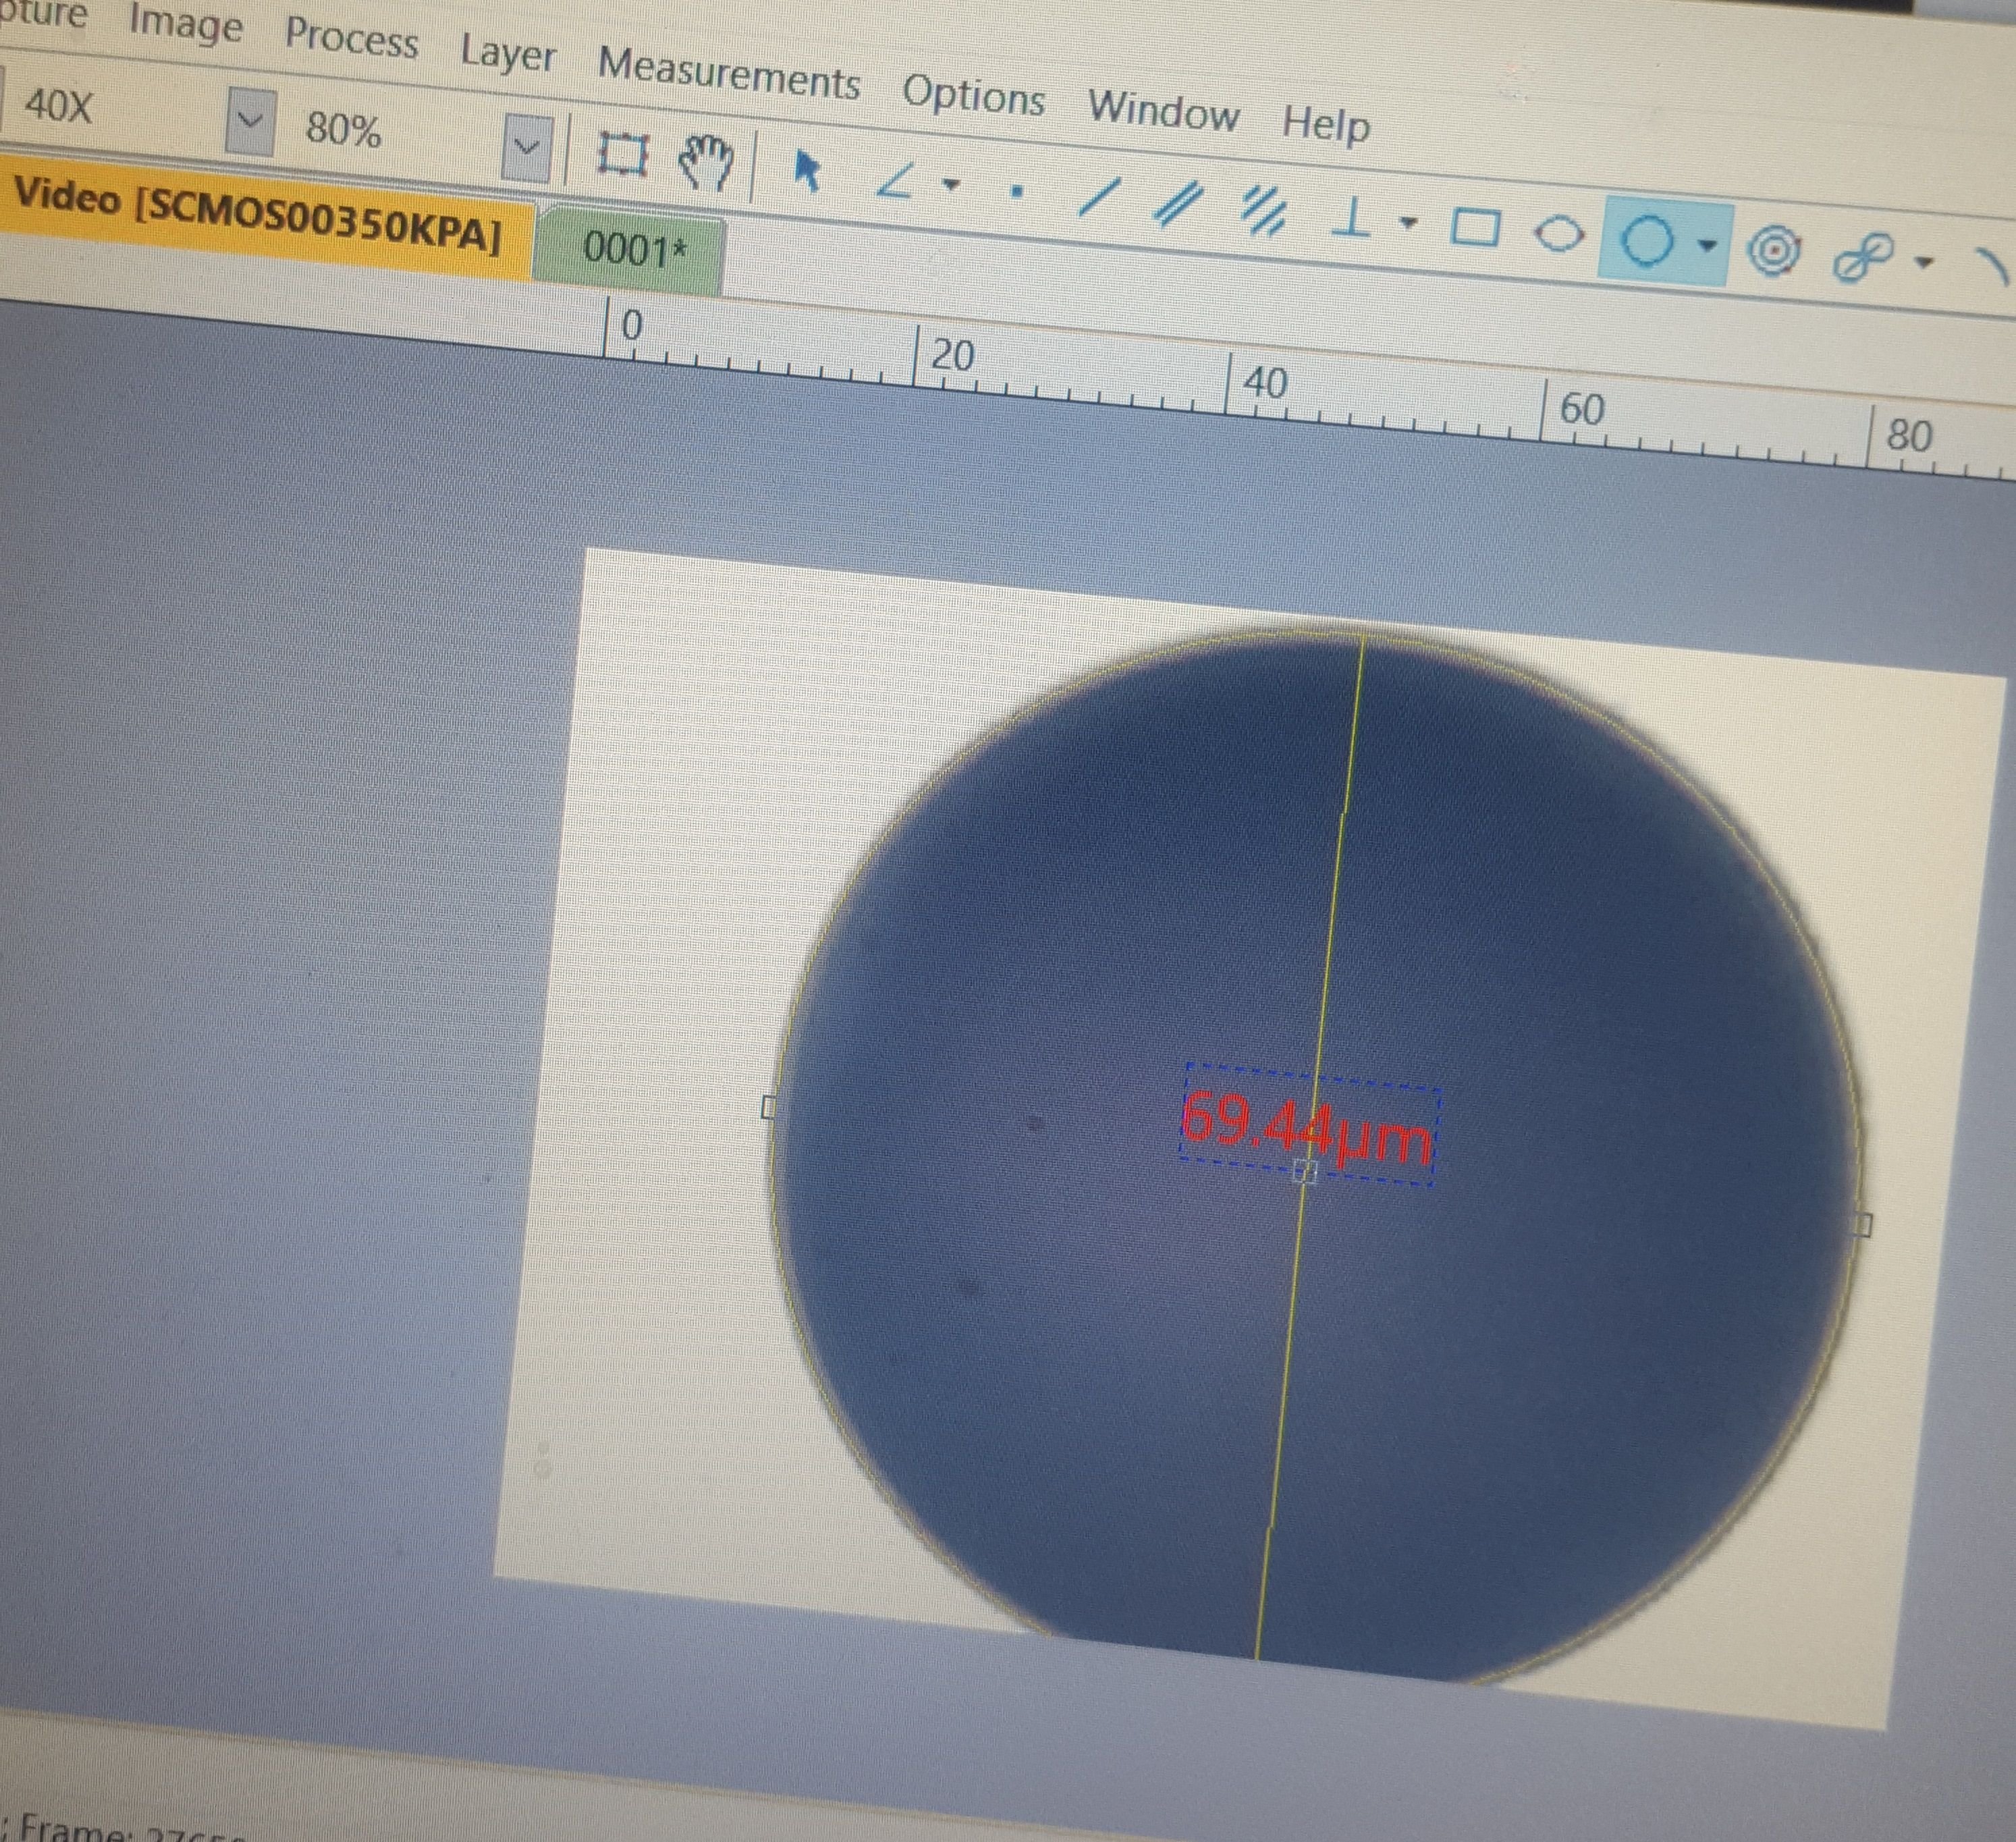
Here's the same sphere, zoomed in to about 400x magnification.
I wanted to use the .01mm crosshairs for the 40x aperture, but I couldn't figure out where the calibrating measurement line should start or end! At 400x magnification, the width of the individual black lines, and where a measurement is placed within them, makes a significant difference.
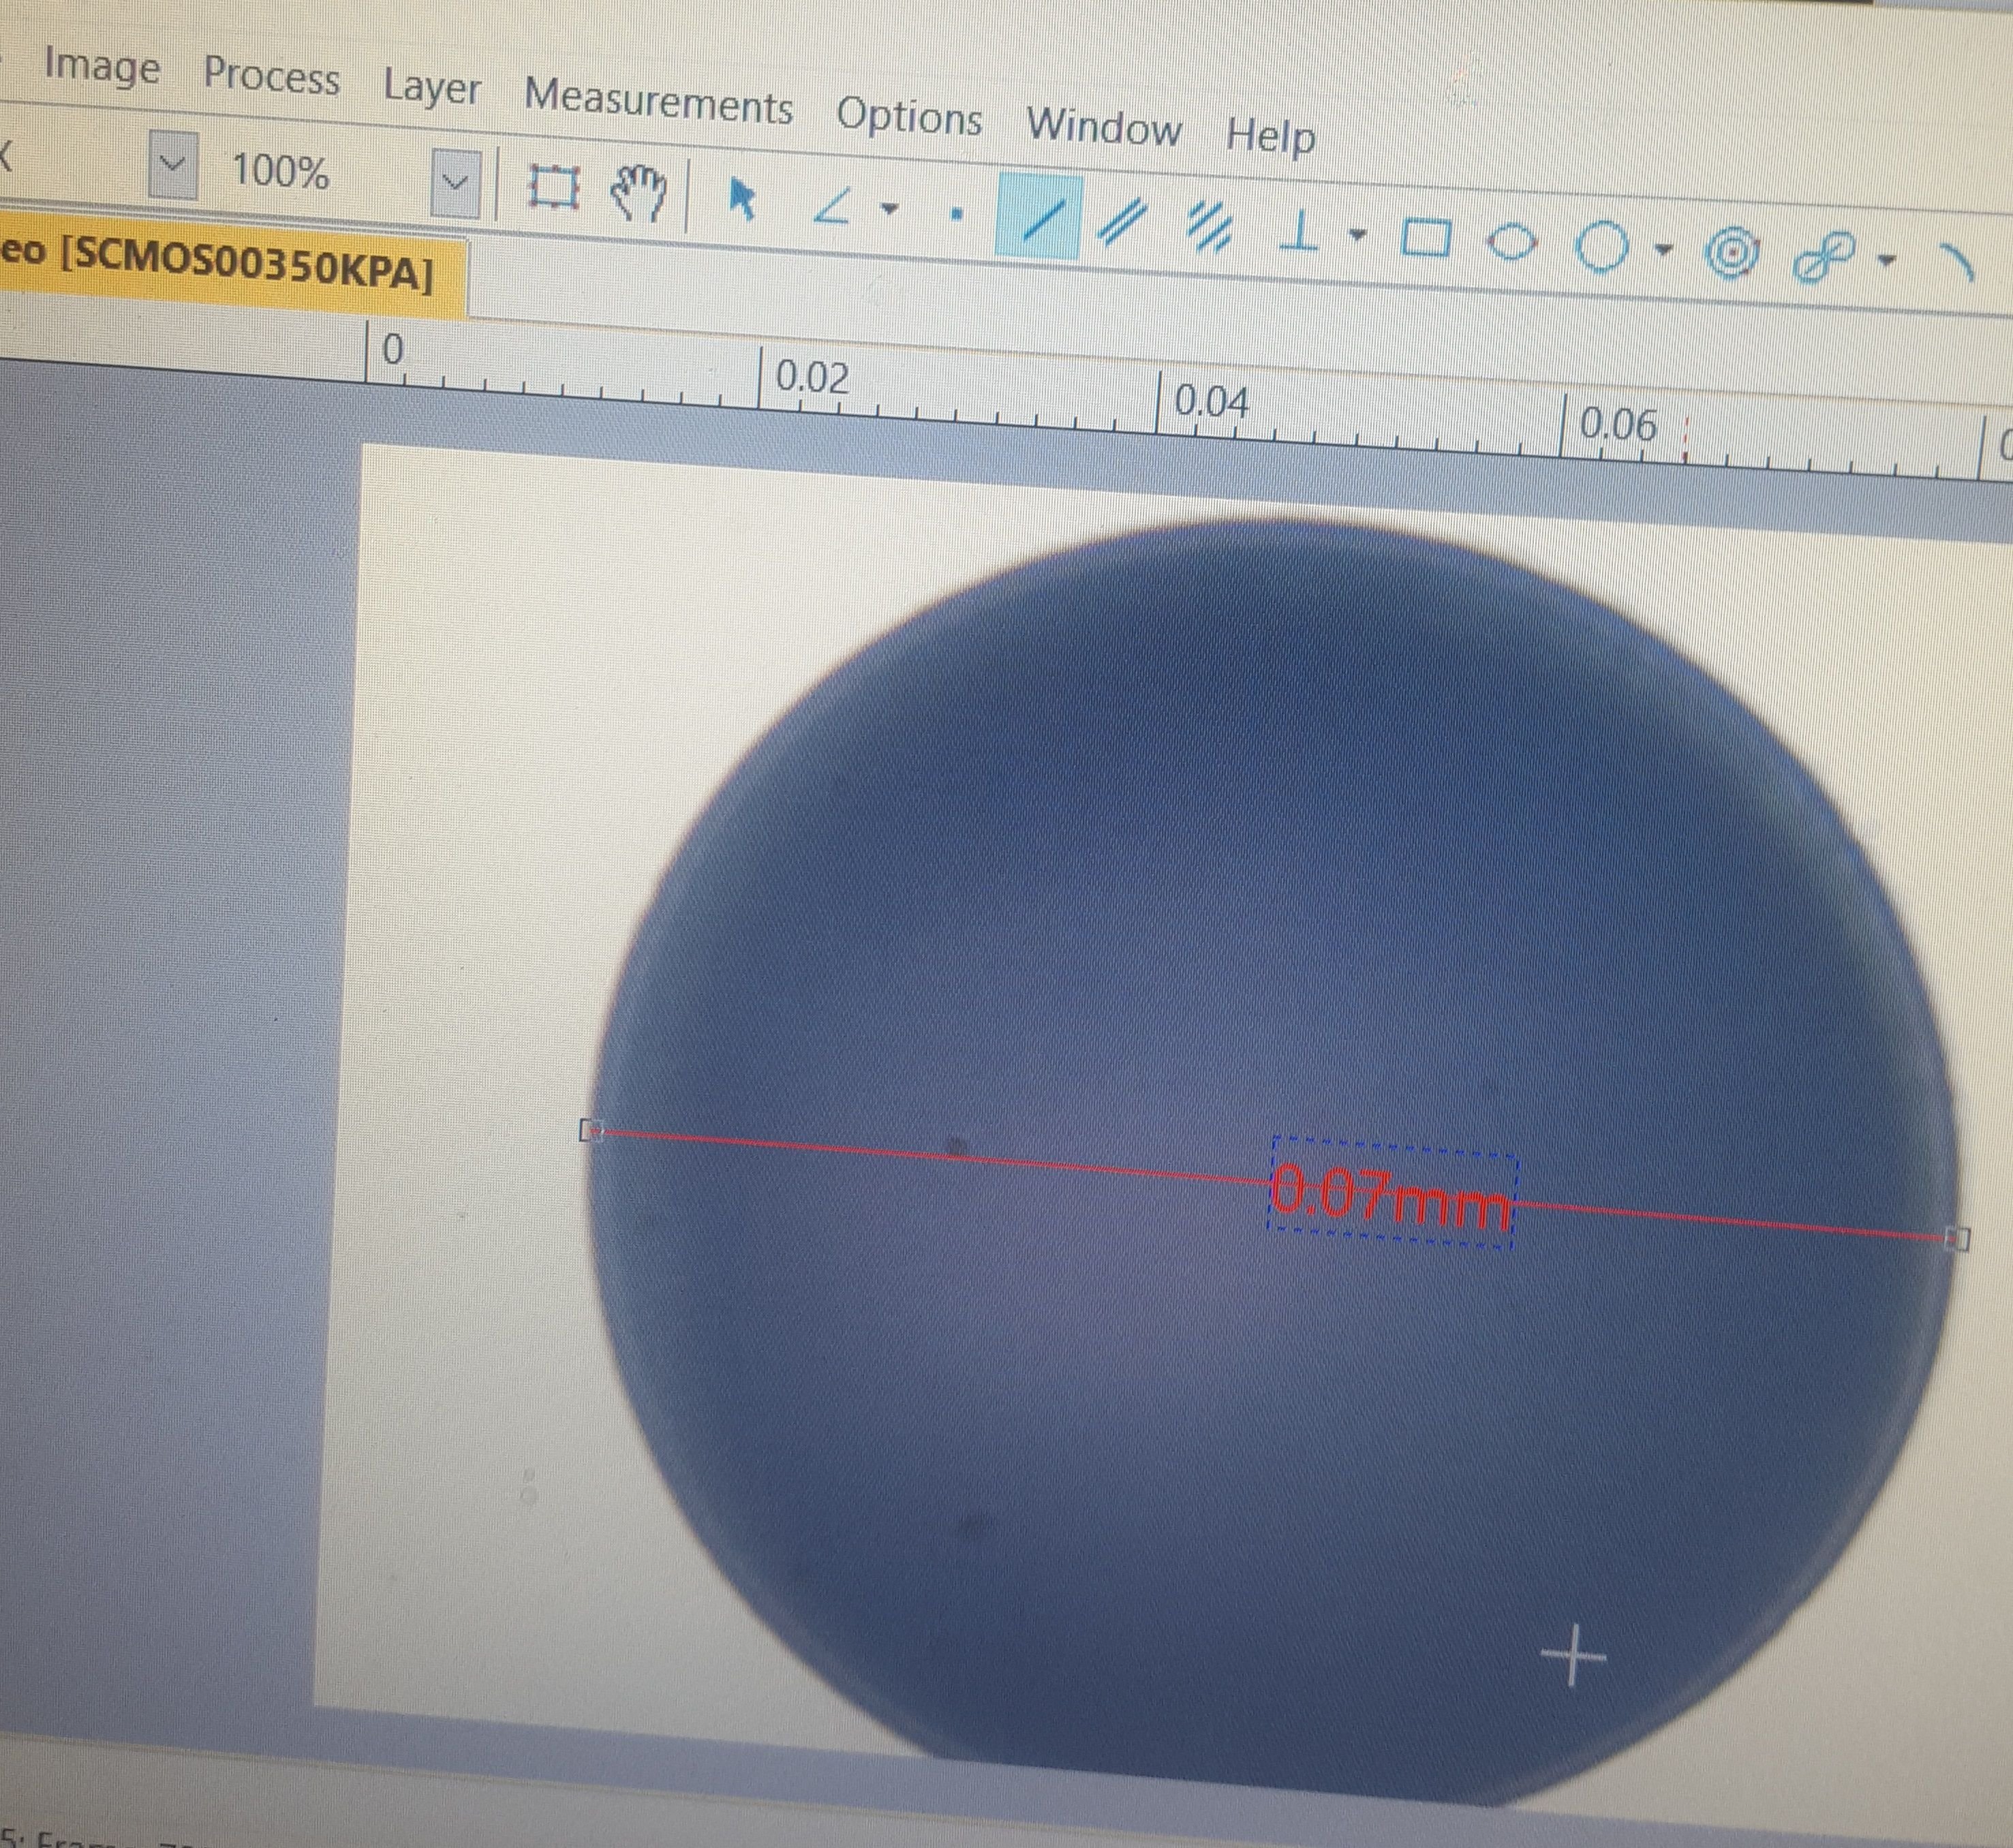
Therefore, I decided to use the similarly imperfect circle. Unfortunately, the calibrating line could only be straight and between two points. So, I guesstimated at the center of the circle and, as you can see to the left, strung a perfectly straight line as its diameter. I think this was still more accurate than picking an arbitrary start and stop point for the calibrating line somewhere within the wide expanse of the crosshair markings.
Now, if you go back up, and look at the 3 point circular measurement, you can see that the final diameter came to 69.44 micrometers. OK, so we're still off, this time slightly in the negative. But, I think this extrapolates out to an accuracy within -.01 micrometers.
What that means it every 1 micrometer I measure with the 40x aperture and this program is going to be slightly off by about -.01 micrometers or so. That is not half bad.
For the majority of relevant measurements, losing or gaining a few hundredths of a micrometer is of no material significance. The majority of my measurements for now will be:
1. Gathering a representative sample of spore sizes and comparing them to the known range and general shape of a specie's spores.
1. Gathering measurements of basidia, cystidia, and other whole cellular structures, when relevant.
There may be measurements that require accuracy to within .01 micrometers - I can imagine using a 1000x magnification oil immersion lens and seeking out specific surface traits of individual spores. But, for now, this is not relevant to my hobby.
All that's left now is to take the new calibration for a basic test ride
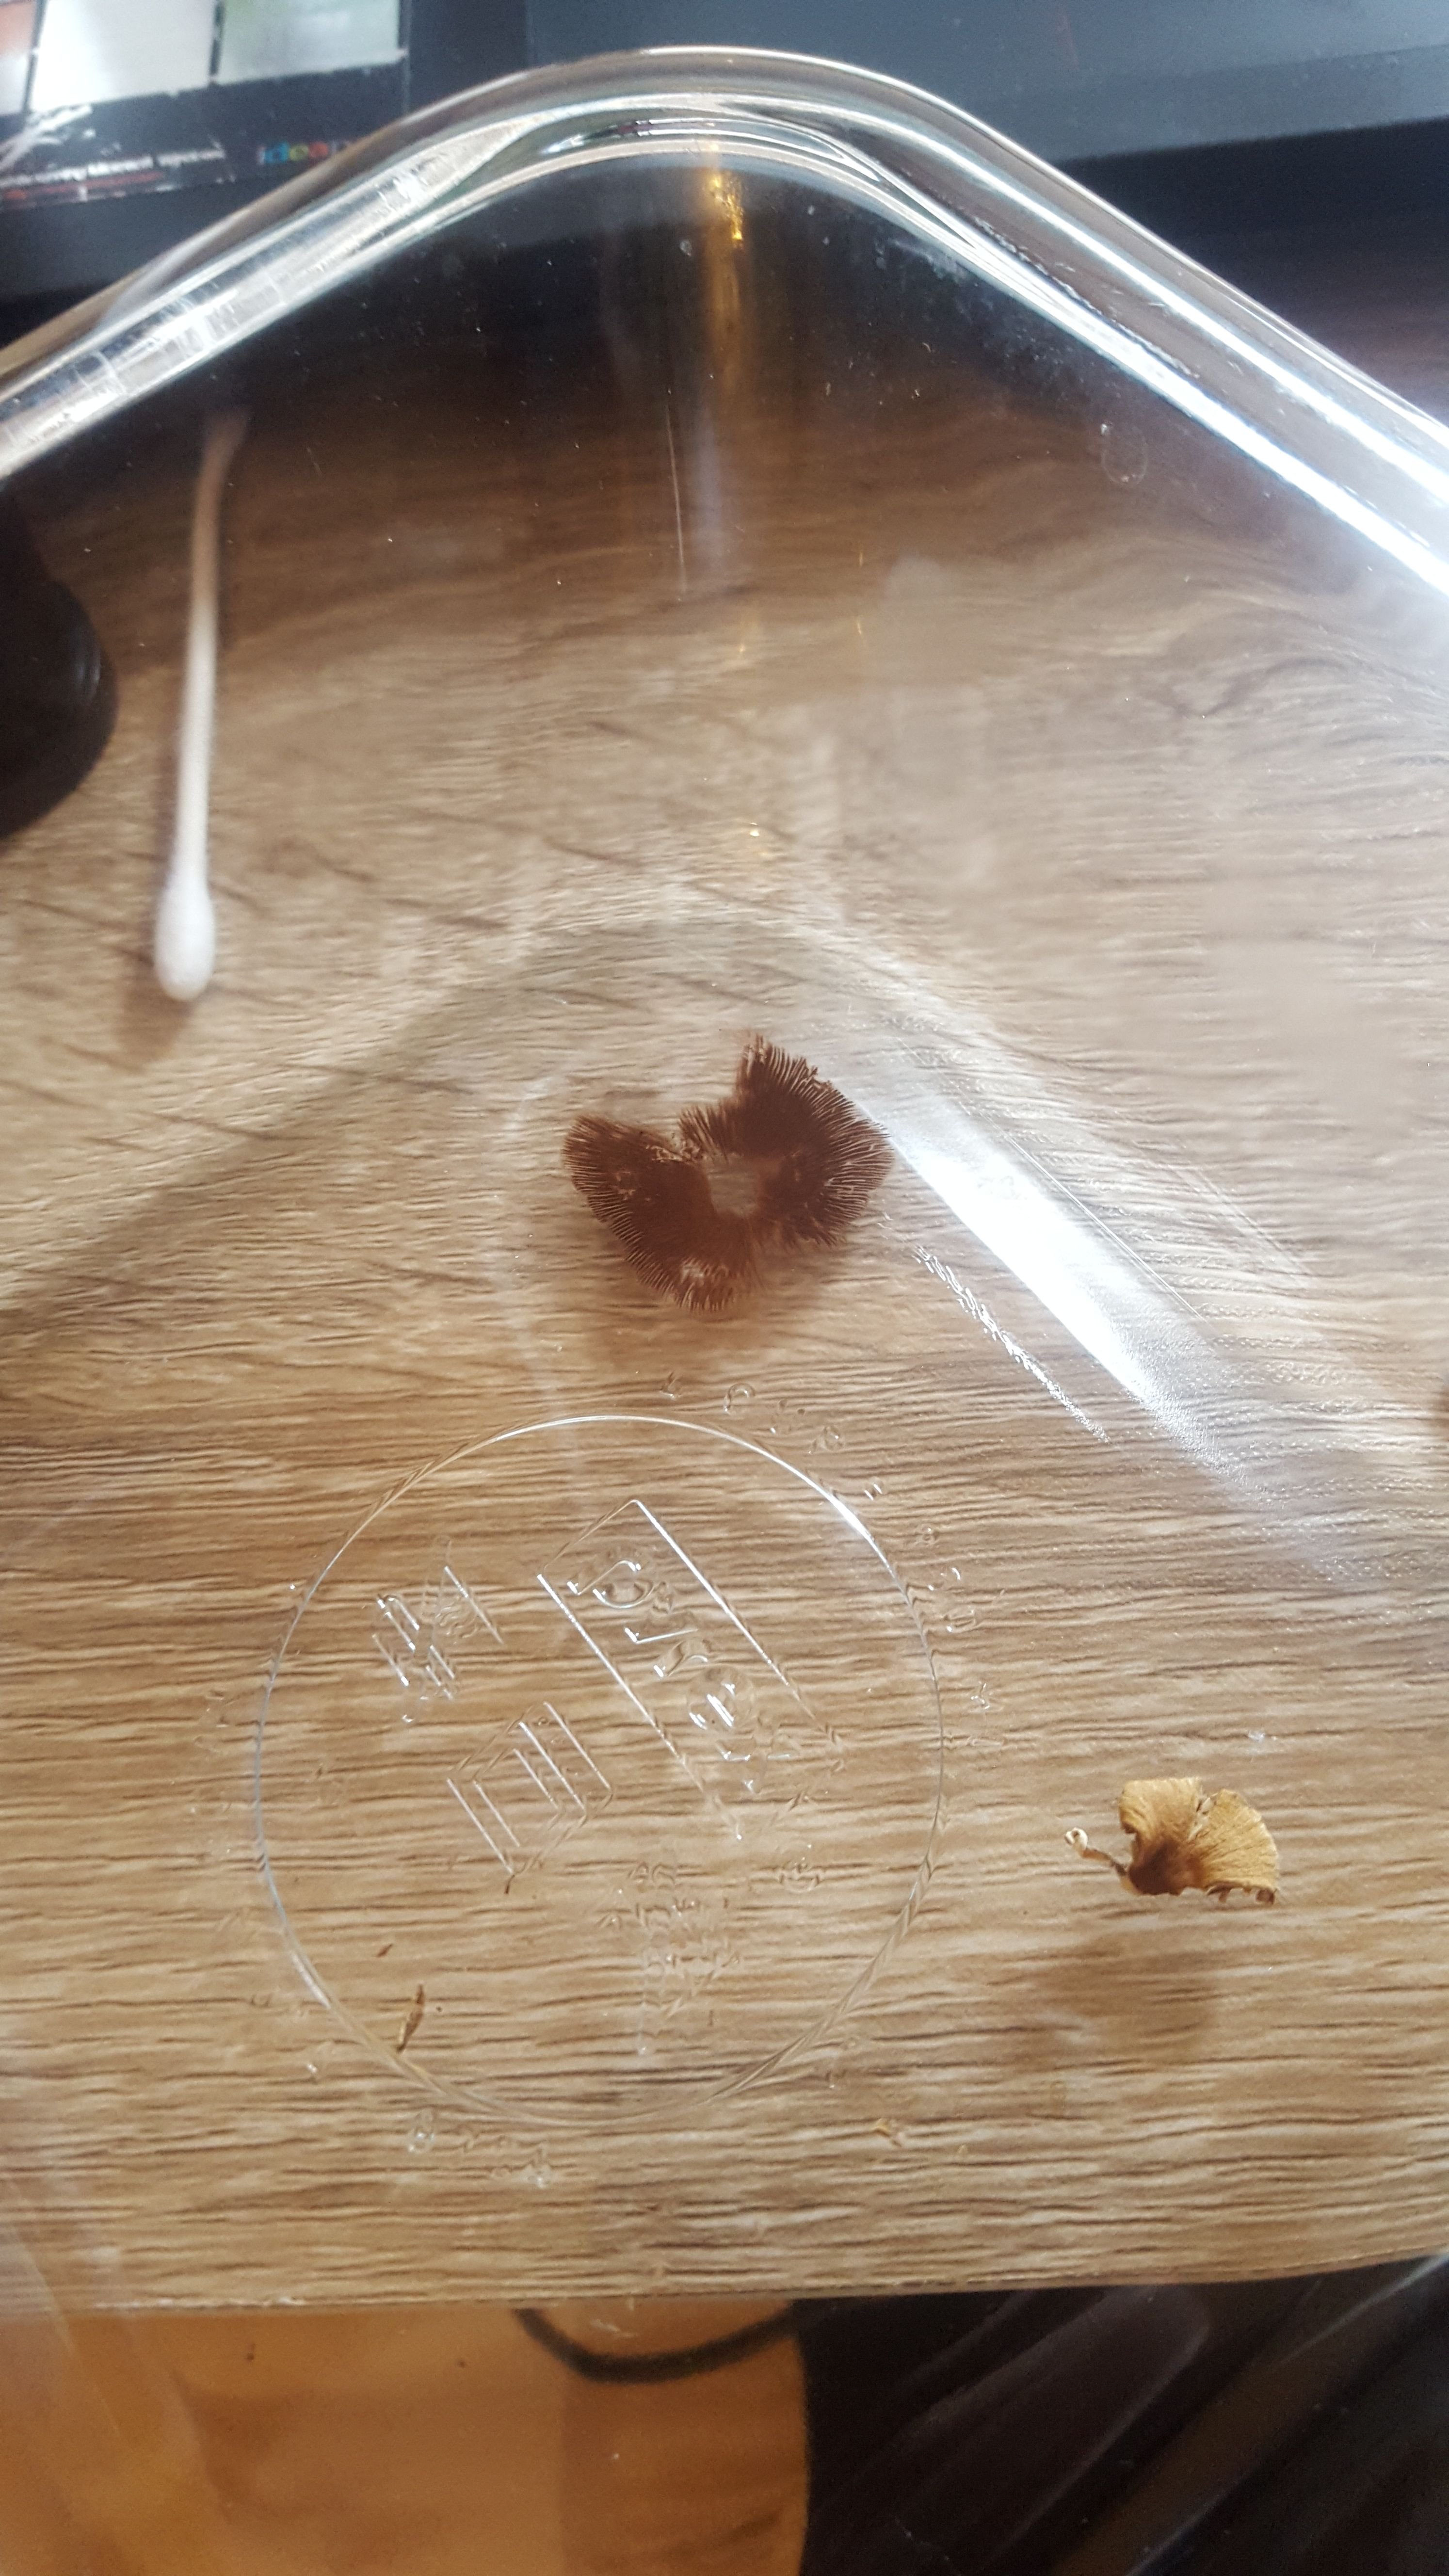
I collected this spore sample from a while back.
It came from an obscure little mushroom growing near my apartment. (Sometimes I find something and either forget about it or just set it aside as too difficult to ID). The mushrooms were tiny, but left a hearty spore print that I thought I might have use for.

First things first, mounting the spores.
In this case, I made things a lot harder than they needed to be. The simplest way to make a mount of spores is just to take a light spore print directly onto the microscope slide. The mushroom's pore surface will happily oblige you and, so long as the mushroom is mature enough, you will quickly have more spores on the slide than you know what to do with.
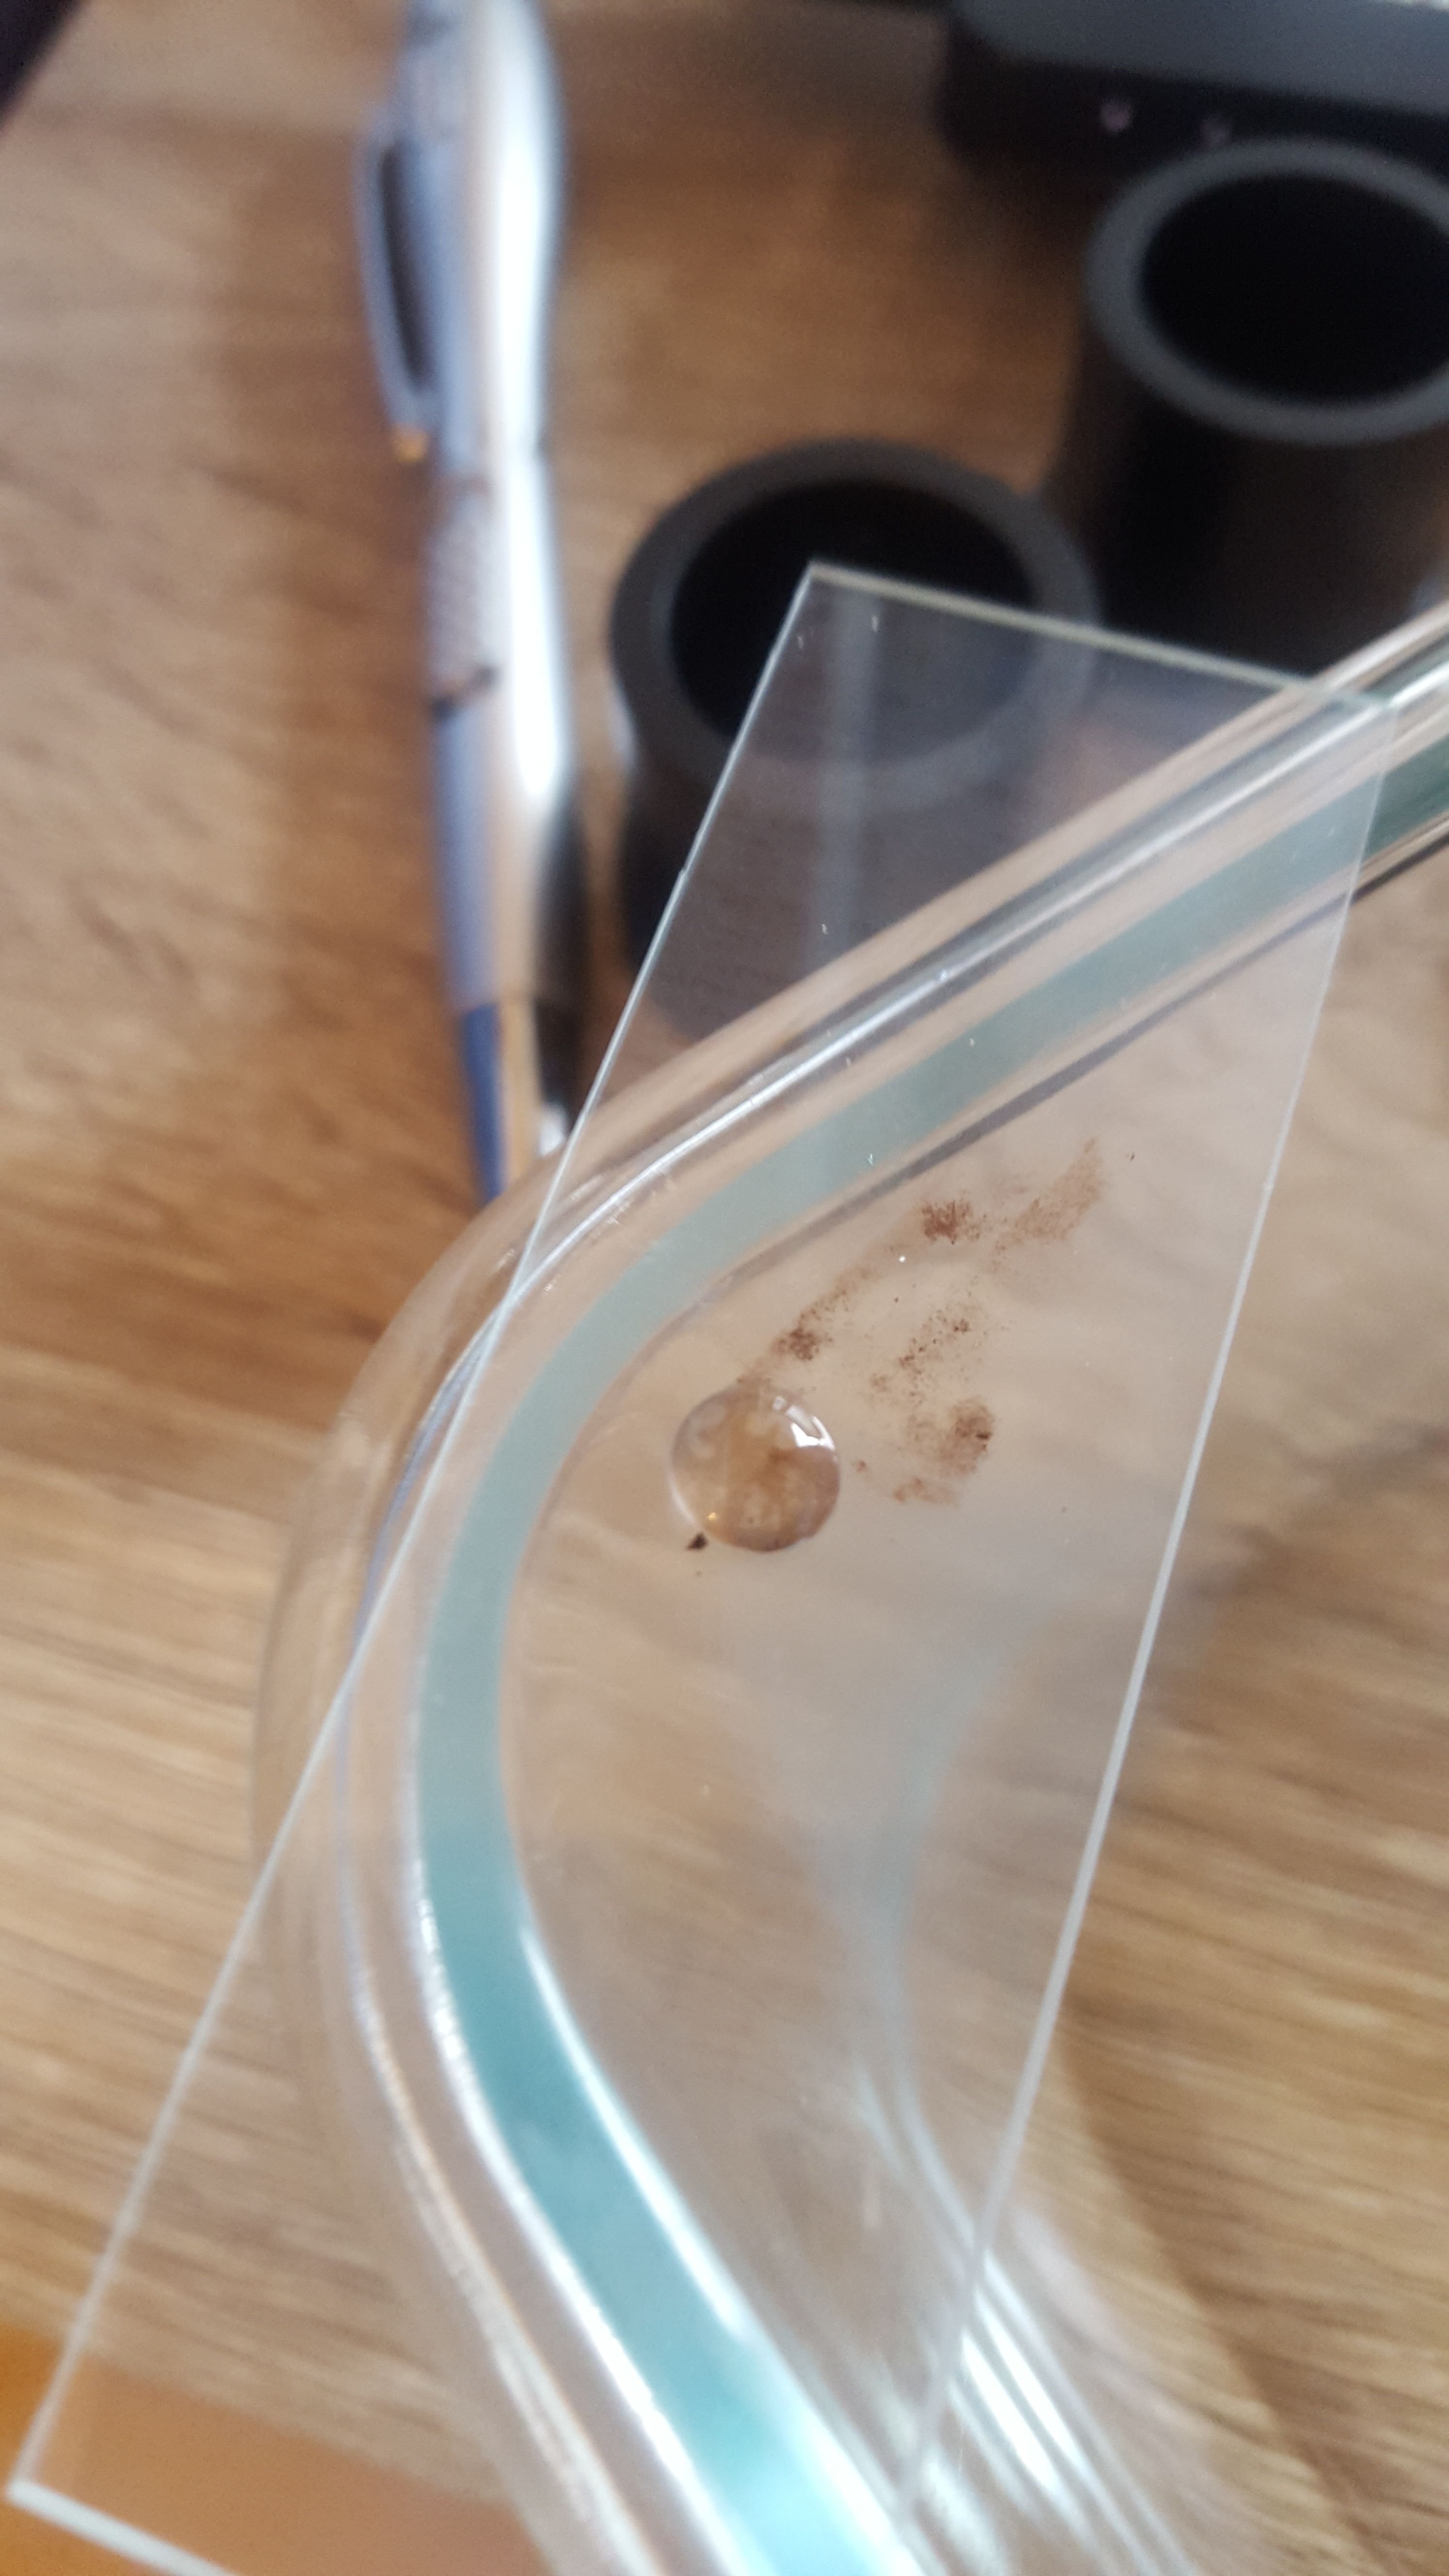
In this case, I needed to transfer the spores onto the slide.
For that I, very carefully, used a razor blade. I only had double edged blades -but those are a very stupid thing to use and I have a pack of single edge blades on the way. Once the spores were on the blade, I scraped them onto the slide. Then, I decided to just use distilled water to help get a better sense of the spore's color. There are a number of different chemicals mycologists use in mounting the various parts of a mushroom, for instance a KOH solution with a "Cotton Blue" stain that helps to see the external structures on the individual spores.
I have none of the various stains yet, and using KOH by itself only has the effect of increasing translucency with a concurrent diminishment of visible detail. When you use a stain, the color of the stain actually enhances otherwise invisible characteristics - but without the stain, I find - in my very very limited experience so far - that plain distilled water is my best bet.
Put a piece of cover glass on top and the spores are mounted. Let's take a look. This video is about 2 minutes and goes from about 40x - 400x magnification. You'll note the relative lack of detritus, which was a major bother before the thorough cleaning.
Finally, a 400x still photo of the spores with the (I hope) accurate measurements in micrometers.

This whole process took several hours, but was extremely fulfilling. Calibrating even this super simple microscope and camera allows for potentially important steps toward more accurate species identification, especially for certain particularly illusive specimens. This may sound like a dubious claim, but I will prove my point on Thursday when we take the new and improved microscopic abilities for a controlled "field test" and get up close and personal with that most ubiquitous of all American mushrooms, Agaricus bisporus
THIS POST IS NOT INTENDED FOR FORAGING PURPOSES AND TO USE IT FOR THOSE PURPOSES WOULD BE DANGEROUS. DO NOT HUNT WILD MUSHROOMS WITHOUT RELYING ON A COMBINATION OF PROFESSIONAL FIELD GUIDES, IN PERSON PROFESSIONAL GUIDANCE, OR IN PERSON GUIDANCE BY SOMEONE TRUSTWORTHY WHO HAS COPIOUS LOCAL, SPECIALIZED MUSHROOM HUNTING EXPERIENCE. FAILURE TO DO SO CAN RESULT IN GRIEVOUS PERSONAL HARM OR DEATH.
Photos Are My Own - Microscopic photos were taken using an AMScope M150B entry level microscope. If you use microscopes, I'm quite sure you've never heard of this model - but its cheap and available on Amazon. The camera lens is also AMScope, MD35 - by far their crappiest microscope camera. But, as we will confirm on Thursday, still capable of material, relevant, and in some cases, dispositive, data collection. Lastly it should be noted that the precise magnifications are not easily deduced using the camera - but based on relative spore sizes compared to known microscopic photos from Kuo and other sources, I estimate 40, 100 and 400x.
Information Sources - Reference 2 and 3 are not super relevant to this post, which was mostly calibration based on reference 1. But 2 and 3 are excellent resources and absolutely integral to the next post on Thursday.
[1]Super helpful video from AMscope on calibration - but all the equicpment is much higher quality than what I'm using
[2]Kuo, M. (2006, February). Using a microscope to study mushrooms. Retrieved from the MushroomExpert.Com Web site
[3]First Nature's excellent page on mycological microscopy introductions


