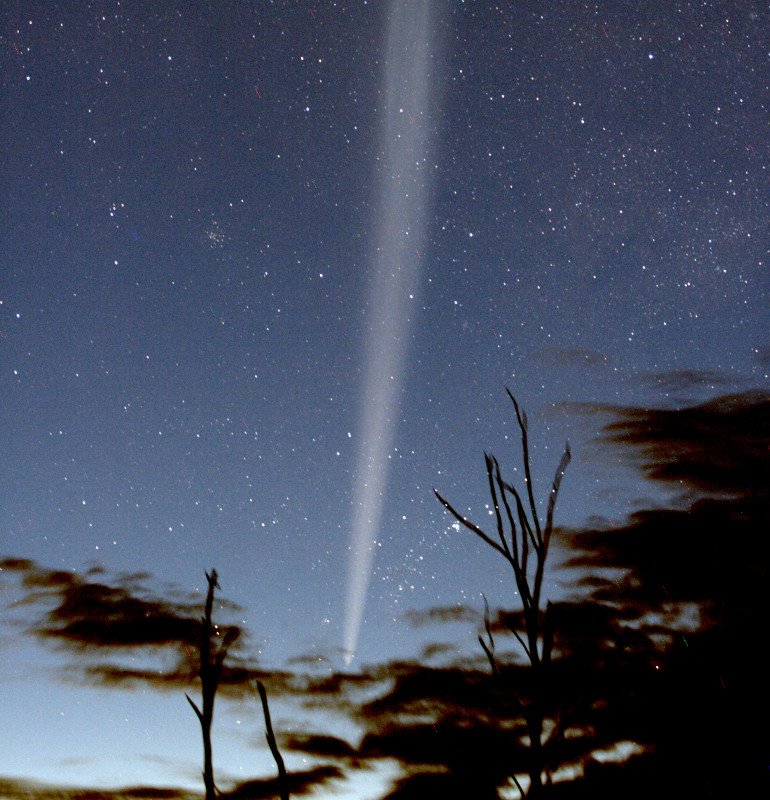
This image shows Comet C/2011 W3 rising from the morning twilight on Christmas Eve, 2011, from near Miles, Australia. It was made with a Canon 350D, a 70-200 mm zoom lens (set to 70mm) on top of a tripod. 8 individual exposures of 6 seconds were stacked then cropped to get this image. Credit:Author
Astrophotography is a very rewarding photographic pursuit that is accessible to anyone with a camera. With modern cameras it is easy to get good results with nothing more than a basic camera and a tripod. In this article I'd like to introduce the basic's of astrophotography, including the following concepts, which I will split over 3 parts:
Part I
- Cameras
- Lenses
- Taking your first Astrophoto
- Camera Accessories
- Tracking and Guiding
- Telescopes
- Polar Alignment
Part IV
- Focus Methods
Part V
- Piggyback Photography
- Planetary and Prime Focus Photography
Part VI
- Computer control
- Processing and Software
Before we start, for a little bit about me please refer to my introduction as well as my facebook page where I post often, although less frequently now because of Steemit!
Cameras
Summary of Camera Types
There are several different types of camera. Here is a rundown of these types and their suitability to astrophotography.
 | Comments |
|---|---|
 | Smartphone : A smartphone is definitely capable of some rudimentary astrophotography. The small sensor in these cameras can be limiting, particularly when trying to image fainter objects, but it is nonetheless possible. Refer to part 1 and here part2 of my smartphone astrophotography series. |
 | Compact Cameras: Sometimes called Fixed lens or Point and Shoot cameras typically not only have better sensors and optics than smartphones, but also have a lot better control over exposure and aperture. Having a fixed lens means eyepiece projection is required when used with a telescope. |
 | DSLR: Digital SLR cameras are perhaps the most popular astrophotography camera, as not only do they have full control over camera settings, the ability to interchange lenses means they can be readily adapted to a telescope. DSLRs also have large sensors that work brilliantly under low light. |
 | Mirrorless:Mirrorless cameras have all the advantages of a DSLR , but without the bulk of the mirrorbox. The smaller backfocus distance when compared to a DSLR means they can be connected to almost any DSLR or Film camera lens with the appropriate adapter. |
 | Astronomical: There are purpose built cameras available for astronomy that have features like cooling, high speed ROI (Region of Interest) modes, 16 bit depth images, lower noise, exotic sensors, etc. These cameras deliver results superior to the other cameras above, but are generally more expensive and are not practical for daytime photography. |
Camera Features
It is desireable for astrophotography that your camera have these features:
- Support for external shutter control
- Bulb mode - Necessary for longer exposures.
- Raw mode - Perhaps not essential, but raw files are better to work with as you start doing longer exposures.
- Liveview that works well in low light.
- External tether control, wired or wireless. Features such as remote liveview and bulb actuation of shutter are pluses.
Just a quick note about raw modes. Some camera's "cook" their raw files, sometimes to the detriment of astrophotographers. So be aware of this if you are looking to buy for astrophotography. Do a search for "Star Eater" and you will find instances of cameras that are known to have a serious issues with astrophotography. In some cases firmware has been released to fix the problem.
Modified Cameras
Several companies offer modified DSLR and Mirrorless cameras which make them perform better for astrophotography.
The most common alteration in cameras to improve them for astrophotography is to remove the UV/Infrared Block filter. This filter sits in front of the sensor and drastically reduces the sensitivity of the camera to Hydrogen Alpha emission, a very specific wavelength of light in the deep red part of the spectrum. Hydrogen Alpha light is emitted by many objects, including emission and planetary nebula, causing them to appear washed out in standard cameras. To show you the result of removing the UV/Infrared Block filter in a camera, look at the following example showing you the difference before and after filter removal.
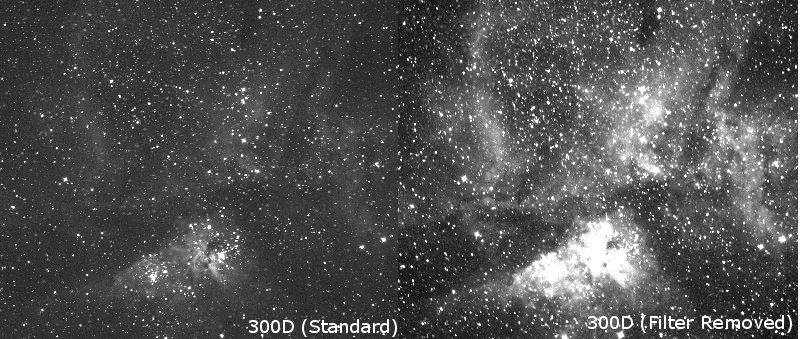
The improvement in visibility of the Eta Carina Nebula is plainly visible in this comparison before and after the modification
Another modification that is done is the cooling modification. A company called CentralDS actually does major modifications where they remove the camera sensor from the body and install it in an air tight chamber.
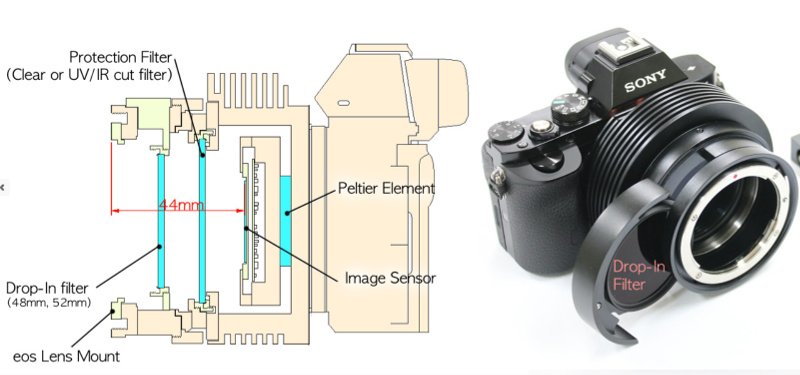
Cooling Modified Sony A7s. Credit: CentralDS
Cooling a camera sensor reduces the amount of dark current and consequently dark noise in the image. Thermal agitation of atoms in the sensor randomly bump electrons out and into the photo-sites, creating an unwanted signal that then contributes to additional noise in the final image. With exposures of several minutes at high ambient temperature dark noise can severely damage an image. The positive impact of cooling can be seen in this comparison of image crops from my own cooled camera at various temperatures all the way from 28C to -15C.
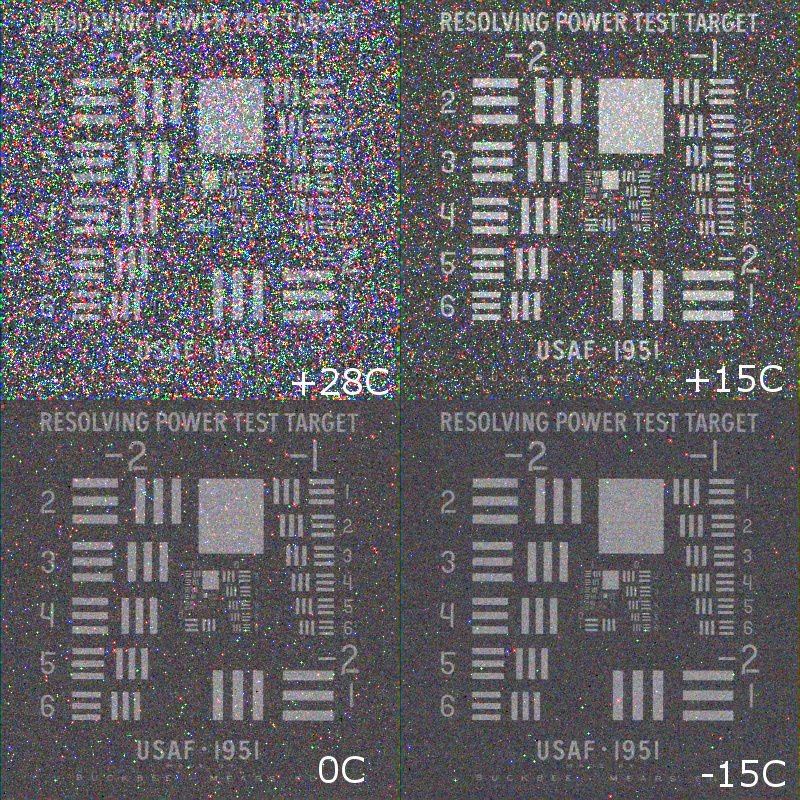
The impact of reducing the sensor temperature can be clearly seen here, where a test target, vaguely visible at 28C, is clearly visible at -15C
Monochrome vs Color
Many astronomical camera’s use a monochrome sensor, and generate color data by using an external filter-wheel with Red, Green and blue filters. Compare this with a conventional color (or one-shot) sensor where the pixels have the color filters incorporated into them in a Red-Green-Green-Blue pattern as shown in the following image.
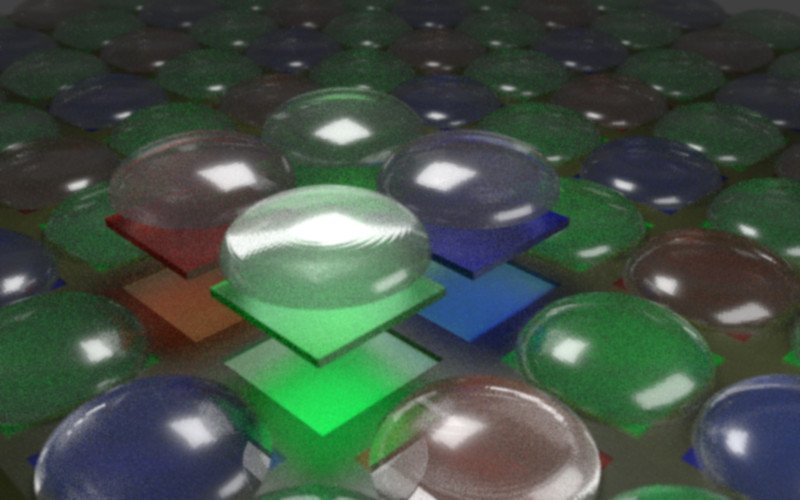
Closeup of conventional color sensor. Pixels have alternating filters of red, green, green and blue use to reconstruct color in a scene. Micro-lenses sit on top of the filter to help direct light into the photo-site detector beneath. Credit: Author
The pattern of color filters overlaying the camera pixels is called a Bayer filter and is currently the most effective way of capturing color, although several companies are trying to perfect a sensor that can detect color within a single pixel photo-site, doing away with filters. In astronomy we often want to use specialized filters designed to only allow certain wavelengths of light through, while rejecting everything else. An example of this is the Hydrogen-Alpha filter which allows only light at a wavelength of 656nm (deep red) which is often emitted by many objects in the universe including Emission nebula.
In a color camera, even a modified one, only the red pixels will be sensitive to this light, so therefore only 1 in 4 pixels will detect Hydrogen-Alpha, meaning a 75% loss in sensitivity. I've included a comparison here between a mono and color camera of the Orion nebula, which emits a lot of light in Hydrogen Alpha. Even though the mono camera is based on 10 year older technology it still beats out the color camera easily.
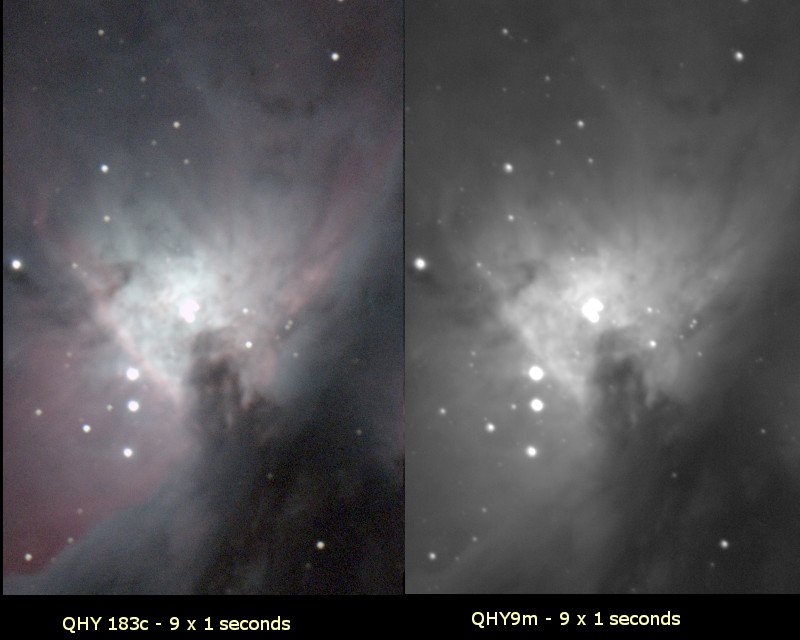
A direct comparison between the sensitivity of monochrome camera and color camera. The image is clickable so that you view and up-sized version of this image. The monochrome camera is much more sensitive. judging by the relative smoothness of the nebula and number of faint stars visible
Generally, when purchasing a monochrome camera, it is also purchased with a filter wheel with at least 5 spots, and usually more, where different filters can be installed. A filter-wheel typically is driven from software from a computer which indexes the color filters, and rotates the wheel automatically at the commencement of an exposure. At this point I will leave this topic in order to avoid venturing into more advanced Astrophotography!
Lenses
Astrophotography is notoriously tough on lenses, as stars appear as small bright points which show up any lens aberrations very clearly. The lens aberrations tend to increase away from the center of the image. The following table contains a summary of different types of lens aberrations.
| Appearance | Aberration | Description |
|---|---|---|
| None | Ideally stars should look small, round and contrasty. | |
| Coma | Coma appears like a conical flare from the star. | |
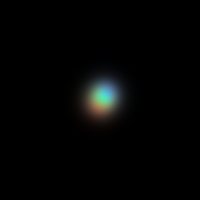 | Chromatic | Chromatic appearance occurs when the different parts of the spectrum don't come to focus at the same point. It is often visible as a blue/violet flare along bright objects. |
| Spherical | Soft focus effect, causes veiling and loss of contrast. Stars have bright halos ugly halos. | |
| Astigmatism | Stars will be drawn into a bar rather than a point, sharp focus is not possible. |
In addition to these aberrations, another effect that interests photographers is vignetting, the light falloff that happens towards the edge of an image. This can usually be corrected if distracting (people seriously into astrophotography use something called a flat field to correct the image, but this a topic for another day).
One serious problem that is unfortunately seen too commonly is decentering of lenses. This is where the lenses are not in correct alignment causing one side of the image to be in focus while the other side is out of focus. In bad cases the decentering problem will make the lens unusable even for normal photography.
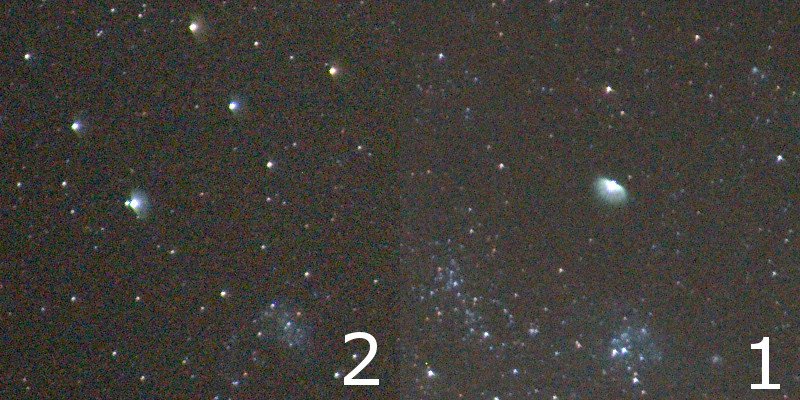
So what does a good lens and a bad lens look like? Here is an example of a bad lens which incidentally was a pro-level 300mm f2.8 lens.
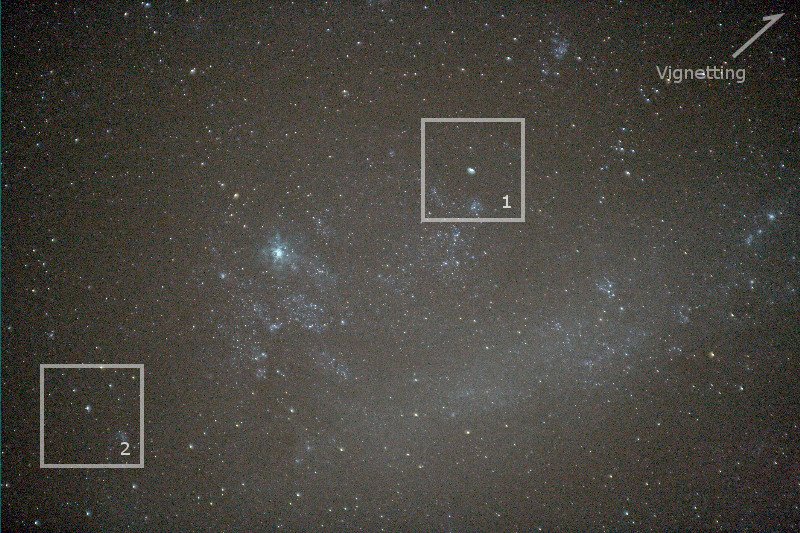
In the above image you can see vignetting at the corners, pretty normal for a lens wide open, but I have identified 2 areas which even in this reduced view you can see the stars are not very nice. Zooming in on the image you can see the stars exhibit pretty much every aberation listed above - keep in mind this was with a 8 Mega pixel crop DSLR, todays 20-24 M Pixel cameras would show these defects much more readily.
Here is a much better lens, not perfect by any stretch, but above average as far as lenses go for astrophotography. This was a Canon 70-200 mm f2.8 non-IS lens. Even comparing the scaled down images on this page it is clear this lens is superior.
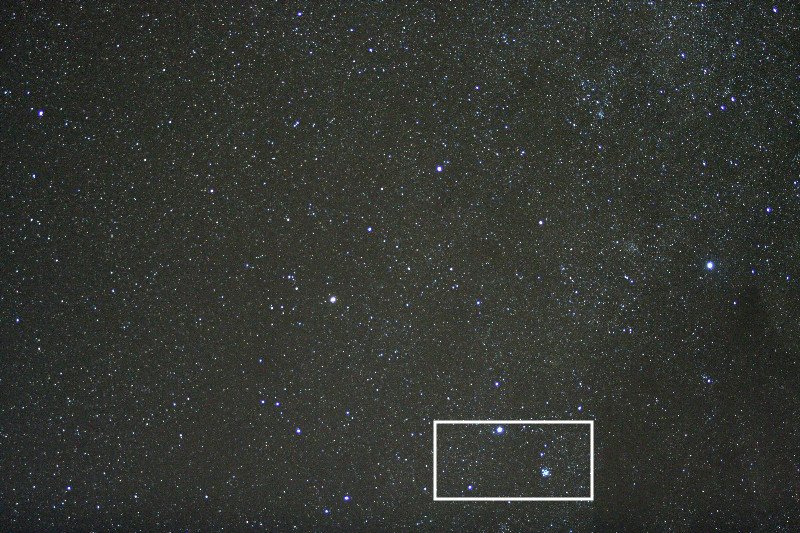
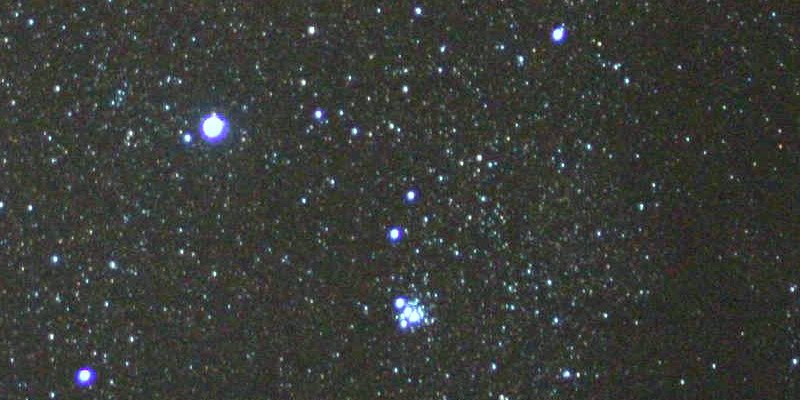
In the above image there is a white rectangle, which is where the image below has been cropped from. You can see the images of the stars are much tighter and rounder, although there is some Chromatic aberation present in the form of a violet halo around bright blue stars.
If planning to purchase a lens, look at reviews done by astrophotographers and if possible look at full-size samples taken at various apertures. When it comes to a purchase ensure you can return the lens, after a testing period. Keep in mind almost no lens will score perfectly at wide open apertures.
Stopping down
Stopping down a lens will almost always reduce lens aberrations, sometimes dramatically. In general, a good lens will render stars as pinpoints across the entire image frame from about f4, and a truly excellent one at f2.8. The amount aberrations that can be considered acceptable is a difficult question to answer and it really comes down to whether it becomes a distraction or not in the image or not.
Adapting lenses
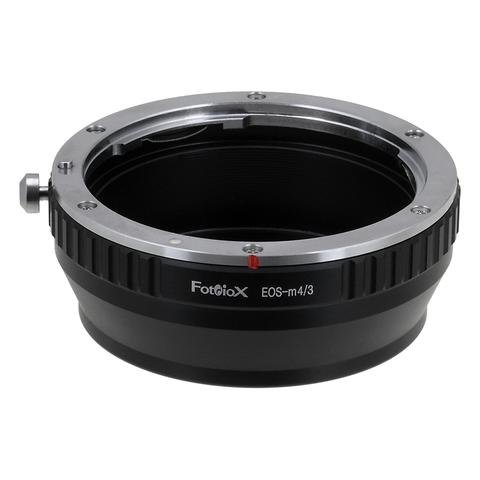
One useful tip is to note that is not always necessary to stick with manufacturers lenses. For instance it is possible to use Nikon Lens with a Canon Body, Canon lens with a Micro Four Thirds camera, if you use an adapter. Be warned however, typically auto-focus will be lost, as well as other information communicated to the camera because generally the electrical connection is not implemented. The lens must then be used as a manual focus lens, which actually is not that big a problem with astrophotography.
In a later this article series I will discuss adapting a camera to a telescope.
Taking your first Astrophoto
I thought it useful to run through an easy exercise designed for an absolute beginner. This will allow you to take a wide angle image of the night sky sufficient to show constellations and at least as many stars as you could see with your eyes alone.
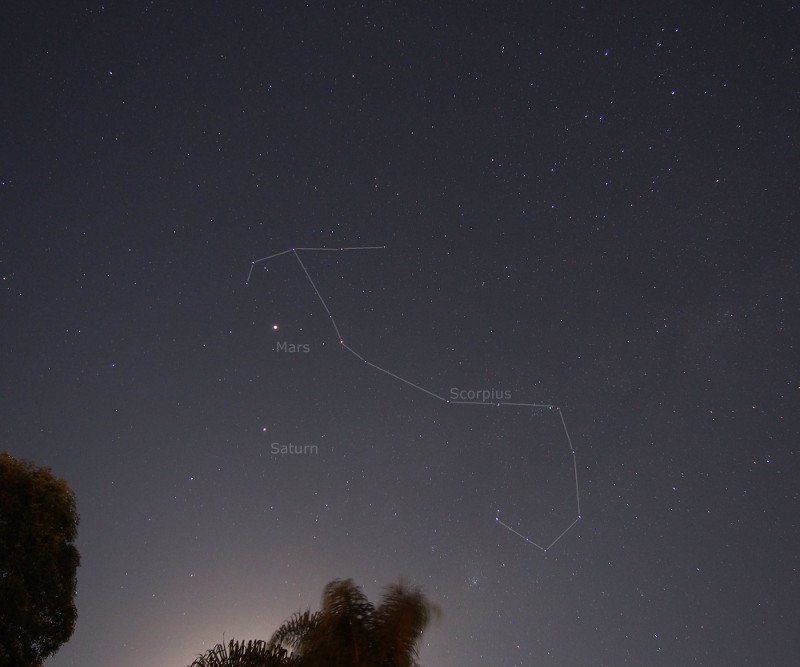
This is the type of result that can be expected with a simple camera on a tripod, I've marked a couple of objects of interest. This was a single 15 second exposure made from around the city, using an Olympus OMD EM5 and the 14-42mm kit lens
Prerequisites
Some basic prerequisites:
- A camera with lens, with a self timer mode and ability to set exposures up to 30 seconds.
- A tripod.
- A clear night.
Setting up the camera is best done beforehand inside where you have access to manuals and internet. Once outside you will have a lot more trouble navigating camera controls. Check the camera is configured the following way:
| Description | |
|---|---|
 | Fit Wide Angle Lens: Fit a wide angle or standard lens (the kit lens that came with the camera is perfect). The longer the focal length the harder it is to get sharp images. |
 | Set Manual Focus: Set camera to manual focusing. In some cameras like Olympus this is controlled from the camera menu and in others like Canon there is an AF-MF switch on the lens. |
 | Disable IS/VR: Switch off lens Image stabilisation (or Vibration Reduction in the Nikon world). |
| Set to Manual: Set Camera to “M” or manual mode which allows full control over Aperture/Exposure. | |
| Set Focal Ratio: Set the Aperture value to a value like f2.8-f4. If the lens can go to lower values stay at f2.8 as image quality can suffer. | |
| Set Exposure: Set Exposure or shutter speed to 15 seconds | |
| Set ISO: Set ISO to 1600 (if you are near the city or there is a bright moon out you may wish to try ISO400 instead). | |
 | Set Self Timer. Set the built in self timer mode, consult the manual, sometimes these are configurable in time. This will allow you to depress the shutter and have a delay before the photo is taken (this way the image isn't bumped while taking the photo). If you have a remote shutter release then this step is not necessary. |
One final bit of preparation is to be absolutely familiar with the manual focus controls of the camera in order to achieve infinity focus. Practice in the daytime on distant objects if necessary - without using autofocus! There are a couple of options:
- If it has one use the distance scale on the lens to set infinity (this OK for an approximation).
- Use liveview on the camera, center the object of interest, get approximate focus then use the camera's magnify liveview function to be able to fine tune the focus. You should be also familiar to be able to boost the brightness and contrast of live view (as you will need to do this at night)
Once the camera is setup, and you are reasonably confident of setting infinity focus, go outside (assuming it is clear ) and mount the camera on a tripod. If your lens does not have a distant scale, then you will need to use liveview. Find a distant bright object (streetlight, bright star or moon) then attempt to focus on that star using liveview. The liveview functions on camera's vary but with my Olympus I can usually find bright stars in liveview back rolling the focus backwards and forwards until I see the stars appear. Once this is done point to camera to an area of interest in the sky and take a photo.
Once you’ve finished it’s interesting to see what results you got. How was the exposure, under exposed, over exposed, was it in focus?
Please feel free to post them in the comments below if you like, I am happy to review. I will also be able to tell you what part of the sky you imaged.
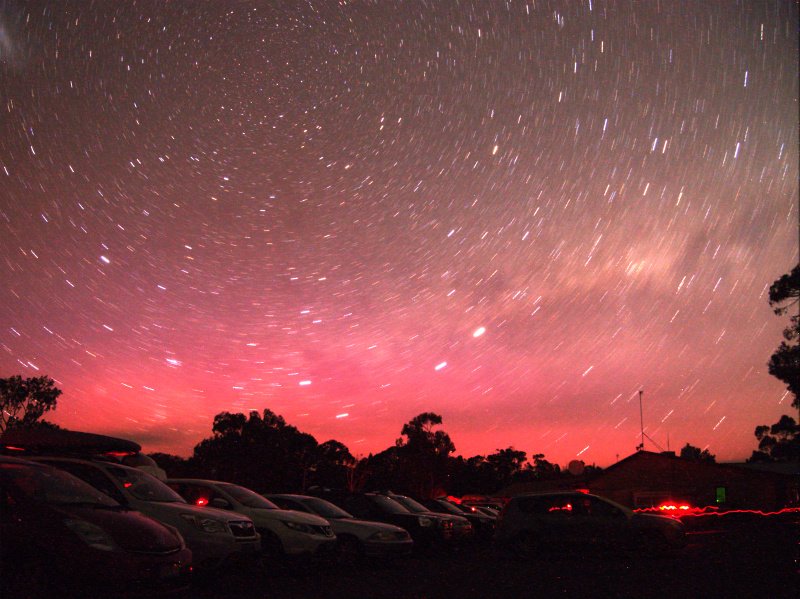
In the meantime here is an image I made of Aurora Australis a couple of years ago using just an Olympus camera, and the 14-42mm kits lens on a tripod.
Conclusion
I hoped you enjoyed Part 1 of this article. In Part 2, I plan to discuss more about astrophotography accessories like intervalometers as well as go over guiding (Which I have already discussed in a previous article). I will also talk about how to attach a camera to a telescope as well as techniques in achieving best focus.
