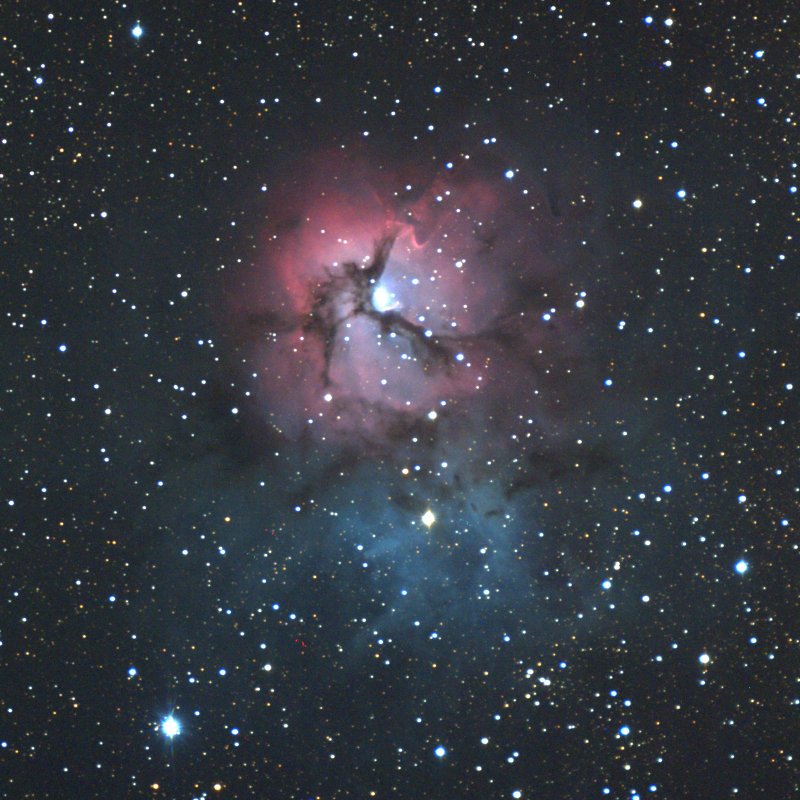
Trifid Nebula in Sagittarius photographed with a Celestron C14/Hyperstar/QHY183c. 32 x 10 second exposures were stacked for this image. Image Credit: Author
This is a part 2 of the series, Astronomical Imaging - the Basics. In Part 1, I discussed Cameras and lenses for astrophotography, in this part I will discuss the following topics:
- Camera Ascessories
- Tracking and Guiding
- Telescopes
As this series is aimed at basic astrophotography I plan to keep this article as straightforward as possible. Additionally, I originally wrote this part to also include focusing and planetary imaging but it soon became clear it was becoming too long so I have split those sections into part 3, my apologies but that is coming soon!
Camera Accessories and Guiding
Assuming you already have a camera and a tripod, there are some items you may want to put on your shopping list to make life easy. These include items like a Remote Shutter Control, a 12 VDC camera power supply and various other items which I describe in a bit more detail in the following few sections.
Remote Shutter Control
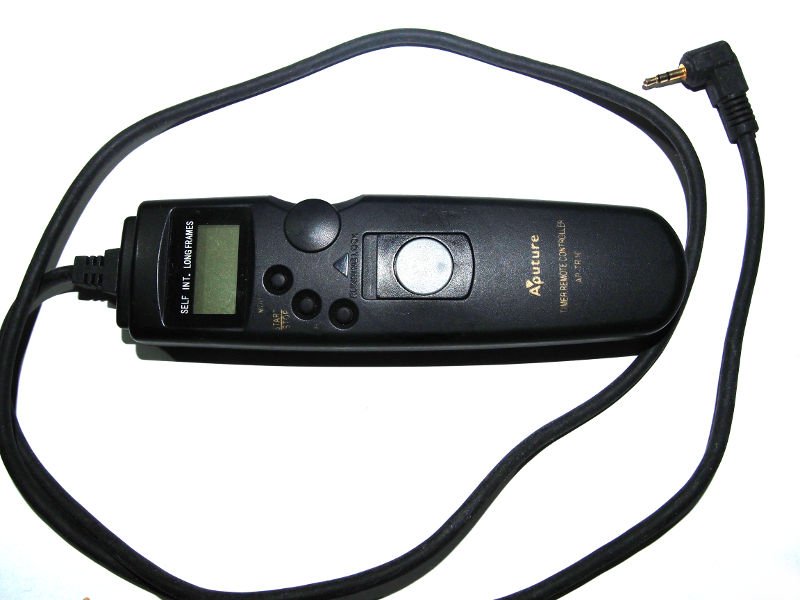
Traditionally, astrophotographers used a cable release to operate a camera shutter if they wanted to avoiding bumping the camera at the start of an exposure. A cable release consisted of a wire that ran from the camera to trigger that could be used to operate the shutter without physically touching camera. These days there are a number of different ways a camera shutter can be operated using wired or wireless technologies. One common inexpensive method is an external intervalometer (as shown above) which allows you to make an automated sequence of exposures. Other methods include (depending on camera) using tethered control via a USB interface or via wifi using a phone or laptop application.
Some camera's have a built-in intervalometer, for example some Nikon cameras and Canon cameras with the Magic Lantern firmware installed, although it is preferable you still remotely initiate the first exposure to avoid bumping the camera at the start.
How you choose to control the camera shutter remotely is a personal preference, although if you can get the wireless method to work that is preferable as it minimises cabling.
12VDC Power and Camera Power Adapters
It is quite possible to spend an entire night imaging which means the you will likely want to power the camera from an external power source. The most common way to provide external power to a camera is to plug an external power lead into the camera's battery slot that provides the necessary power the camera needs. These can usually be purchased, but if you have basic electronic skills they can also be built quite easily. Many camera's have a standard voltage input of around 7.4 VDC.
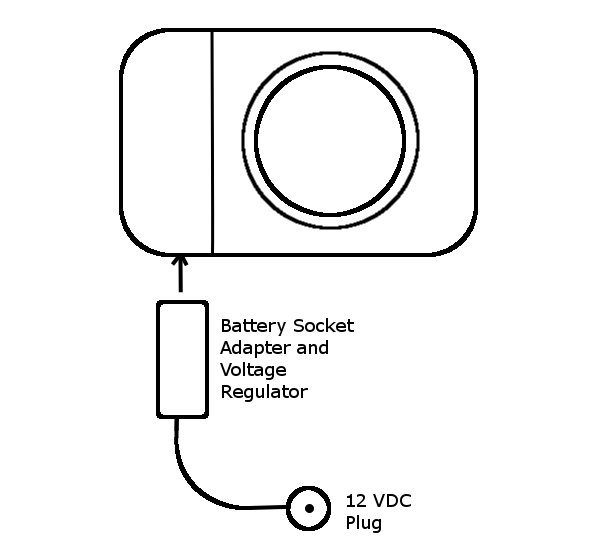
Speaking of power, it is a good idea to base all/as many devices on 12 VDC, which means the equipment can be used where there is no AC power available. Most devices will fit this criteria except laptops which you will need either an invertor or a laptop car DC-DC converter. A number of the telescope manufacturers produce portable rechargeable power units, for example:
Other Items
There are also a number of other items that are invaluable in the field, and I've listed some important ones is the following table.
 | Description |
|---|---|
 | A head lamp is invaluable as it allows you to work with both hands free (which you will need!). Also keep a small torch around for more directed light. When using torches at an astronomy gathering at night, ensure you cover them with red filter to reduce the light and be careful where you direct them. |
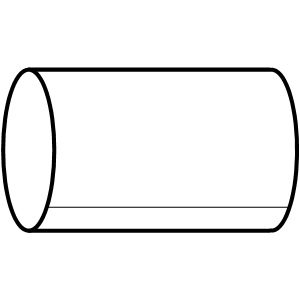 | A dew shield can be made using flexible waterproof sheet, like black foam rubber sheeting. This helps prevent dew forming on the lens/mirror. For a camera lens you can use the lens hood, but be wary if you add an extra dew shield it might be visible in the image! |
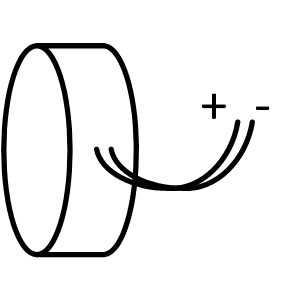 | Telescopes with front optical elements and lenses are subseptable to dew forming on them, and if relative humidity is high Dew Shields are insufficient. In that case a dew heater is used that helps raise the temperature of the front element above the dew point. There are a number of manufacturers making dew heaters, however, they can be made pretty easily using resistors or resistive heating wire. |
 | Sometimes the dew is so bad, that you may need to dry off equipment and optics in a hurry. For this a hairdryer is indispensable. |
Tracking Platforms
I've already covered Tracking mounts in an earlier article here
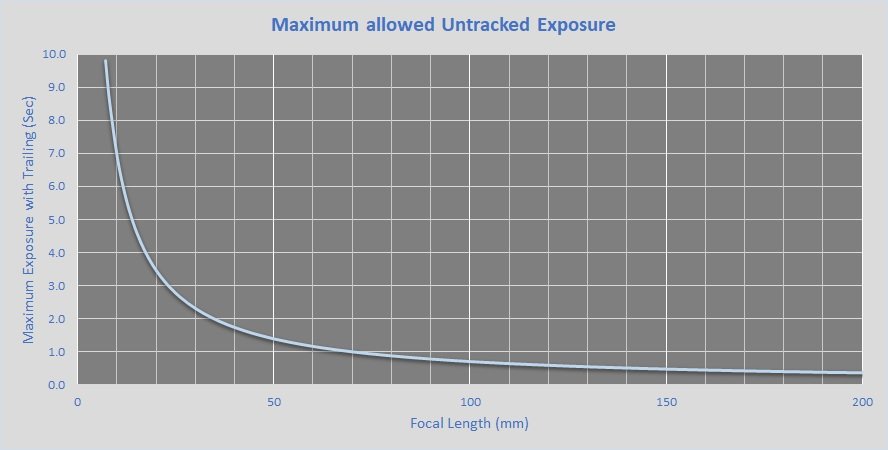
To briefly recap, once exposures exceed a certain elapsed time celestial objects will start to trail because of the earth's motion. The longer the focal length (or more correctly the smaller the image scale) the shorter the allowable exposure becomes before star trailing occurs. Here is a graph that gives indicative maximum exposure times versus focal length before star trailing becomes evident. From this graph it is clear that even a normal 50mm lens will start to show trailing at 2 seconds exposure.
In astrophotography it is common to take exposures of 5 minutes which requires some form of device to track the stars. The common way is to use some form of GEM (German Equatorial Mount). Here is a summary of the typical options from inexpensive and very portable, to expensive and heavy:
| Mount | Application |
|---|---|
| Portable | Sits on tripod, extremely portable, perfect for a camera with lens from wide angle up to a medium telephoto (i.e up to a 200mm f2.8-300mm f4). These are relatively inexpensive and are highly recommended! |
| Autotrack Dobsonian | Useful for planetary imaging, but limited for Long exposure photography. One downside is that field rotation is introduced, that needs to be removed in later steps. |
| Low end GEM Mount | Easily One person portable, can carry up to 12kg of equipment (8" telescope + camera + accesorries and reliably track). |
| Medium end GEM Mount | Heavy for one person, transportable but easier in a small observatory, can carry up to 25kg of equipment and reliably track. |
| High end End GEM Mount | Observatory class, can carry up to 50kg or more in equipment and reliably track. |
Important Tips
- Telescope Mounting Plate: Always check the mount has the right mounting plate (sometimes called Saddle) for the telescope. You will hear terms like Vixen Dovetail, Losmandy, Celestron CGE being used as the mounting plate size, always check with the supplier before purchasing.
- Polar alignment: All of the above tracking mounts (except the Autotracking Dobsonian) require that the mounts drive axes been aligned correctly. Any inaccuracies will cause drift and stars will trail, although if it is approximately aligned (+/- 10 degrees) it will still be better than a tripod. I will deal with polar alignment in a later article.
- Autoguiding: Even with accurate polar alignment, the drive mechanism will not be perfectly uniform and and there will be trailing caused by variations in drive speed. Only very expensive direct drive mounts can overcome this, so most people will resort to autoguiding which is to introduce a second guide camera that sends corrections back to the telescope drive.
Telescopes
Up to this moment, I've not mentioned telescopes, however, if you catch the astronomy bug a telescope purchase will not be too far away, or you may already have a telescope but are not sure if you can used (if at all) for astrophotography. Rather, than a comprehension review of telescopes and their design I have tabulated a few telescope configurations that are in common use and how useable they are for astrophotography.
Refractor

The first telescope design was the refractor, and was the design used by Galileo in 1609, and it is the design most recognised by the general public. Galileo's refracting telescopes used a single lens "objective" to focus light at the end of a long tube where an eyepiece was placed to view the resultant image. Since Galileo's time the design has been refined by using a multi-lens objective to focus light in order to correct the severe chromatic aberattion that existed with the original design. The refractor is an excellent option for small portable designs less than 10cm in aperture as is the design basis for almost all photographic lens today. For wide field, high resolution astrophotography, optimised refractors excel in performance, but for high resolution planetary imaging they are very expensive for the performance.
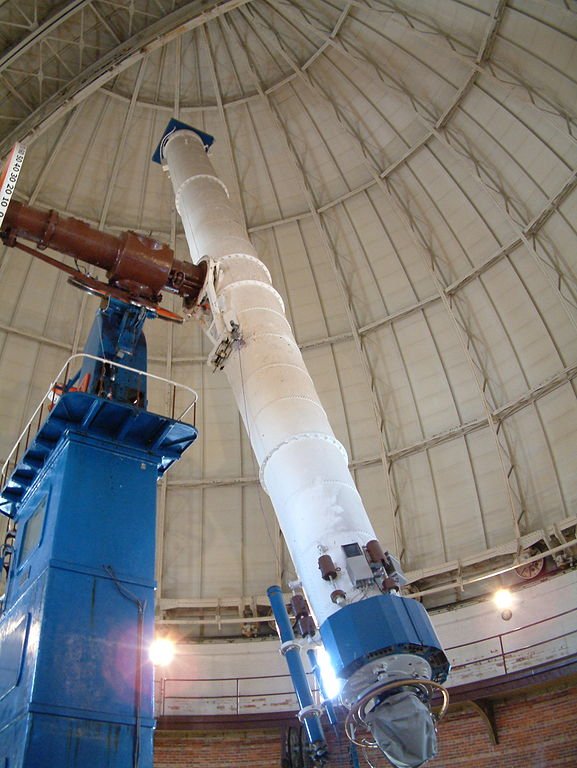
One of the largest refractors ever built. The Yerkes 40" telescope near Chicago. Credit
Reflector / Newtonian
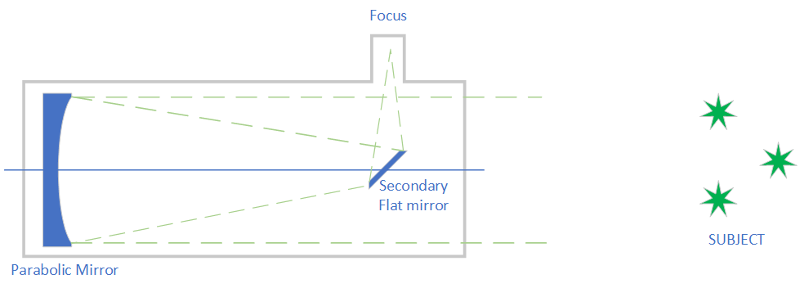
The most common form of telescope is the newtonian or reflecting telescope named after the famous scientist Isaac Newton who invented it. The basic design is shown above and features a parabolic mirror that focuses light, and is reflected out to the side by a flat mirror (otherwise your head would be in the way of the view!). The big advantage of newtonian telescopes is cost and the fact that it is very well corrected for chromatic aberation. For Astrophotography they also make a good general purpose platform, although as they get larger the length of the tube means it gets harder to dampen vibration, requiring a heavier duty mount (i.e expensive). The other consideration is that reflector's with fast focal ratios suffer from bad comatic aberation off centre, although this can be corrected using a coma corrector.
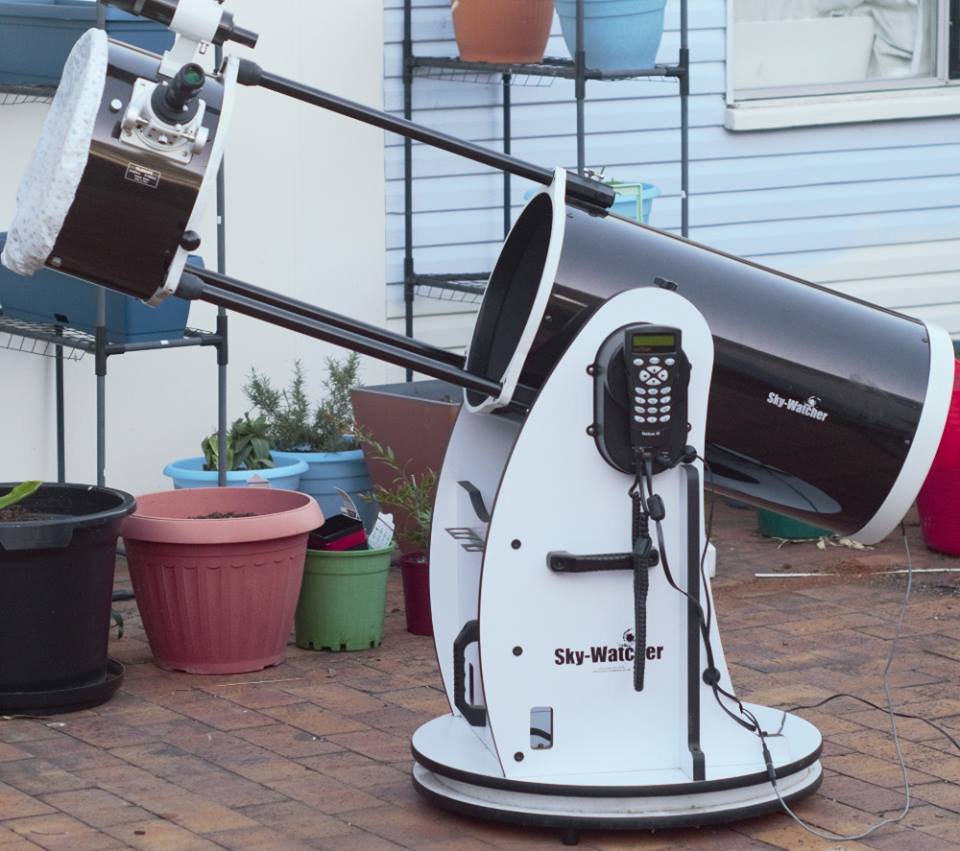
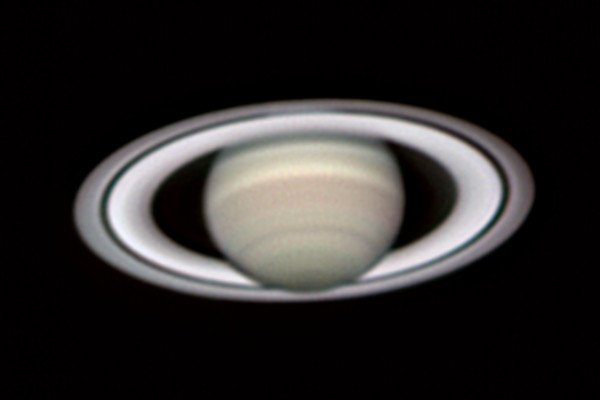
A popular implementation of the Newtonian reflector is the Dobsonian's (pictured above). Dobsonians are built around a "lazy Susan" design that keeps costs to an absolute minimum. A basic Dobsonian is NOT well suited for astrophotography as they are non tracked and limited to photographing bright objects like the moon and maybe the bright planets. However, in recent years dobsonians have appeared that can track the stars and can be used for astrophotography up to a couple of seconds exposure. Although really still limited to planets and the moon, they can be used to photograph fainter objects (just not as well as with an equatorial mount). An example of what can be achieved with a tracking Dobsonian in the photo above, is this image of saturn.
Schmidt-Cassegrain

The Schmidt-Cassegrain Telescope (SCT for short) is a very popular short tube design that is a variation on the Cassegrain design. The design uses to spherical mirrors that are easy to manufacturer and an optical window with a light aspheric curve. These telescopes are very versatile, and the short tube makes them more stable on a tracking mount. One interesting aspect of the design is that they typically have a long focal ratio of F10 or F11, giving it good scale for planetary imaging, but the primary mirror alone has an F-ratio of 2, meaning it is possible to remove the secondary mirror with a corrector lens (called a Hyperstar) that allows imaging a F2. With a focal ratio of F2 the SCT in Hyperstar is equivalent to a very fast supertelephoto lens. The author found 4 comets with this system!
Other Designs
There are a couple of other designs that are commonly in use and these are the Ritchey-Chretien and the Maksutov designs. The Maksutov designs are commonly seen around the 10cm aperture and make very compact spotting scope type designs. The Ritchey-Chretien is popular as an observatory class telescope as it has a compact size with most of the weight in the primary mirror, making it easy to mount and ideal for astrophotography - but it is quite an expensive design and aimed more at experience astrophotographers.
Adapting a Camera to a telescope
Fixed Lens Camera: Connecting a fixed lens camera to a telescope requires the Afocal method covered in my articles for Smartphone Astrophotography. Check those out here and here. Afocal imaging is where the camera images through the telescope eyepiece as shown here:
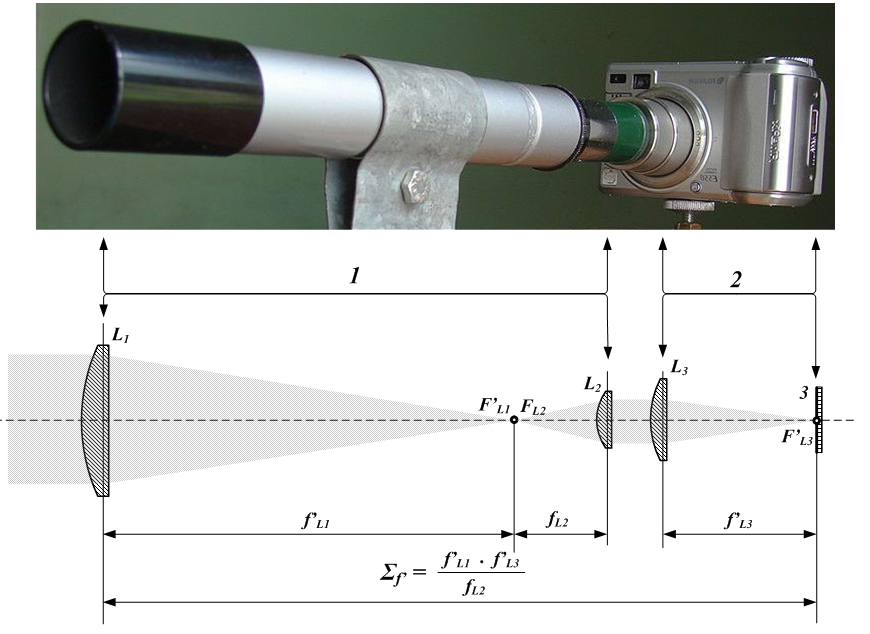
The concept of Afocal imaging is shown here, the resultant imaging focal length is modified by the ratio of the camera lens focal length divided by the eyepiece focal length. Credit: User:Tamasflex/wikipedia commons
Interchangeable lens camera: With an interchangeable lens camera, the eyepiece and the camera lens are no longer required, resulting in greatly improved optical performance. The camera is attached using a T-Ring adapter which connects to it like a lens, but has a M42x0.75mm female thread on the outside that is used to attach it to a telescope. The T-Ring must be selected for the camera that you are using, i.e if you are using a Canon DSLR you must select a T-Ring to suit Canon EF (sometimes labeled EOS).
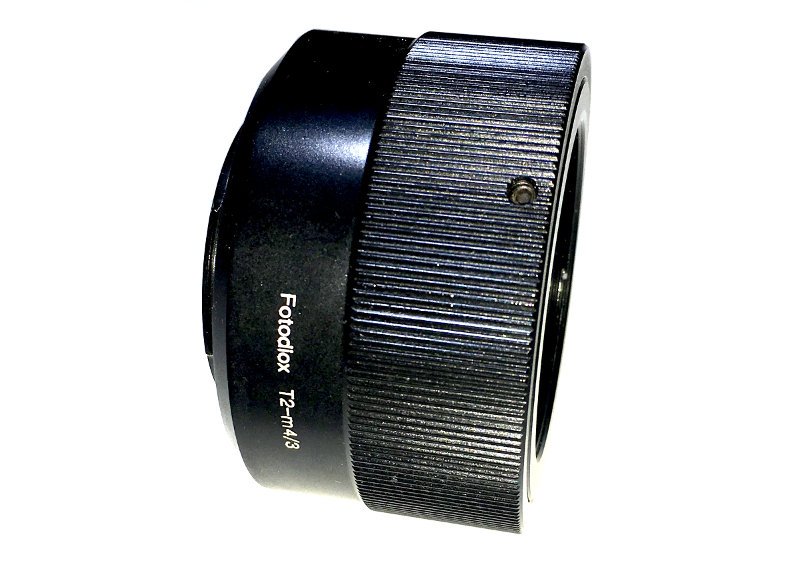
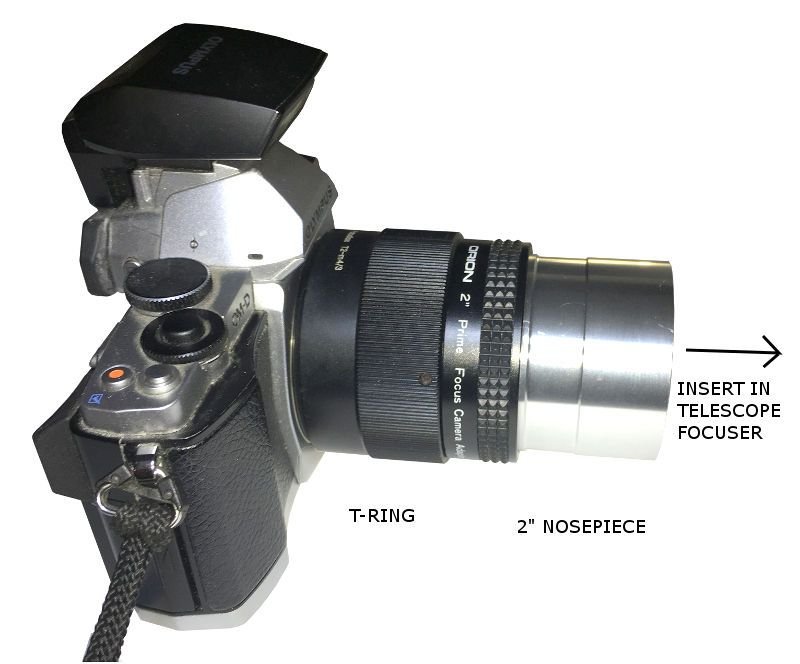
Here are a couple of examples of how you may wish to connect a camera to a telescope using a T-Ring. The first method is with a nose-piece that slides into the existing telescope focuser. The nosepiece will typically be a 1.25" or 2" diameter tube to suit those standard sizes used by telescopes, so check whether you have a 1.25" or 2" focuser.
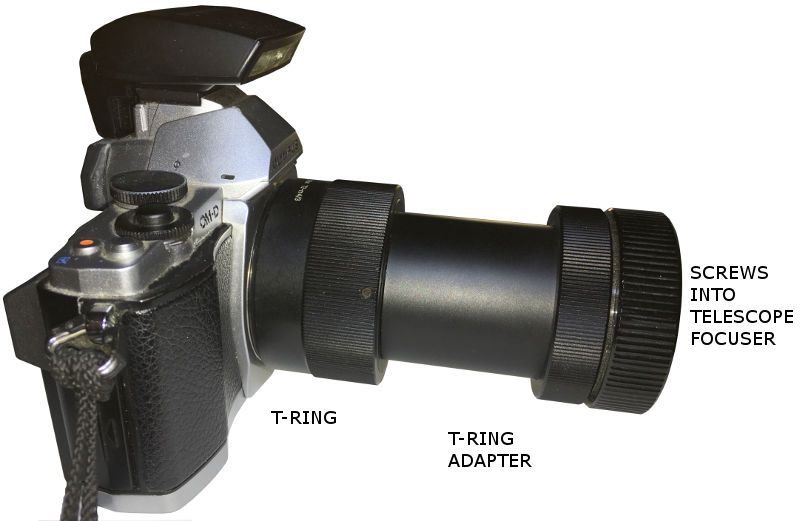
The next example is where the T-Ring screws directly into the telescope without a nosepiece, which is the case with the popular Celestron and Meade Schmidt-Cassegrain telescopes. This is my preferred method with a DSLR as it is a more rigid connection and there are less chances of problems with back-focus spacing (which I will talk about in a moment).
Important tip : One important consideration when attaching a camera to a telescope is backfocus, which is the distance back from the focuser to the focal plane (or the point of focus). You will need ensure the camera is in the right position so that it can achieve focus within the range of adjustment of the focuser. It's impossible to cover all the possible combination but it is worthwhile asking the supplier/looking at manuals for advice regarding what spacing is needed for the camera.
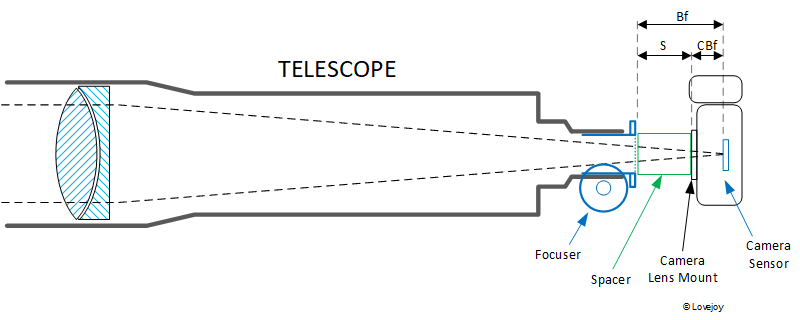
Backfocus is shown as "Bf", "CBf" is camera flange focal distance and "S" is length of spacer. The Focuser is assumed to be set midway to allow travel adjustment either way. Values of camera flange focal distance for different manufacturers can be found here. Credit:Author
Conclusion
In this article we covered equipment selection further, in Part 3, I plan to start talking more about practical astrophotography including polar alignment, focusing and planetary imaging. Stay tuned!
Final Note: All images and diagrams are the authors unless otherwise credited, please feel free to use them but I ask that you credit them with @terrylovejoy
