
What is Child Theme In WordPress:
We can consider Child theme as a mirror reflection of a theme. And that original theme becomes parent theme after creating a child theme for it. If we make any changes in parent theme it will also affect your child theme. But when you make changes to child theme it won't affect actual code of parent theme.This way we can customize our WordPress website according to our need without touching the original theme file.

Why Creating and Working on Child theme is so important?
Almost everybody wants to customize their WordPress website according to their need. A study from Elegant Themes suggests that above 85% user customize their WordPress theme. But very few of them use the child theme.
It's not wrong to customize your original theme, but later problem can arise when you want to upgrade your theme to the newer version because all the changes made before will be lost after updating the theme.
To avoid this problem it is necessary to create and work on a child theme, your works are always preserved on the child theme.
The child theme can save lots of development time as well since we can use already existed development and customize things according to our need.
How to Create Child Theme?
Please note that I am running WordPress on localhost using Xampp. You can directly perform these actions on your server if you are familiar with these things.However, I prefer customizing on localhost. If you don't know how to install WordPress on your PC please refer my previous tutorial here
Create a new folder for child theme inside theme directory.
Goto the WordPress theme folder of your project and create a new theme folder and give a suitable name.
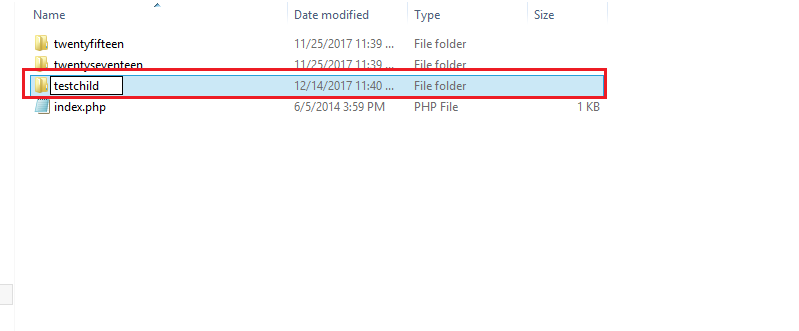
I have named it testchild as you can see in above screenshot.
Remember not to use spaces in the name.
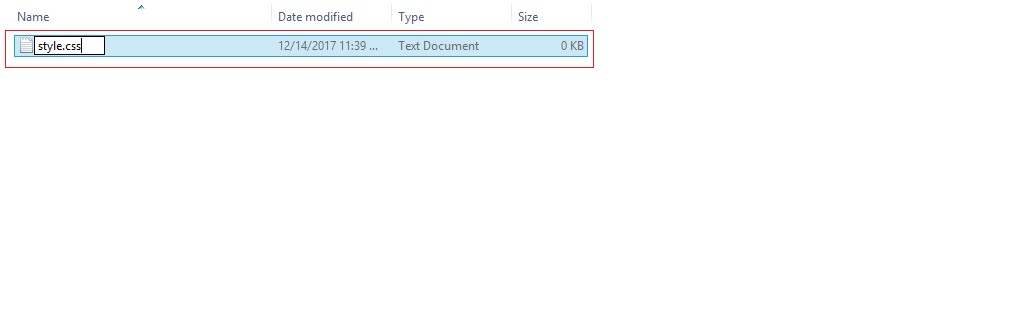
Create a new style.css file.
Create a new blank text file inside that folder and name it style.css as shown in the figure below.
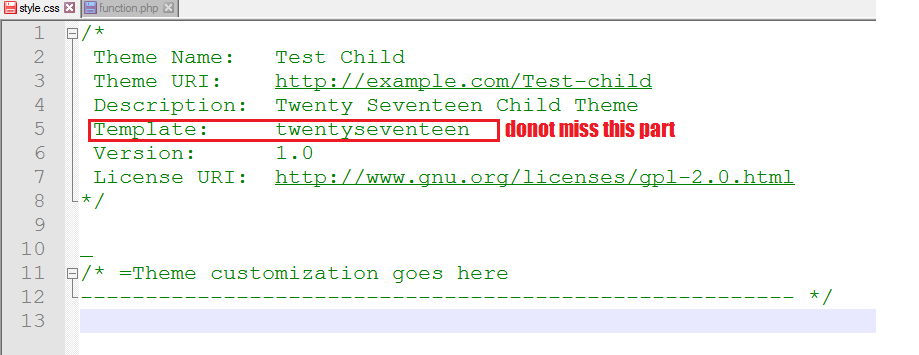
Open the style.css file in your favourite editor and add following code there.
I am using WordPress's default twentyseventeentheme as an example in this tutorial.
/*
 Theme Name:   Test Child
 Theme URI:    http://example.com/Test-child
 Description:  Twenty Seventeen Child Theme
 Template:     twentyseventeen
 Version:      1.0
 License URI:  http://www.gnu.org/licenses/gpl-2.0.html
*/

/*  Theme customization goes here
------------------------------------------------------- */
Give your theme a appropriate name in Theme Name section and include the parent theme you are using in Template section. Make sure to write the exact parent theme name in this template section, this way wordpress will automatically take your theme as Child theme of its parent.
Save the style.css file.
Remember you can do all the customization from here adding your own CSS code.
Importing the Parent Theme Stylesheet.
Now in the final step, we need to enqueue the parent and child theme stylesheets. For this purpose we have to create a function.php file in our child theme and add wp_enqueue_scripts action and use wp_enqueue_style().
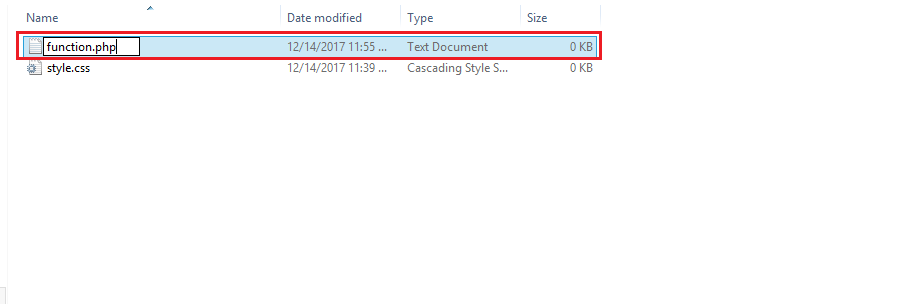
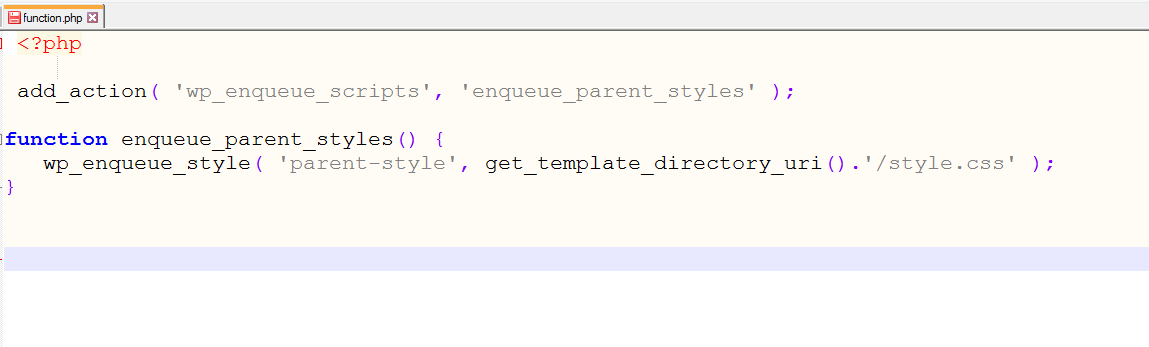
Again create a blank text file and name it function.php. Open it in your favourite text editor and the following code inside.
<?php

 add_action( 'wp_enqueue_scripts', 'enqueue_parent_styles' );

function enqueue_parent_styles() {
   wp_enqueue_style( 'parent-style', get_template_directory_uri().'/style.css' );
}
And Save the File.
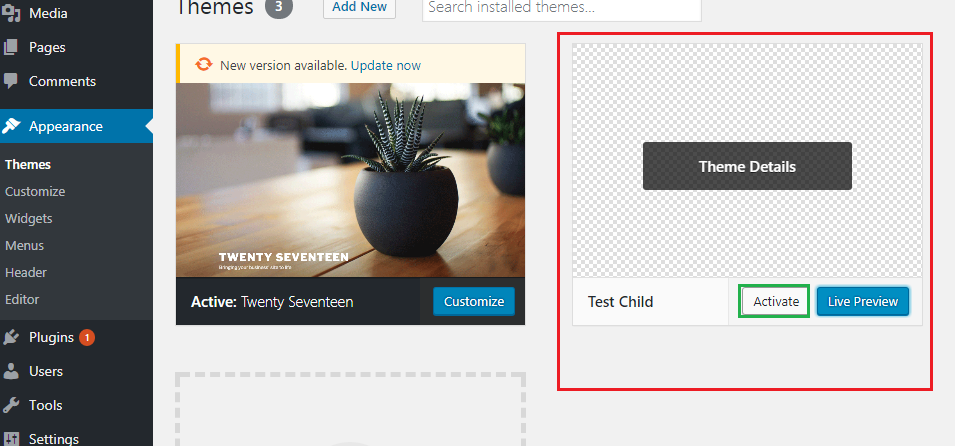
Congratulations!! you have just successfully created a child theme for WordPress.
Your Child Theme is ready. Now login to your WordPress admin panel and activate the child theme.
Posted on Utopian.io - Rewarding Open Source Contributors