It’s time. It’s time to take what you have learnt from Learn To Knit With @sweetpea and put your new skills into action. Yup, this is the moment I (YOU) have been waiting for…can I have a drum-roll please?! BRRRRRRRRRRRRRR (drum-roll sound).
…
This is the VERY FIRST knitting pattern that I am sharing in my series that teaches you how to knit. Up until now I have touched on how to choose the correct needles and yarn (wool), how to cast on your first stitches, how to do a knit and purl stitch as well as how to cast off again. We’ve also looked at how you can increase and decrease stitches, so that you can give your projects shape.
To recap, or if you are new to the series, you can view my past tutorials and guides here:
01 - Learn To Knit: Matching Yarn And Needle Sizes
02 - Learn To Knit: That First Stitch
03 - Learn To Knit: Casting On The First Row Of Stitches
04 - Learn How To Knit With @sweetpea: The Knit Stitch (Garter Stitch)
05 - Learn How To Knit With @sweetpea: The Purl Stitch (Stocking Stitch)
06 - Learn To Knit With @sweetpea: Decreasing Stitches (SSK)
07 - Learn To Knit With @sweetpea: Increasing Stitches (Inc 1)
By knowing how to do the above steps in the knitting process, you’ll be able to knit a beanie just like the one I made!
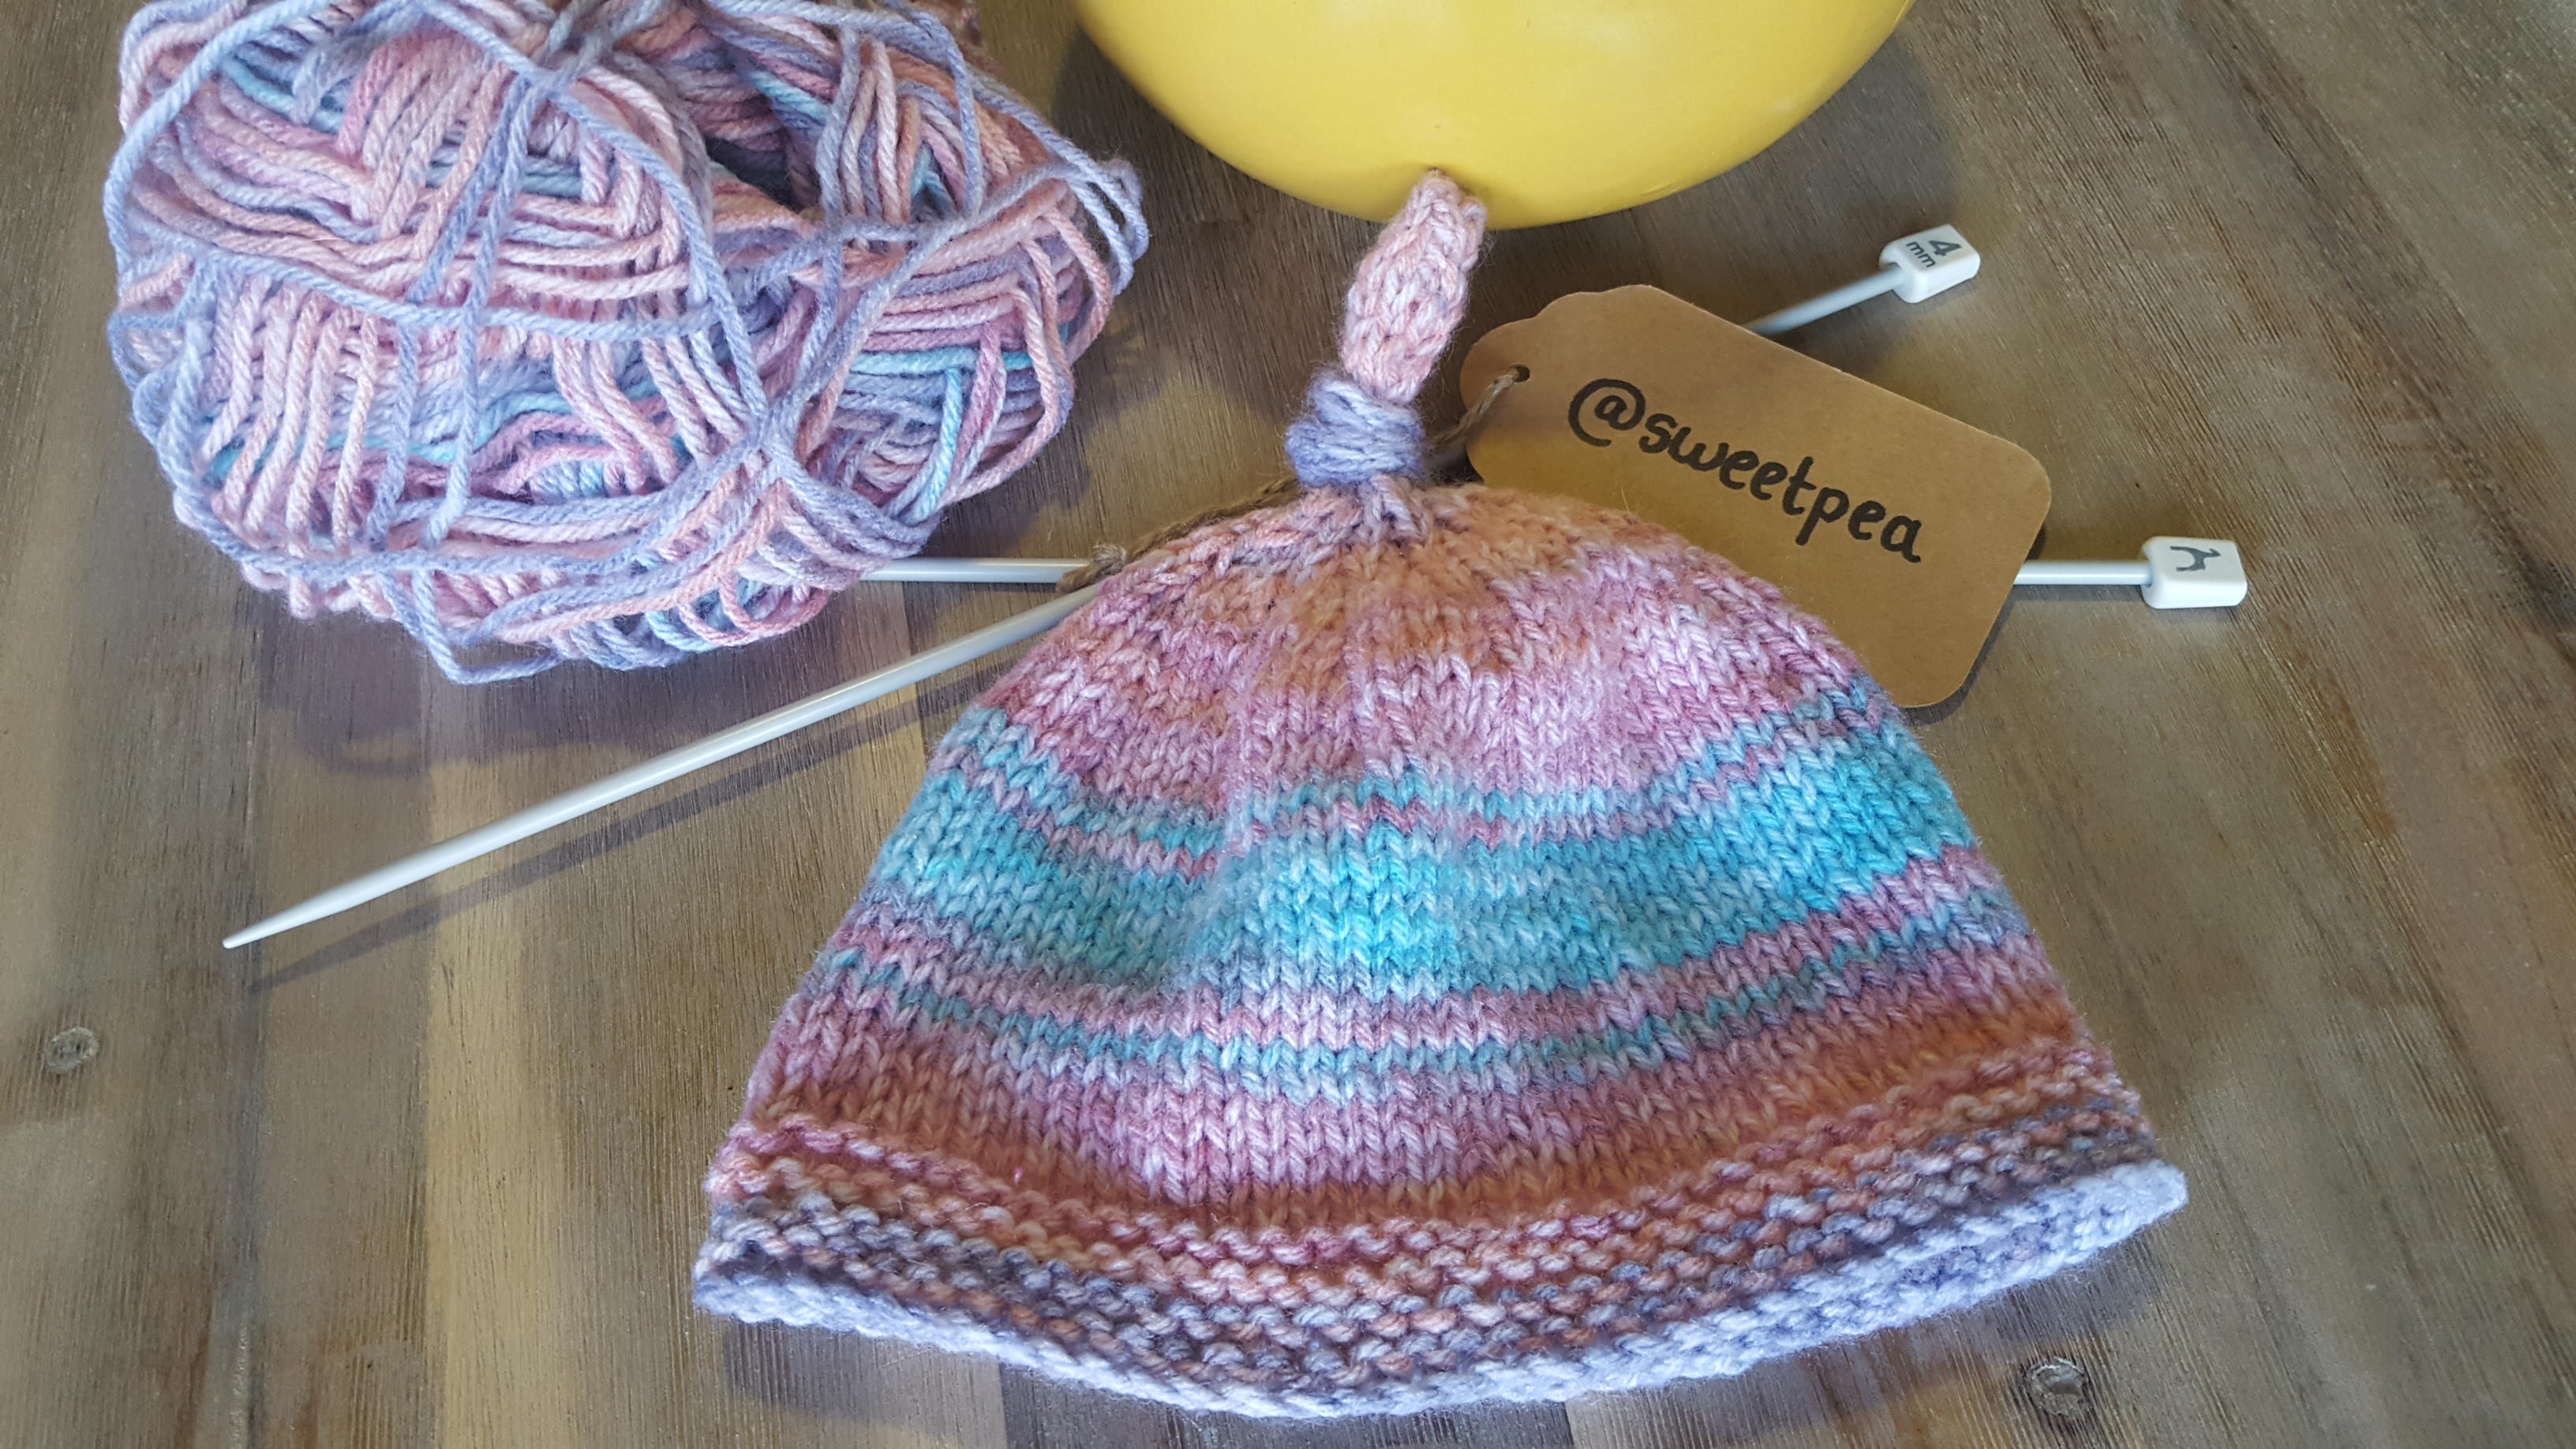
Baby BEANIE Pattern
While there are many types of beanies that come in all shapes and sizes, in this guide I have included a pattern for beanies for babies, that end off with a top knot (which I think is oh so cute)!
Before you begin, you’ll need the following utensils on hand:
- A set of size 3 mm knitting needles
- A set of size 4 mm knitting needles
- A ball of double knit yarn (your colour of choice of course)
- A ruler
- Scissors
- A large sewing needle
The pattern I followed can be viewed HERE and is courtesy of raverly.com, where it can be downloaded safely and for free.
In this pattern you will knit a garter stitch as well as a purl stitch, you will also decrease stitches by knitting two stitches together, to form a crown. You’ll then cast off and sew the back seem together to finalise your project.
* You’ll notice that the pattern gives you two options, to knit with double pointed needles in the round, or with straight needles. We’ll be following the straight/flat knit option.
Taking You Through The Steps
So, to start, you’ll cast your stitches on to your smaller-sized needles. The number of stitches you cast on will depend on what size you want your beanie to be. The pattern gives you size options and guides, which are can be found in the brackets, next to each set of instructions.
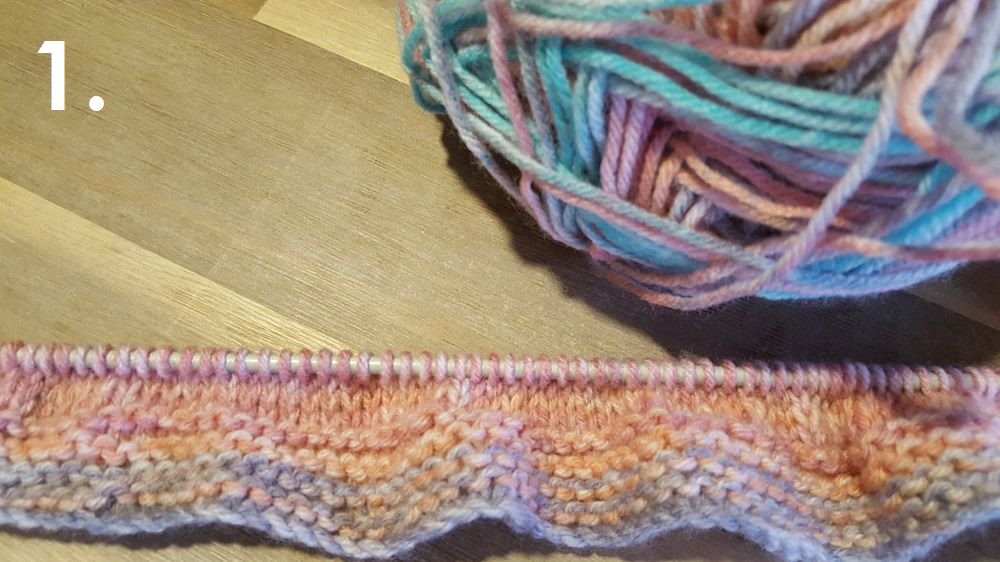
1. Once you have cast on your stitches, you’ll knit 8 rows of garter stitch.
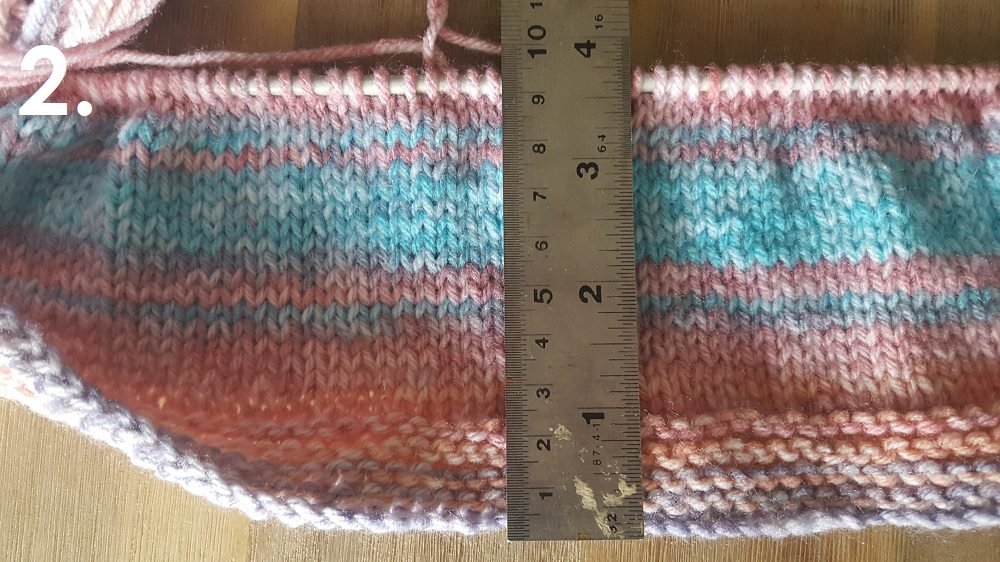
2. After you have knitted your 8 rows of garter stitch, it’s time to switch over to your larger needles. You can do this by simply knitting on to the bigger sized needle in the next step. Now you will knit stocking stitch, continuing to do so until your beanie measures the indicated amount from the cast on row and up. In my case, I knitted in stocking stitch until my work measured 9 cm.
3. Now it’s time to start shaping your crown, so that your beanie will come to a point and fit to the shape of a head. It is at this point that you will start decreasing stitches, by knitting two together.
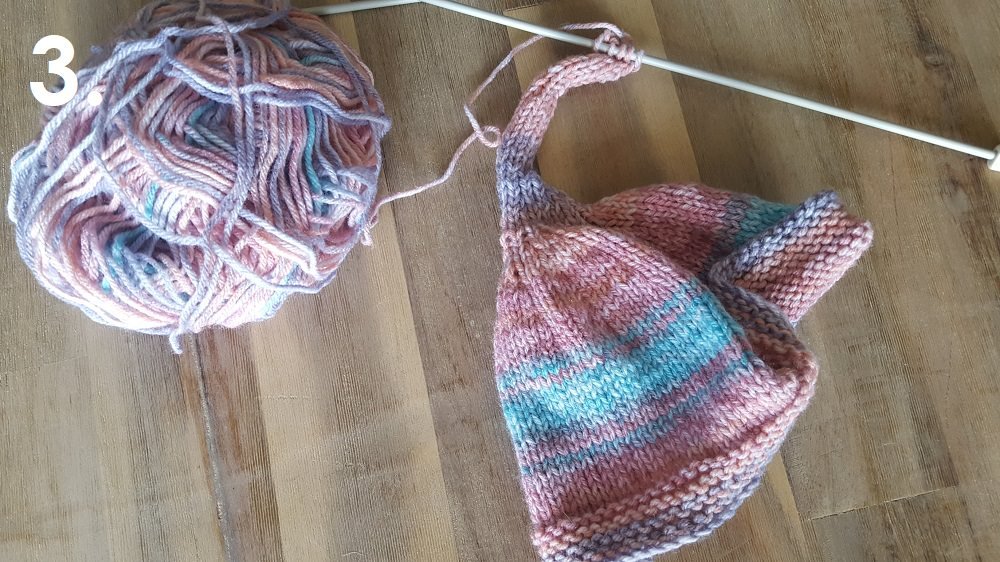
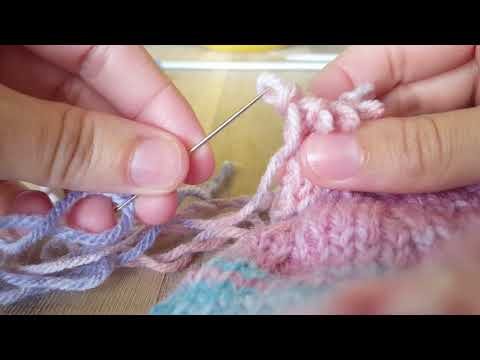
Once you get to the end of the pattern, you can either cast of as it requests, or you can do what I did (which I find secures the end-work much better), is to thread the cut off working-wool through the stitches, ending off with a slipknot. To demonstrate what I mean, I have included a short video of the procedure below.
As the final steps, turn your beanie inside and sew together the edges (the back of the beanie). Once done, fold it back to the right side, pushing the long pointy end up, and then ending off by tying it into a knot.

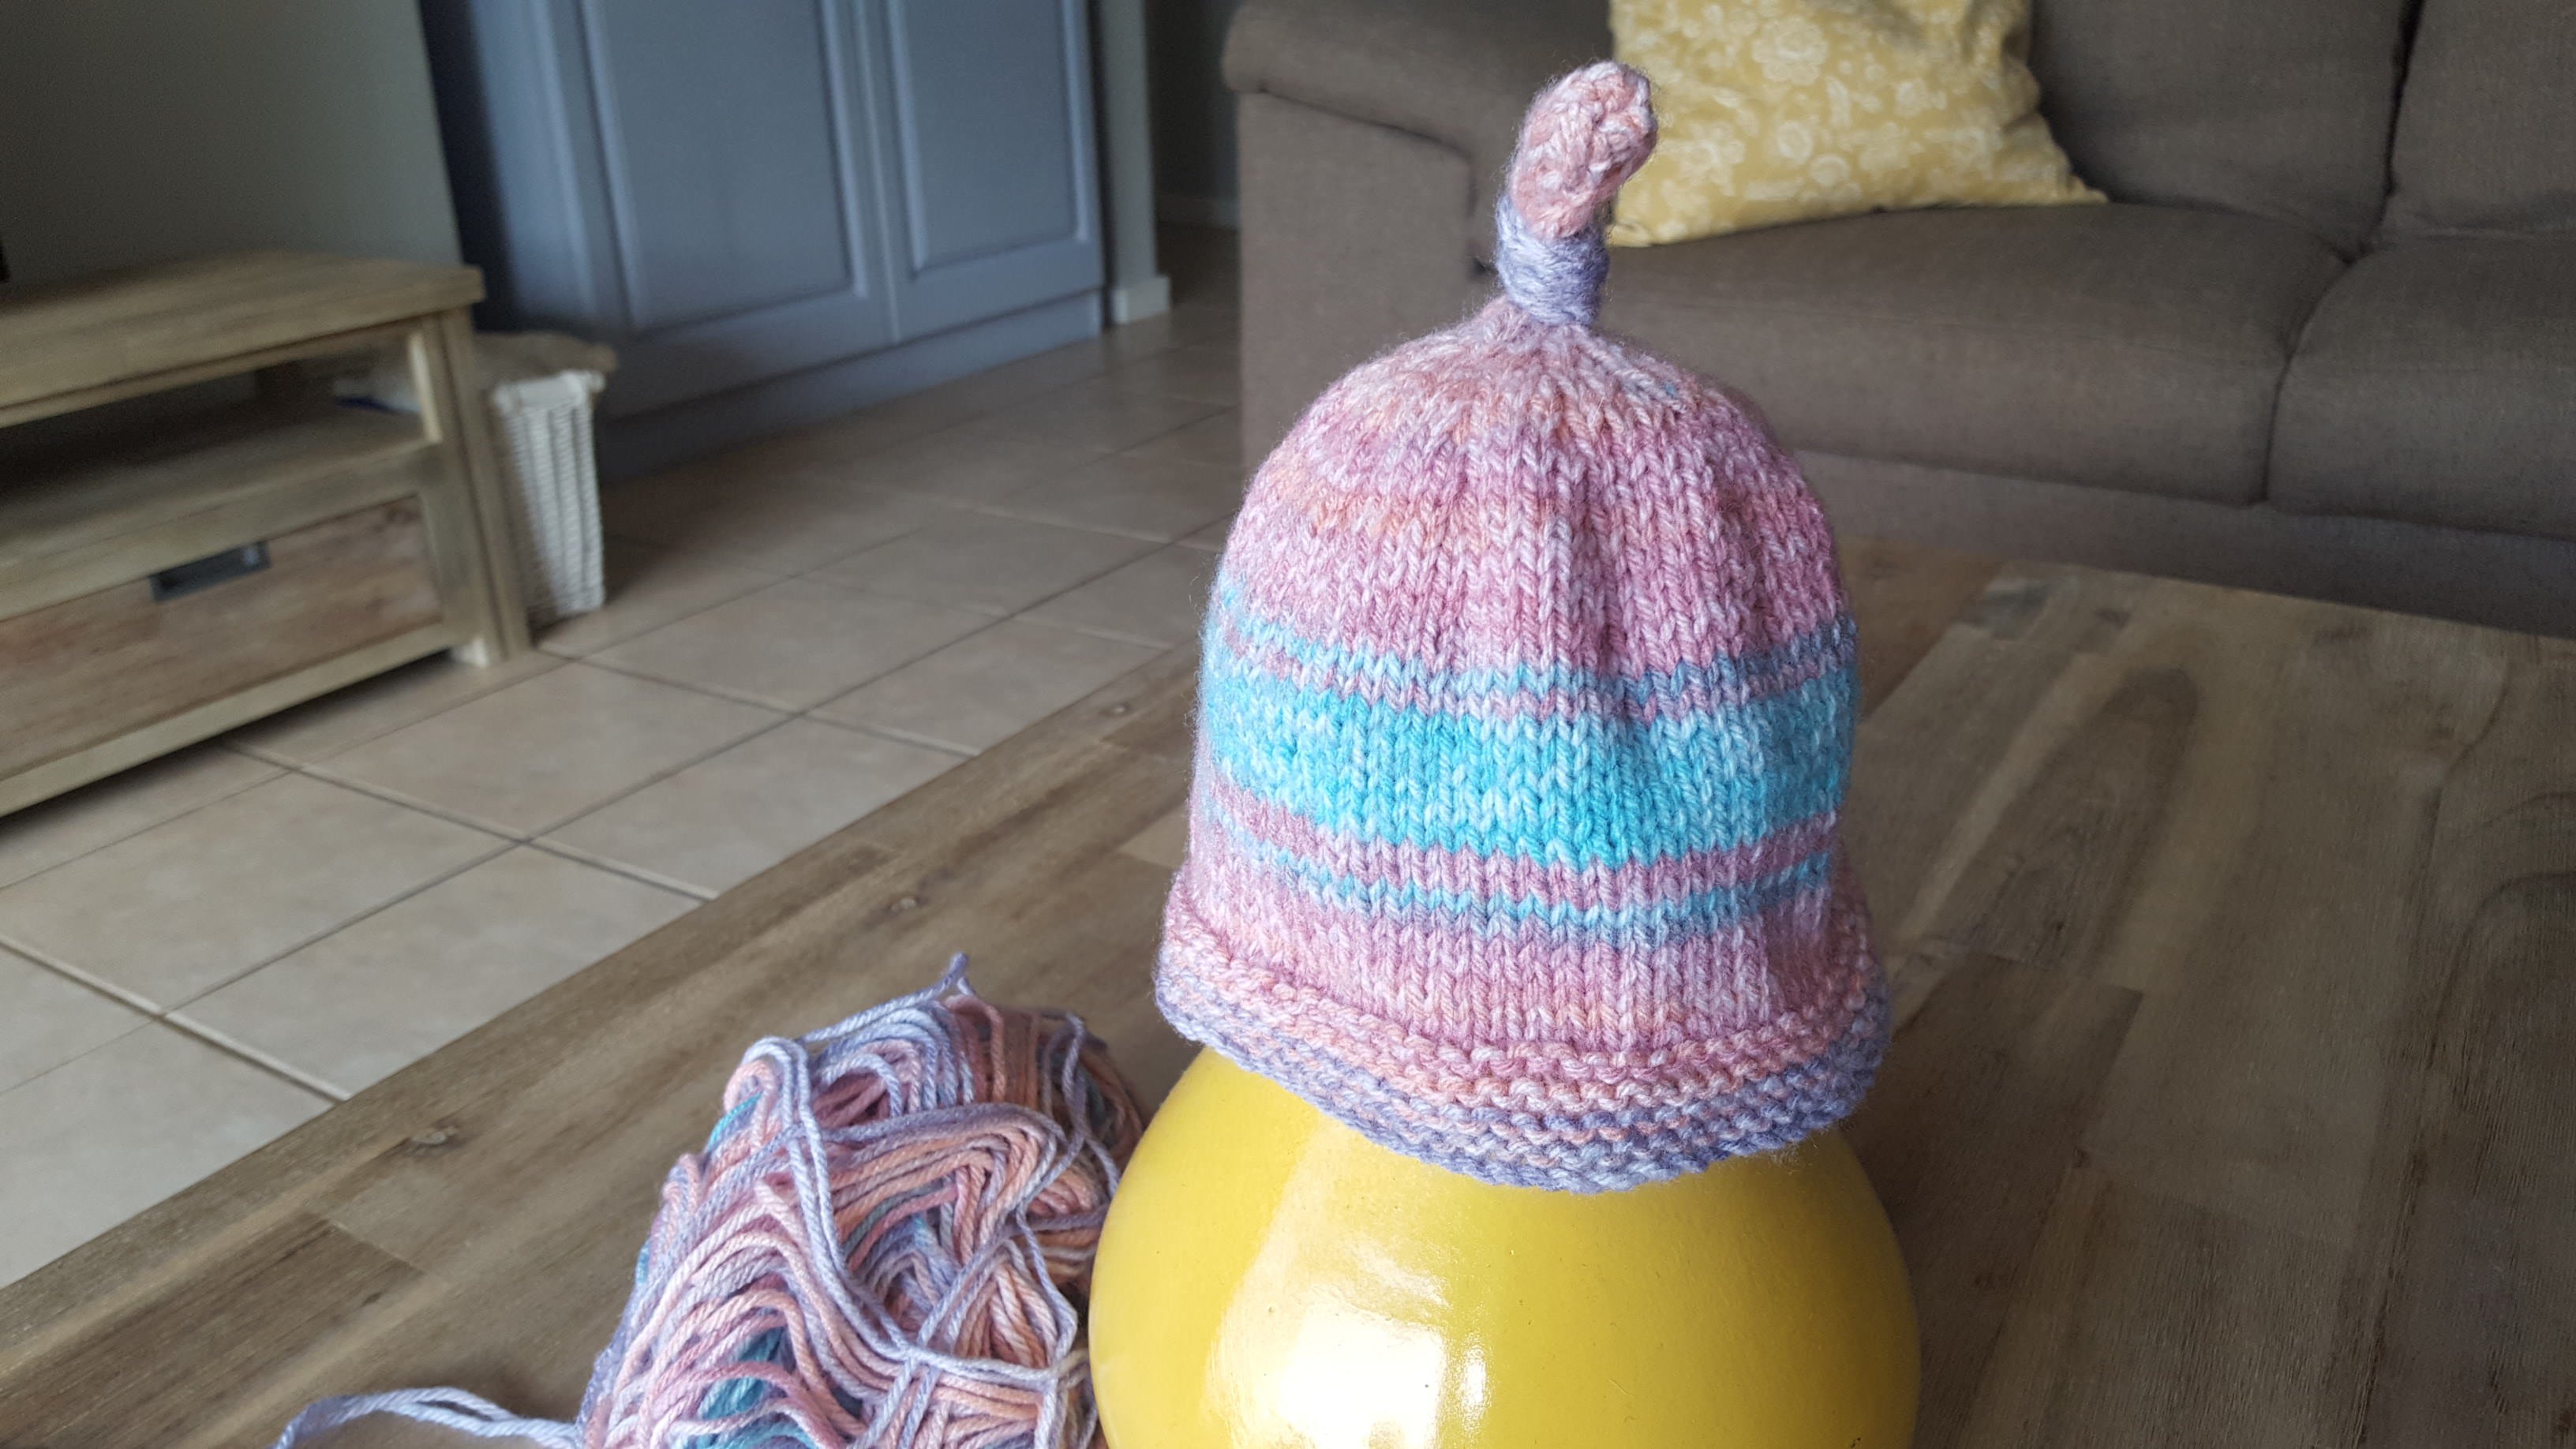
And there you have it folks! Your very own hand-made (full of love) beanie! These make awesome gifts, or you can knit a ton and donate them to your nearest baby home or orphanage!
I am so thrilled to have reached this point, where we can now start working on projects together! And, to top it all off, I’ll be introducing a challenge of sorts soon too, where you can share your knit-work and win a prize, from me, @sweetpea!
If you have any questions regarding the steps, or the pattern, please feel free to contact me here, or on Discord. Happy knitting!
Much love - @sweetpea

Join us @steemitbloggers