Greetings my dear friends of Steem Kids. 💜🎨
I am pleased to present my publication in the community as a Digital Drawing Tutor. Through my drawing lessons, I will be teaching and guiding you in the wonderful world of colors, based on everything I have learned self-taught. I hope you like my work and that you learn a lot!

Are you new to drawing or already experienced? My dear kid you can still participate in this lesson and learn more every day, because “You don't need to be an expert to be a great artist” – Rui Torres.
Today I present to you my seventh lesson, related to the Ibis Paint X Drawing Application, which I will be using for the lessons and will be the main protagonist of them. You can download it through the following link: Ibis PaintX

Function "Drawing Layers"
They are a great function that allows us to make a digital drawing in parts (layers), to bring a better order and ease when drawing. The layers are one below the other, the first being the ones that will be seen first in the drawing, that is, the upper ones.
Ibis Paint X has this function, located at the bottom and represented by a number 1 and a box with several below it, which simulate drawing layers. By clicking on the mentioned icon, a menu will appear where we can configure the drawing layers.
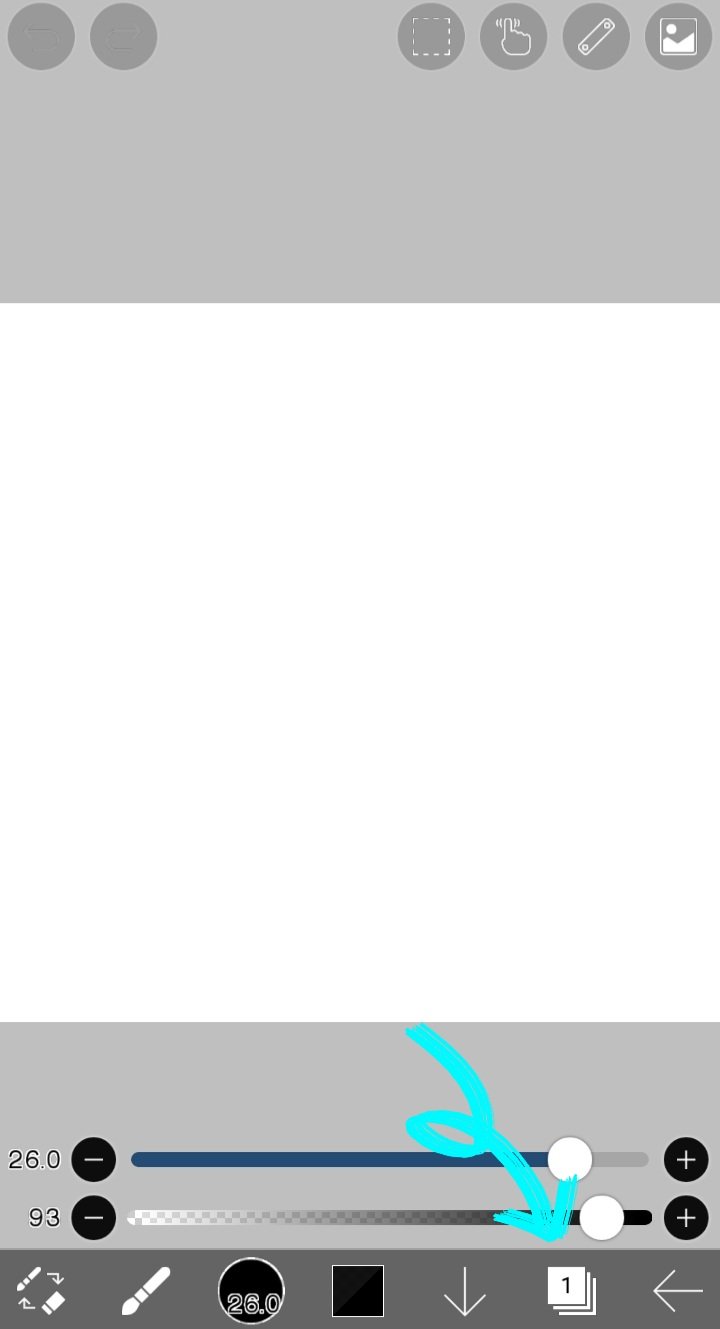
In addition, a drawing layer appears by default, as indicated by the blue arrow.
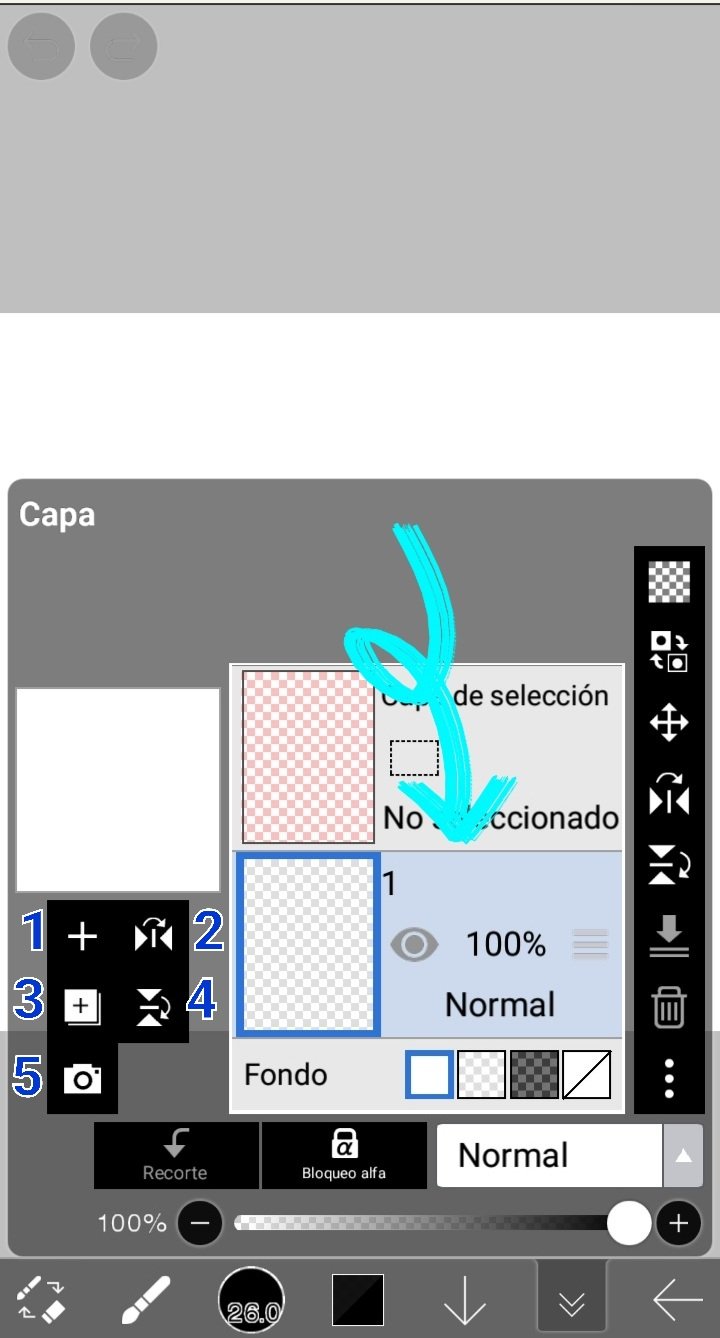
Next I define each of the options listed in the previous image:
1. Add Layer: Clicking on this option will quickly add another layer to the drawing.
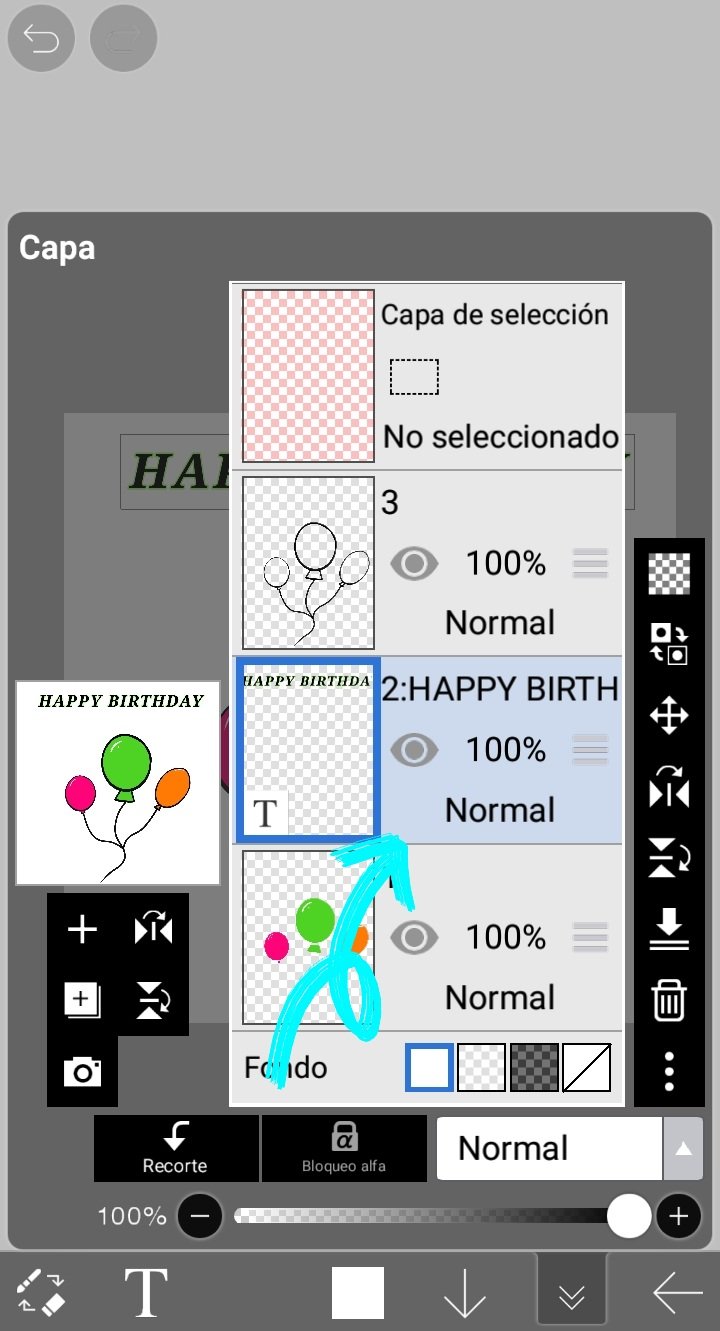
It is important that you know the layer where you want to work, that is, the layer that you have selected or active, so that you do not draw on the wrong layer. This mistake is made by many digital artists, so we must go back or delete to be able to accommodate the drawing. To avoid this, you must know which layer selected is the one that is surrounded by blue, for example layer 2 indicated in the following image. On the other hand, if you want to activate another layer, you just have to touch it in this same menu:
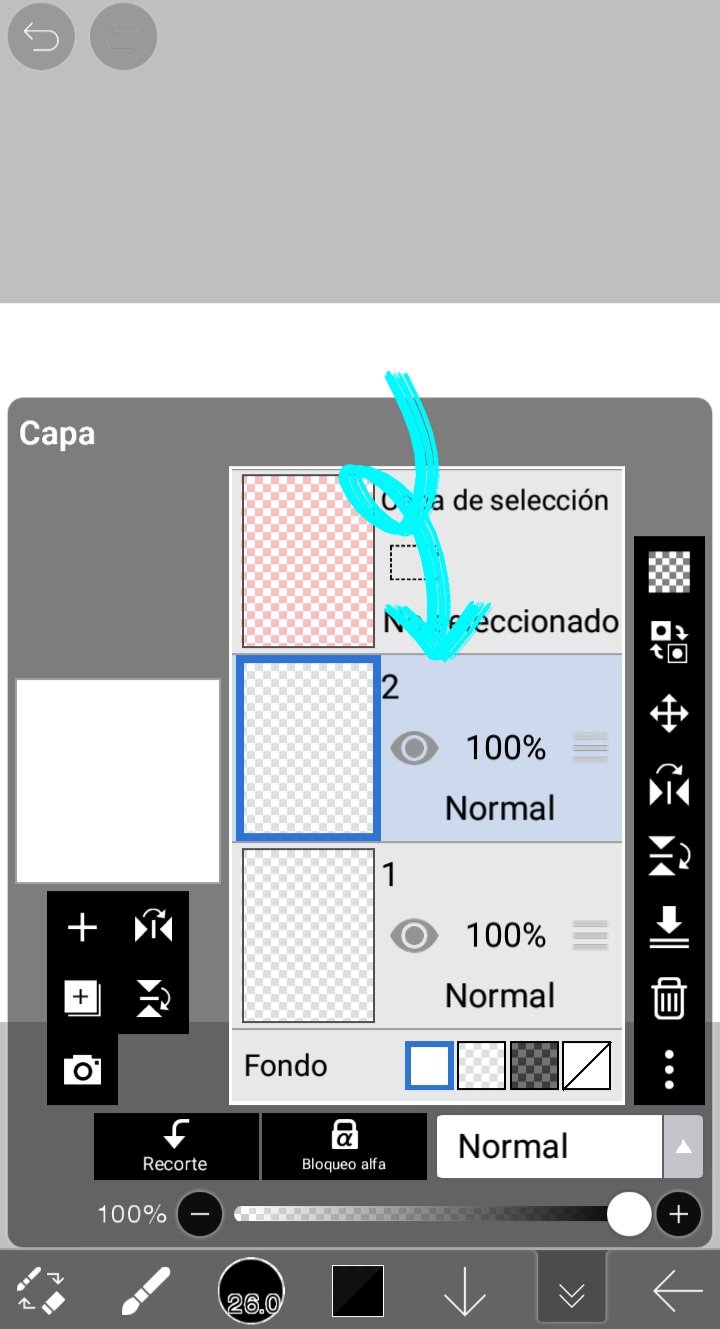
To move a layer above or below another, just slide your finger on the one you want to move.
2 and 4. Invert canvas: They allow you to rotate the canvas by selecting horizontally and vertically.
3. Add a special layer: It has 3 options, of which I only use the second "Clone Layer" that allows you to make an exact copy of the selected layer on the canvas. This makes the job much easier.
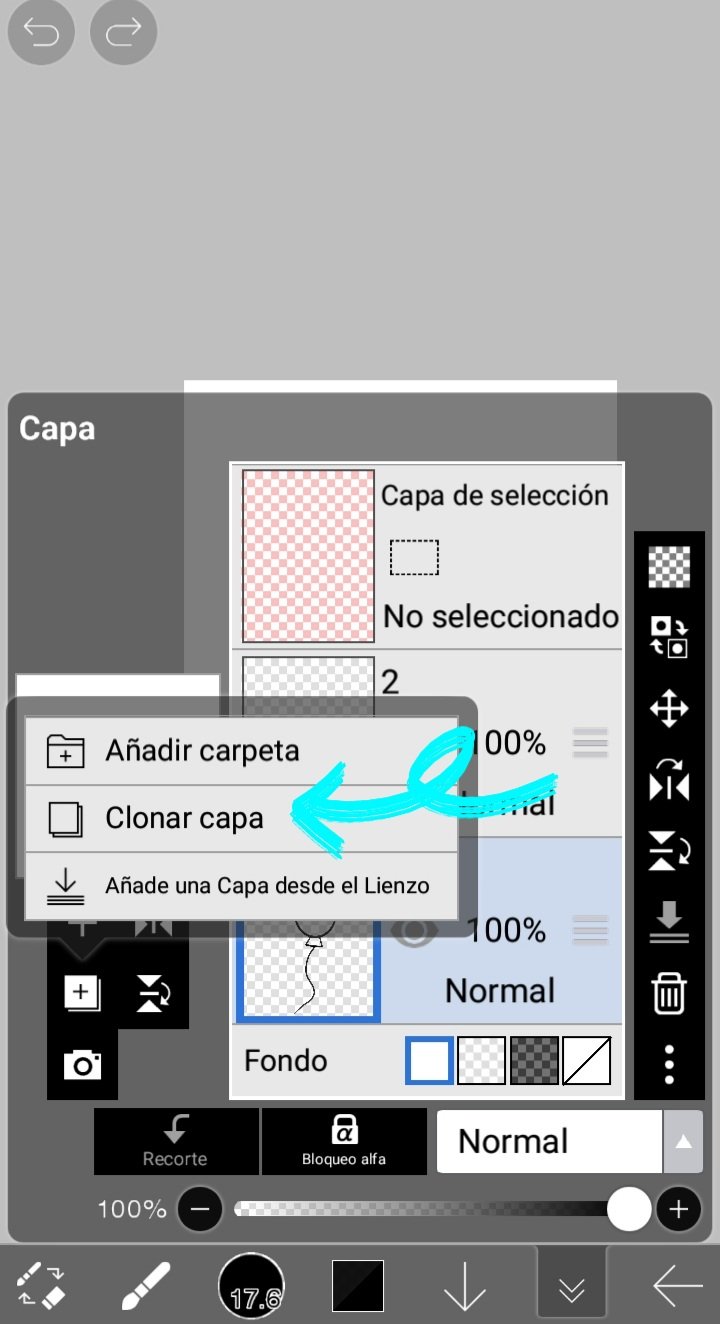
5. Import image: Allows you to add a photo layer from your gallery to the drawing.

Drawing Layers Usage Example
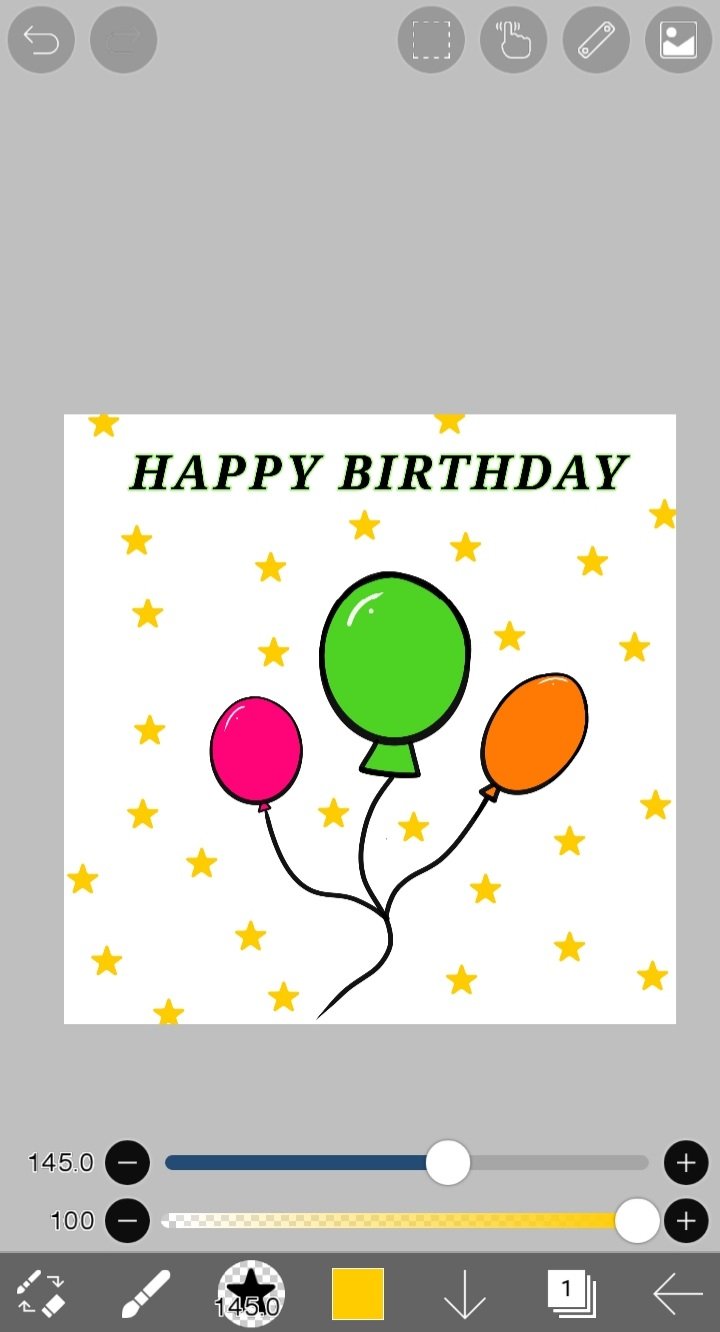
Here is a simple example where you can visualize the use of drawing layers, through an illustration related to a birthday:
1. I drew the balloon shape on layer 1. Then I added a new layer 2.
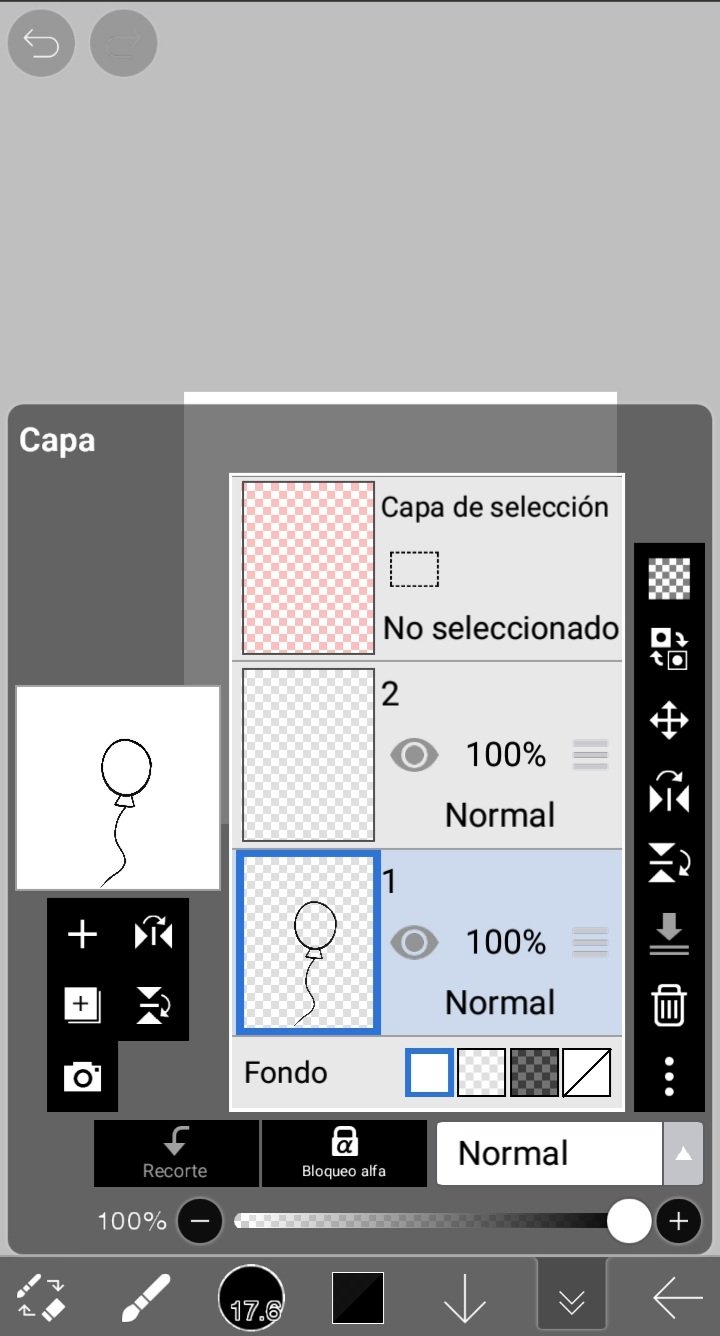
2. I slid layer 1 up, so that it was the top layer of the drawing. In this way, it changed the name to "layer 2" and the other one was left below.
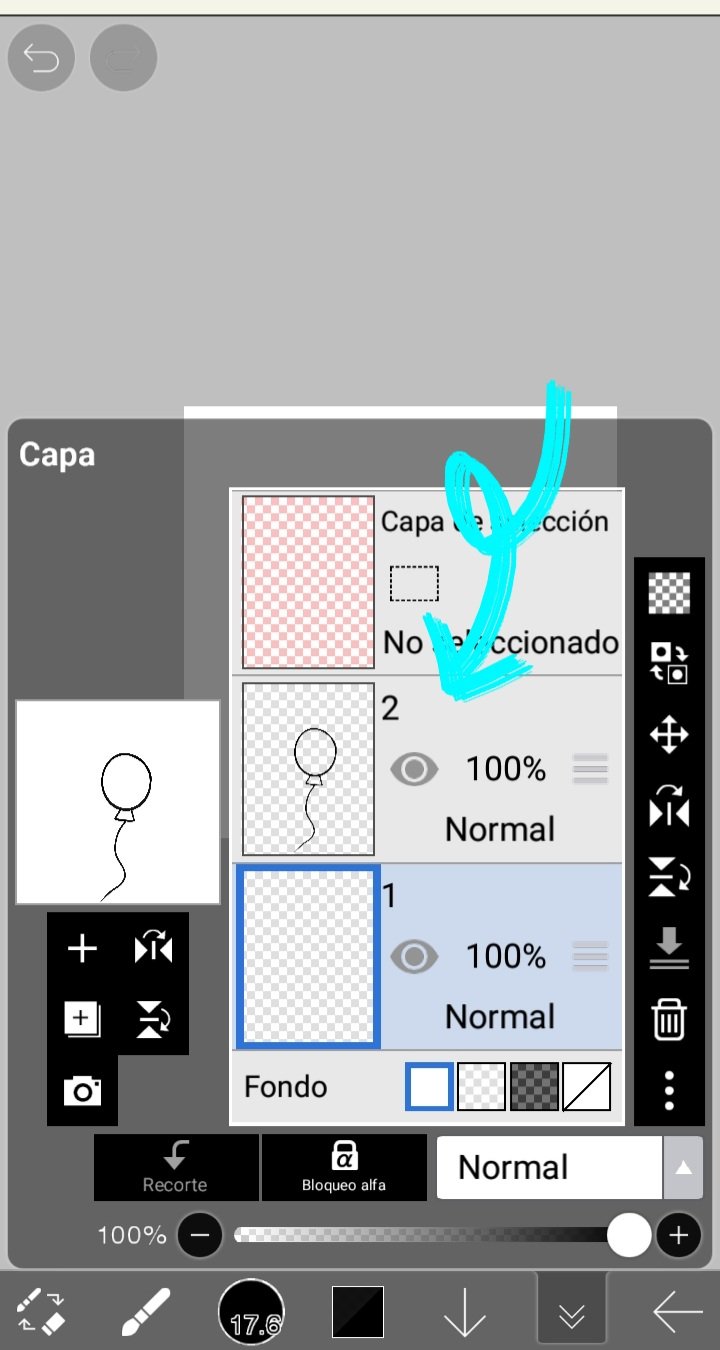
On layer 1 I added the colors of the balloons.
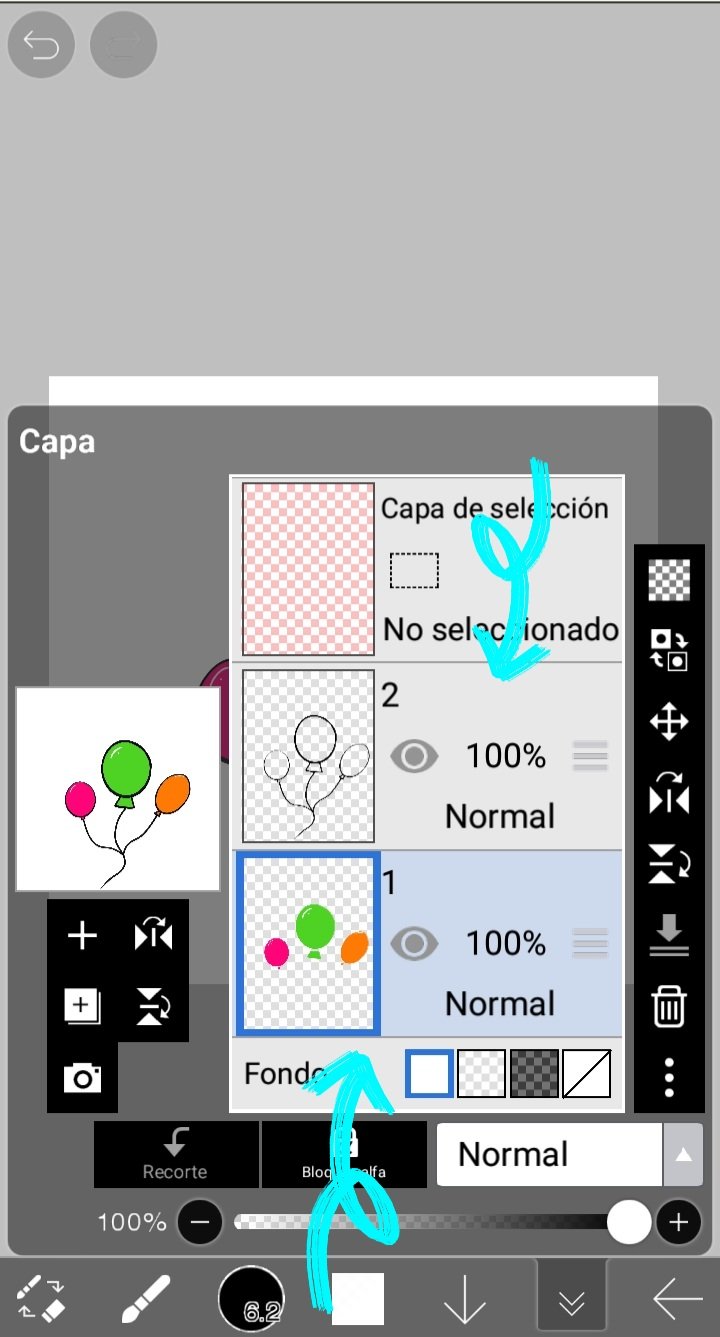
3. I added text, as I explained in previous lessons. As you can see, the text is also a drawing layer.
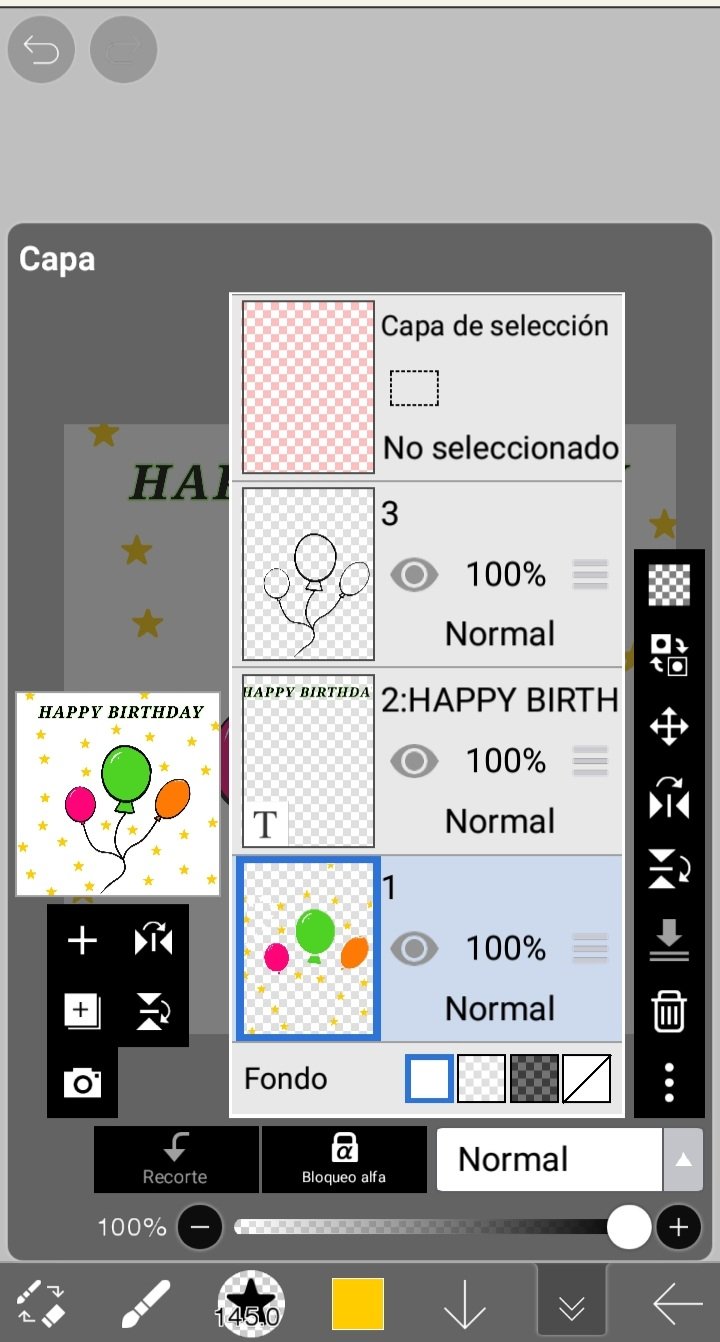
Finally I added yellow stars on the canvas, on layer 1... And my drawing is ready!

Drawing Process Gif


As you can see, I made the drawing with 3 layers: #1 was to add all the colors, #2 was for the text and #3 was for the sketch or outline in black drawing. Usually the more complicated or detailed the drawing, the more layers it will have. With time and practice, you learn to use fewer layers, which is more advantageous because the application runs faster.
On the other hand, as I was making the drawing I had an active layer, that is, selected (shaded with blue). You should always be aware of this, so as not to draw on the wrong layer: For example, add the color to the sketch layer.

Homework:
Enter the Ibis Paint x Application, and create a free digital drawing of your choice, where you use at least 2 drawing layers. Present the step by step of your cute drawing as you wish, for example: by screenshots from the application.
You can draw something simple, just like I did in every example I gave in this lesson. I'll give you some ideas: A house, some clouds, flowers... Everything is up to your imagination to make this drawing.

Help Content: Compilation of my Lessons:
🎨Lesson 1: LINK
🎨Lesson 2: LINK
🎨Lesson 3: LINK
🎨Lesson 4: LINK
🎨Lesson 5: LINK
🎨Lesson 6: LINK
🎨Lesson 7: LINK

Rules for doing your homework:
1- You must be a community verified child.
2- You must make your publication in the Steem Kids community and leave the link of your entry in this publication, in the comments section.
3- You must belong to club5050, club75 or club100.
4. Your publication must have a minimum of 300 words and the appropriate tags; being essential # steemexclusive.
5. Your content must be your own. If you use information from a third party, indicate the sources correctly to avoid plagiarism and its consequences on the platform.
6. Use the tags in your publication correctly.

Recommendations for doing your Homework:
1. Please resteem this post so more kids can join the lesson.
2. If you have any questions, leave them in the comments of this post. I will gladly answer you!
3. Have fun and learn Make your publication without any fear! I will grade and correct you with love and respect.
Homework is accepted until the expiration of this publication.

10% of rewards from this post go to the @steemkidss community account
CC: @patjewell, @ngoenyi
