Hi, Steemians!
Today I want to share a recipe that I use to prepare the mini brownies I sell to a local shop. I used to make them for my family, but due to the lockdown, I had to stay home, unable to travel to work , for it's a two-hour bus ride. Just like many people, I had to find new ways to earn some money, so my niece, who happens to have a mini market, offered me this chance.
I cook and bake a lot, but seldom have the opportunity to take pictures. At the bottom, you’ll find some of the the recipes I’ve been able to post to my Steemit blog so far. I love to share cooking tips.
Hoy quiero compartir una receta que uso para preparar los mini brownies que vendo en una tienda local. Antes los hacía para mi familia, pero debido al confinamiento y cierre entre estados, tuve que quedarme en casa, sin poder viajar al trabajo (son dos horas en autobús hasta mi trabajo), y por eso tuve que buscar nuevas formas de ganar algo de dinero.
Cocino y horneo mucho, pero rara vez tengo la oportunidad de hacer fotos. Al final, encontrarás algunas de las recetas que he publicado en Steemit hasta ahora. Y, por cierto, me encanta compartir trucos y consejos de cocina.


Esta receta de brownies te encantará. Es súper sencilla de hacer y, además, muy económica. Se preparan en veinte minutos, sin necesidad de batidora eléctrica y se hornean en menos de 15 min. Y si los comes calientes, ¡mejor!
Brownie significa “marroncito” en español, pero nadie les dice así. Originalmente el brownie de chocolate o brownie de Boston no llevaba levaduras de ningún tipo. De allí que su consistencia tradicionalmente sea crujiente en el exterior y suave, hasta untuosa (como en los chewy brownies), en el interior.
He probado muchas recetas de brownie en mi cocina. Luego de experimentar mucho, al fin tengo una receta cuyo resultado me parece delicioso. Y es que cada localidad tiene diferentes calidades de harinas, azúcar, aceites, huevos y cacao, los cuales son los ingredientes principales para elaborarlos. Por eso es importante conocer cómo se comportan los ingredientes que consigues en tu zona, para así lograr un mejor resultado.
You will love this recipe for brownies. It's super simple to make and low-cost. You mix everything in less than twenty minutes; you don’t need the electric mixer and will have them baked in less than 15 min. Eat them when they are still hot; better!
Brownie_ means "marroncito" in Spanish, but nobody calls them that. Originally the chocolate brownie or Boston brownie had no yeast of any kind. Hence its consistency is traditionally crunchy on the outside and soft, even unctuous (like chewy brownies), on the inside.
I have tried many brownie recipes in my kitchen. After a lot of experimenting, I finally have a delicious recipe. There are different kinds and qualities of flour, sugar, oil, eggs and cocoa, which are the main ingredients to make them, so it is important to know the properties of the ingredients you get in your local shops, in order to achieve a better result.
Ingredients || Ingredientes:

Para preparar esta receta de mini brownies, necesitarás
• 100 gr de cacao puro en polvo, sin azúcar
• 140 gr de harina de panadería (uso Robin Hood “todo uso”)
• 200 gr de azúcar blanca granulada
• 200 ml de aceite de maíz (uso Mazeite)
• 200 ml de huevo batido (aproximadamente 3 huevos L)
• ½ cucharadita de soda (para dar mejor crocante)
• 1 cucharadita de polvos de hornear
• ¼ cucharadita de sal fina
• 3 cucharaditas de esencia de vainilla
• 75 gr de chocolate oscuro en trocitos, para adornar (por lo regular uso Savoy o St. Moritz)
• ½ cucharada de margarina (con o sin sal) y una cucharada de aceite de maíz, para engrasar los moldes
• 10 bolsitas plásticas (paquitas)
To prepare this mini brownies recipe, you will need
- 100 gr of pure cocoa powder, unsweetened
- 140 gr of baking flour (I use Robin Hood "all purpose")
- 200 gr of granulated white sugar
- 200 ml of corn oil (I use Mazeite)
- 200 ml of beaten eggs (about 3 eggs L)
- ½ teaspoon of soda
- 1 teaspoon of baking powder
- ¼ teaspoon salt
- 3 teaspoons vanilla essence
- 75 gr dark chocolate sprinkles to garnish (I usually use Savoy or St. Moritz)
- ½ tablespoon margarine (salted or unsalted) and 1 tablespoon corn oil, to grease the molds
- 10 plastic bags (to store each brownie separately)

Preparación
PASO 1
En un bol, tamiza y mezcla en seco el cacao, la harina, los polvos de hornear, la soda y la sal. Reserva.
El tamizado es sumamente importante, ya que de esta manera nos aseguramos que no haya grumos ni trocitos sólidos, con lo que la mezcla quedará más suave y más bonita.
Instructions .
STEP 1
In a bowl, sift and dry mix the cocoa, flour, baking powder, soda and salt. Set aside.
Sifting is extremely important to avoid lumps or solid pieces which may diminish the smoothness of the batter. Also, this way the brownies will be more beautiful and fudgy.
PASO 2
En otro bol, agrega en este orden: el azúcar, el aceite, los huevos y la esencia de vainilla.
Es importante seguir el orden, ya que si agregas la vainilla directamente al azúcar, por ejemplo, ésta se impregna y luego ya el aceite no penetra igual.
STEP 2
In another bowl, add in this order: sugar, oil, eggs and vanilla essence.
It is important to follow the order, because if you add the vanilla directly to the sugar, for example, the sugar will be impregnated and then the oil will not penetrate as wished.
PASO 3
Une las dos mezclas, agregando indistintamente el contenido de un bol en el otro. Bate con un tenedor, batidor o paleta. La verdad, da igual, ya que no se ha de mezclar mucho; solo hasta que se integre todo en una sola pasta untuosa. Yo uso un batidor de mano, como puede verse en las fotos.
Es importante no mezclar mucho los ingredientes. Solo lo mínimo necesario. Además, al igual que pasa con la gran mayoría de los bizcochos, la mezcla ha de hornearse inmediatamente. De esta forma evitamos la activación exagerada del gluten y el resultado será el de un bizcocho suave (menos aglutinado = menos pesado).
STEP 3
Join the two mixtures, adding indistinctly the contents of one bowl into the other. Beat with a fork, whisk or paddle. It doesn't really matter, since you don't have to mix it much; just until everything is integrated into one smooth batter. I use a hand whisk, as you can see n the pics.
It is important not to mix the ingredients too much. Only the minimum necessary. Also, as with most cakes, the mixture should be baked immediately. In this way we avoid the exaggerated activation of gluten and the result will be softly fudgy (less agglutinated = less heavy).

PASO 4
Precalienta el horno a 180˚C o 350˚F. Engrasa con margarina y/o aceite de maíz 10 moldes para 200ml y llena cada uno hasta la mitad con la mezcla que has preparado. Decora con los trocitos de chocolate, distribuyéndolos de manera más o menos uniforme (no necesitas humedecerlos, ni pasarlos por harina).
Cuando el horno esté caliente, introduce los moldes y hornea por 15 min. Al terminar el tiempo de cocción, debes sacarlos a enfriarse. No los dejes dentro del horno, o se seguirán cocinando y quedarán secos. A los 5 minutos, cuando aún están tibios, ya se pueden desmoldar.
Step 4
Preheat the oven at 180˚C or 350˚F. Grease 10 200ml mini baking dishes with margarine and/or corn oil and fill each one halfway with the batter. Garnish with the chocolate sprinkles, distributing them more or less evenly (you don't need to dip them, or dredge them in flour).
When the oven is hot, put the brownies in the oven and bake for 15 minutes. At the end of the baking time, take them out to cool. Do not leave them in the oven, or they will continue to bake and become dry. After 5 minutes, when they are still warm, you can unmold them.

PASO 5
Para almacenar los mini brownies, debes esperar a que estén completamente fríos. Luego los guardas bien sellados en bolsitas plásticas, que estén completamente secas. Luego los puedes tener en tu alacena y tendrás brownies frescos hasta por un mes.
Es esencial que los brownies boten todo el calor antes de meterlos a las bolsitas. De esta maneras aseguras que no haya humedad y podrán durar más tiempo.
También se pueden congelar en enero y comerse en diciembre. Son una maravilla.
STEP 5
To store the mini brownies, you must wait until they are completely cool. Then you store them well sealed in plastic bags, free from humidity. Then you can keep them in your pantry and you will have fresh brownies for up to a month.
It is essential that the brownies release all the heat before putting them in the bags. This way you ensure that there is no moisture and they will last longer and fresher.
They can also be frozen in January and eaten in December, which is wonderful if you don’t like baking so often.

Espero puedas probar esta receta de brownies. ¡Son deliciosos! y como verás, no llevan frutos secos, ni lactosa; así que son una merienda ideal para quienes son alérgicos. Y si además, los prefieres sin gluten, puedes sustituir la harina por fécula de maíz, harina de avena y cambur, pero ya es asunto de otra receta.
I hope you can try this brownie recipe; they are positively delicious! And as you will see, they are lactose free, no nuts either; so they are an ideal snack for those who are allergic. And if you prefer them gluten-free too, you can substitute the flour with cornstarch, oat flour and banana, but that's another recipe.


Text and pictures are mine. ||El texto y las fotos son de mi autoría.
Thanks for reading ||Gracias por leer.

My recipes on Steemit|| Mis recetas en Steemit
Bienmesabe de coco al estilo tradicional. Una vieja receta venezolana
Post
Tortellinis rellenos de ají dulce, queso blanco y plátano maduro. Receta con toque venezolano

Post
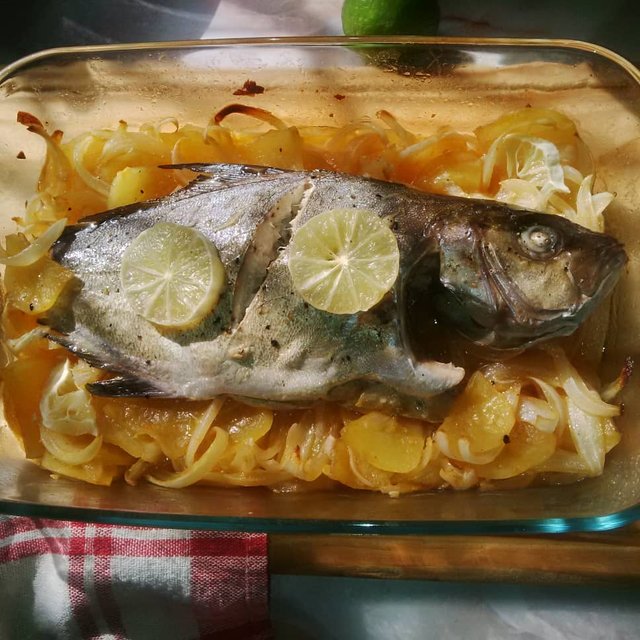
Atún medregal horneado en una cama de papas y cebolla con paprika picante. Receta facilísima
Post