We continue the series of posts for beginner photographers. At the end of the post there will be links to previously covered topics.
We often come across a situation where we want to take a beautiful picture in which the sun is located. The sun is the brightest natural light source. Usually the dynamic range of the camera is not enough to take a picture without overexposure or excessive darkening. In order to avoid overexposure, we are forced to cover the aperture as much as possible or make the shutter speed shorter. In this case, the light from the sun will not look like a white spot without color. But at the same time, the rest of the objects in the frame will look dark and even sometimes black, and in these places we can lose details.
If we focus on details when setting up the camera, then the sun and the area around it will most likely be white and will also lose detail and color.
The best way to get a normal shot is to use technology. HDR. This is a separate topic and we will talk about it later. And now I want to show you a compromise way to get a decent quality frame.
First we need to set up the camera. A darkened result can serve as a guide, but when the contours of objects in the dark area are still distinguishable. When processing from shadows, it is easier to draw out details than from overexposure. Especially if you shoot in RAW.
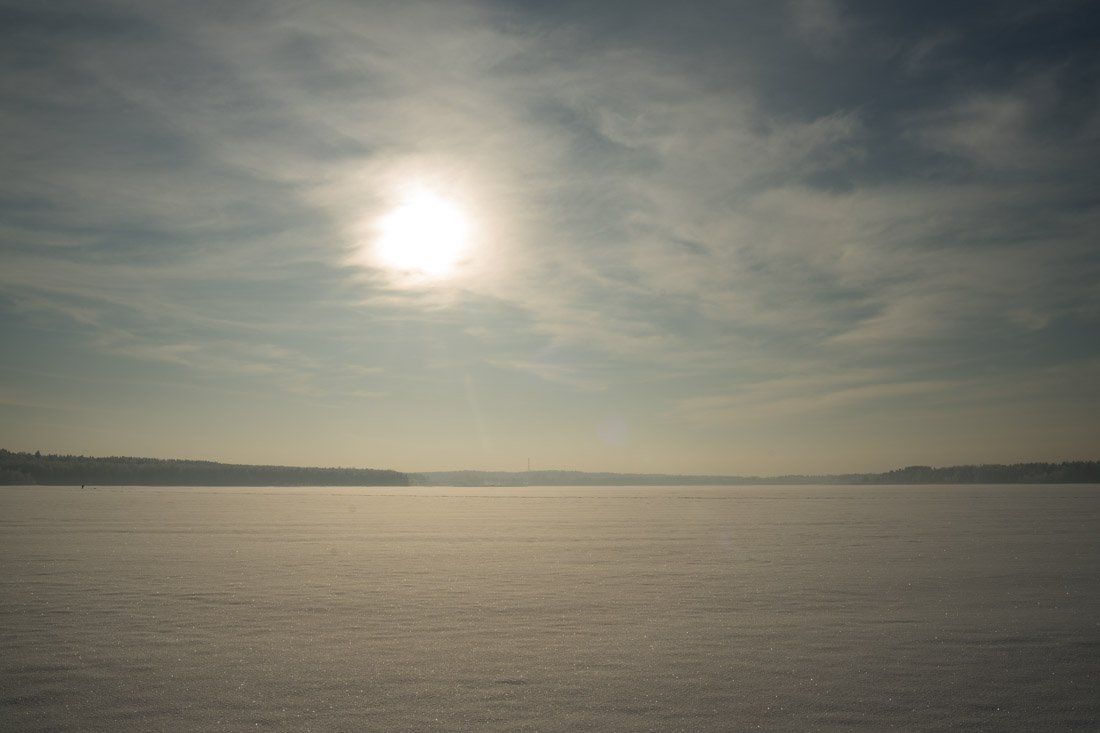
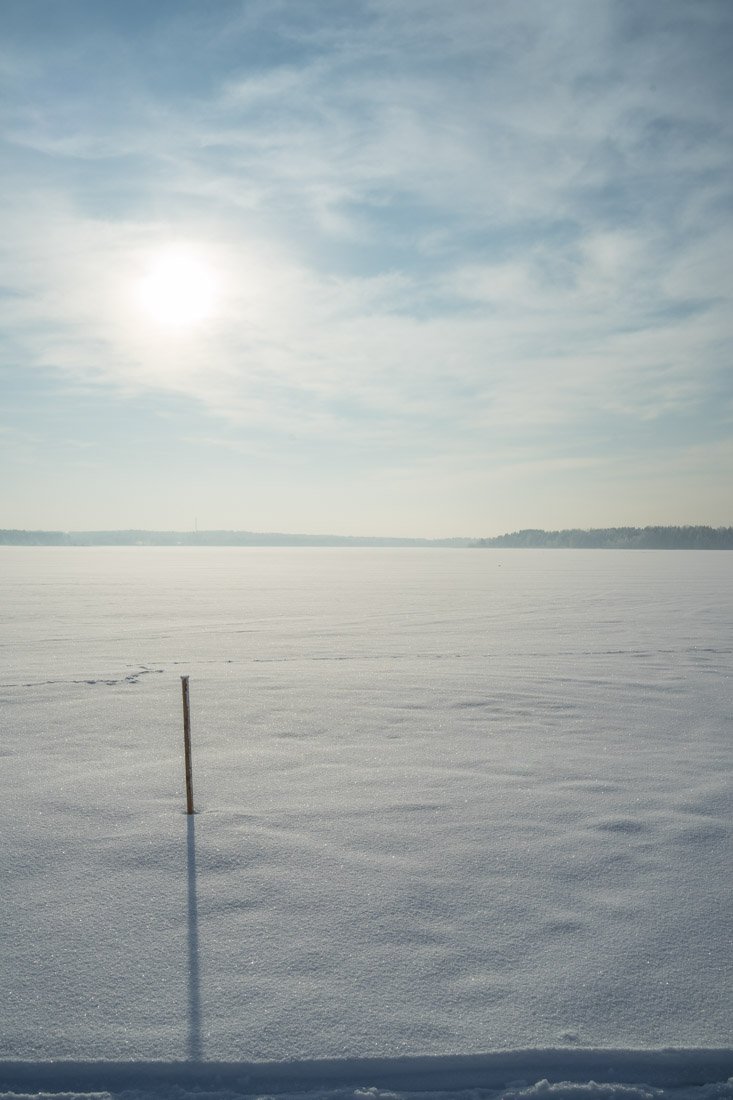
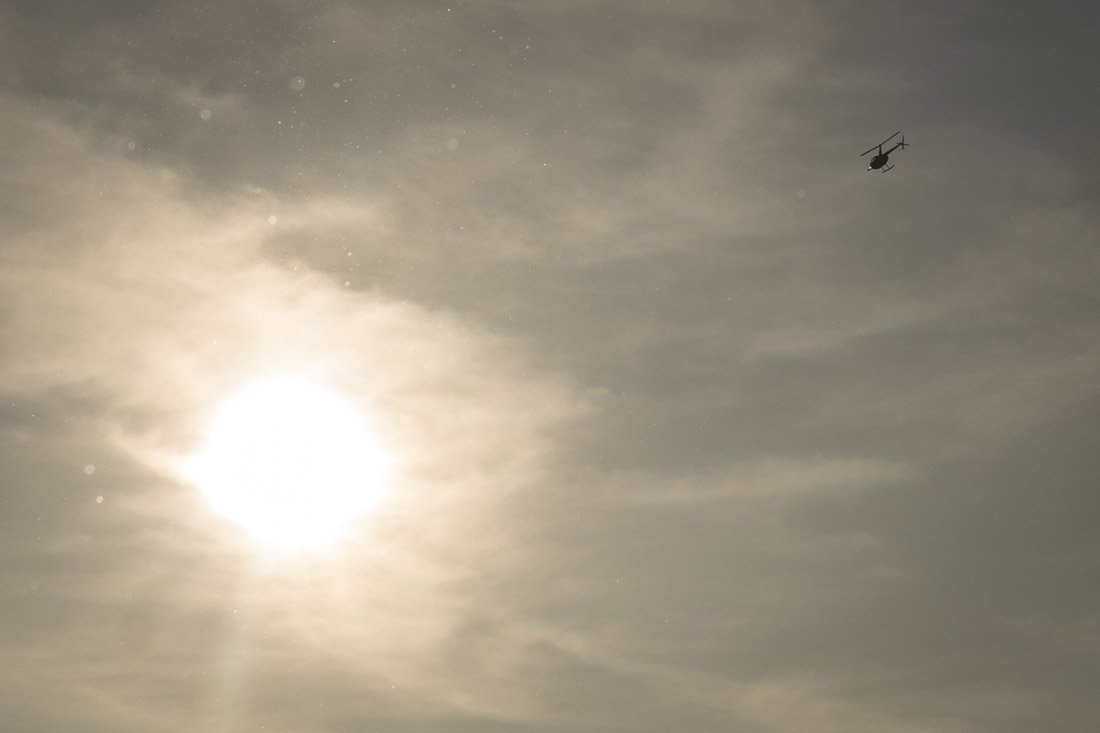
I shot in sunny weather, there was a lot of snow. The difference between light and shadow (dynamic range) was not so great. Here is a frame I received in raw format.
Продолжаем серию постов для начинающих фотографов. В конце поста будут ссылки на ранее освещённые темы.
Часто мы встречаемся с ситуацией, когда хочется сделать красивый снимок в котором находится солнце. Солнце является самым ярким естественным источником света. Обычно динамического диапазона камеры не хватает, чтобы сделать снимок без пересветов или излишнего затемнения. Во избежание пересветов мы вынуждены максимально прикрывать диафрагму или делать короче выдержку. В этом случае свет от солнца не будет выглядеть белым пятном без цвета. Но при этом остальные объекты в кадре будут выглядеть тёмными и даже порой чёрными и в этих местах мы можем потерять детали.
Если мы будем ориентироваться на детали при настройке камеры, то солнце и область вокруг него скорее всего будут белыми и тоже потеряют детали и цвета..
Самый лучший способ получить нормальный снимок, это использовать технологи. HDR. Это отдельная тема и о ней мы ещё поговорим. А сейчас я хочу показать вам компромиcсный способ получения приличного по качеству кадра.
Для начала нам нужно настроить камеру. Ориентиром может служить затемнённый результат, но когда контуры объектов в тёмной области ещё различимы. При обработке из теней легче вытянуть детали, чем из пересвета. Тем более, если вы снимаете в RAW.
Я снимал в солнечную погоду, было много снега. Перепад света и тени (динамический диапазон) был не столь велик. Вот такой кадр я получил в сыром формате.

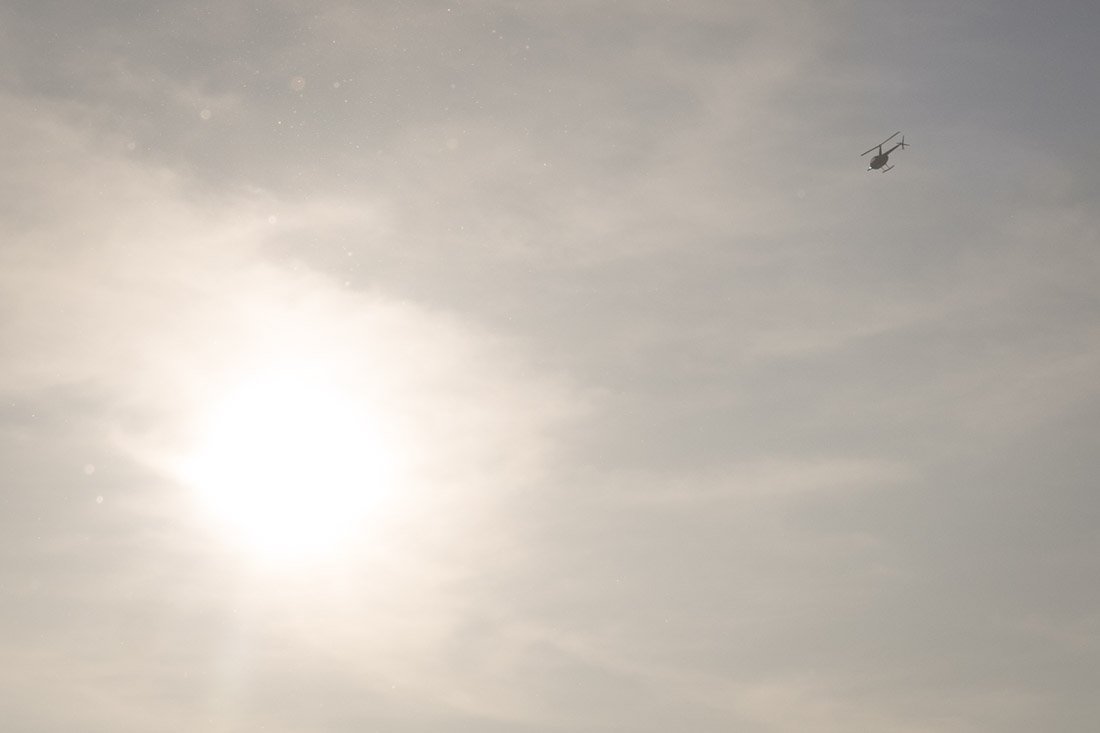
The center of the sun is overexposed, but for the eye it is perceived as usual. We rarely look at the sun directly and always squint sharply.
However, the snow turned out to be dark, in dirty warm colors. This photo needs some editing.
Центр солнца пересвечен, но для глаза это воспринимается привычно. Мы редко смотрим на солнце напрямую и всегда резко щуримся.
Однако снег получился тёмным, в грязноватых тёплых тонах. Такое фото требует доработки.
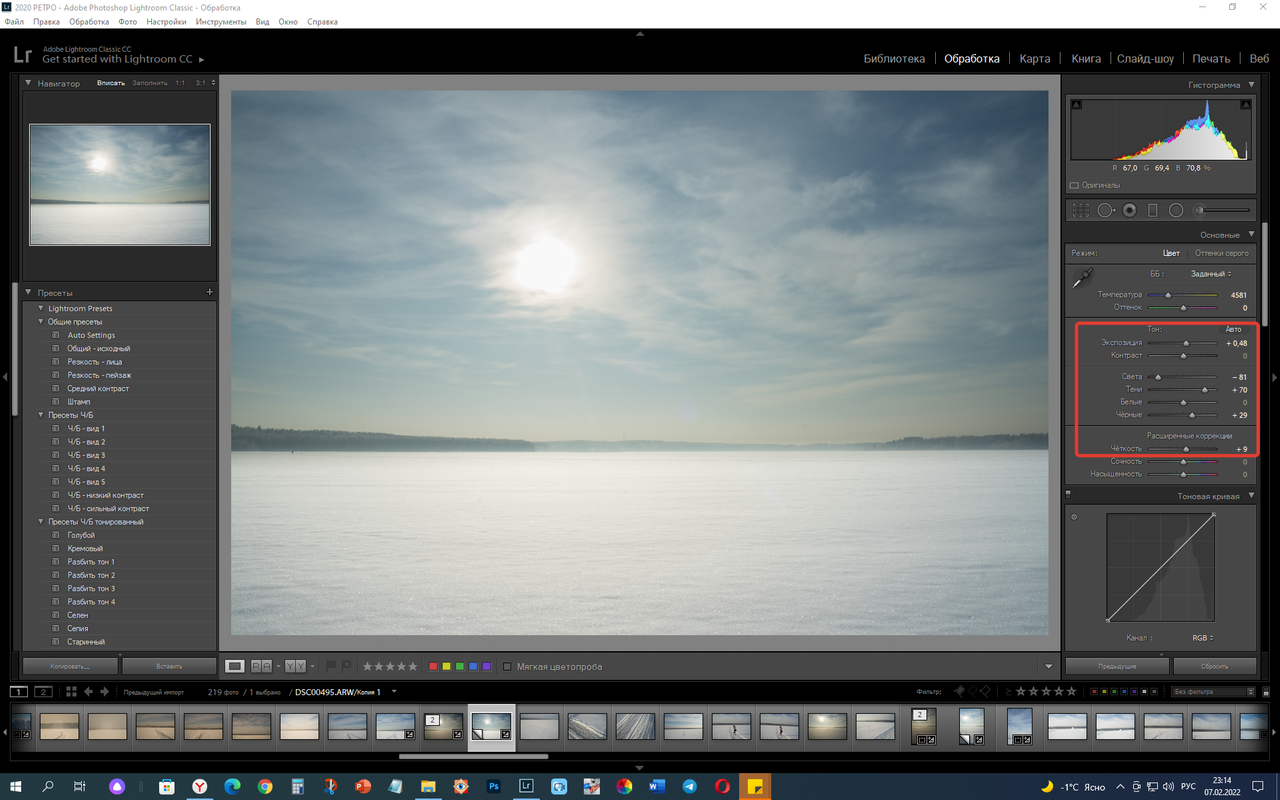
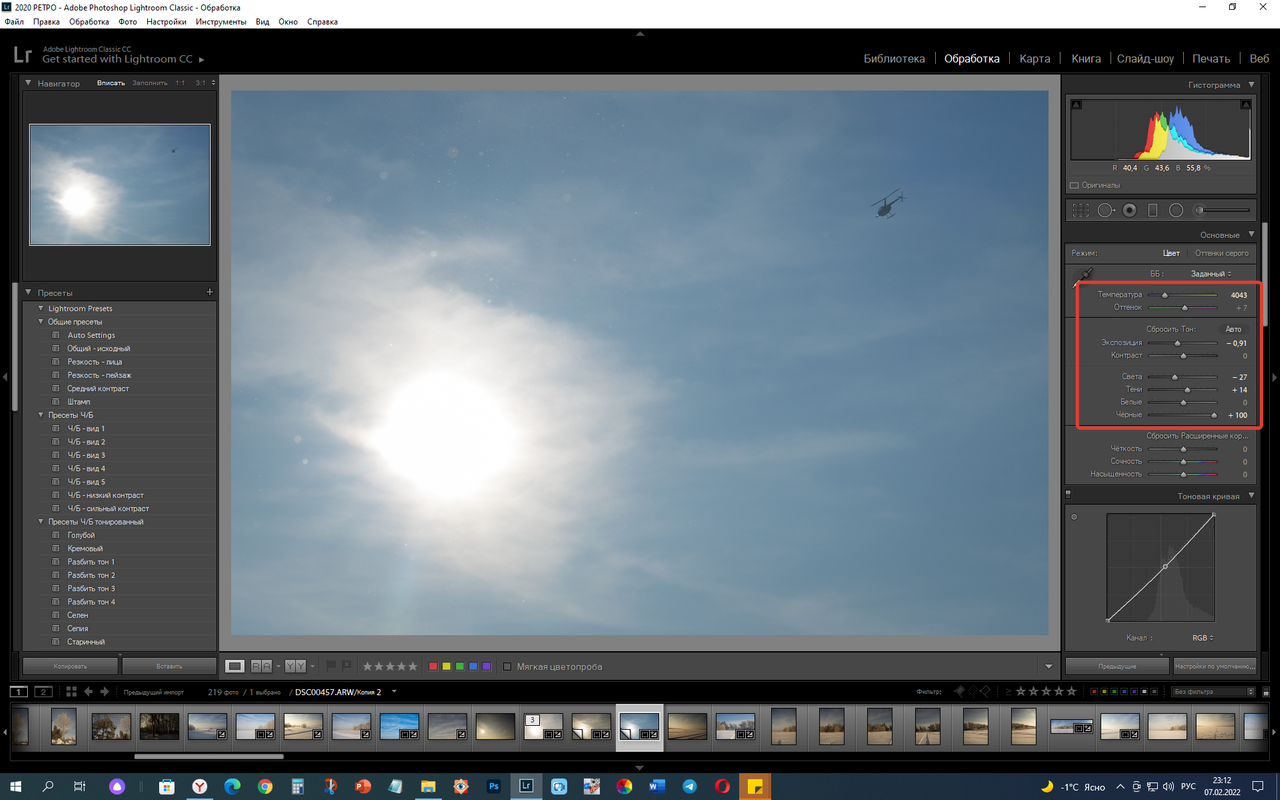
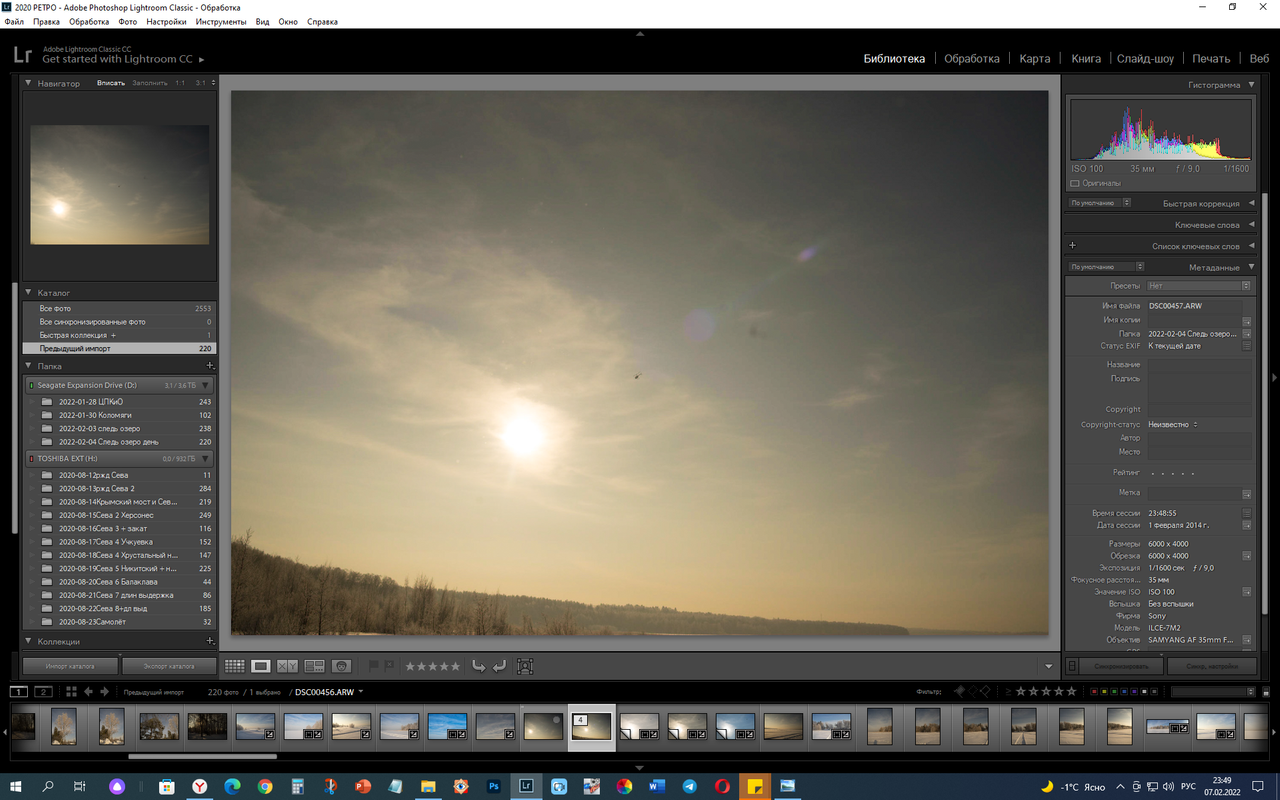
In the red rectangle on the screenshot you can see the settings changes that I made.
Lightened up the frame a bit.
Removed completely "light" (-81)
Removed "shadows" (+70)
Reduced "black" (+29)
Added sharpness (+9)
At the same time, the "white balance" shifted towards cold tones.
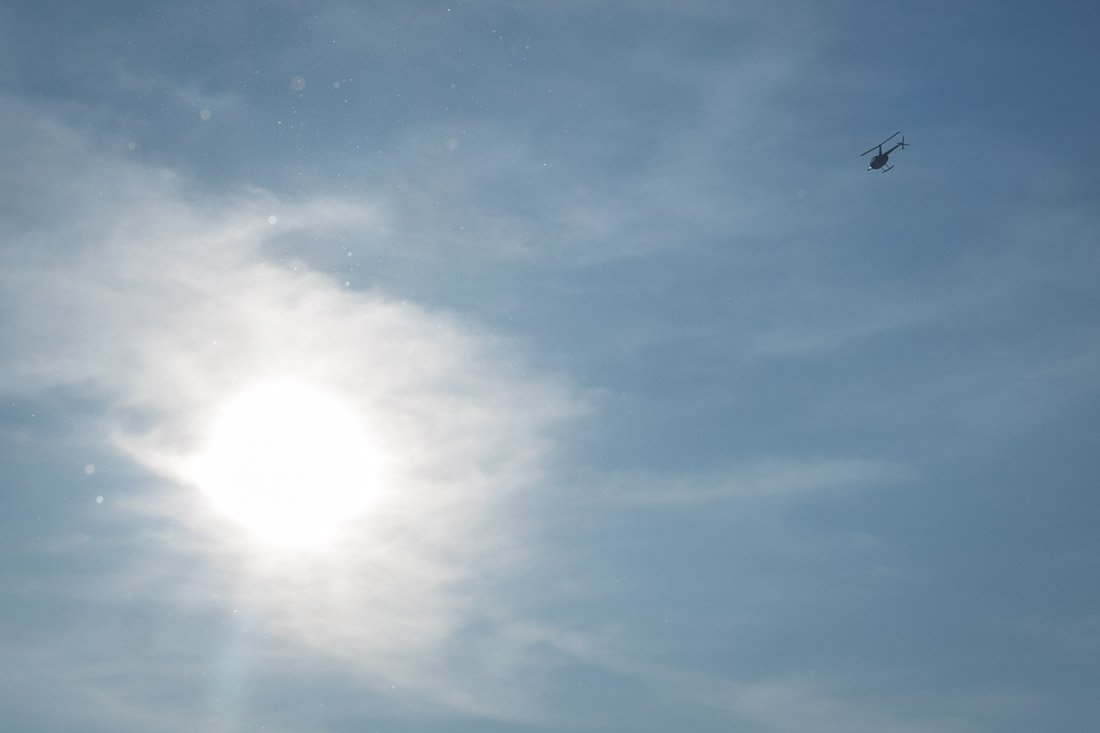
As a result, we got a more natural photo, close to reality. If desired, it was possible to change the shades, colors, but this is already a deeper processing.
The main value in this correction is the reduction of black and shadows and the adjustment of white balance.
Below is another similar example of post-processing a raw frame.
В красном прямоугольнике на скрине вы видите изменения настроек, которые я произвёл.
Чуть-чуть осветлил кадр.
Убрал полностью "свет" (-81)
Убрал "тени" (+70)
Уменьшил "чёрные" (+29)
Добавил резкости (+9)
При этом "баланс белого" сдвинул в сторону холодных тонов.В результате мы получили более естественную фотографию, близкую к реальности. При желании можно было изменить оттенки, цвета, но это уже более глубокая обработка
Основное значение в этой коррекции имеет уменьшение чёрного и теней и регулировка баланса белого.
Ниже приведён ещё один подобный пример постобработки сырого кадра.
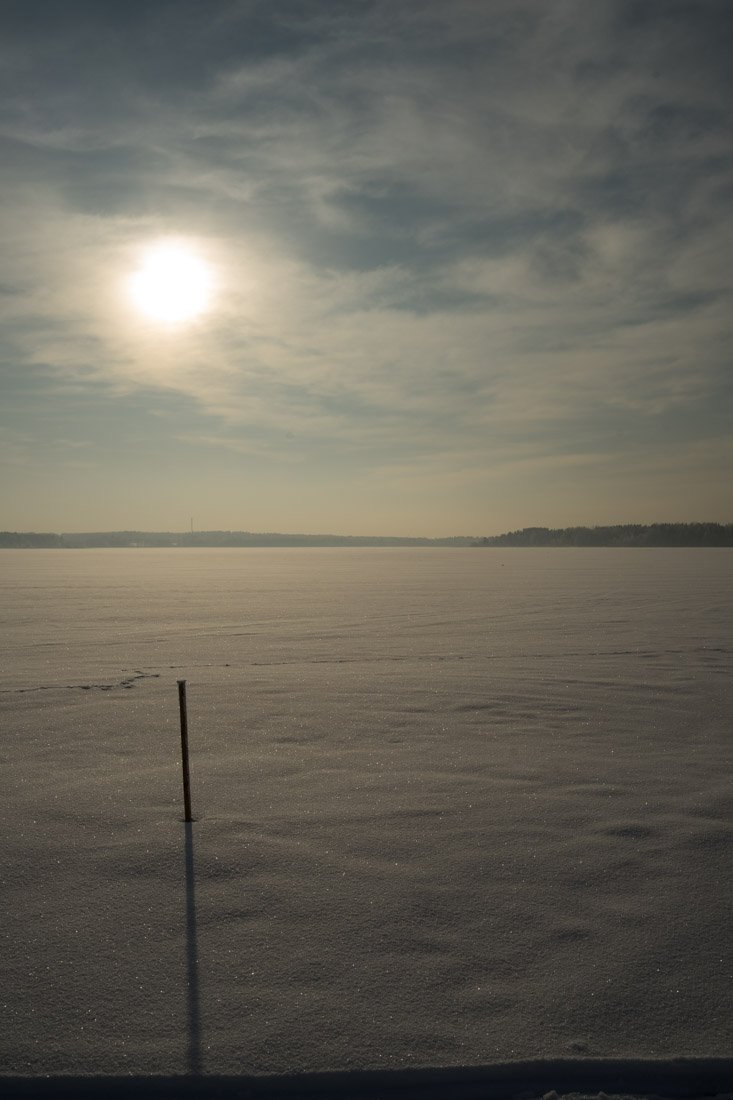
You may want to apply cropping or something, but now you have something to start from. Instead of a raw frame (darkened) you have a frame close to reality.
Возможно вам захочется применить кадрирование или что-то ещё, но теперь у вас есть, от чего отталкиваться. Вместо сырого кадра (затемнённого) у вас есть кадр, близкий к реальности.
For example, you wanted to take a more dramatic shot. You can add sharpness, change the temperature to warmer or colder. It all depends on your creative goals.
Например, вам захотелось сделать более драматичный кадр. Тогда вы можете добавить резкости, изменить температуру на более тёплую или холодную. Всё зависит от ваших творческих целей.
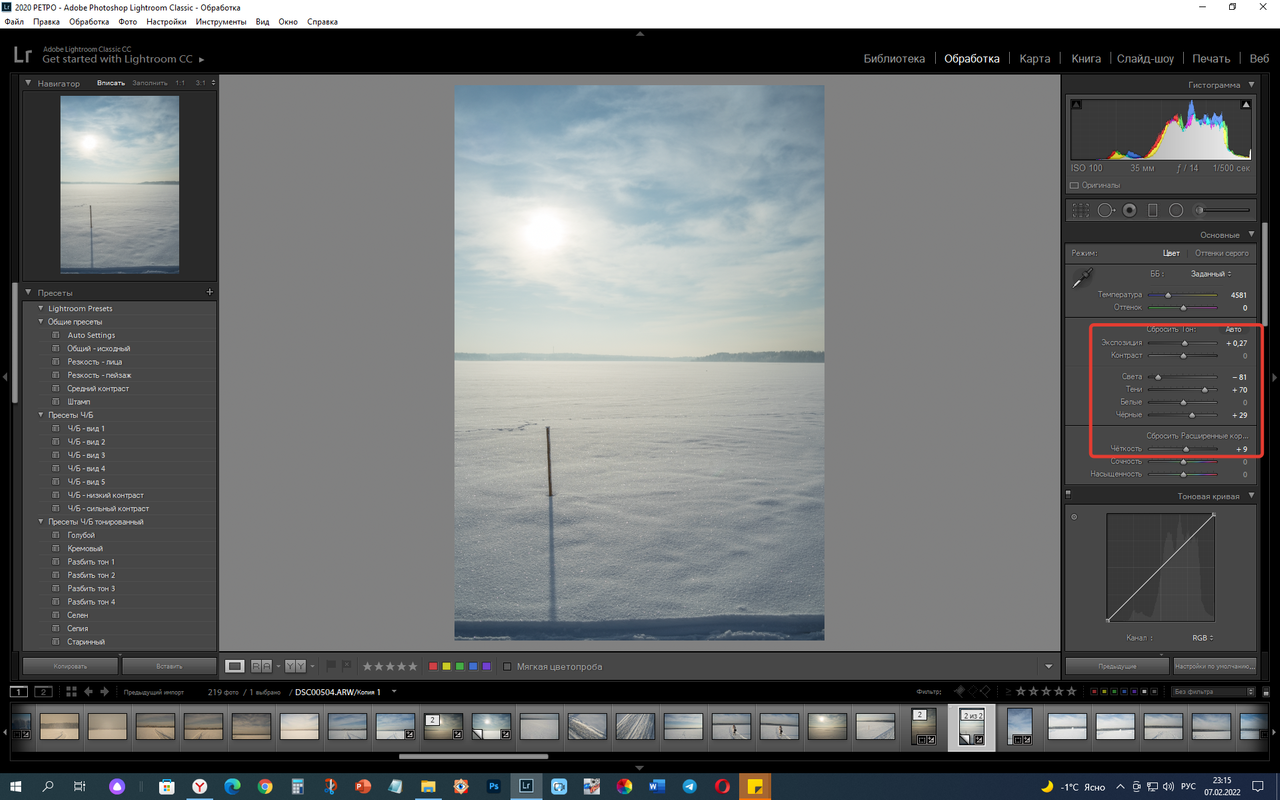
Actually, the raw photo of the third frame initially looked like this:
Вообще-то, сырое фото третьего кадра изначально выглядело так:
On the right side of the screen, you can see all the settings.
Next time we will talk about HDR technology.
С правой стороны скрина вы можете видеть все настройки.
В следующий раз мы поговорим о технологии HDR.
Basic photo editing for beginners
Manual camera settings: exposure
Applying a polar coordinate filter
100% SP (manual translation to SP)
#club100

The time has come to build our own steem power
| ▽ | ▽ |
|---|---|
| Camera | Sony A7М2 |
| Lens | Samyang 35 1,4 |
| Location | Russia |
| Post-production | in LR |
Manual processing in Lightroom
From Russia with Love


SUBSCRIBE Here to join WORLD OF XPILAR Community
Regards, @bambuka