How do you layout and design a house in the shape of a circle!? That was the challenge I had, and one that I spent countless hours playing with. I made a large number of designs and layouts. I had so many ideas and I couldn't have them all! I also had some help from a dear friend who drew some wonderful layout ideas.
There were a few things that I knew I wanted, and that led the way for a lot of the planning. I decided very early on that I would make the entire house open plan, with the exception of the bathroom. Due to the height of the roof, it would have also been quite difficult to close off the ceiling except for under the mezzanine. I also knew that I would have two planter cells by the kitchen and both front windows. Upstairs would be more private, and so I located the bedroom and a lounge area to be upstairs.
The location of the kitchen was known to me all along, since I wanted to have a good window and view of the mountains whilst I cooked. The area under the mezzanine had much less light and was the perfect spot for my office since it is very hard to see the screen when the sun is out.. This is especially the case when you have a 15ft skylight at 12:00 midday. It's fair to say that we have more than enough light in Earthship Karuna, and during a full moon the entire house is lit up! That is one of the reasons we have a 4-poster bed here with a good covering. It makes everything feel cozy. One thing is for sure, I NEVER got up with the sun my whole life before I slept under a 15ft skylight! Nowadays I am awake at 6:30 every day, just as the sun makes her way over the mountain edge. This eco house even has a built in alarm clock!
I've just looked everywhere, and I'm sorry to say I have lost the sketches of my original plans! Knowing me i'll discover them right after I post this!! lol. Luckily I do have plenty of great photos, so you will still see how we sculpted and crafted the interior of Earthship Karuna. The overall look and feel was to be rustic but not too rustic. I took a lot of influences from Japanese design and blended it with a bit of rustic-ness, and dash of funkiness. I had to be careful not to go over the top, and yet still create something beautiful and eye catching.
It was also very clear that I would need to have some carpets downstairs to assist with noise reduction. Once we had taken all the scaffolding down and had this large and tall roof in place, the acoustics were unbelievable. The bare bones Earthship was more like a cathedral than a house. You could almost not talk to someone right next to you because there was such a strong echo. We put these amazing acoustics to use right away as my friend got her flute out and started playing. Every sound you made sounded just beautiful, and I also had a nice drumming session which blew my mind! As good as the acoustics were, I couldn't live like that! Therefore I made sure to add some carpet and rugs, as well as all the other fixtures and fittings that would be made.
The work itself was done by my wonderful Indian team from Auroville, and myself. I also had the artistic magnificence of Chloe, who spent nearly 2 months adding her artistic magic to many areas of the Earthship.. in particular the bathroom! This whole finishing process took around a year, although there wasn't an actual moment when it finished.
I moved in right at the beginning of this interior work and managed to find a secluded spot up on the mezzanine with some plywood on top of the mezzanine frame. The whole process started off by us creating the main features of the house. The kitchen floor was raised about a foot, and I decided we would make all of the kitchen units rather than trying to buy something that would fit. We needed a spiral staircase in the center of the house! I wanted a nice big fireplace in case it got cold during winter. The bathroom needed partition walls, as well as tiling and finishing. The list went on of course but those are the basics!
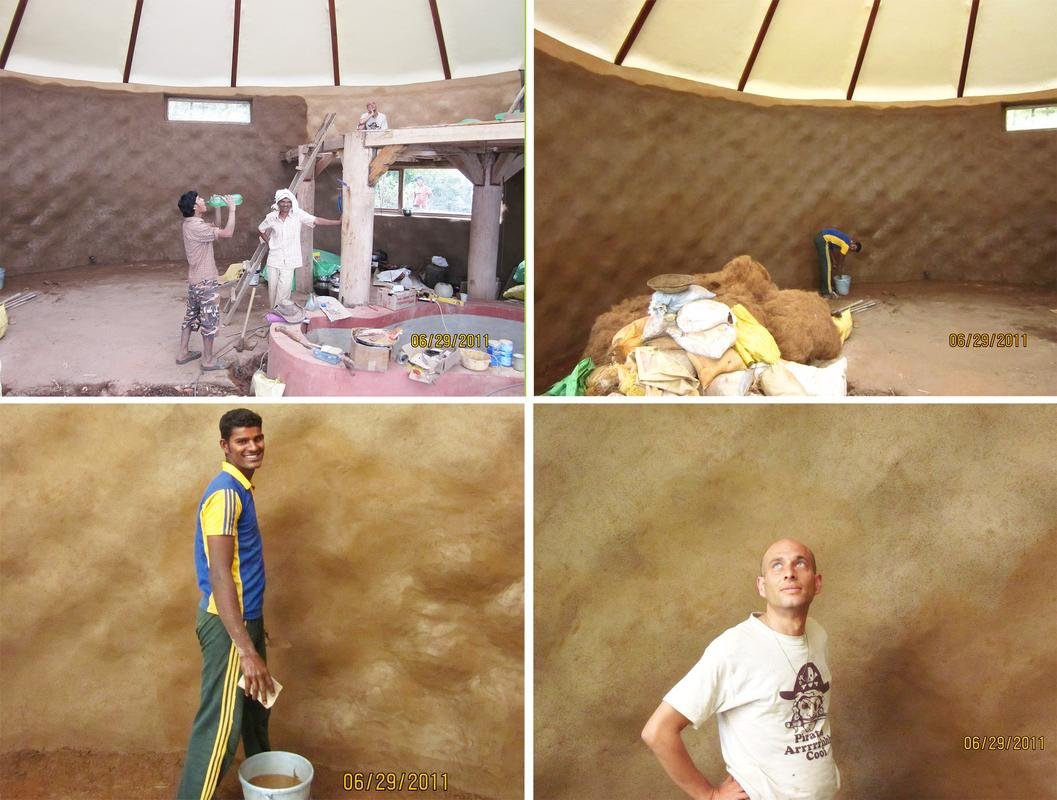
The first job was to finish the gray cement plastered walls with something a bit more natural. We had already added a 1/2 inch thick cement plaster to the entire inside and outside of the tyre walls. This was to ensure strength as I had exceeded the normal height of a tyre wall. It was also because we have 2 monsoons a year and it can rain like you have never seen for days and even weeks on end. I wanted to be sure the walls would not have issues, particularly outside. The final plaster was a mix of 10% dirt, 80% sand and 10% cement. It had a lovely brown colour and because of this small amount of cement would set quickly and have a nice natural brown colour. Once the walls had been plastered, which only took a few days we waited for them to dry. The final layer we put was a sealant to help protect and reduce any dust and damage. It also improves the waterproofing abilities which was most important outside! I decided to use Linseed Oil which was liberally painted on the walls several times with several dilutions with paint thinner. We put about three layers on, and the walls took on a lovely deep brown colour. This took some weeks to dry, but we carried on with other work.
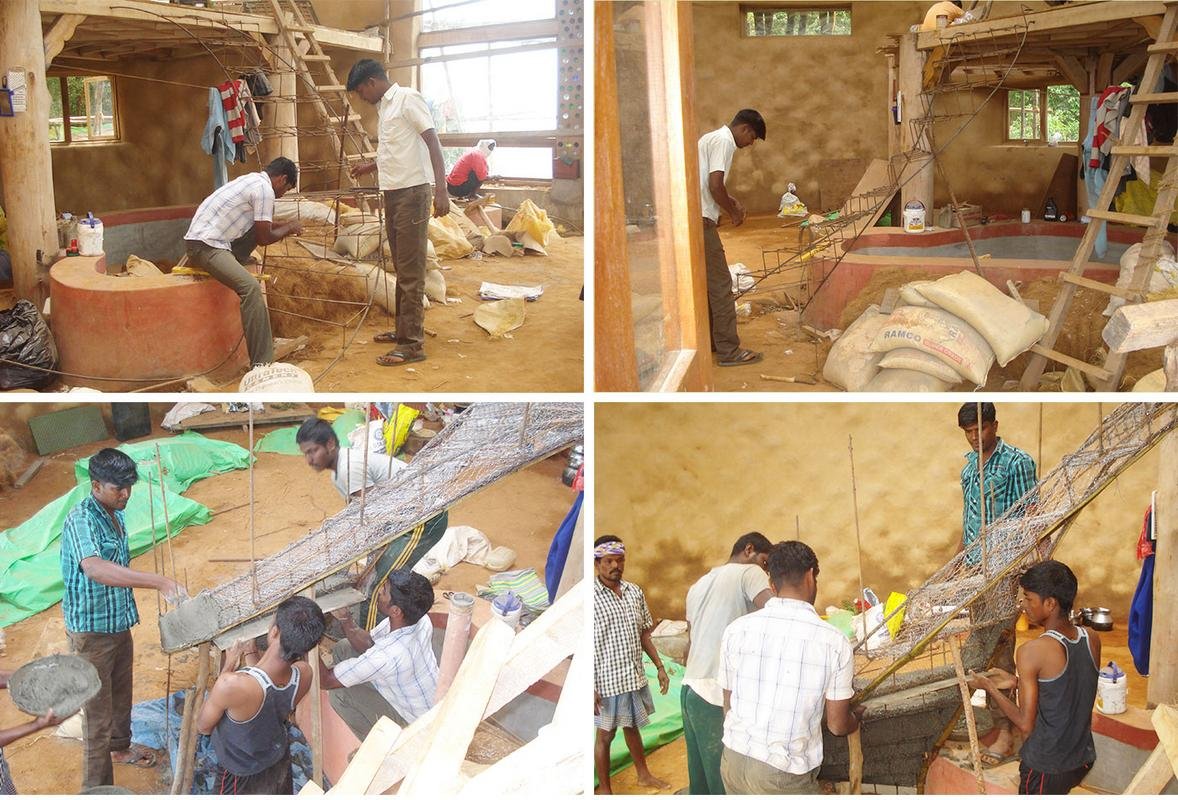
I had spent quite some time researching and reading about ferro-cement on the Internet. Whilst I try to use as less cement as possible, there are times when a little cement can go a LONG way! A prime example was the staircase. We would never have managed to build this staircase with such ease using any other material! In the end I made the kitchen units, staircase, bathroom walls, systems rooms, fireplace and roof guttering all out of ferro cement! There are many advantages to using it including, a very thin 1" wall is possible, it is very quick, it is very strong, it is quite cheap, it can be made into almost any shape or form and hardens in a few days.
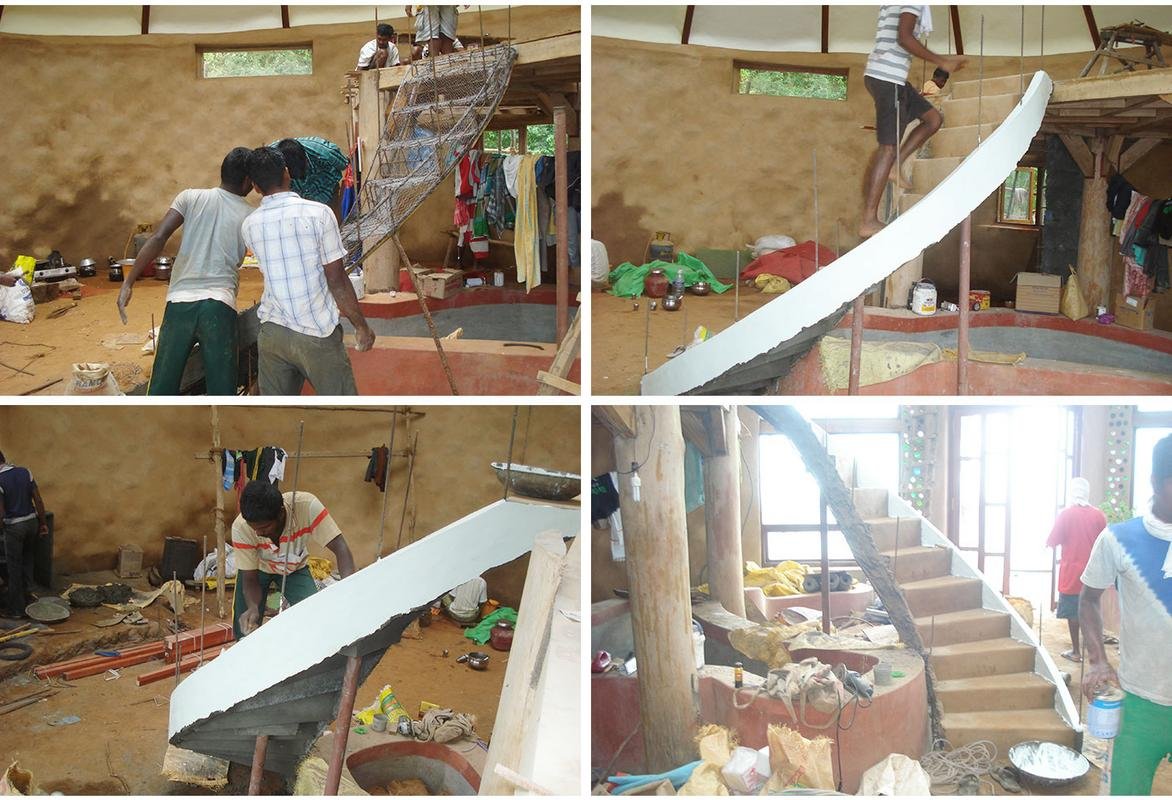
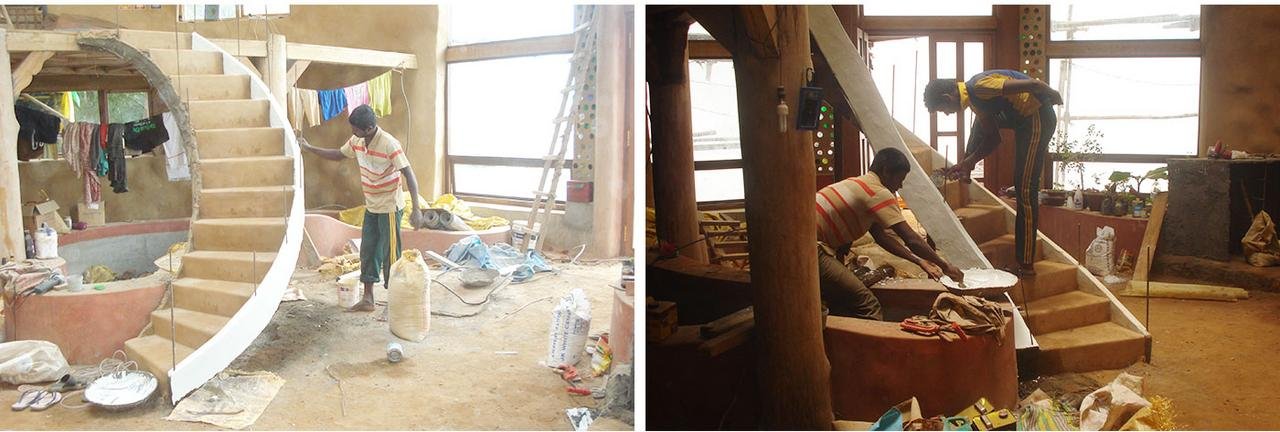
The first job we took on was the staircase. It seems hard to believe that this approach would really produce a strong sturdy staircase when you start out making the framing, but I can assure you it does! The work started with us making a skeleton frame out of long steel rebar. It is strong stuff, but flexible enough to bend into any shape. The challenge with this was to make the frame such that the steps were evenly space out and each had the same height. It took some fiddling around, but we got there in the end! You can see in the images below the different stages. The frame was covered with chicken mesh. It was then plastered in regular cement. We finished the steps in the same mix as the walls. The sides of the staircase were finished with white cement. Once Chloe arrived we tiled the whole thing with an arty mosaic. You will see that soon!
The kitchen units were next! If i had chosen to use wood, I think the carpenters would have been busy for weeks! There were no straight lines, and the whole thing was a real custom fit. Using ferro-cement we just framed the whole thing like the staircase. I chose the size and depth of the cupboards and we just made the shape how I wanted it. The hardest part was deciding how high to make the counter and sink. ;=) You can see below the stages involved.
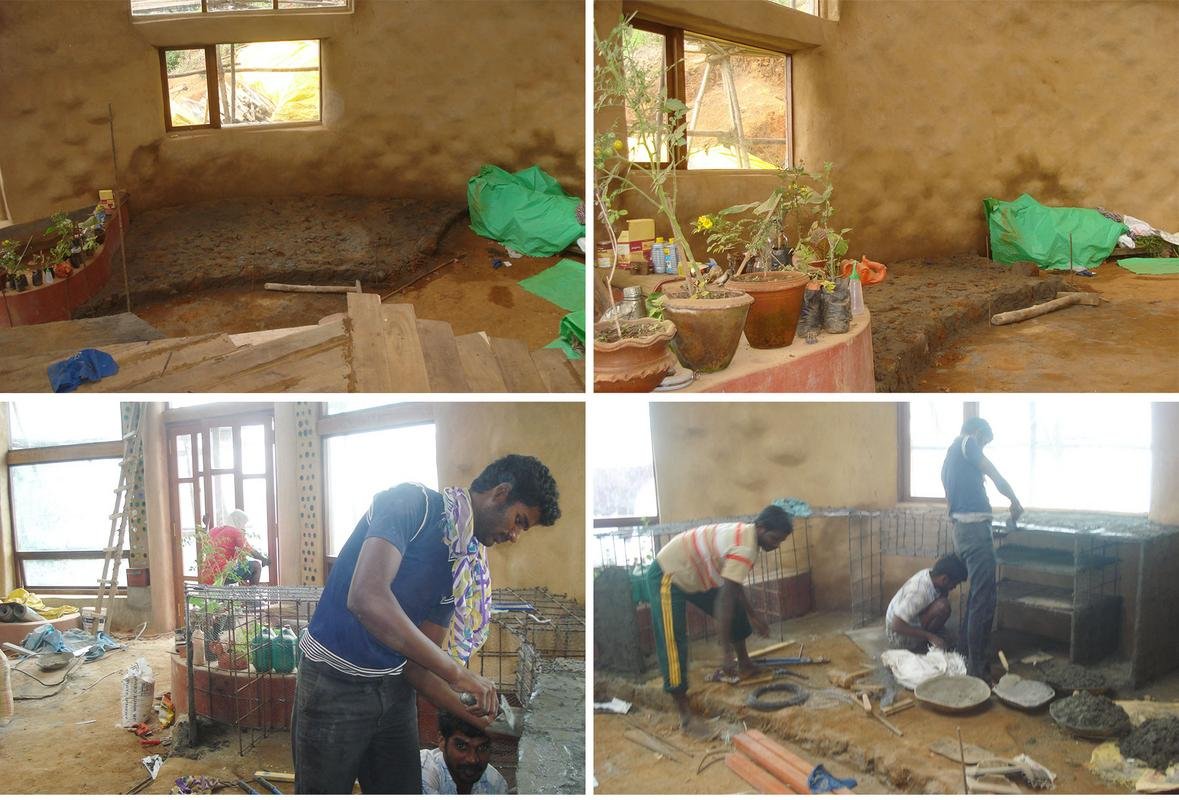
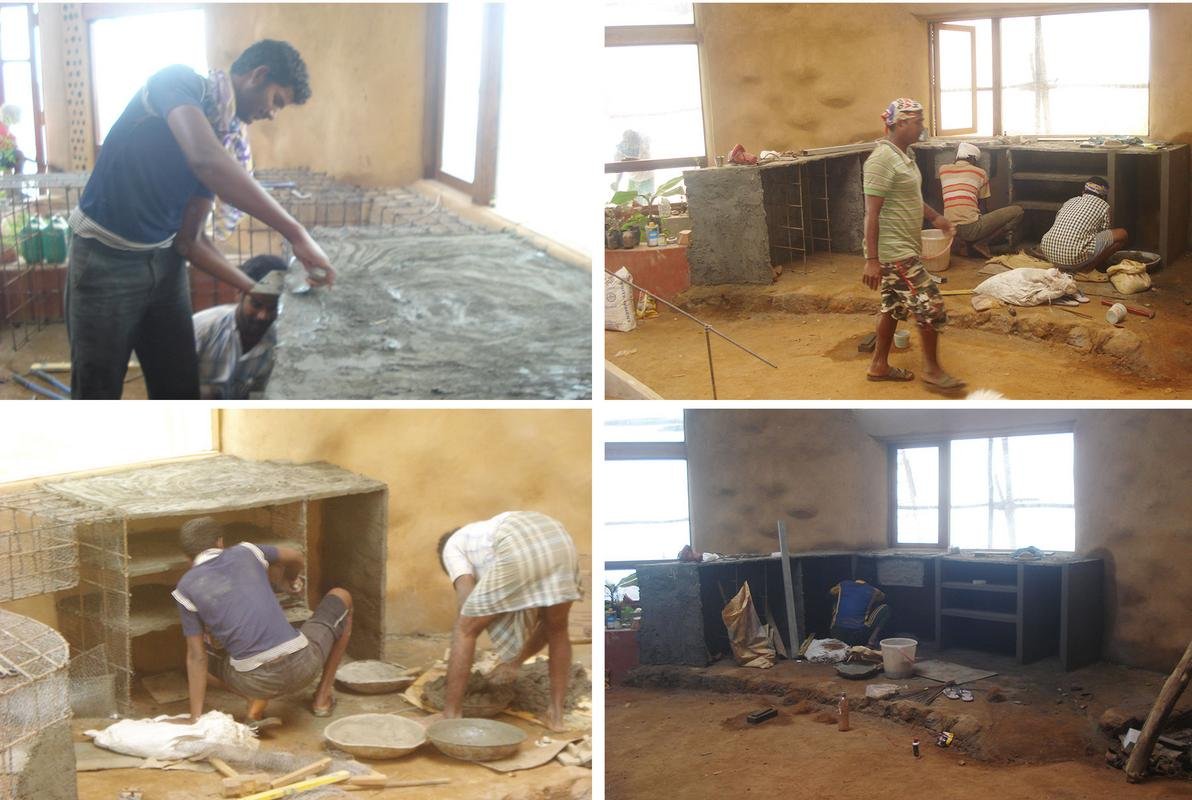
The final layer was put on afterwards which you will see later. It was a white cement with a yellow pigment with a very smooth finish.
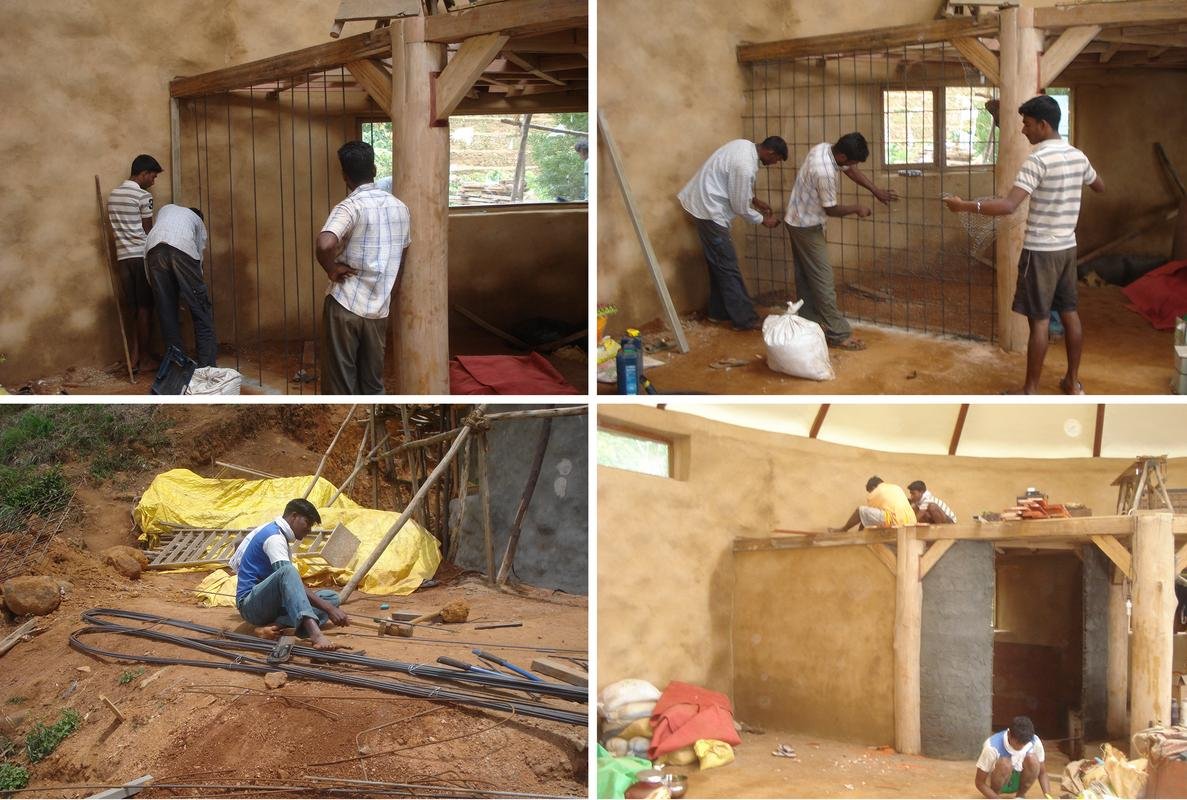
We were manifesting everything in quick-time using this method! It took just a few days to make the kitchen unit. We were on a roll, and after so much slow progress it was great to see it all come together so quickly! Next we moved on to the bathroom walls. Since we were using ferro-cement, we could also make the wall curved and very thin. We make this wall very quickly again, and with just a few sacs of cement and sand.
Whilst the maisoners were busy with all that, we had the carpenters work on the mezzanine flooring. They brought some 1/2" thick hardwood planks with them from Auroville. This wood was Supposed to be dry, which is hard to get around here. When you spend the time getting the joints and cuts just perfect, you really do need dry wood or else it will all move and shrink as it dries. The shape of the mezzanine was pretty unusual, and we decided not to floor it with straight lines but rather follow the shape of the mezzanine. It made it a bit harder to do, and there were definitely some uneven levels which made the job a bit more challenging. They took a good 3 weeks to do this work, nearly all by hand. It seemed to me that most of their time was spent cutting tongue and groove joints throughout. It took a while to get each piece to fit perfectly to the next. Definitely a labor of love!
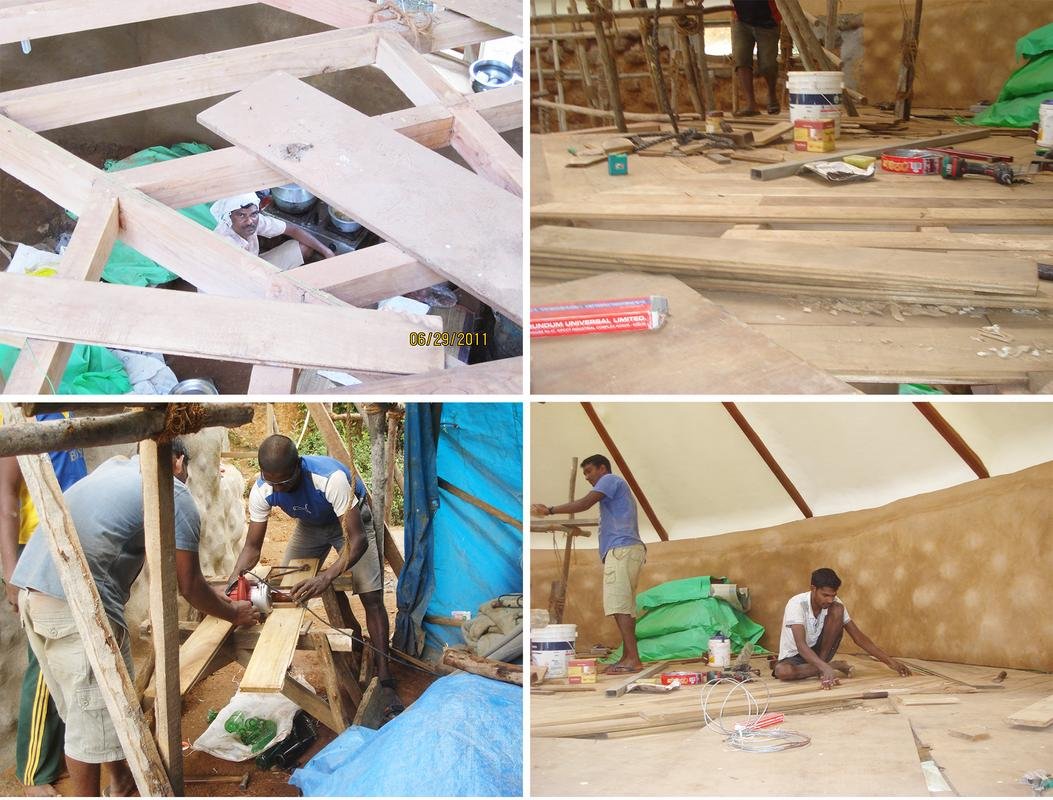

By the time they were finished the entire house was covered in wood dust. Not a square inch was spared from sawdust! Even before the varnish was put on, I could see it was going to look lovely. We also added some teak wood colored stainer to the varnish to give it a deeper colour. That you will see soon!
It was interesting during this process to notice how making these big structures like the staircase and kitchen took no time at all. It was the detail work and smaller jobs that took the longest! It was always worth going that extra mile, and with no deadline or need to finish we took our time and made everything as nice as we could.
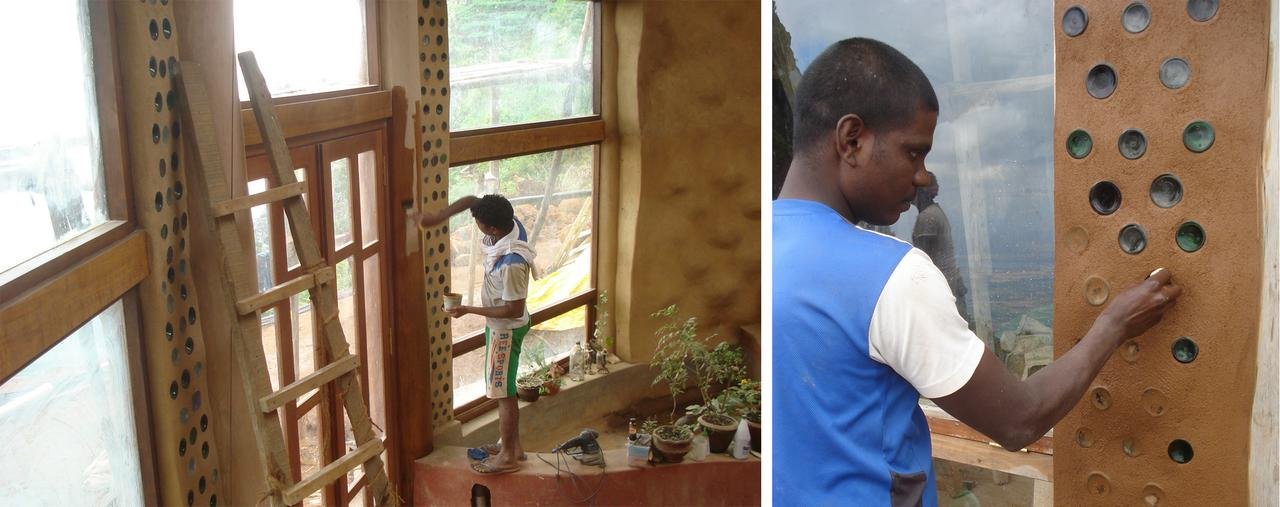
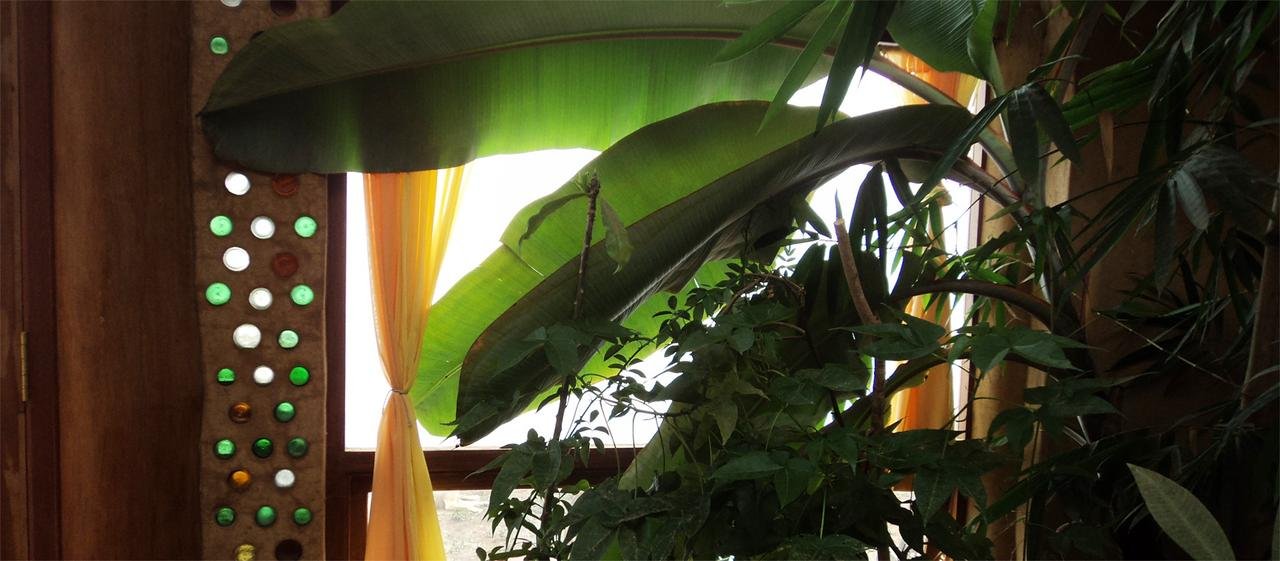
The front of the Earthship has several features. Two of them are those big wooden pillars that you may have read about in a previous part. The other features are the two glass bottle pillars, and the front door! The bottle walls were also pillars that whilst simply filling a gap, also helped to support the roof, and made for a beautiful decorative and colorful feature. Once you put the time into cleaning and polishing each inch by hand, the result was very beautiful. From the inside you can see a colored stain-glass window affect when the sun shines through. The design for the doors was my own, based on Japanese proportions. The guys couldn't understand why i wanted the glass panels to be uneven, and I kept insisting that they do it even though to them it made no sense.. Hopefully you can see below what I mean! ;-)
We also had an electrician and 'plumber' on the team, and they were kept very busy. Earthship Karuna is powered by a solar power system, that arrives just after this finishing work happens. To prepare for it, we installed normal electrical wiring throughout. Although Earthship Karuna runs will run on solar power, the whole technical side of that happens outside the house in the battery room. What is fed into the house is normal AC current at 220V.
The plumbing was much more thought out, and had in fact been planned well ahead of the entire build. I knew what pipes i would need where. The main difference between normal household plumbing and an Earthship is that the waste water is dealt with very differently. There are two types of waste water, gray water and black water. Gray water comes from the kitchen and shower, and black water is anything to do with the toilet. We had installed an underground septic tank behind and below the house to deal with the toilet flushing. I chose a normal water flush type toilet so that we didn't have to deal with any maintenance. We also have plenty of water here and not much hay for something like a compost toilet! This tank should last many years if not indefinitely if done properly. The idea is that you encourage bugs and roots to drink and eat the feces that are underground, so that you have little mini ecosystem that is dealing with your waste without any centralization or further treatment needed.
The kitchen water would be funneled into the planter cell that was just by it and near the front window. This planter would have a banana tree, a bamboo tree, aloe vera, fruits, and all sorts of ornamental plants. They would be fed and watered when I used the kitchen sink, and I built in a by-pass to send water straight outside so that I could use lots of soap and hot water if needed without polluting the planter! The whole planter also overflowed outside, where we put another banana plant that could feed and drink from this nutrient rich water all day long. The great thing about this system is that all you have to do is wash the dishes and use your shower and you end up watering most of your fruits and vegetables with no effort!. This is a system that is very water conserving, and in fact reuses the same water up to three times! In some Earthships they also flush the toilet with gray water, which is a very smart idea. Why flush a toilet with perfectly clean water!? I chose not to do that as we have plenty of water and less power to drive the pumps we would have needed. My entire water system works without any pumps at all! I am very lucky that our main source of water is from a few fresh water springs high above us. We pipe all that down to 5,000 liter holding tanks that are above and behind the house. These feed high pressure water to the house and all taps without the need of pumps. Whilst i do harvest rain water as well, i only use it as a backup option. SO far I have never needed to use it. TO do so would require pumps and power, and we really don't seem to need it. Here is a peek of how this planter looked after we finished!
On and on we went, for many weeks. This whole finishing stage was split over two sessions totaling around 2-3 months. In the final finishing stage we turned this rough but stunning space into a polished spectacle! The final reveal will be in the next part! I was in a state of awe and intense focus. I had to watch everyone all of the time and didn't have a day off for the whole time. On Sunday i would be busy running to town to buy more materials. It just didn't stop, and I didn't want it to. This was just too exciting and I ran on adrenaline and excitement and coffee the whole time!
MISSED A PART?
CATCH UP ON PARTS 1-9 HERE:
Part 1: The creation of my life's dream, a totally off-grid self sufficient home - Earthship Karuna
-
Part 2: The dream was born.
-
Part 3: How to accomplish anything in life!
-
Part 4: Finding My Spot in India at Last! The Journey Ends and Starts!
-
Part 5: The Remarkable Diary of an ecoBuilder. A plan and vision was born
-
Part 6: A Diary Of My First Eco-Build Of An Off-Grid Sustainable Earthship: - We Start Building!
-
Part 7: Epic Tales Of An Eco-Builder : The 200 Ft Tree Challenge!
-
Part 8: The Remarkable Diary Of An Eco Builder Part 8: The Show Must Go On!
-
Part 9: Remarkable Diary: The Roof! I love it when a plan comes together!