Okay Steemers,
for those of you who have followed the hole tutorial series so far, this may be the most epic part. We are finally putting everything we‘ve done so far together and create the first, real CI-Build using Jenkins, Maven and SonarQube.
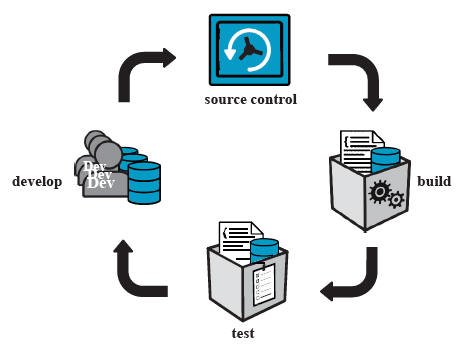
In the last part 4.2 we‘ve already created a Jenkins-Server using Docker and did the basic configuration. According to the definition of Martin Fowler, we are still not quite done. Let‘s step through the list of tasks we‘ve defined in the last part, to get an idea of what we've missed:
- A central place to store the software changes
- A system that can trigger a build when there are changes on the software
- The build has to do the following steps:
- Get the newest source code
- Compile the source code
- Execute the test cases
- Do a static code analysis
- Give feedback to the developers. (For example: After your commit, 2 test cases have failed. Please fix them)
Okay, we've put our Software under version control in part 4.1 using GitHub and we also saw the different triggers that Jenkins offers us in part 4.2, but never used them so far. In part 2 and part 3 we've learned that we can compile and test our code using Maven.
According to that, we can identify the following to dos for today’s part:
- Configure Jenkins Trigger
- Configure Jenkins to execute Maven goals
- Do a static code analysis
- Inform the developers
I would like to start by loosing some words about the static code analysis first, as we never talked about it.
Static Code analysis
You can buy thousands of books about testing of software and it is a quite complex topic. Right now the only thing we have to now is the difference between static and dynamic testing. I‘ve tried to make it very short, so please don‘t judge me if the following definition is not the greastest!
Static and dynamic testing
The difference between both testing types is basically that for a dynamic test, your code acutally gets executed while it won‘t for static tests. As an example you don‘t need to execute your code for a simple syntax check which makes this kind of test a static test. A Unit test does execute parts of your code so we would say that this a dynamic test.
Tools to perform a static code analysis
The above chapter already gave an example for a static code check: The syntax check that is automatically performed by the compiler. But are there more techniques/checks to verifiy the code quality? Yes, there are! And thank‘s god, there is already a tool that offers a huge bunch of different, static checks called SonarQube.
SonarQube – A short description
I‘ve already wrote a small article about this tool which you can found here. SonarQube basically provides a collection of static code analysis tools for several programming languages and a cool dashboard to present the results including dynamic test results.
Setup the Build Environement
We want to run our own SonarQube-Server and add it to our Build-Environement. To do so, we will jump to part 5.4 and use the Docker-Compose file that is provided at the end of that part. This file will setup our own Jenkins-Server, a SonarQube-Server and a MySQL-Server.
At this point I have to say sorry for those of you who are following the tutorial part by part as I began to use Docker right now while the description about it is the content of the upcoming parts. The reason for this is that I initially thought about installing the tools normally until part 5 of this series to give you a kind of “Wow – That is cool and easy” effect. But it went out that the normal installation of all these tools is so complex that I believe no one of you would have ever tried it. So I would suggest to USE Docker right now and UNDERSTAND it in the next parts – Hope that is okay for you. If not, you may read part 5.1 to part 5.4 and than come back to use part.
Make sure you use the same volume for Jenkins like you did in the last part, so you do not have to configure Jenkins again.
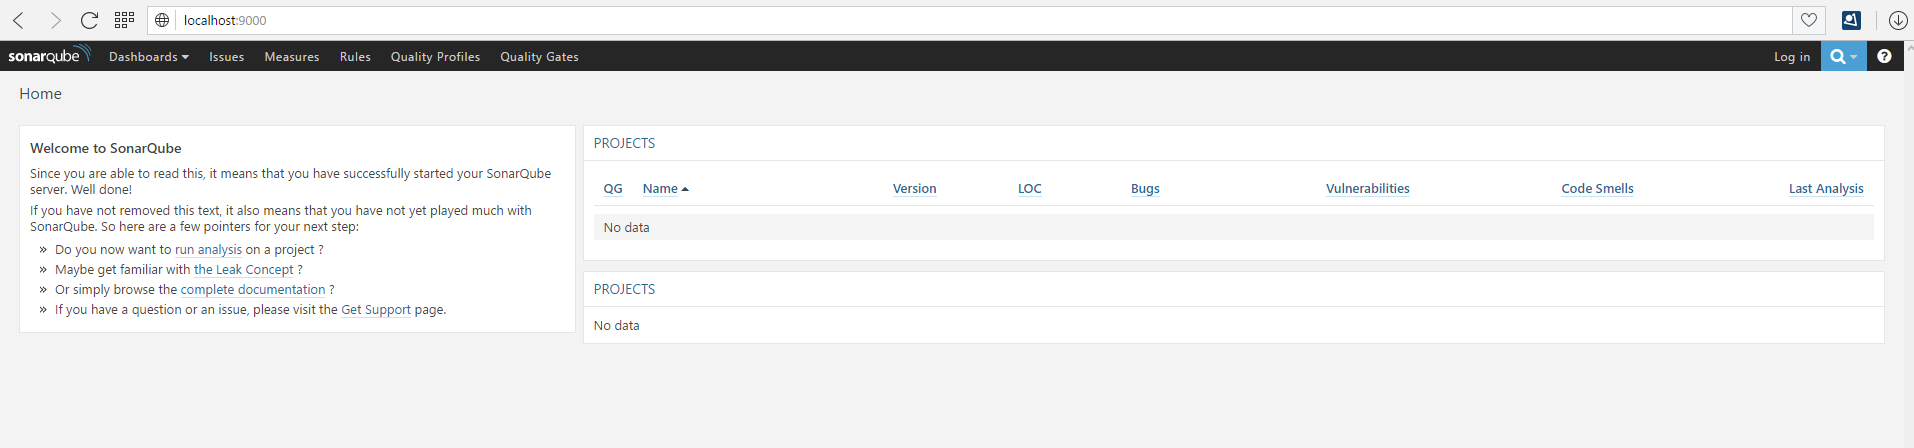
If everything has worked correctly, you should be able to access the Jenkins web interface under “http://localhost:8080” and the SonarQube web interface under the “http://localhost:9000”.
Jenkins - Web interface

SonarQube - Web interface
Configure the CI Build in Jenkins
Yeha – Seems like we are finally prepared to configure our first CI-Build. Let’s step back to our Todo list and start with the first point: Configure Jenkins Trigger.
Configure Trigger in Jenkins
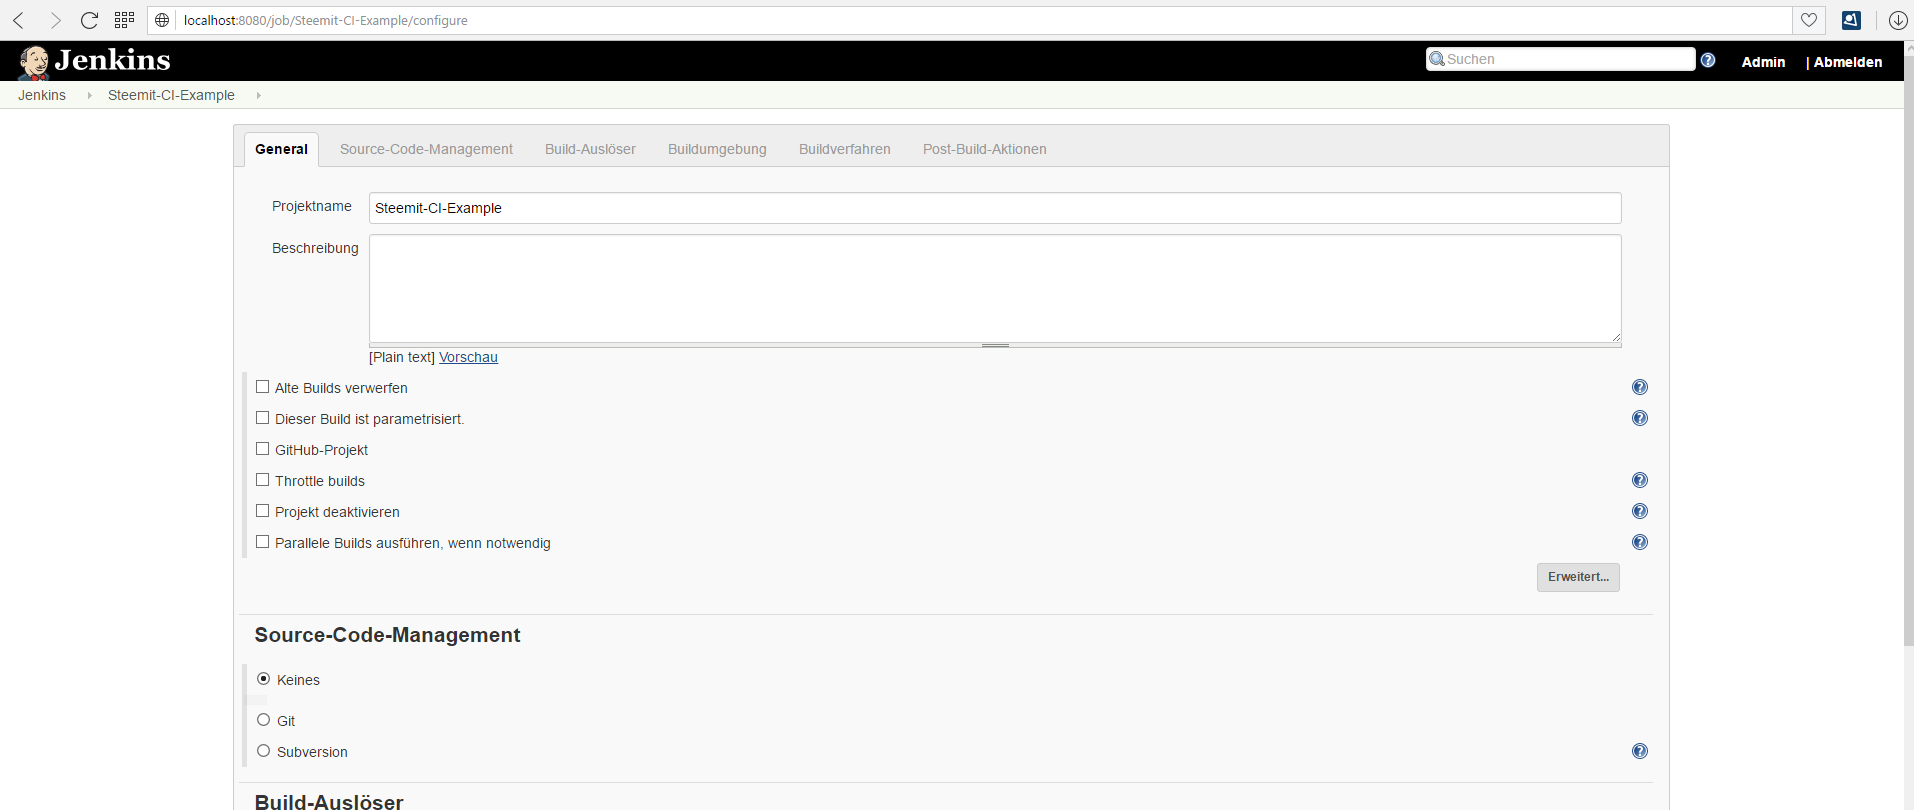
Login to Jenkins and create a “new Element” like we did in the last part. I will name it “Steemit-CI-Example” and choose “Free Style Project” as a type.
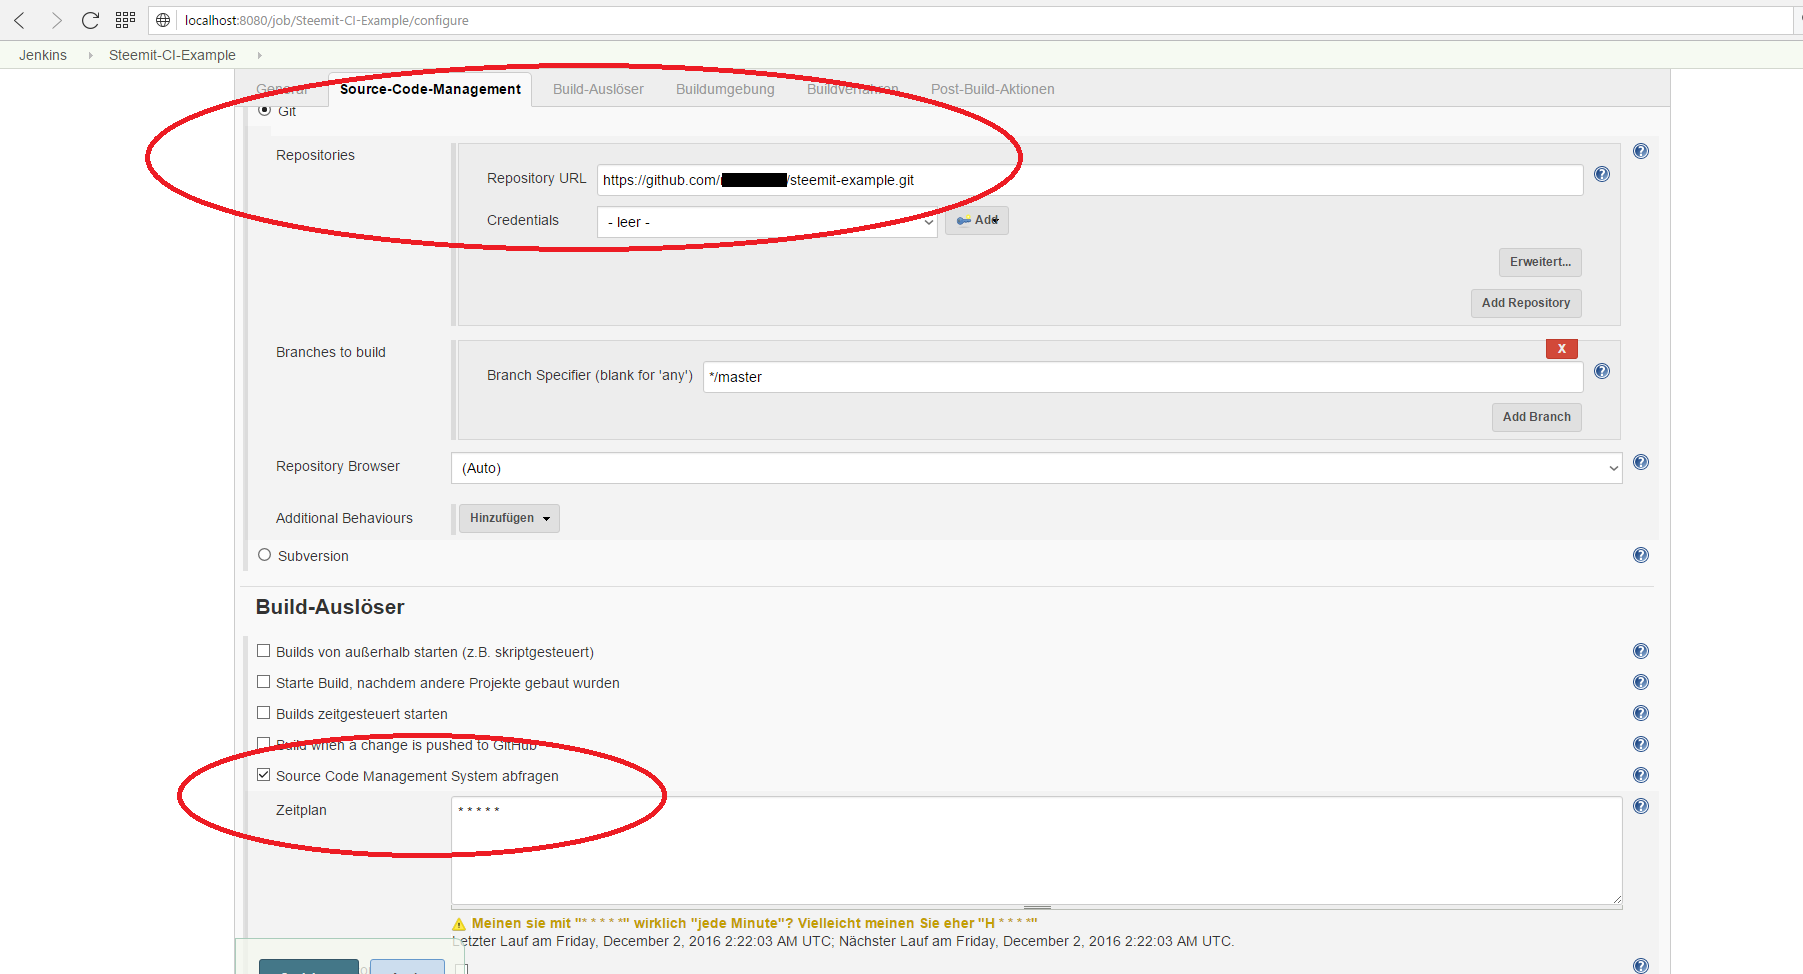
According to the definition, a CI-Build should get executed as often as possible. So we would like to run this build for every single change on the version control.
Just configure your Git-Repository under the “Source-Code-Management” category and select the radio button “Poll Source code management system” under the category “Build-Trigger”. In the new textarea, you have to specify the interval that Jenkins should check for changes in the Git repository using the Linux crontab syntax. We will enter "* * * * *" which means that Jenkins will check every minute for a change.
Jenkins is reasonable the most common CI-Server - You now know why: It is pretty easy to configure and also free to use.
Configure Jenkins to execute Maven Goals
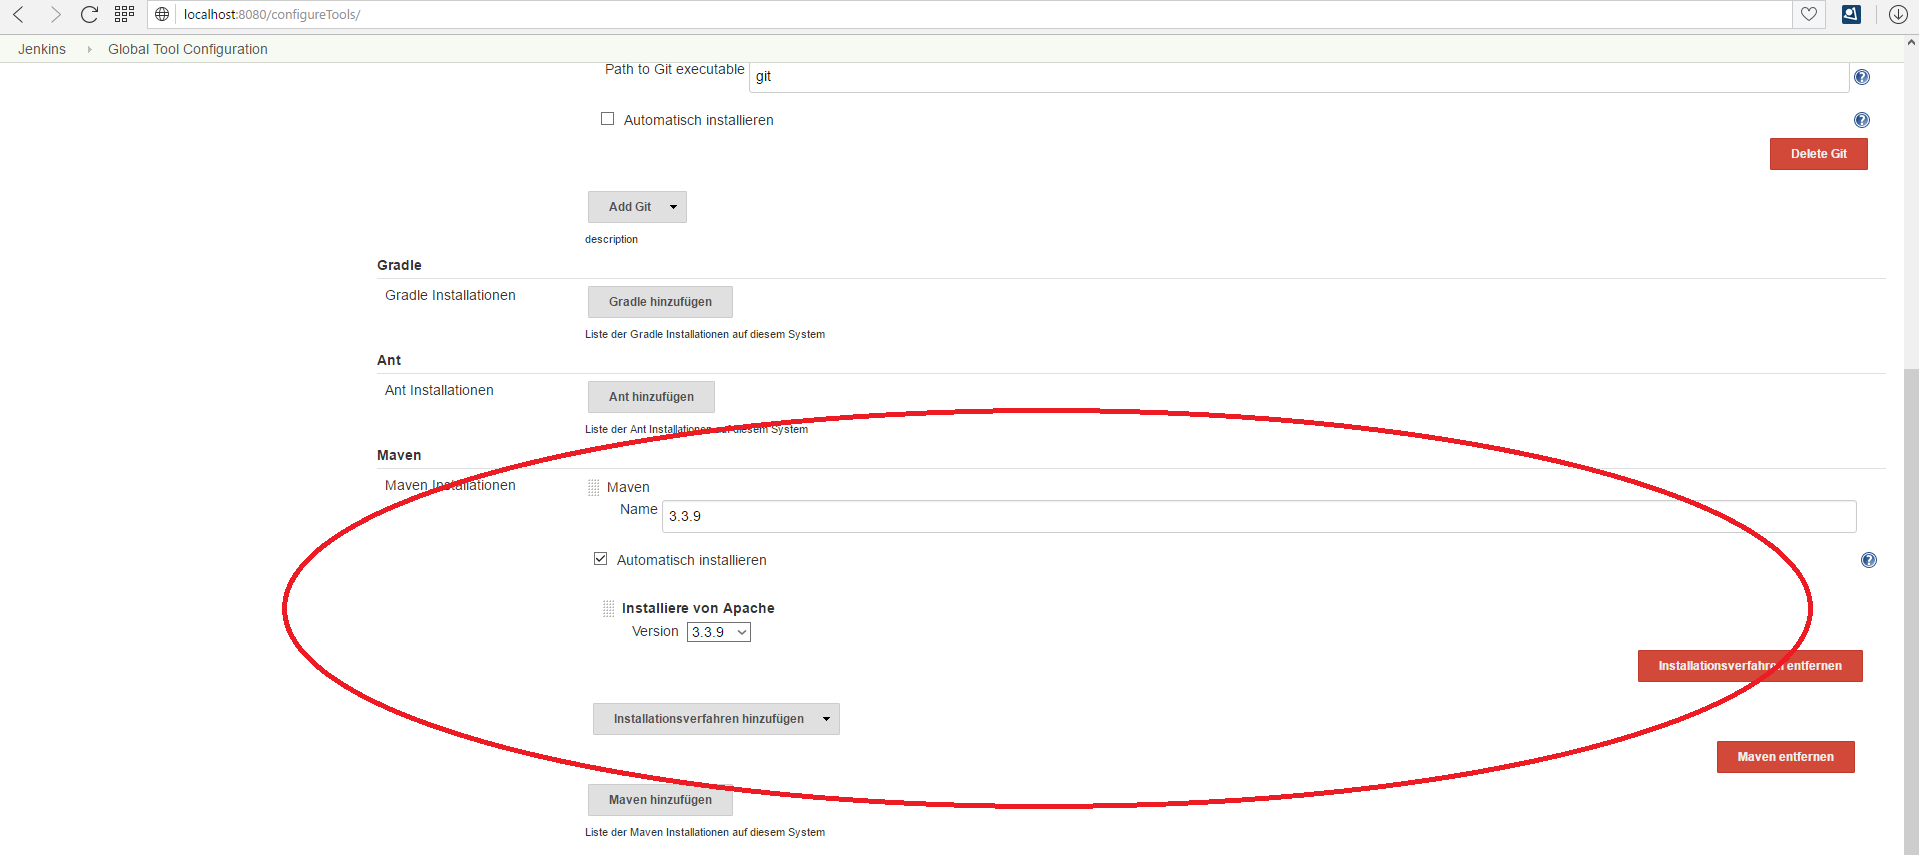
To execute Maven goals we need to install Maven on the host where Jenkins is running. As I am a lazy person, we will tell Jenkins to install it for us. To do so, go to “Manage-Jenkins” - “Global tools Configuration” and Scroll down to “Maven”.
Simply add a new Maven Installation and give it a name. I usally use the version as the name to make it easy to identify the version later.
Now jump back to our build and scroll to the “Build” category. You can now add new build steps of the type “Execute Maven goal”. Take care to select the Maven-Installation we’ve defined before and just put in our goals. The result should look like this:
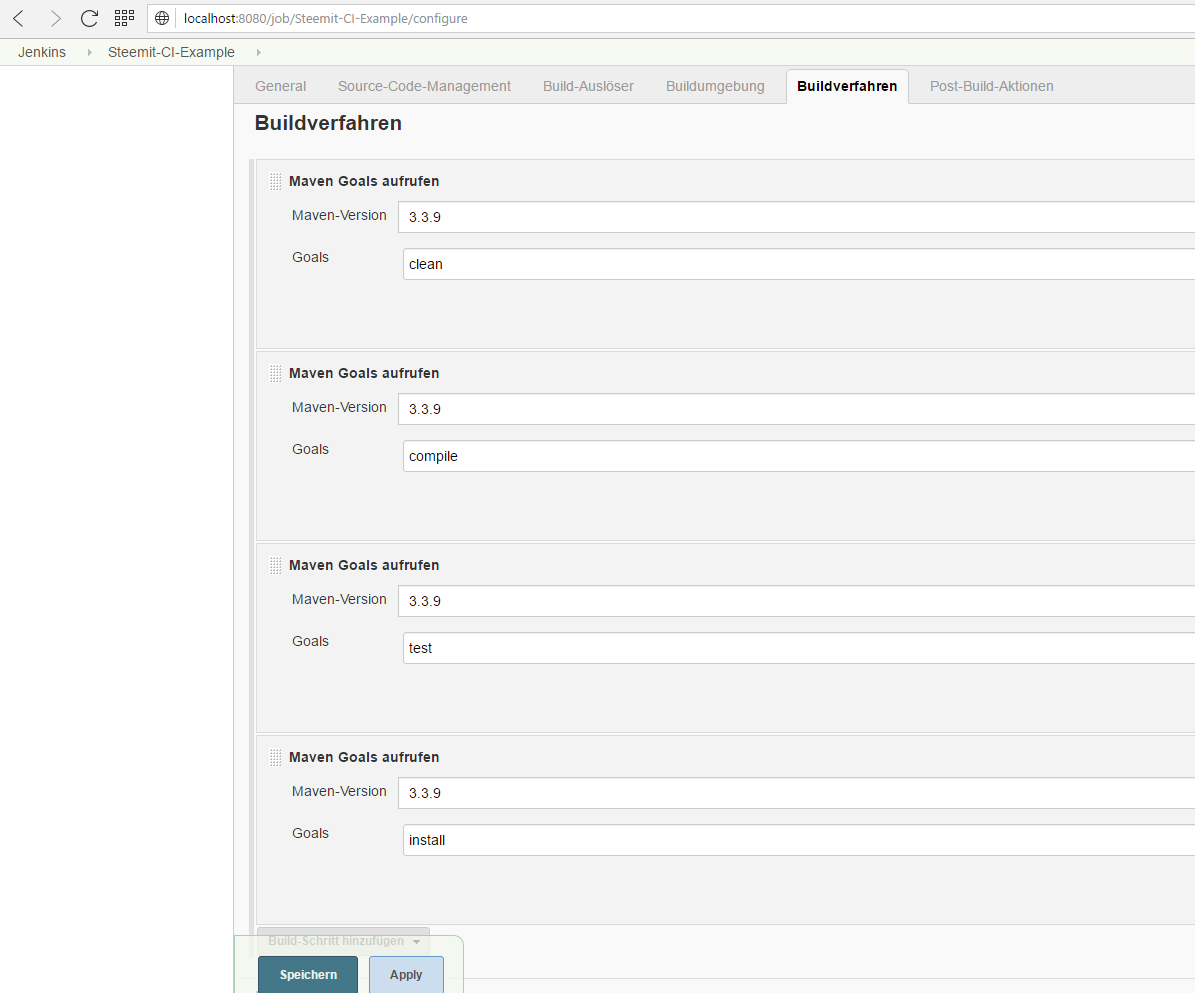
Save the changes and the next step is done! Easy again, wasn't it?
You may have one question: Why do I created so many single steps instead of just calling “clean install” in a single goal? The answer is quite easy: In the real world a project may consists of multiple Sub-Projects called Maven Modules. Also, those huge projects need multiple hours for a single build including tests.
Keep in mind that we want to find failures as soon as possible and achieve a fast Feedback. Imagine that the last Sub-Project has a compile error. If you just run the single Maven goal “clean install”, Maven will step through each Sub-Project and compile it, test it and publish it. If the last Sub-Module has a compile error, you’ve need hours until Maven will report this compile error. Long story short: We want to check for compile errors before we do anything else.
Execute a static code analysis
Since the introduction of this post we know that we want to use SonarQube for the static code analysis, but how to get it working?
Configure the SonarQube-Server
I would describe SonarQube as a skeleton that can be filled with a bunch of plugins to fit your needs – So do we have to configure it? No, not yet. The tool supports Java, C# and Javascript by default so we will not get into the configuration right now. I may write a detailed post about the SonarQube configuration later – Stay tuned for that if you are interested.
Execute an Analysis
I would suggest to execute the analysis under the use of the SonarQube-Maven plugin. To do so, we have add the plugin to our pom.xml of our project and configure the SonarQube-Server url. If you are interested in the details, you can find a complete documentation about this plugin right here.
After adding those information, the pom.xml looks like this:
    <project xmlns="http://maven.apache.org/POM/4.0.0" xmlns:xsi="http://www.w3.org/2001/XMLSchema-instance"
    xsi:schemaLocation="http://maven.apache.org/POM/4.0.0 http://maven.apache.org/maven-v4_0_0.xsd">
    <modelVersion>4.0.0</modelVersion>
    <groupId>example.steemit.com</groupId>
    <artifactId>dez1337example</artifactId>
    <packaging>jar</packaging>
    <version>1.0-SNAPSHOT</version>
    <name>dez1337-Example</name>
    <url>http://maven.apache.org
    <dependencies>
        <dependency>
            <groupId>junit</groupId>
            <artifactId>junit</artifactId>
            <version>4.12</version>
        </dependency>
    </dependencies>
    <build>
        <plugins>
            <plugin>
                <groupId>org.sonarsource.scanner.maven</groupId>
                <artifactId>sonar-maven-plugin</artifactId>
                <version>3.1.1</version>
            </plugin>
        </plugins>
    </build>
    <properties>
        <sonar.host.url>http://sonarqube:9000
    </properties>
</project>
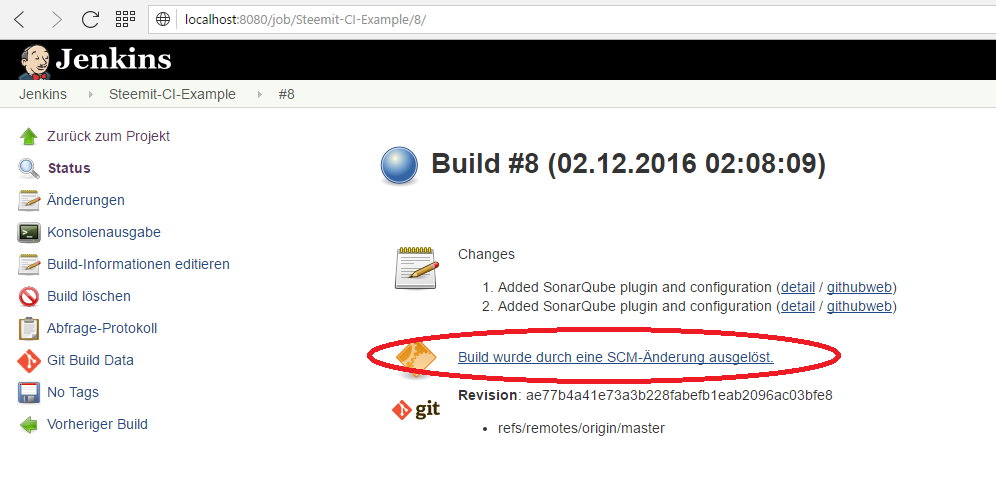
Now commit and push the change and wait up to one minute. We will now test if the trigger we've defined earlier. And? Does it work? Yes, it does!
Click on the lastest build and you should see that it has been triggered due to a change in the repository.
Okay, back to business. We intially wanted to add SonarQube to our project. Now, that we've configured everything in the pom.xml, we can just add another Maven goal to trigger the plugin.
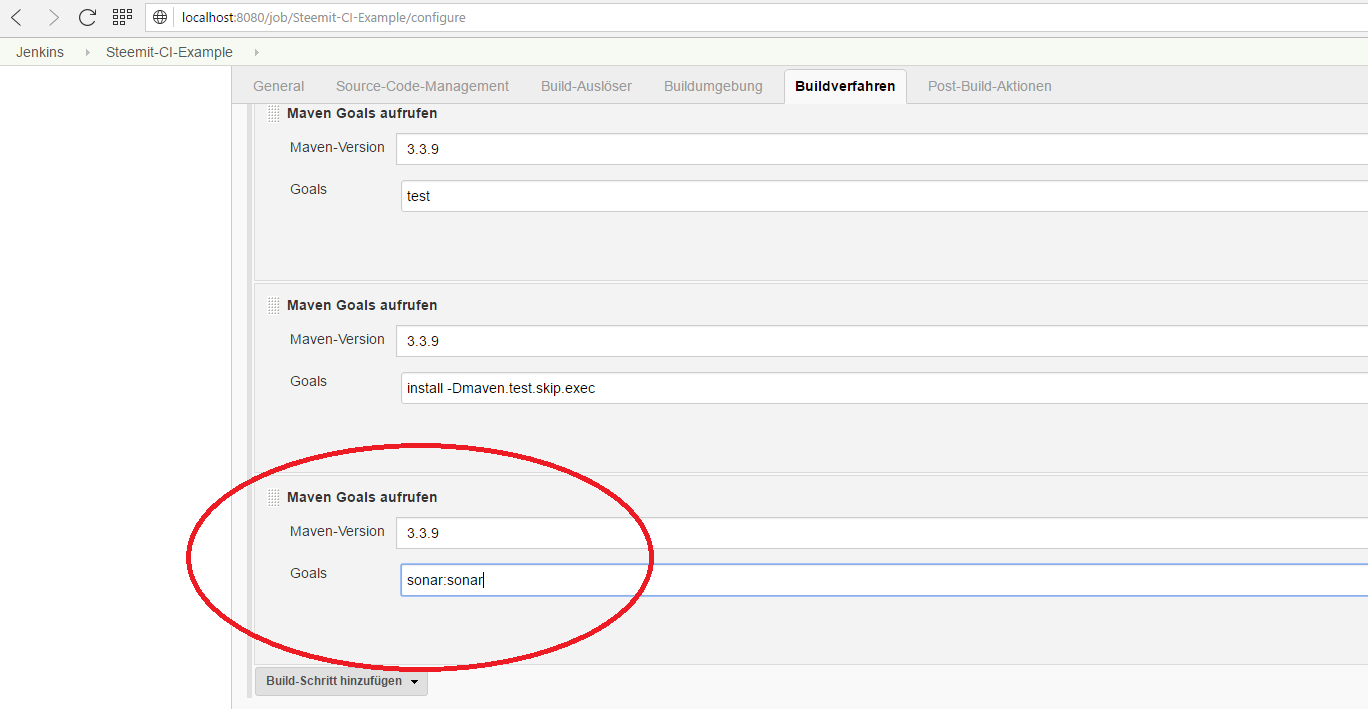
Save the job and trigger another build (manually or by commiting a change). When the build is done and blue, you could take a look at the SonarQube web interface. It should now display your project. Let's take a look into it.
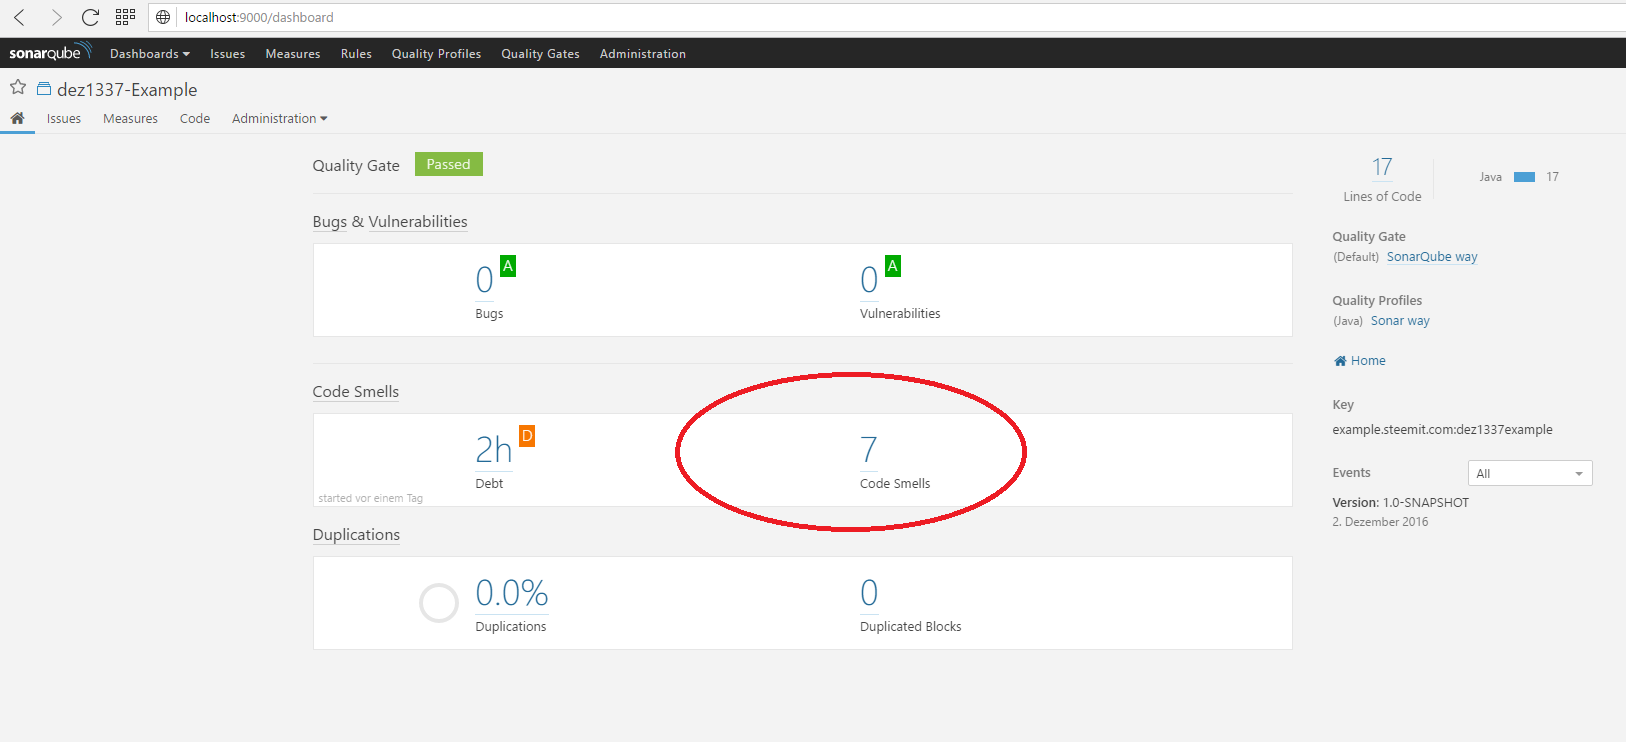
SonarQube found 7 so called "Code smells" in our example project. SonarQube checks so code for common bug patterns, coding conventions and makes sure you document your code. You should always have a look at those code smells to get a good code quality.
As I said, we could configure a bunch more things in SonarQube, but this will be the content of another part.
Notify the developers
Okay, the part got pretty long so far and I think it is enough for today if we say that the blue or red circle next to the job run is our feedback to the developer. In the upcoming parts we may improve this setup by configuring our own mail server so we can let Jenkins send mails to the developer team.

Summary
I hope I did not promised to much at the beginning of this part and it was so exciting to you as I thought it would. We did a bunch of cool stuff today and finally put everything we have done so far together by building a CI-Build-Environment and the first CI-Build.
There is still much stuff to add here, but I think we are at a point where many companies would like to be. So as usual: Give me feedback, asks Questions in the comments and don’t forget to follow me to never miss a new part of this series.
Thank you and best regards!