Prime Focus - Deep Sky Astrophotography
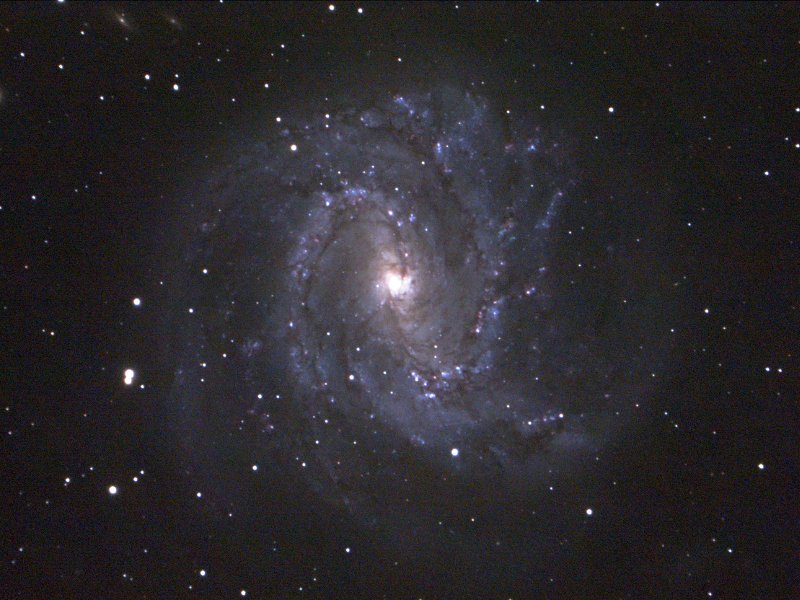
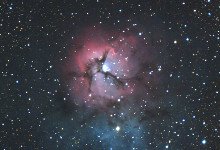
388 x 6 second exposures were stacked together for this image of M83. That is a total exposure of almost 39 minutes. The telescope was a C14 operating at F7 and using a QHY183c camera
This article continues the series "Guide to Basic Astrophotography" which has already discussed the following topics:
- Cameras
- Lenses and telescopes
- Tracking Mounts
- Polar alignment
- Focusing
- Prime Focus Imaging of Planets
At the end of this post, you will find a table with links back to those to previous articles.
Continuing on from part 6, where I discussed planetary photography, I will now discuss prime focus Deep Sky astrophotography. Deep Sky objects include the following:
- Star Clusters
- Nebula
- Galaxies
Deep sky imaging does present some additional challenges, since most of the time, we are dealing with targets as faint if not fainter than the sky background. Because of this, we need to approach imaging a little differently (compared to the approach we used for planets which are much brighter).
Surface Brightness
Most deep-sky objects are very faint indeed. Astronomers use a measurement called surface brightness which is the measure of brightness per unit sky. In other words, it is a measure of how concentrated the light or how intense an object appears
The following table illustrates the surface brightness of various objects versus a very dark night sky.
| Object | Relative Surface Brightness |
|---|---|
| Faintest Deep Sky Object detail | 0.01 |
| Darkest Sky | 1 |
| Typical Deep Sky Object | 3 |
| Good suburban | 6 |
| Inner City | 50 |
| Brightest Deep Sky Object detail | 1,000 |
| Jupiter | 3,000,000 |
| Daytime Sky | 20,000,000 |
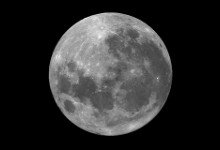
| Moon | 30,000,000 |
The surface brightness also tells us how strongly an image registers photographically. Therefore, from the table above the moon needs an exposure roughly 10% of Jupiter, because this is the ratio of surface brightness. In photography speak, Jupiter is over three stops fainter than the moon. Remember, for each extra photographic stop we halve the surface brightness.
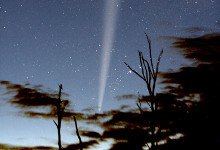
Note that Surface brightness should not be confused with brightness. An example of a bright object that has low surface brightness is the milky way. The Milky Way as viewed from Earth has a brightness comparable to a bright planet. But its light is distributed across a large area sky which means that its surface brightness is very low. The following animation shows a flashlight shining on a piece of paper. Note that the brightness of the reflected spot is always constant, but the surface brightness increases as the paper get closer.
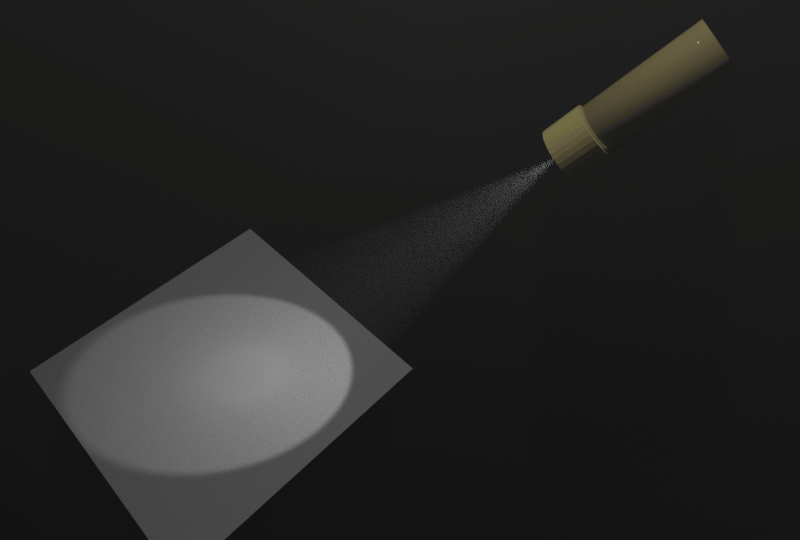
Surface brightness (or intensity) of the reflected spot increases as the paper approaches the flashlight, but note the brightness of the spot is actually constant
The main point to take home with this list is that deep sky objects are much fainter and the surface brightness typically millions of times less than the planets and moon. To compensate for this astronomers use faster optics and longer exposures.
Faster Optics
Photographers, when confronted with a dimly lit scene will consider "opening up" the lens aperture. This is the same approach used by astronomers (typically they use an optical reducer), but the following trade-offs need to be considered:
- Image scale is reduced which means there is a potential loss of resolution
- Image circle will be reduced (the image could be severely vignetted)
- Image quality might be reduced
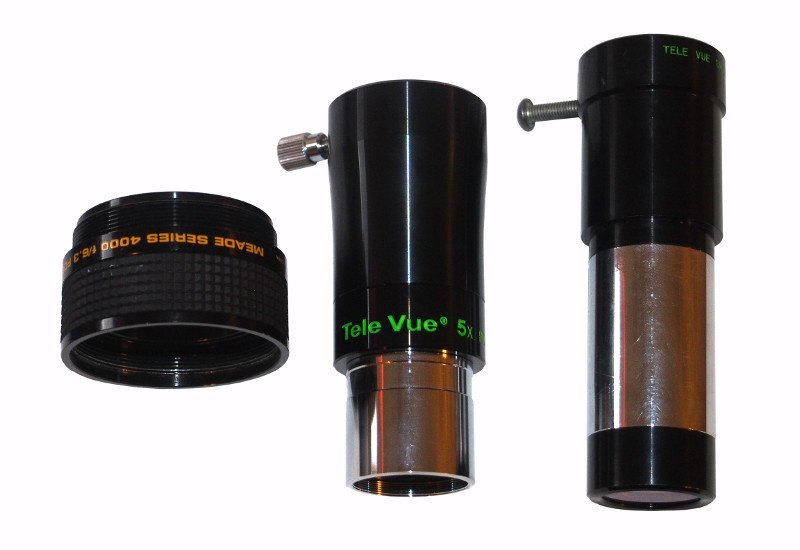
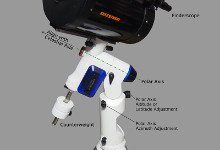
Accessories used to adjust the Optical speed of a telescope. On the left is a reducer, which we would use to reduce focal length and focal ratio, and thus increase photographic speed
Exposure
A photograph of the moon might require a 1/400 second exposure to get a properly exposed noise-free image. But a faint deep sky object will need considerably more. A typical deep sky object will have 10,000,000 times less surface brightness compared to the moon, this means to get a similar image we would need an exposure of 25,000 seconds or nearly 7 hours! It is actually worse than this because even in the darkest skies the sky background pollutes the image, requiring even longer exposures. As a result, many of the best astrophoto's have exposures approaching 100 hours!
The impact of increased exposure time is clearly evident in this sequence of images with increasing exposure time from 6 seconds through to 1920 seconds (32 minutes). Note how much more detail is visible as the exposure time is doubled from each consecutive image.
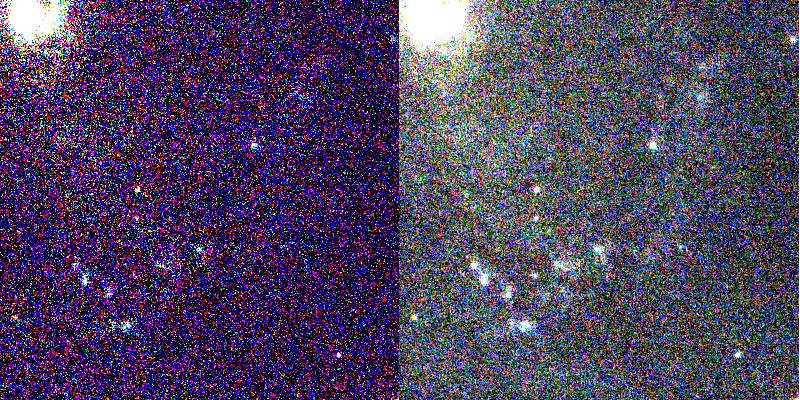
Left: 6 second exposure. Right: 24 second exposure
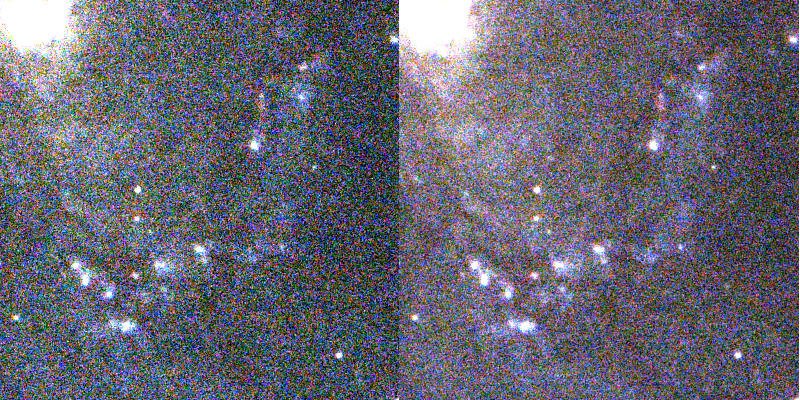
Left: 60 second exposure. Right: 120 second exposure
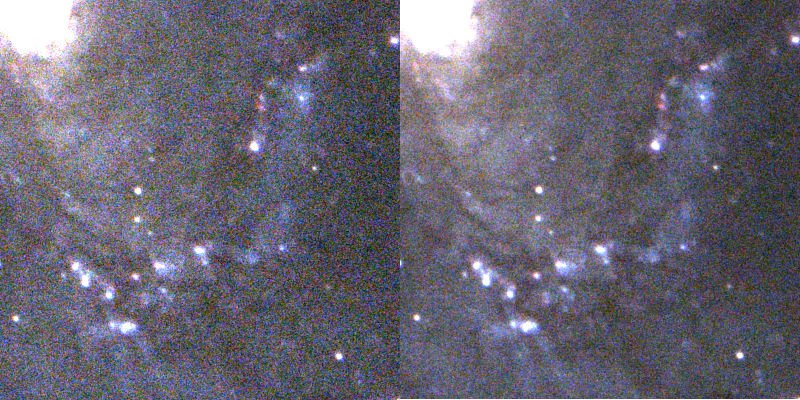
Left: 240 second exposure. Right: 480 second exposure
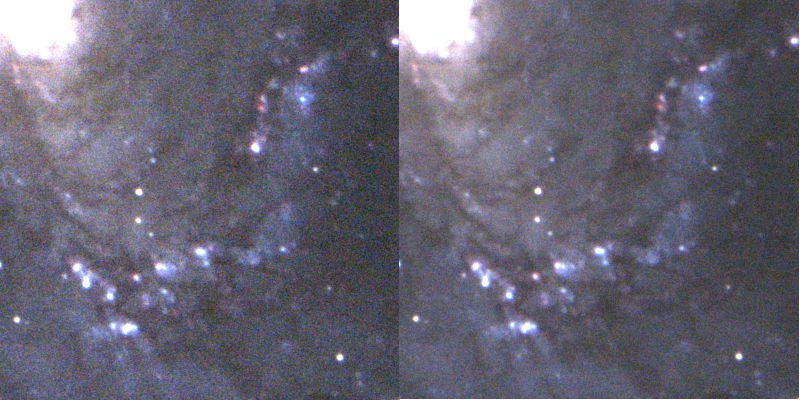
Left: 960 second exposure. Right: 1920 second exposure
Slightly More Advanced Topics
I will touch on a couple of topics that are likely to be encountered early on while setting up an astrophotography setup.
Autoguiding
Most people doing serious astrophotography these days with a telescope are using Auto-Guiding. Auto-Guiding is a technique where a second camera is used to send feedback to the telescope drive motors. The feedback tells the motors to make small corrections to compensate for tracking errors.
But I'm here to tell you it is possible to do very good basic astrophotography with modern cameras and shorter exposures with no Auto-Guiding. It is actually my preferred way of imaging these days since it keeps things simple.
Image Acquisition Software
To start with most people will likely use a Consumer camera and intervalometer to do imaging sequences. However, in time it is likely that you start tethering a notebook computer to a camera as it will provide more control over camera functions, such as live view to screen for focusing, focusing aids and so forth. Some camera manufacturers (Canon for example) have very good support in this regard.
More advanced setups with dedicated astronomical cameras will use a program like Maxim DL or Sharpcap to not only acquire images but perform other functions such as focus aids, live view, cooling control, filter wheel operation, auto-guider control, etc.
Calibration
To get the most out of images it is necessary to calibrate images to remove the effects of dark noise (ie hot pixels) and uneven illumination of the sensor. The calibration requires obtaining bias, dark and flat images which are done as follows:
Bias : Multiple images of shortest possible exposure are taken with the sensor in complete darkness (i.e with lens cap on).
Dark : Multiple images of similiar exposure length to actual image exposures are taken with the sensor in complete darkness (i.e with lens cap on). Some cameras have this function built in.
Flat : Multiple images of a flat illuminated sheet (with no texture) or the daytime sky are made.
These calibration images are then processed in software to become "master calibration frames". We will touch on this in Part 8.
In reality, for basic astrophotography calibration is probably not necessary and can be approximated using standard Photoshop type tools.
Conclusions
We are coming to the end of the "Guide To Basic Astrophotograph" series. The next and final part will look at the processing of images.
Further reading
I have previously posted on background topics, here is a list of them.
 | Heading | Topics |
|---|---|---|
 | Astronomical Imaging - The Basics - 1 | Selecting and using a camera |
 | Astronomical Imaging - The Basics - 2 | Camera accessories and Telescopes |
 | Astronomical Imaging - The Basics - 3 | Polar Alignment |
 | Astronomical Imaging - The Basics - 4 | Focus. Theory and techniques |
 | Astronomical Imaging - The Basics - 5 | Prime Focus Imaging - Introduction |
 | Astronomical Imaging - The Basics - 6 | Prime Focus Planetary Imaging |
 | Astronomical Imaging - Planetary Nebula | A compilation of images of Planetary Nebula |
 | Astronomical Imaging – The Moon | Techniques for imaging the moon, adapting cameras, etc |
 | Astronomical Imaging – Tracking Mounts | Discussion of the different types of mounts available for tracking stars |
 | Astronomical Imaging – Stacking | Introduction to stacking. Basic Theory as well as how-to (including a video) |
 | Astronomical Imaging: Using just a Smartphone | Imaging using a Smartphone |
 | Astronomical Imaging: Using just a Smartphone- Part II | Adapting a smartphone to a telescope |
References
- Falchi, F., P. Cinzano, D. Duriscoe, C. C. M. Kyba, C. D. Elvidge, K. Baugh, B. A. Portnov, N. A. Rybnikova, and R. Furgoni. "The New World Atlas of Artificial Night Sky Brightness." Science Advances 2, no. 6 (2016). doi:10.1126/sciadv.1600377. PDF
- Clarkvision.com Surface Brightness of Deep-Sky Objects. Accessed April 07, 2018. URL.
NOTE: All Images are the authors, please credit @terrylovejoy if you wish to use them.