Hi guys and gals. Friends and family. This one goes out to my buddy, Mitch, who has a fairly new Steemit account and wants to begin posting videos on @dtube.
DTube is an incredible platform that I have had the privilege of using for the past number of months. It is a place to use your mind and be creative. A place to spread a valuable message and build a relationship with an audience.
I like using this decentralized video sharing platform for a number of reasons, and today I am going to get into the how-to of posting on DTube because it is not exactly the same as YouTube or Vimeo.
First off, when beginning your posting journey, you need to have a Steemit.com account created. I went over that in a previous post that you can find here. Once that account is live and you are logged in, now you can also log into DTube.
Head on over to https://d.tube/ which is the main site page. From there, you will click on the red "Login" button at the top right of the screen. Now, it will ask you for your Steemit username and private posting key. Go ahead and type in your username in the first field.
In the second field, you need to navigate back over to your Steemit blog and then over to your Wallet tab. From there, click on Permissions. Under permissions, you will see a list of keys. Click on the button that says "show private key" next to posting key.
Since you are already logged into Steemit, it will then reveal your private posting key. Copy and paste that key into the respective DTube field labeled "private posting key". The last thing to do before logging in is to click the ticker that says "remember me" so that you don't have to log in every time that you visit the website.
Great! Now it is time to post! You will more than likely see a big red box that says the words "drop a file or click to start the upload". Click inside that box and it will open up the file explorer on your computer. Navigate to your desired video and then select "open".
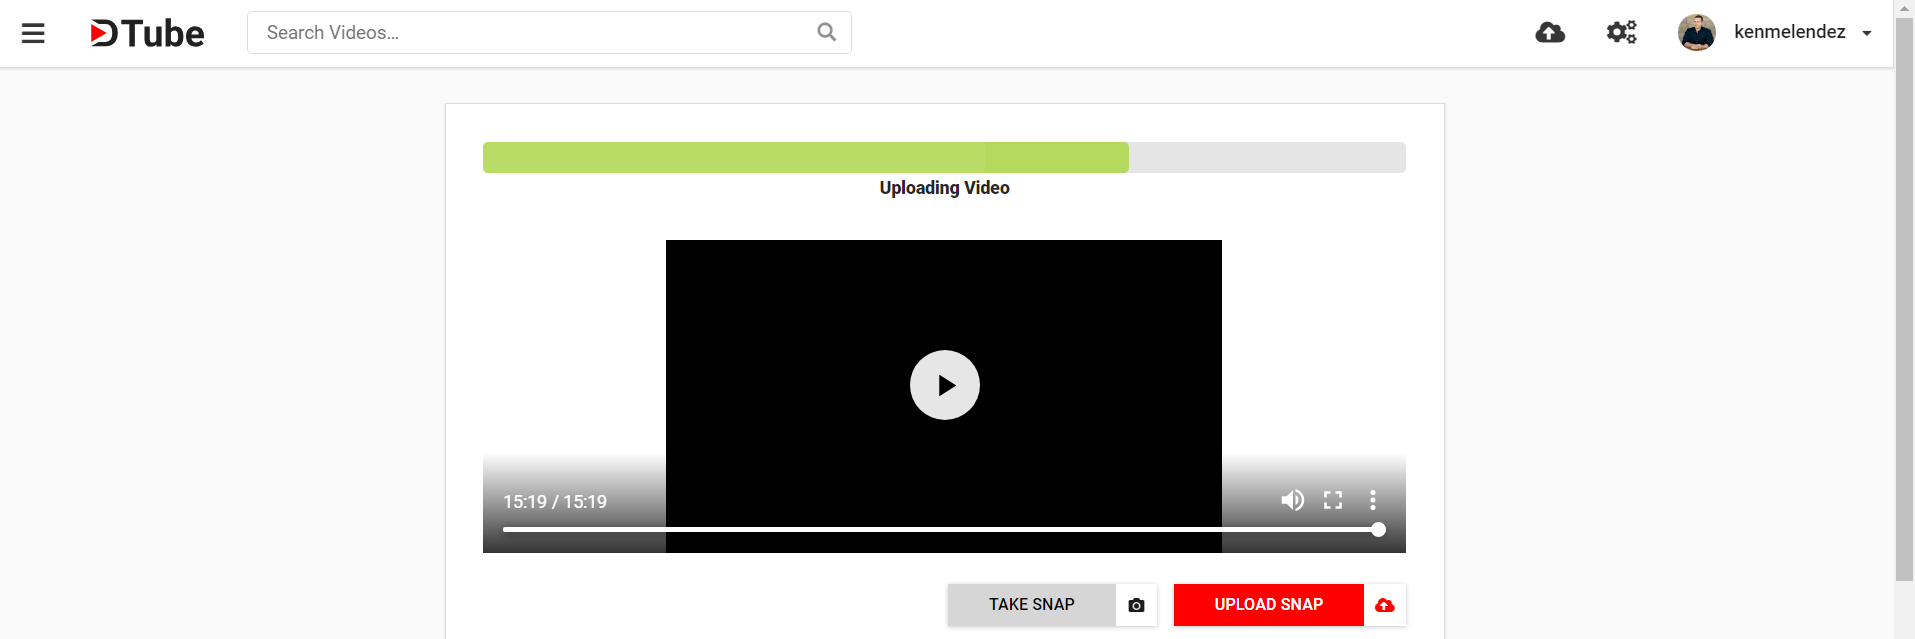
You will now see a progress bar at the top of your page that shows the progress of your upload. After that, you will noticed another set of bars that show up which simply means that DTube is encoding your video to IPFS.
In the middle of the upload process, or even after the upload has completed, is when you can upload your snap. A snap is DTube's word for thumbnail as YouTuber's would be familiar with. Upload your snap (photo) for your video using the red "Upload Snap" button, and make sure it is less than 1MB in size. If for some reason your snap is larger than that, simply use an easy site called http://resizeimage.net and resize your image.
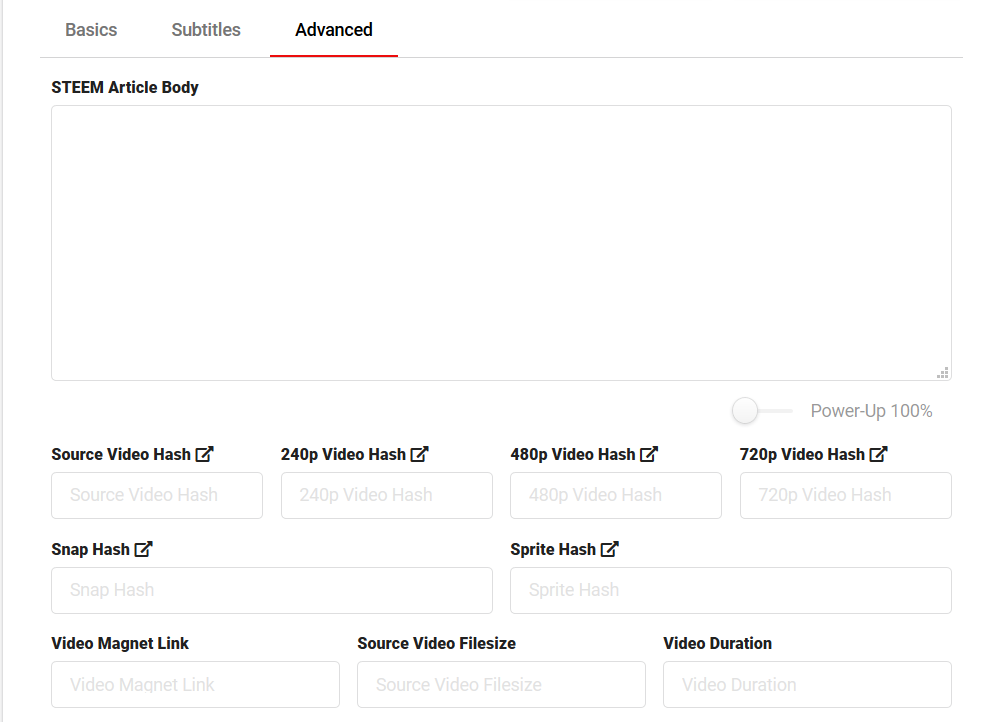
After the upload is complete, you need to make sure the hash addresses are in before publishing or else you will get a blockchain error message. If you click on the "advanced" tab, you will see an area for video hashes. When a video is finished uploading you will see at least a source video hash, as well as a sprite hash. You will see others if your video was recorded in HD such as the 240p, 480p, or 720p.
Now it is time to enter your text. On the basics tab, you will see a field for the title, the description, and the tags. Fill those out depending on what you want your audience to read. Most times I will write out an entire blog (such as this one), and place it inside of the description.
A little tip to make your posts look cleaner, is to click on the
advanced tab, and paste your Steemit blog inside the Steemit article
section. This way, when you publish your video, your Steemit.com blog will be properly formatted with the use of markdown which is kind of like html.
Since DTube does not accept markdown formatting, you need to strip down your blog inside the basics tab description box so that it only shows text, not markdown. I learned this after trial and error of being on the platform.
As far as putting tags in, choose ones that are appropriate to your topic. For instance, if you are talking about Steemit in your post, then choose "Steemit" as a tag separated by a space. If you are cooking in your video, use a tag such as "cooking". You can insert up to 4 tags when uploading to DTube.
Once everything is in, it is now time to submit! Click the red "submit" button on either the basics or the advanced tab, and your post is now published! Congratulations!

If you need more help on this or have a specific question, please leave a comment below so I can assist you. After you get in the groove of posting every day or every other day, you will get become a DTube uploading master!
Hope this video added value to you and I cannot wait to see you in the next one. Until next time, friend...remember...You Are Awesome!
Take care.

-Ken
@kenmelendez
P.S. Tag me in one of your videos and I will come check it out!
If You Can Make Videos, You Can Speak From Stage - Steem Creators North Event Promo
How to Sign Up and Interact with the Steem Blockchain
Winners of the DTube T-Shirt Giveaway - Super Exciting!
Check Excuses at the Door and Achieve Your Dreams
Shifting Perspective for Added Joy and Fulfillment
Don't Throw in the Towel - Ride the Steem Wave
5 Honorable Characteristics of Steem Whales
▶️ DTube
▶️ IPFS


