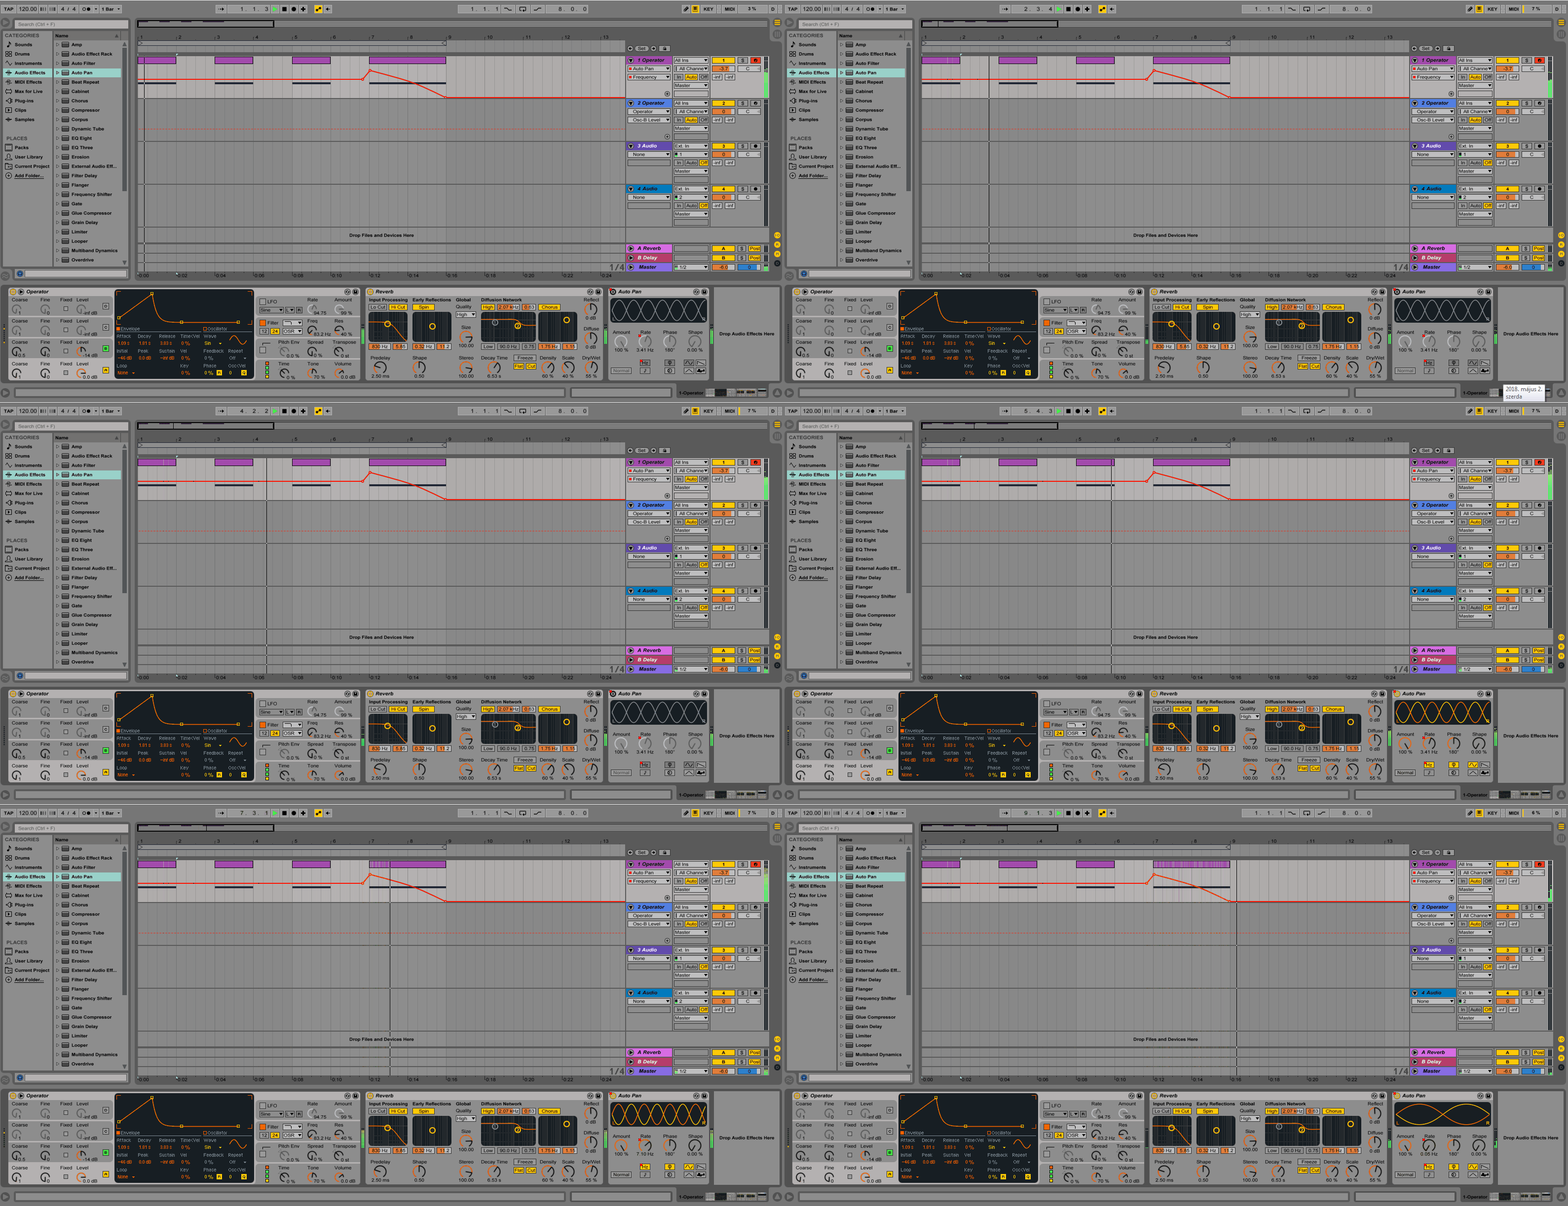
Hello steemains!
In this post I'm going to explain how to create the sound above,
which I like to call "the invasion" for obvious reasons.
We'll be using the Operator tool and the Reverb audioeffect, plus for some extra fun we can add an AutoPan at the end.
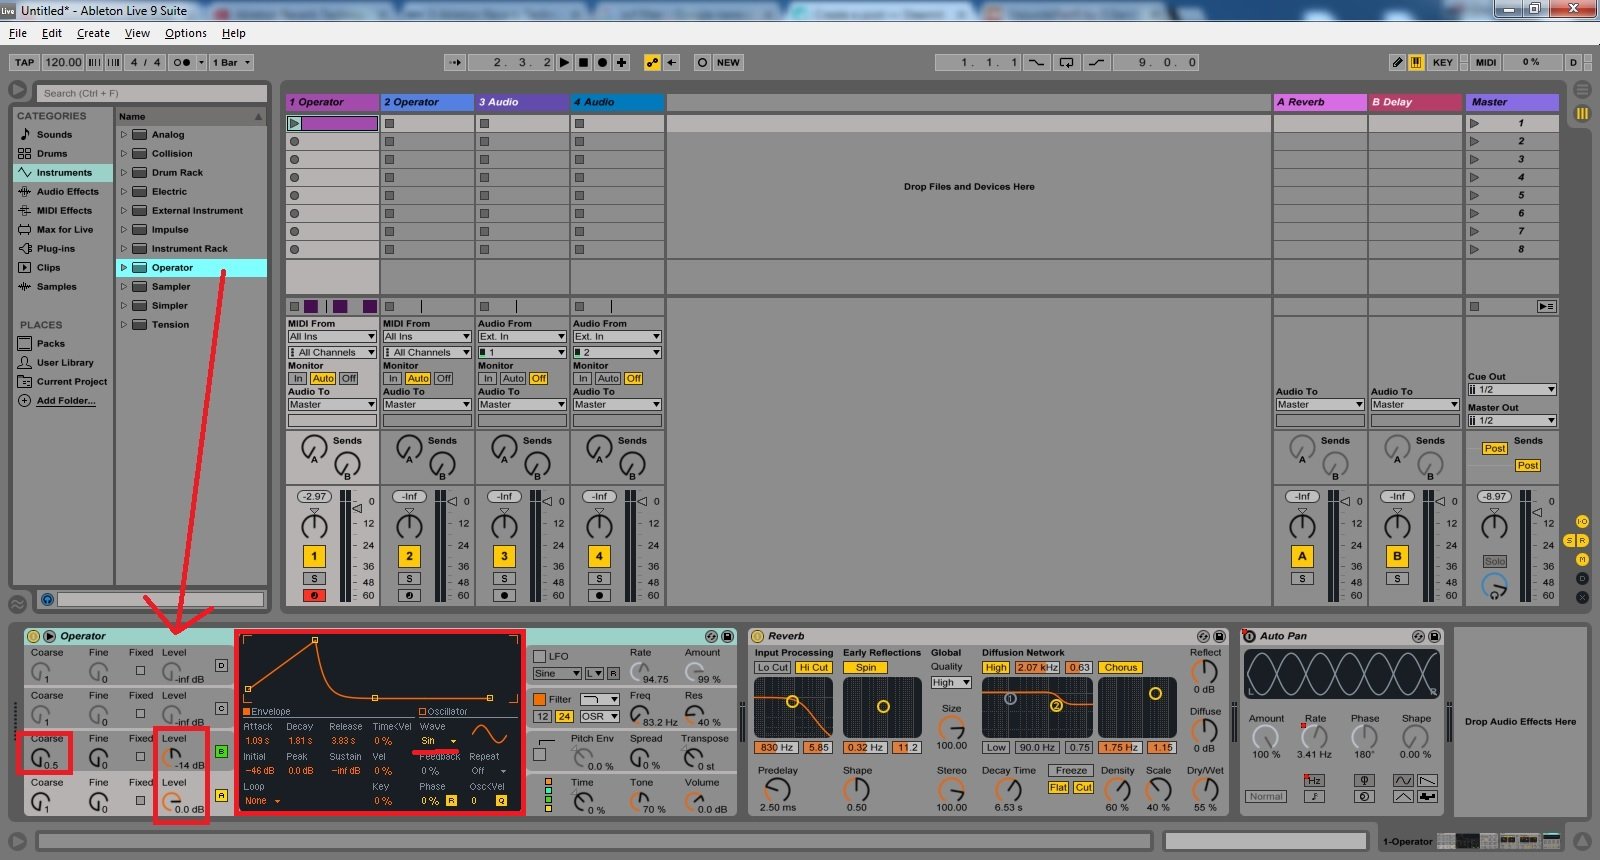
Let's start by setting up Oscillator A and B:
For Osc A :
- select the Sine waveformat
- put the output level on maximum
- drag the envelope points to make something similar to the one on the picture or set the values manually:
Attack and Decay over 1s and Relesae over 3s.
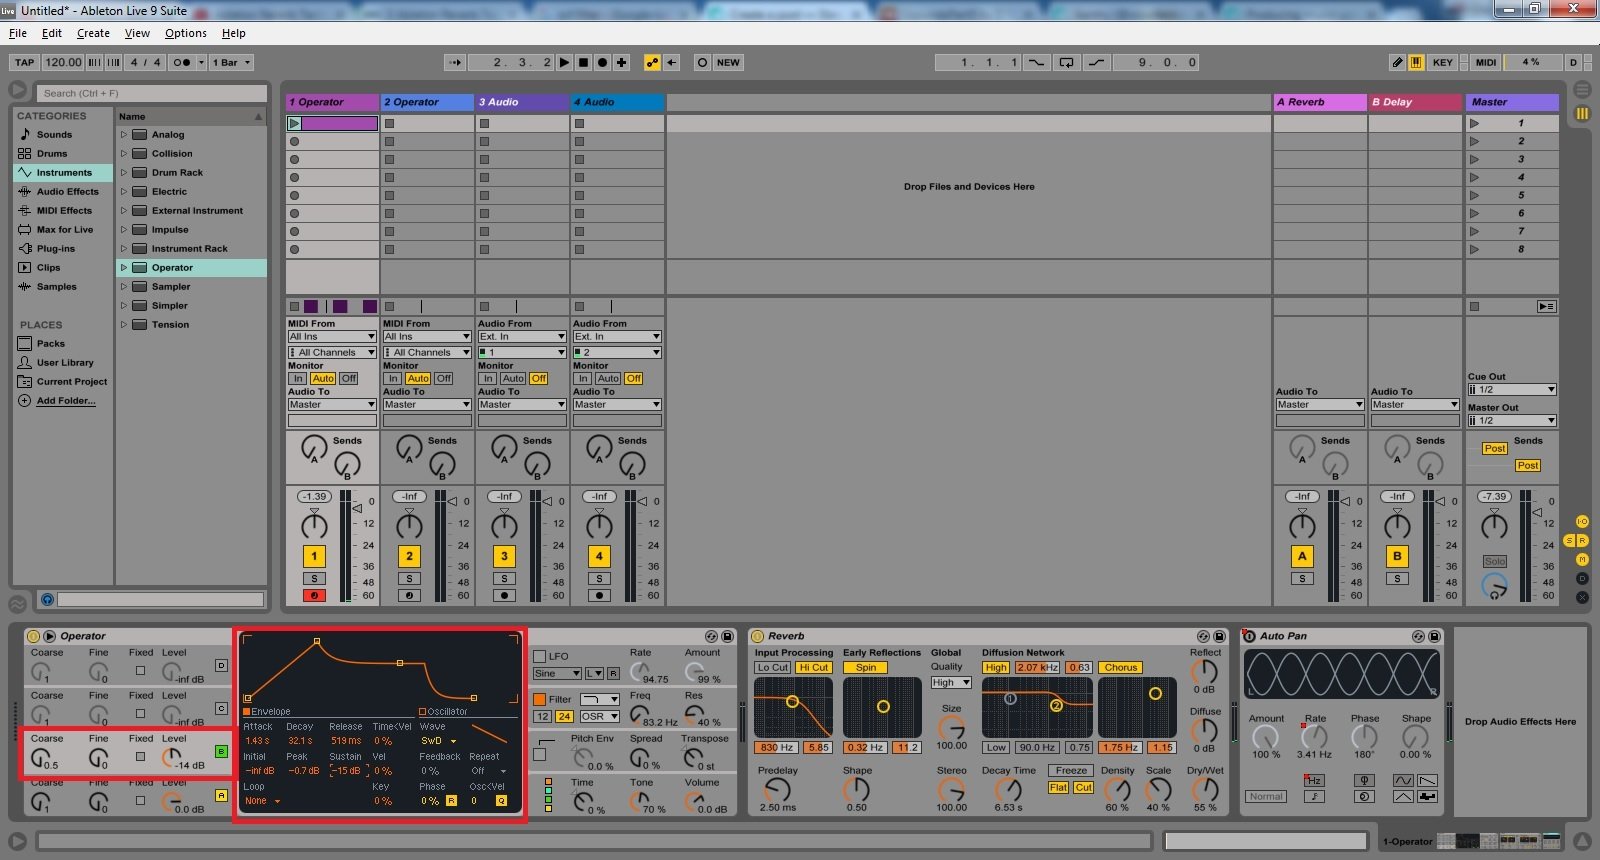
For Osc B:
- select the SawD waveformat
- set the output level at around -15dB
- turn the coarse knob at 0.5 value
- Drag the envelope or adjust manually:
Attack ~ 1.5s, Decay ~ above 10s, Release ~ 1s, Sustain ~ -15dB.
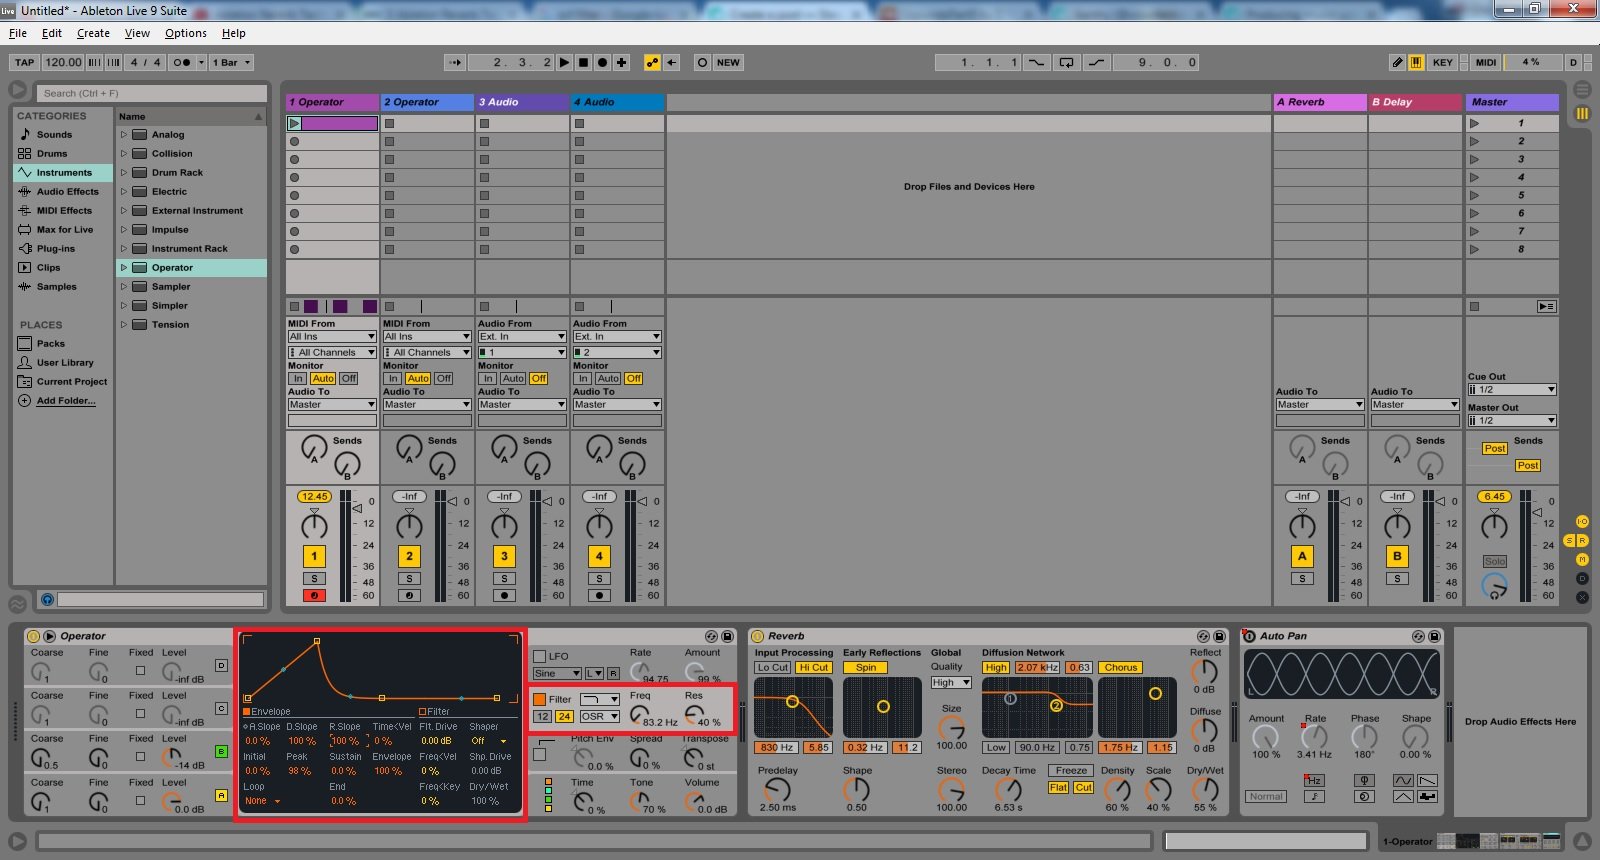
Now let's move to the Filter's controll panel:
- Select the LowPass, OSR filter type from the dropdown menus
- Adjust the Frequency knob to around 80-90Hz
- Resolution to 40%
At the envelope display:
- D.Slope 100%
- R.Slope 100%
- Peak 100%
- Envelope 100%
Everything is set. Let's add the Reverb:
- Decay above 5s
- add some Chorus on it
- set the quality to High
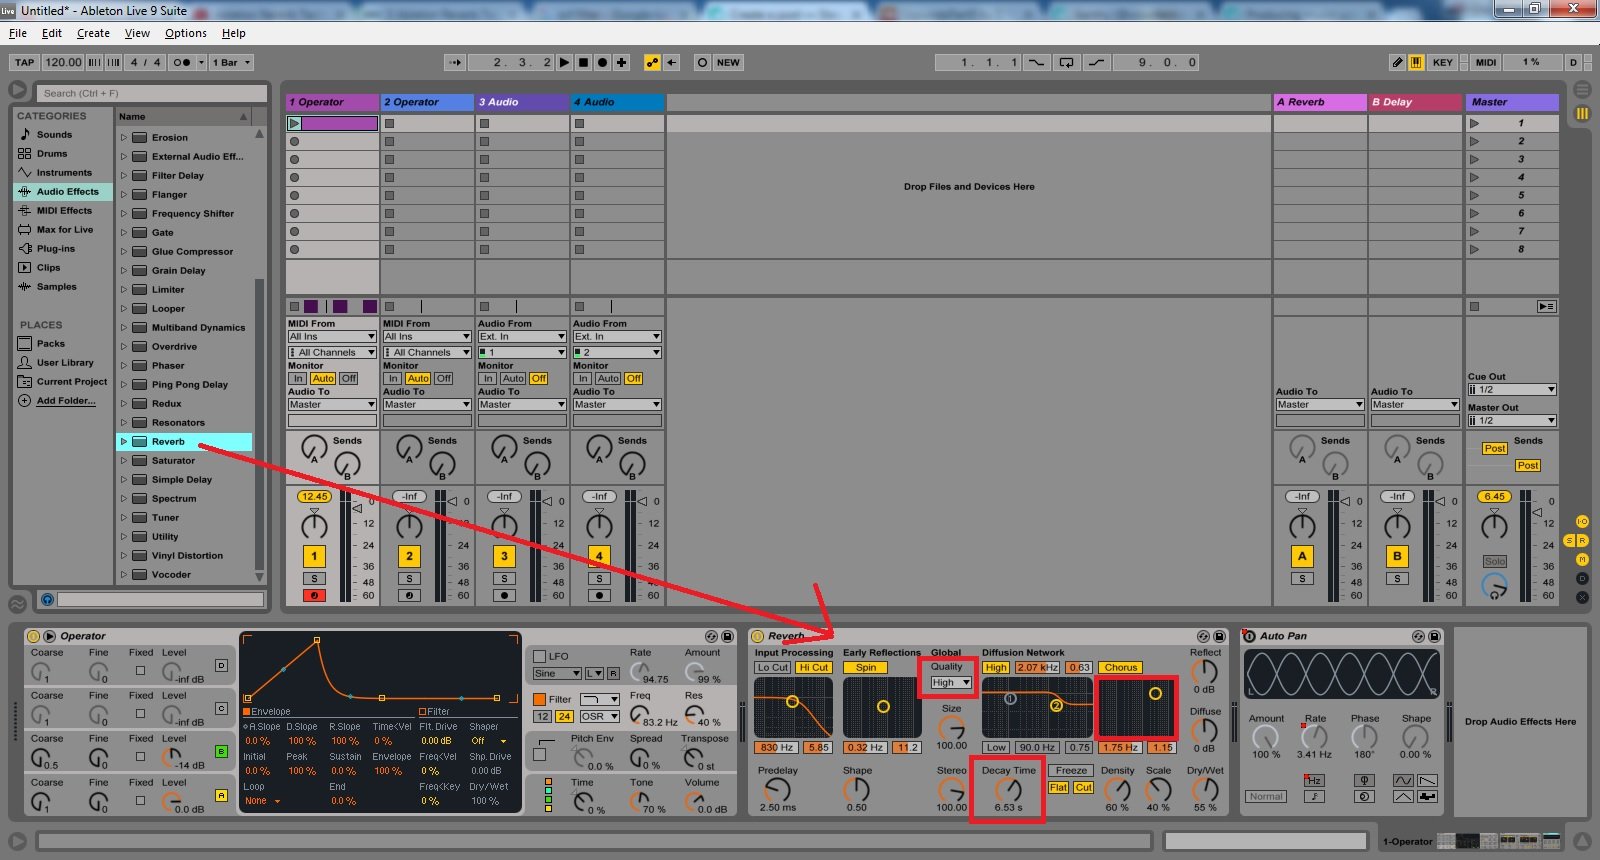
That's it... and now comes the fun part.
AutoPan swirls the sound left to right, you can make a lot of interesting automations, especially with the Rate and Phase knobs. If you turn the Phase all the way down or up it starts acting like a ring mod, so the sound goes around and around. Drawing an envelope for the Rate will serve as a nice turn up or turn down effect. You also might want to change the wave type for a different sounding, but from this point it's all just experimentation and adjusting things to suit your needs.
This is it... don't be afraid to change things.
STEM ON!
