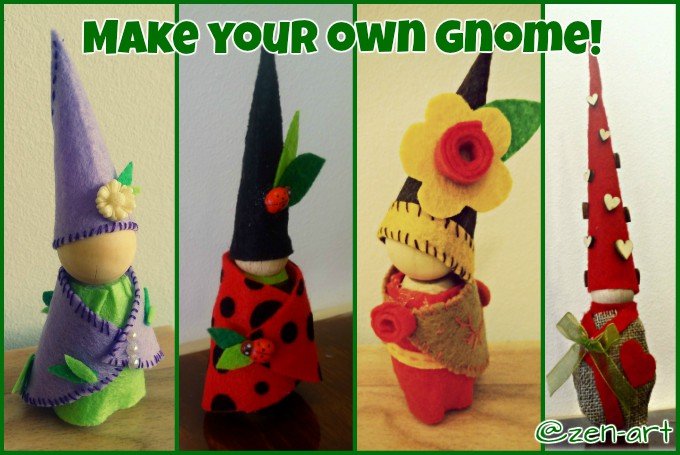
It is a start of a wonderful week. The Sun is shining, my coffee is delicious (as is my apple pie) and when I thought about todays posts, gnomes came to mind. It is needlework Monday and some sewing projects are in order. Why not cute little gnomes that you can make for yourself?

- scissors
- needle and various colors of thread
- felt or fabric in different colors
- a glue gun
- small decorations or buttons
- wooden peg (in one or two pieces)

I often use felt because I find it to be the easiest material to sew manually (do not have a sewing machine yet) but sometimes I do take some scrap fabric too even dough it is slippery in my hands. If you use a sewing machine any fabric will do and if you sew manually then I definitely recommend felt.
Wooden pegs can be bought in any hobby art store and they do not cost much. I buy them in two pieces, body and the head separately and then glue them together using a glue gun. In Croatia, I think they are around 3,5 HRK which is 0,5 euros, a good price if you ask me.
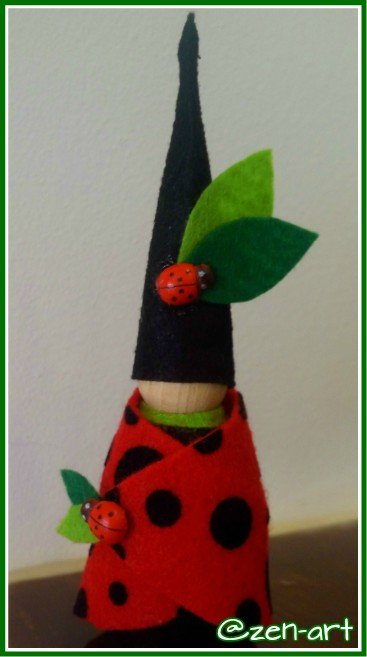
As for the small decorations, you can use plastic or wooden ones. Those are tiny details that will make your gnome stand out. I love small ladybugs, buttons or beads but I did make a few of my gnomes with just felt alone.

I tried making one as I go and it did not turn out as good as those that I planned ahead so I decided to always plan it and prepare my self before making one. You can draw it if you have some artistic skills or just write down what your gnome will look like.
I usually take a piece of paper and write down all the pieces that I will need and for what part they are needed so it looks like a simple list that has coat - green, hat- brown sort of writings on it. When deciding what color to use on anything I take them in my hands and just see what goes well with what. I love contrast so mixing dark with bright colors is my favorite thing.
There is, of course, the change-your-mind effect that often takes place and it happens with decoration pieces. I plan what little part will go where and then when the time comes to put it there I decide against it and either change the piece altogether or put it somewhere else. Some things you can plan and imagine but can not know how they would look until you actually see them.

I have once tried making the head separately from the body and then gluing them together in the end but was not satisfied with the results so my advice is to first glue the two wooden peg pieces together and then go along to sewing the clothes for it.
While your glue on the peg is drying out, take your felt or fabric and measure how big your clothes pieces are going to be. Cut them out and glue them around the body of the peg. You could just make a little coat but then you gnome would look naked underneath. Always glue a little dress/shirt around the body so it looks like it has clothes on.
After you have the main clothes on the gnome, there are still two things left, the coat and the hat. Use a thread that is different in color from the fabric and make a little stitch around the coat and the hat. You will glue it, but the stitch gives a gnome-y look. When you are done with the stitches, glue the hat on the head and coat on the body.
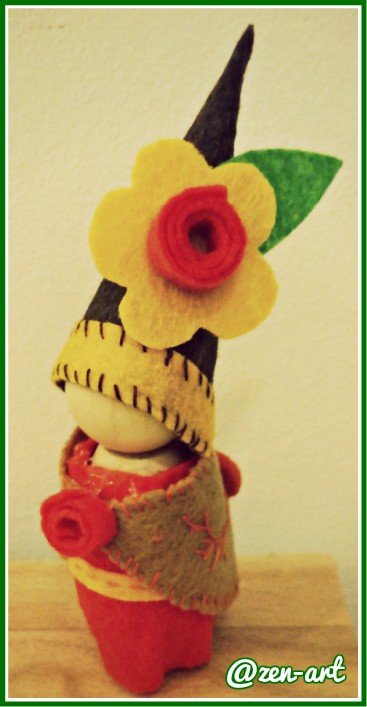
The finishing touches are the most important. Decide if you want your gnome to have a flower, leaf, a bug or something else on it and play a little with different decorations and small felt pieces to make your gnome as cute as it can be.
Do you like my gnomes? Let me know in the comments which one is your favorite.

KEEP YOUR SMILE ON!
All images used in this post are mine and made by me, please ask for permission if you wish to use them, thank you.
For my recent Philosophy of hapiness posts follow these links:
- What is the difference between fault and responsibility?
- Are you carrying prejudices?
- Thank your parents, they did the best they could
- Where attention GOES, energy FLOWS
- How to decipher your DREAMS
- Panic attacks - a heart-attack monsters
For the "Into the quantum world..." novel that I am writing exclusively for steemit click here:


made by @simgirl