Greetings my dear friends of Steem Kids. 💜🎨
I am pleased to present to you my tenth post in the community as a Digital Drawing Tutor. Through my drawing lessons, I will be teaching and guiding you in the wonderful world of colors, based on everything I have learned self-taught. I hope you like my work and that you learn a lot!

Are you new to drawing or already experienced? My dear student, you can still participate in this lesson and learn more every day, because “You don't need to be an expert to be a great artist” – Rui Torres.
Today I present to you my tenth lesson, related to the Ibis Paint X Drawing Application, which I will be using for the lessons and will be the main protagonist of them. You can download it through the following link: Ibis PaintX
Options to modify Digital Drawing Layers
Next I will continue explaining the options or tools that allow us to modify the drawing layers. This will be the final class on the use of layers, to focus on the next ones on how to create a digital drawing, once all the basic tools and options of the application have been understood, explained in the previous lessons.
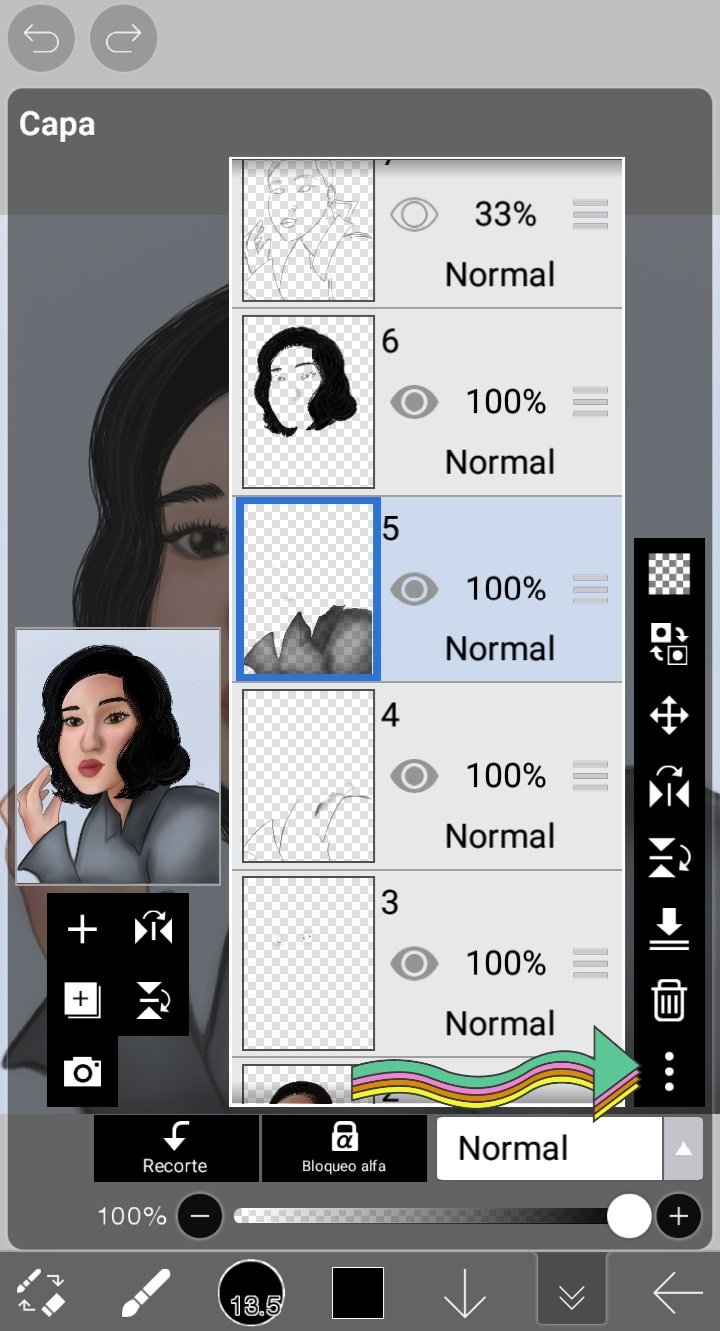
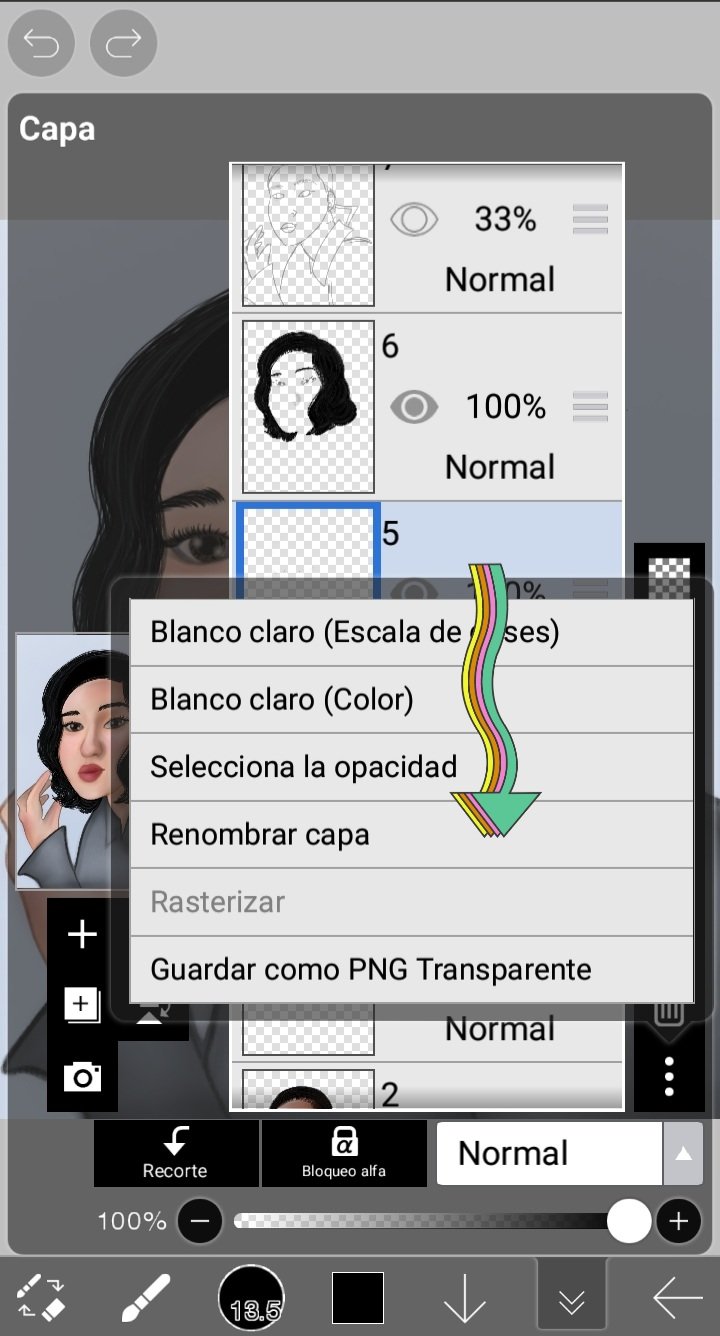
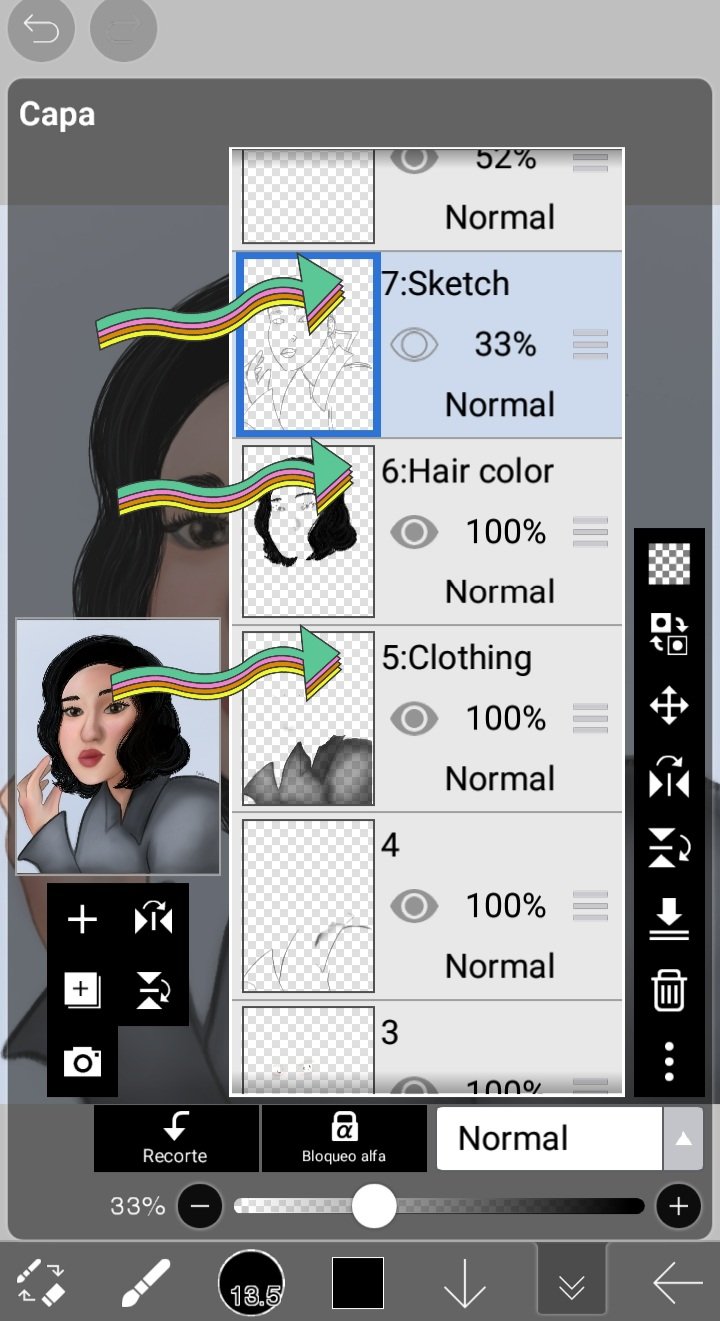
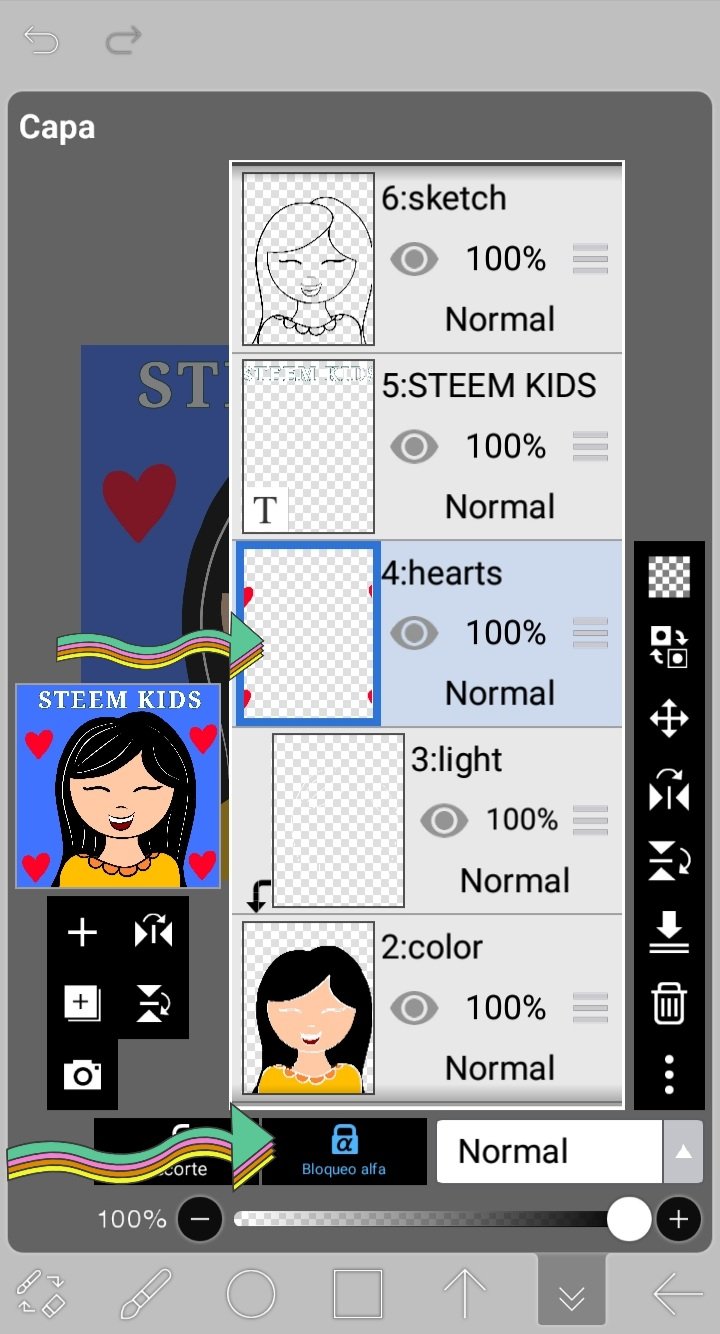
Change the name of the layer: Having a good identification of the layers allows us to work well and with a correct order. This option is located in the three vertical points, at the end of the right side options, as seen in the following image:
When clicking on these three points, several options appear and we must look at "Rename layer" where we can name each layer (sketch, base color, shadow, lights, background, among others) and then click on the option "OK" to save the change.
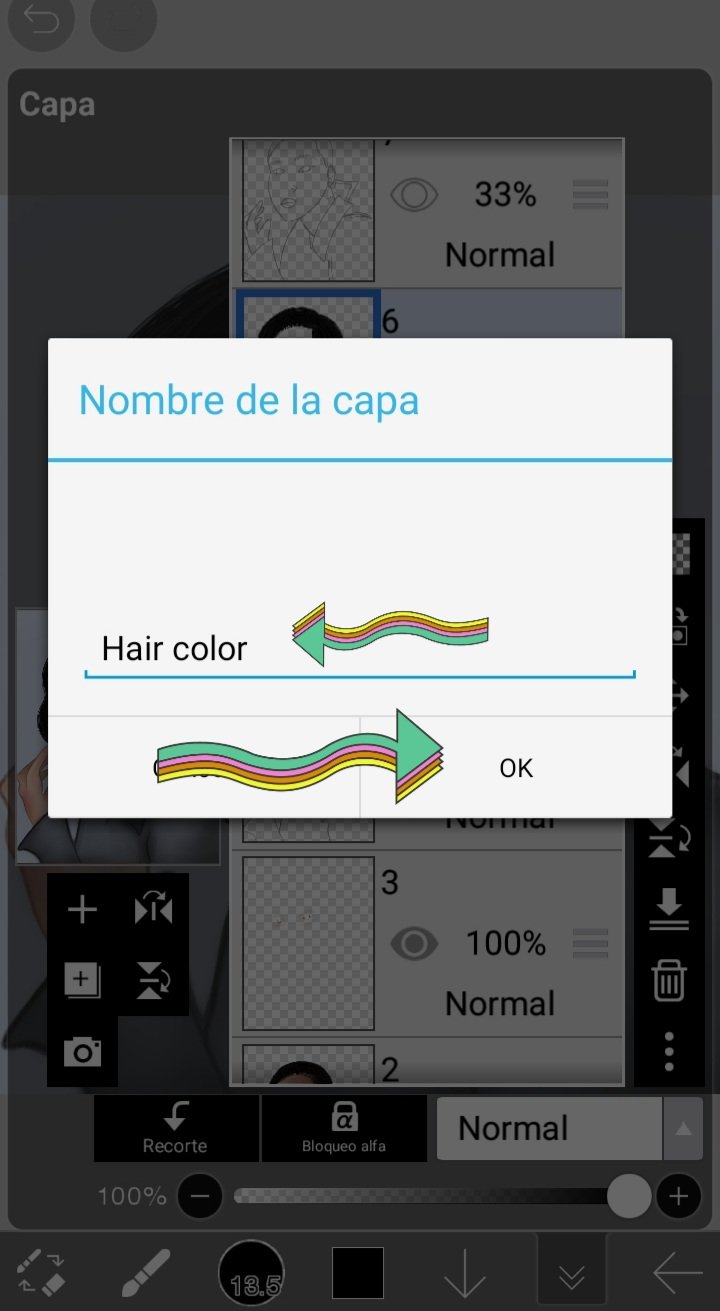
As you can see in the following image, I gave the names to the layers of the drawing, these being "Sketch" "Hair color" and "Clothes". I always recommend identifying the layers, so as not to draw or edit the wrong one, which can damage the drawing and have to correct it, which will take time depending on the case.
Clipping: This option is located at the bottom or above the layer opacity bar, as can be seen in the following image, and allows you to draw or edit only a part of the drawing that has been colored in a previous layer.
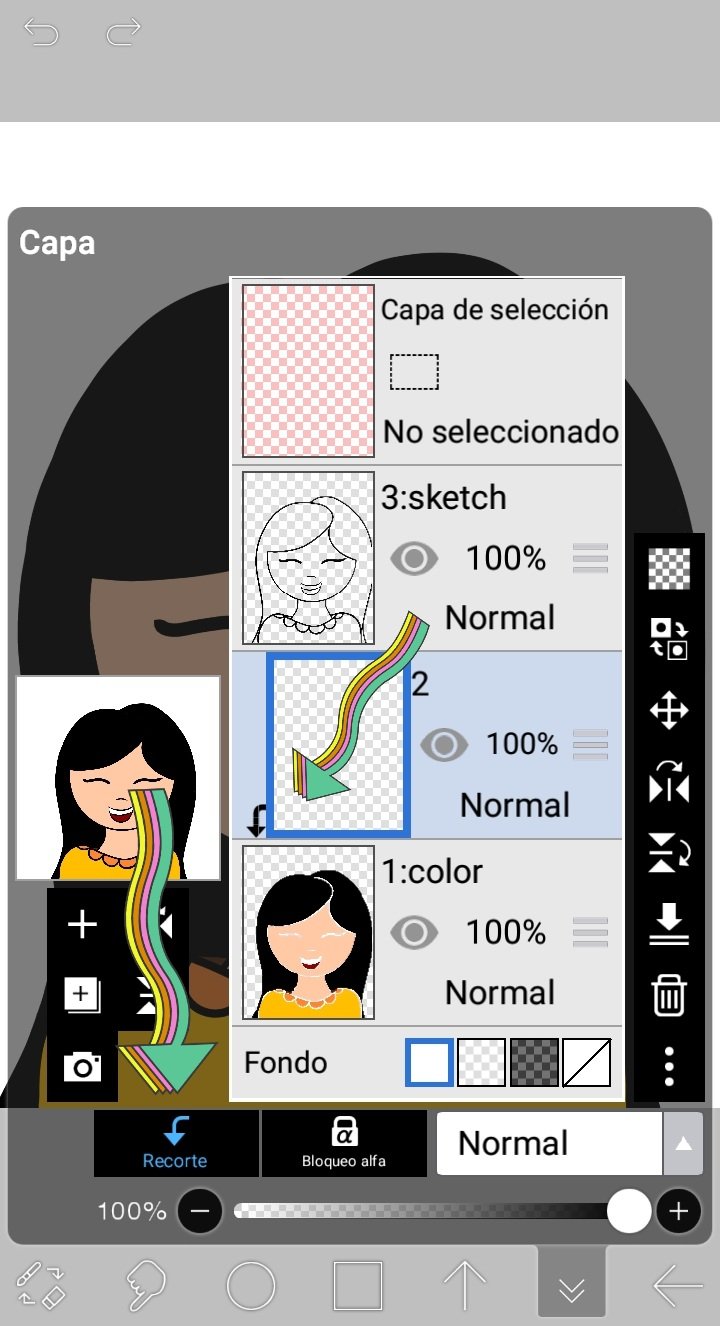
For example: You want to make a line that is only on top of the drawing, without affecting the background as seen in the following image:
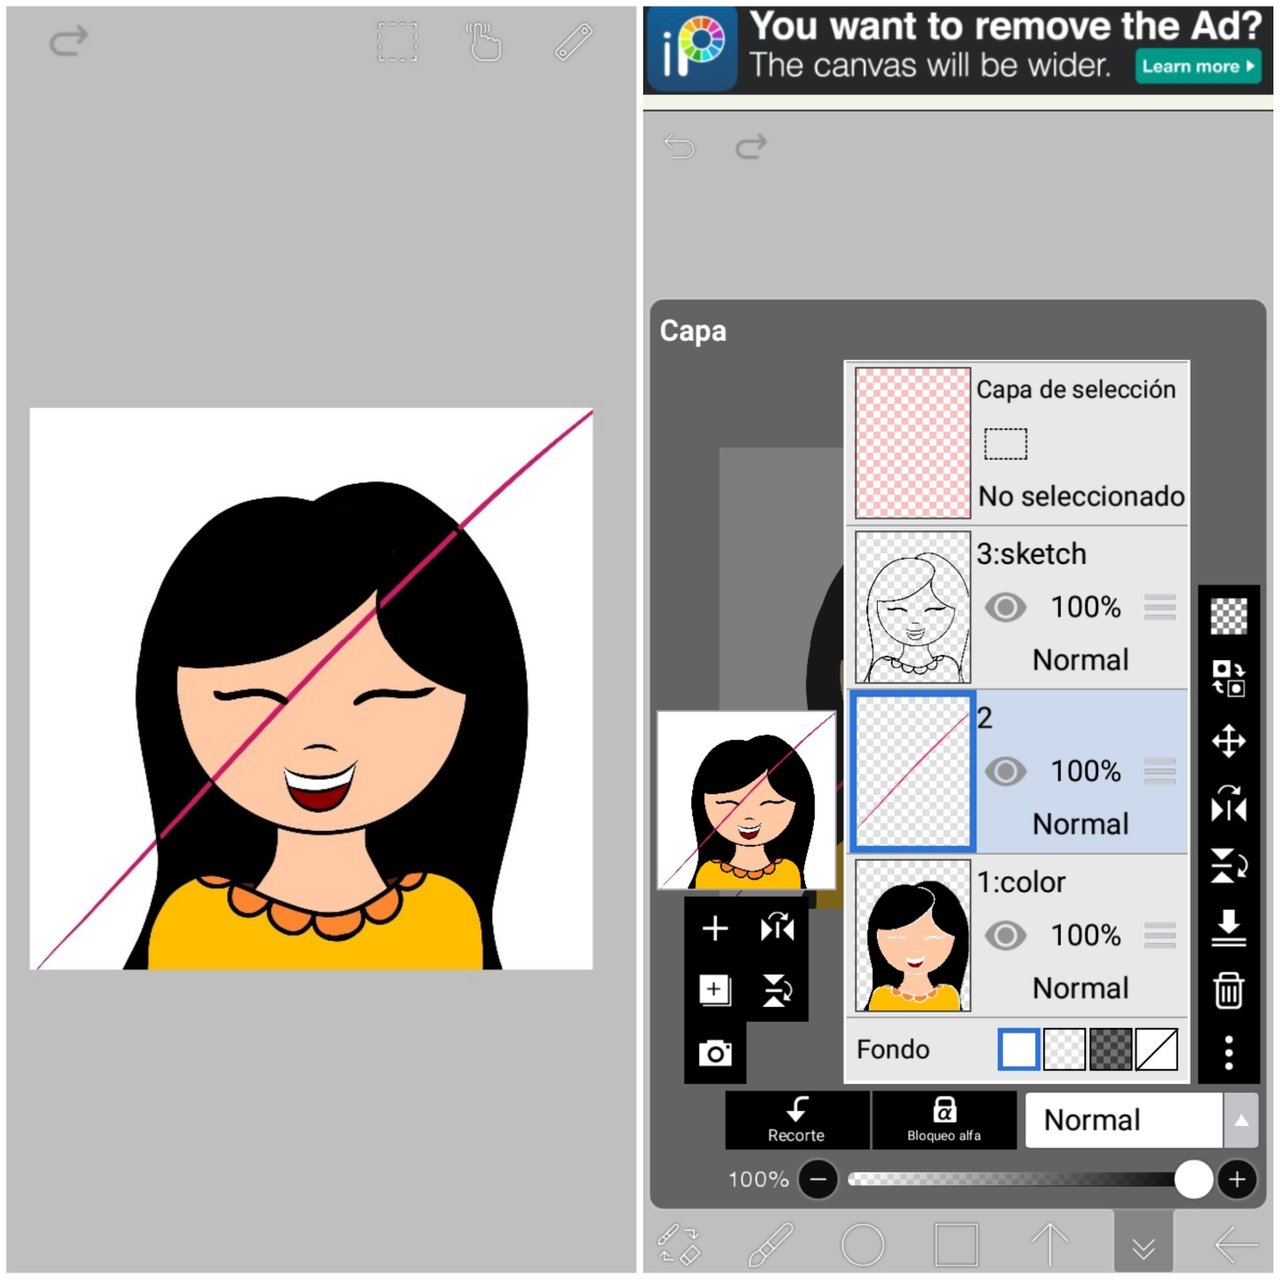
What you have to do is click on the desired layer (where the line is, in this example) and activate the "Clipping" option by clicking on it. This way, a black arrow pointing down will appear in the layers section, and when you view the drawing, you will only have the line where the bottom layer color is. That is, the layer to which the clipping option is applied will be reflected in the layer below it.
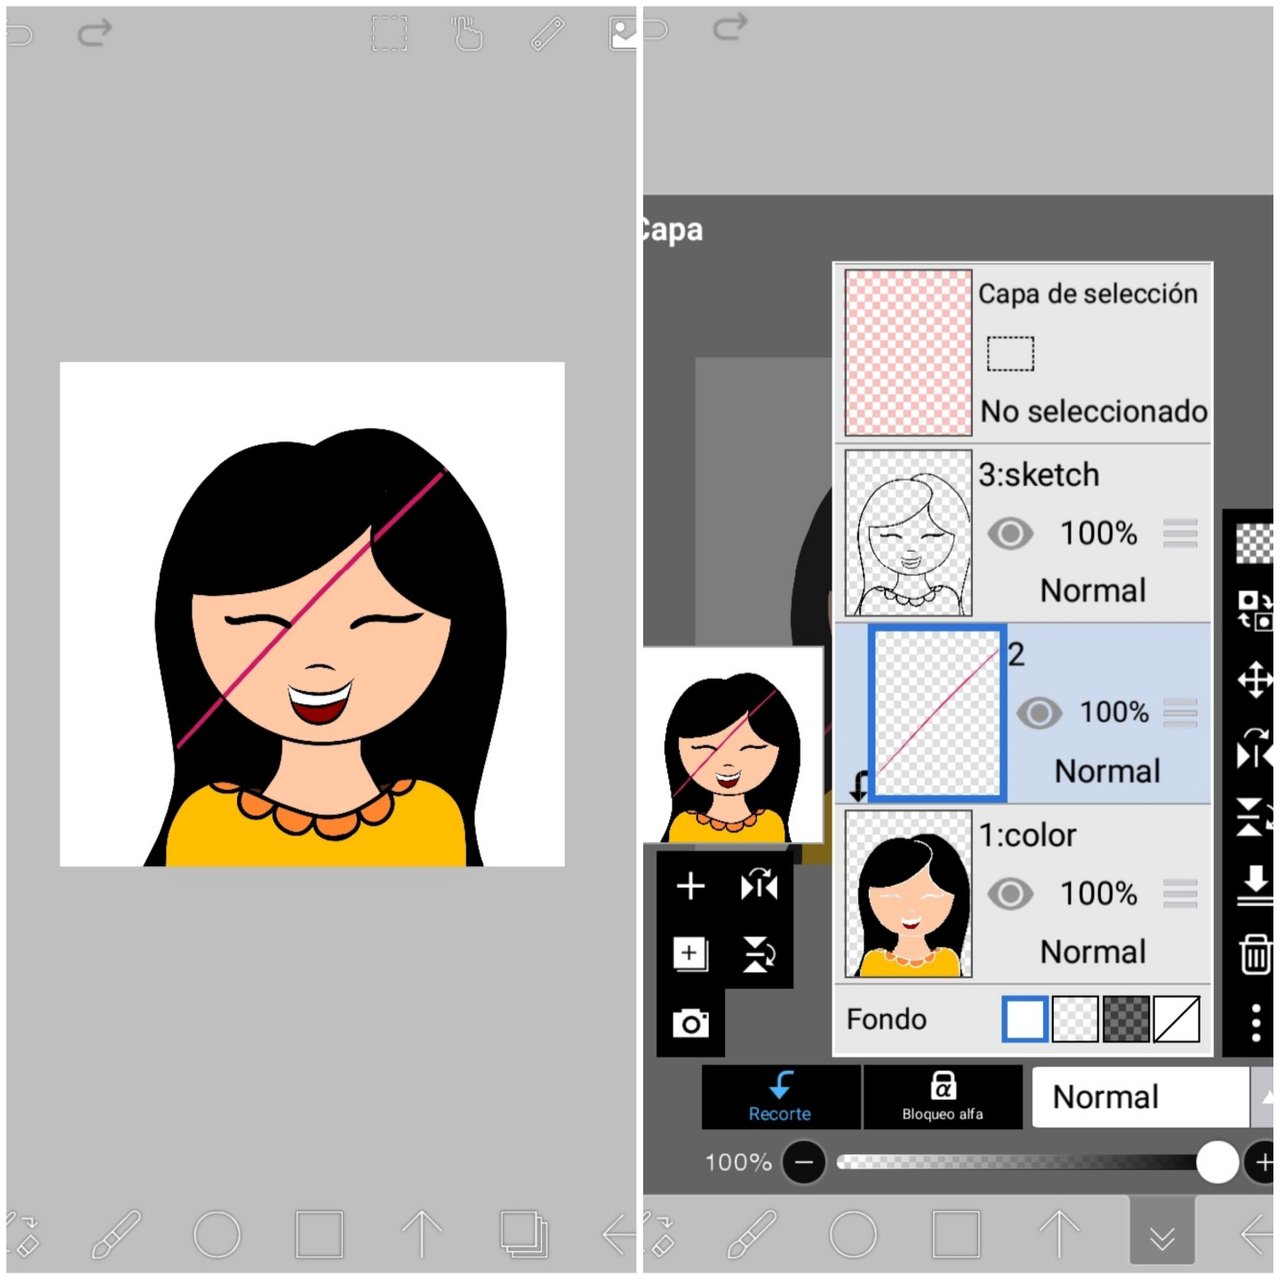
This option is widely used to add shadows, lights or details to the drawings. An example for the case of shadows is that in one layer there is the base color of the character's skin, and in a higher layer, when activating the "Trim" option, shadows can be added without interfering with the other elements of the drawing (hair, clothes, background, among others).
Alpha lock: This option has a similar function to the previous one and is located to the right of it. An example of its use is as follows:
I drew some red hearts on the canvas and you want to add some spirals to them, but not go out of the shape of the heart, as it happened in the following image:
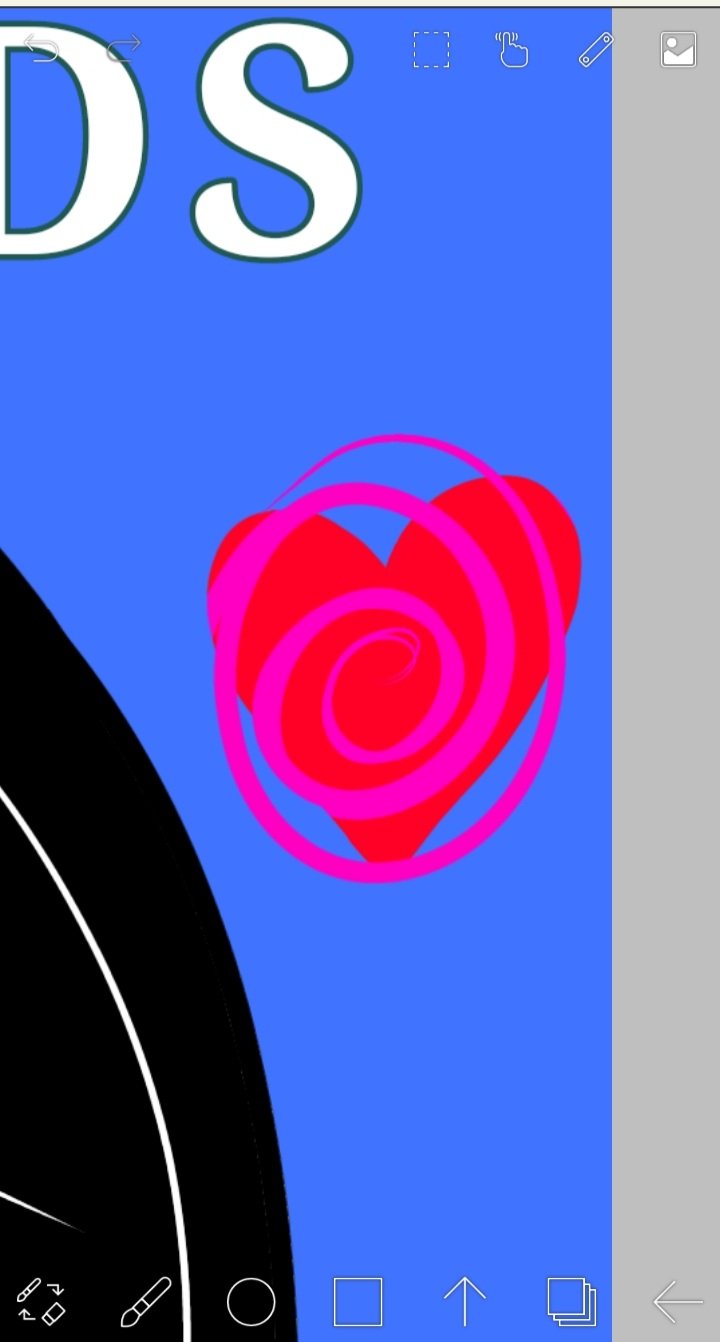
What you need to do is turn on the "Alpha Lock" option and draw the spirals on the same layer as the hearts. In this way, the latter will remain inside the heart and will not affect the blue background:
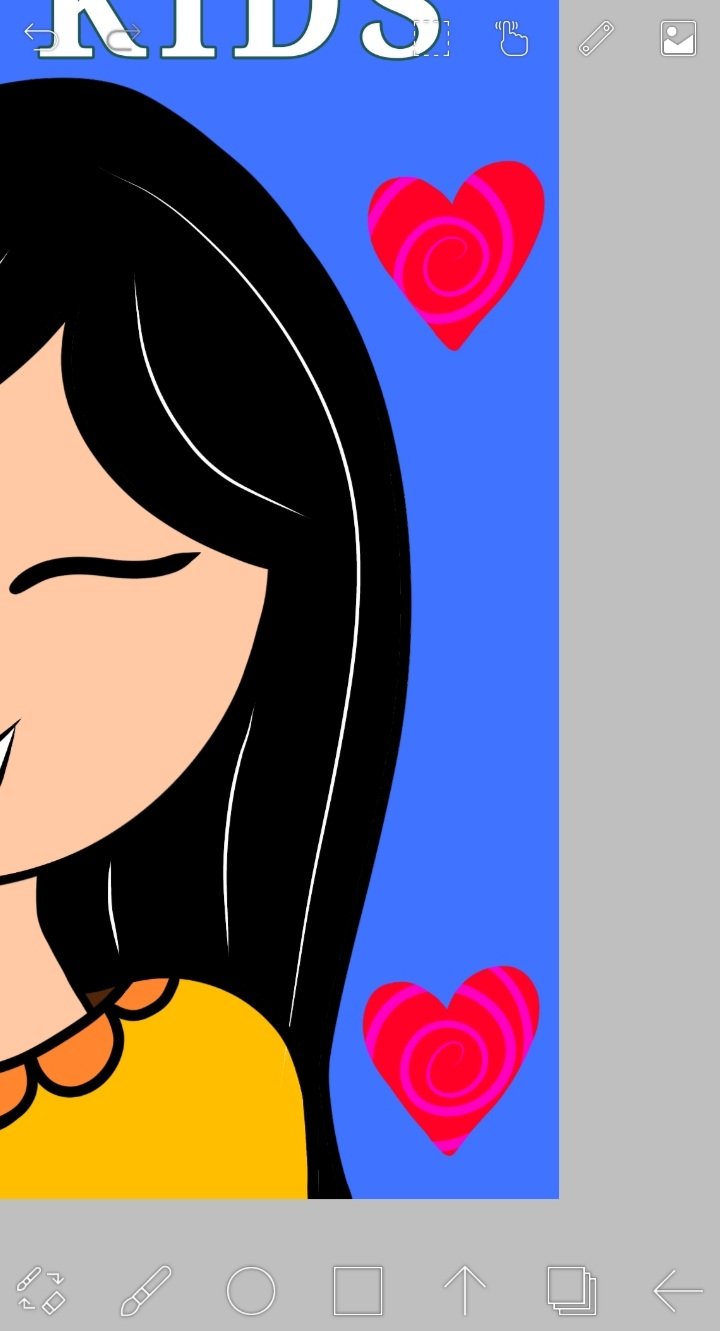
This is how the drawing for today's lesson turned out. It is a little girl member of Steem Kids, drawn with the basic options explained in the previous lessons and the present one.


Homework
Enter the Ibis Paint X Application, and create a free digital drawing of your choice, where you then use the 3 options explained in this lesson to modify the layers of the digital drawing. Present the step by step of your cute drawing as you wish, for example: by screenshots from the application.
Help Content: Compilation of my Lessons:
🎨Lesson 1: LINK
🎨Lesson 2: LINK
🎨Lesson 3: LINK
🎨Lesson 4: LINK
🎨Lesson 5: LINK
🎨Lesson 6: LINK
🎨Lesson 7: LINK
🎨Lesson 8: LINK
🎨Lesson 9: LINK
🎨Lesson 10: LINK
Rules for doing your homework:
1- You must be a community verified child.
2- You must make your publication in the Steem Kids community and leave the link of your entry in this publication, in the comments section.
3- You must belong to club5050, club75 or club100.
4. Your publication must have a minimum of 300 words and the appropriate tags; being essential # steemexclusive.
5. Your content must be your own. If you use information from a third party, indicate the sources correctly to avoid plagiarism and its consequences on the platform.
6. Use the tags in your publication correctly.
Recommendations for doing your Homework:
1. Please resteem this post so more kids can join the lesson.
2. If you have any questions, leave them in the comments of this post. I will gladly answer you!
3. Have fun and learn Make your publication without any fear! I will grade and correct you with love and respect.
Homework is accepted until the expiration of this publication.
10% of rewards from this post go to the @steemkidss community account
CC: @patjewell, @ngoenyi