Hi friends!
Starting with the drawing of a rectangle that we will divide in two.
By drawing diagonals from the corners, as shown, we will find the midpoint and can draw a perpendicular line at the crossing point of the diagonals.
Then, we erase the diagonal lines and just leave the crossing point.
(In all the drawings the thin grey lines will be help lines that we will finally erase and the black lines will be the definitive lines).
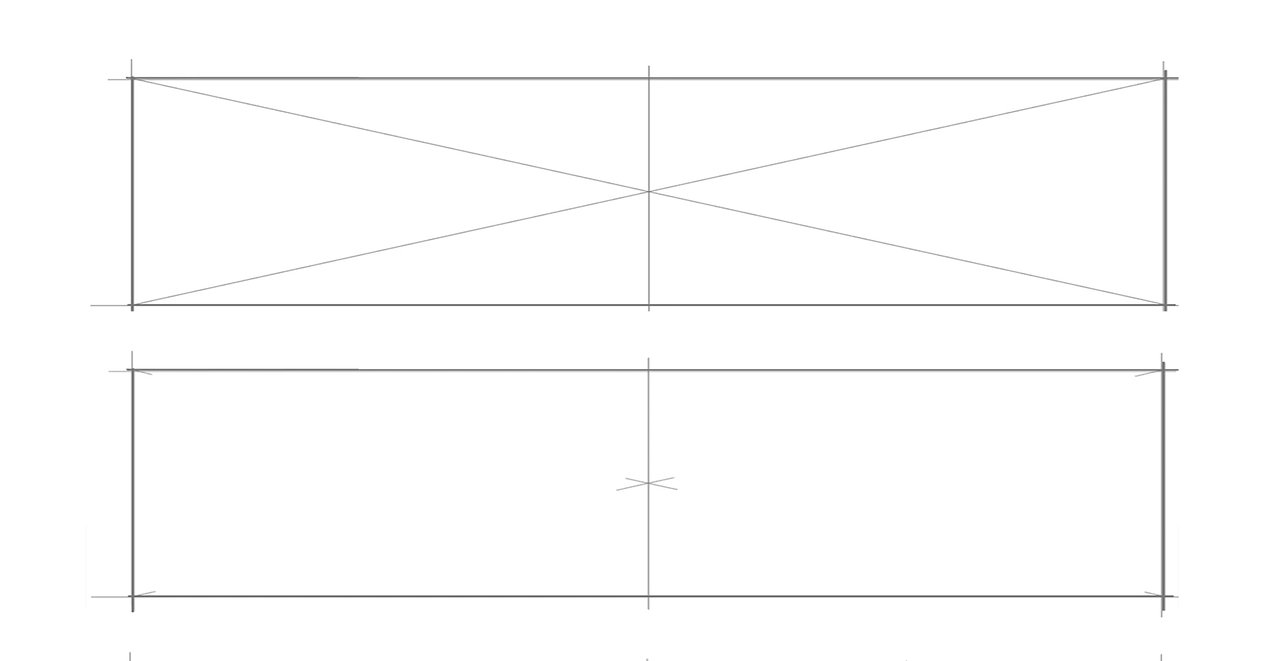
Repeating the same process to both sides of the division line we get to divide the rectangle (the wall) into four.
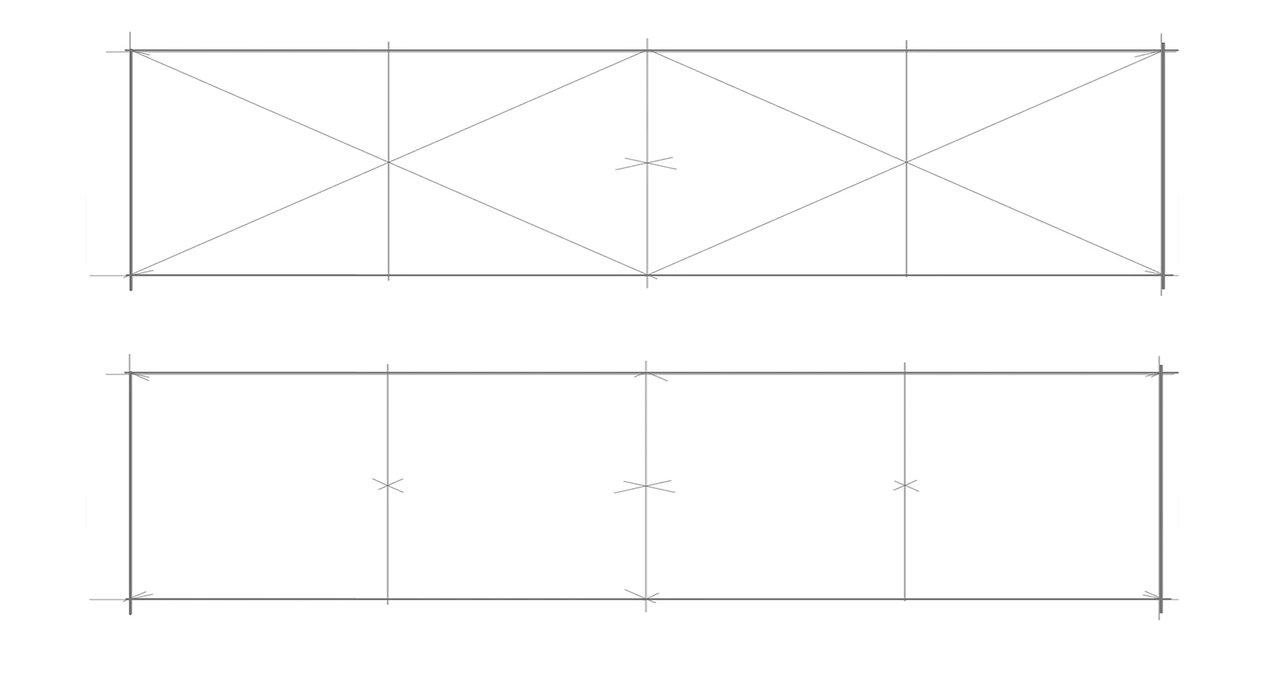
Once again the same process to obtain eight divisions. Then, by drawing a horizontal line in the centre of the rectangle, we obtain a rectangle divided into sixteen parts.
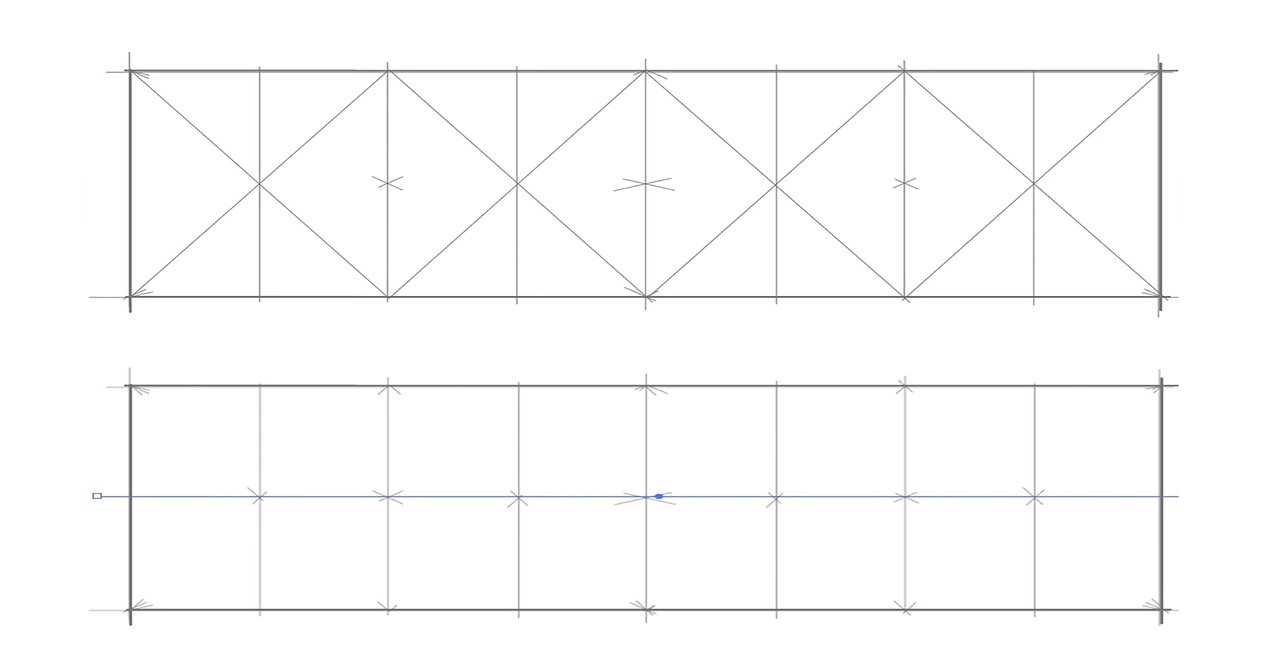
Draw auxiliary lines inside the rectangle as shown below, then draw the final lines to form the inner squares. Finally, remove all help lines to get the result shown bottom.

Now, imagine that this drawing above represents the front view of the wall of a building.
We will draw this front view in one-point perspective.
In the left corner of the drawing paper, we make the helplines starting with the height line of our future wall.
At the bottom, we draw the eye-level line and also draw the lines starting from the ends of the height line to the vanishing point, as shown.
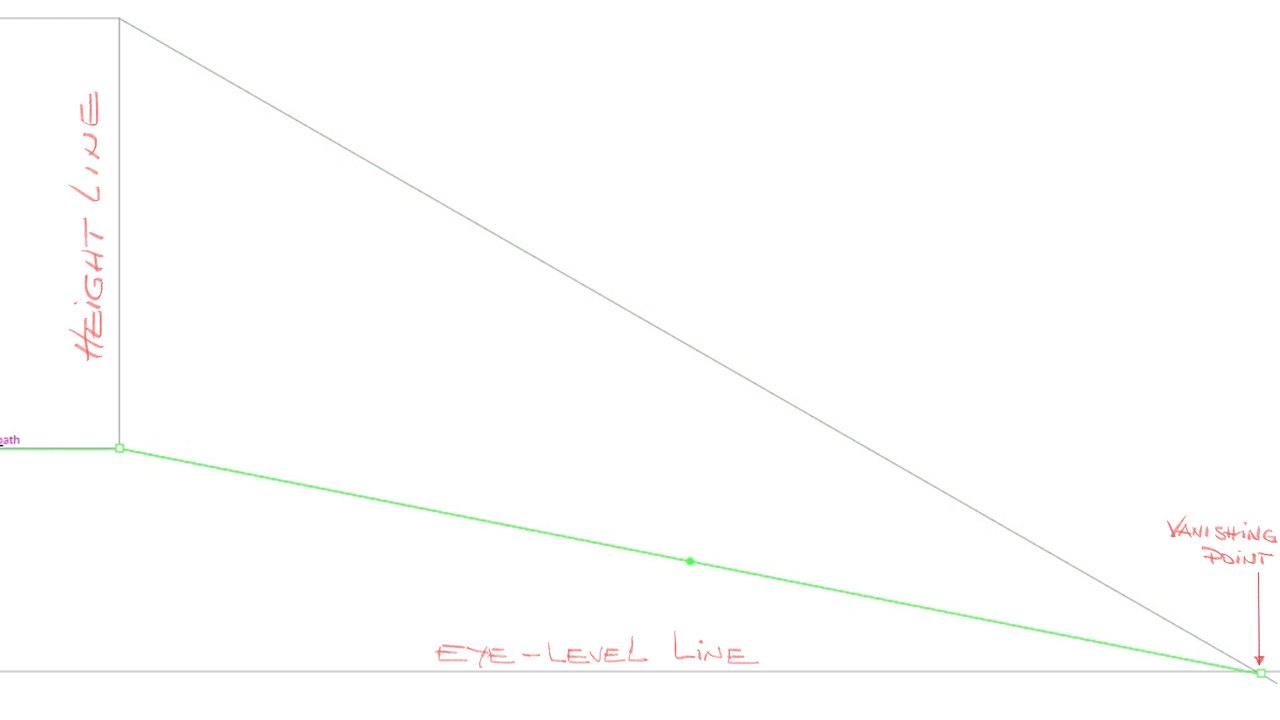
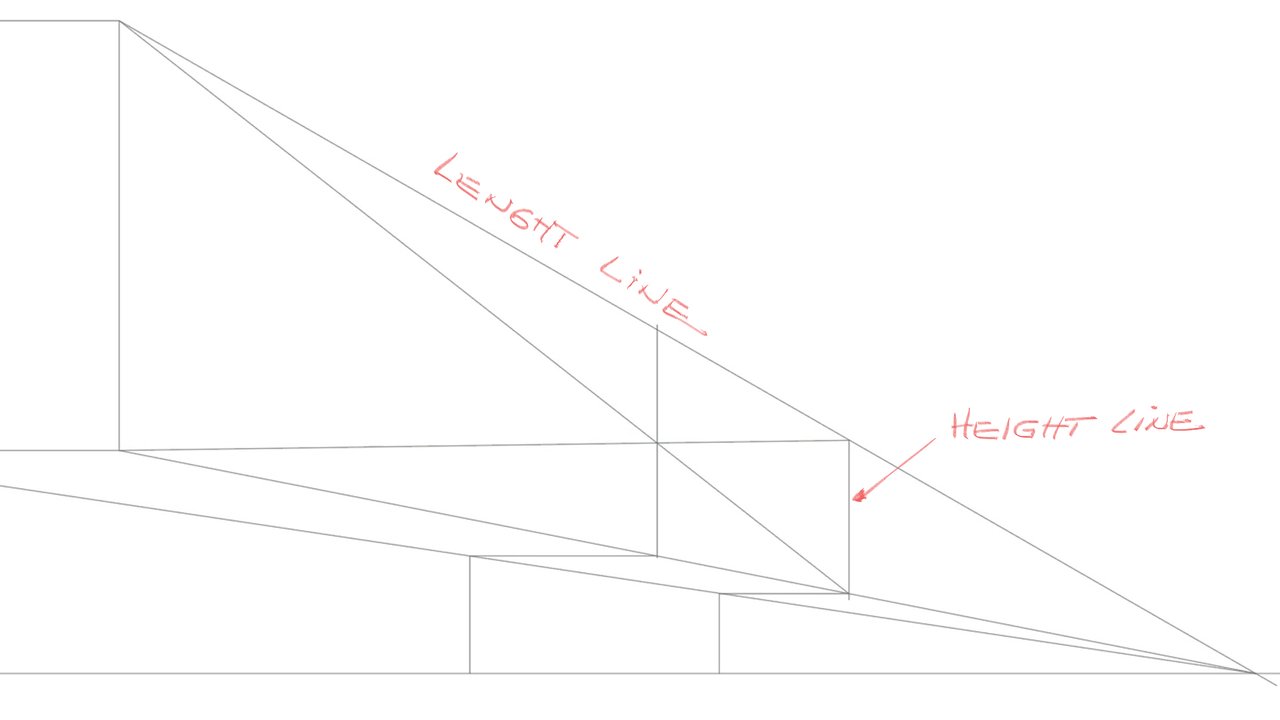
We'll define the length line of the rectangle, so we'll get the furthest height line for the rectangle.
We then start by drawing the diagonal lines to divide the rectangle as we did before in the front view.
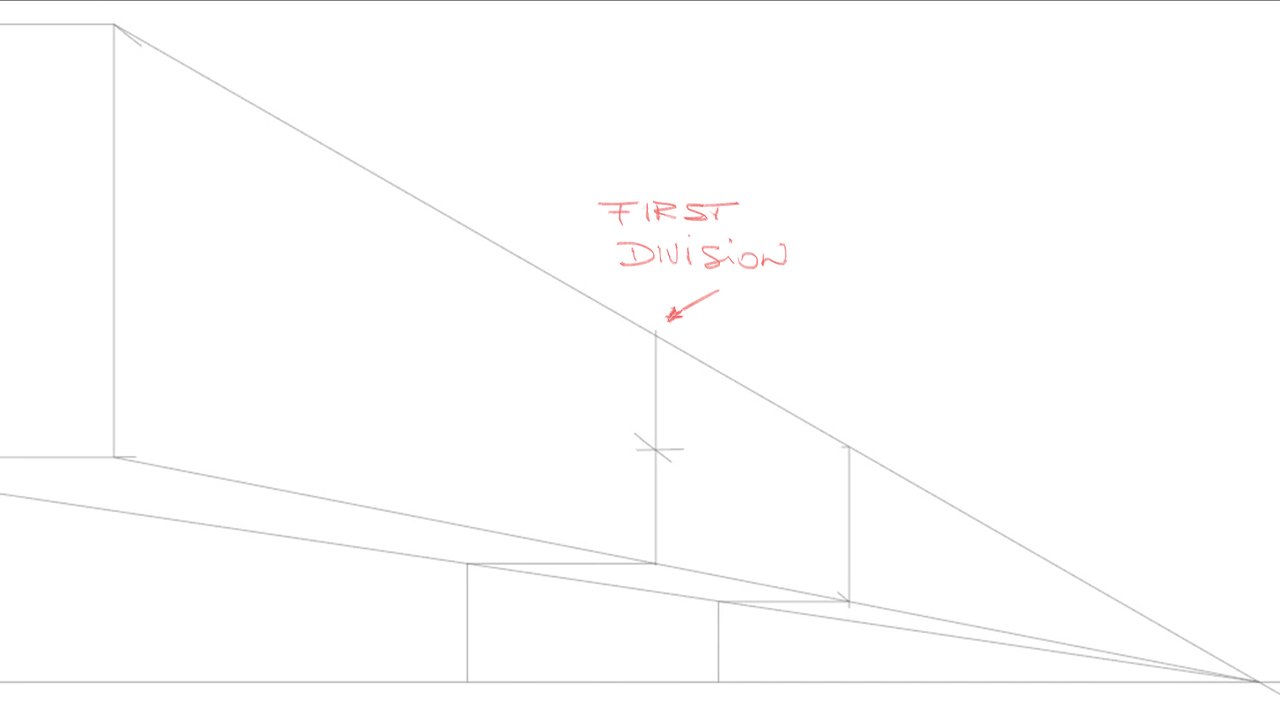
Here we have the first division, and we will continue repeating the steps we have already done until dividing the rectangle into sixteen parts.
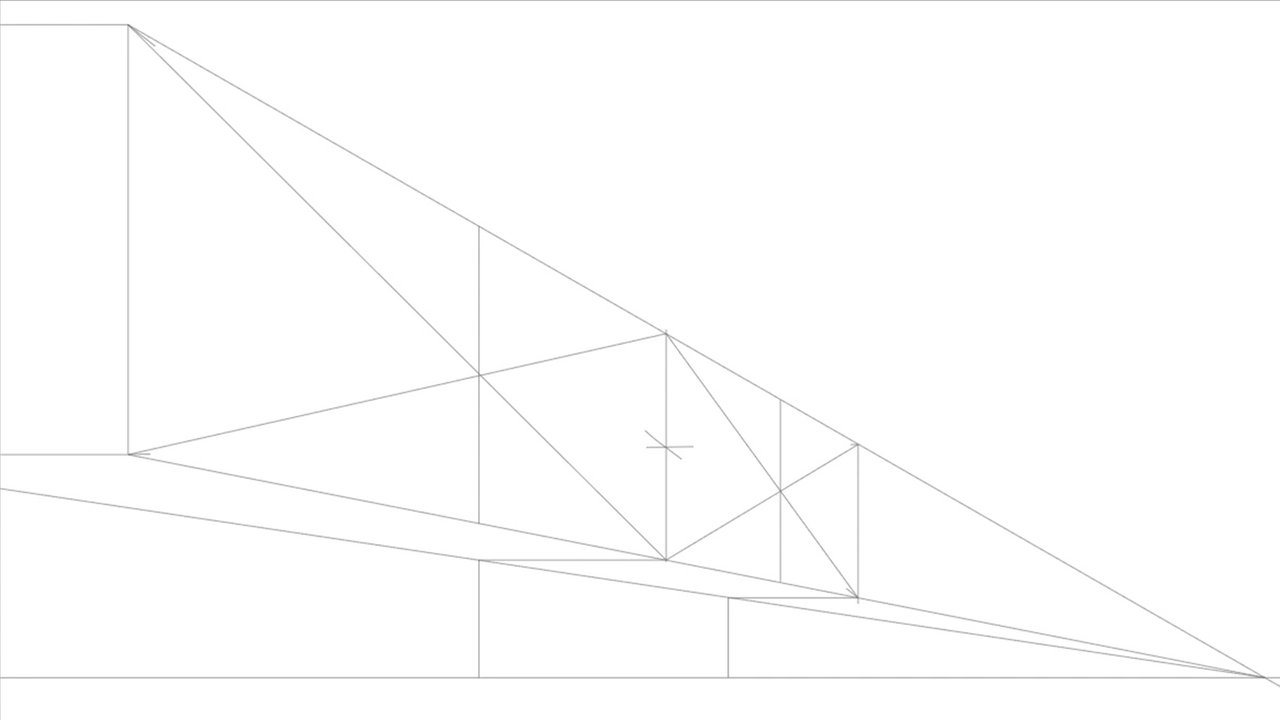
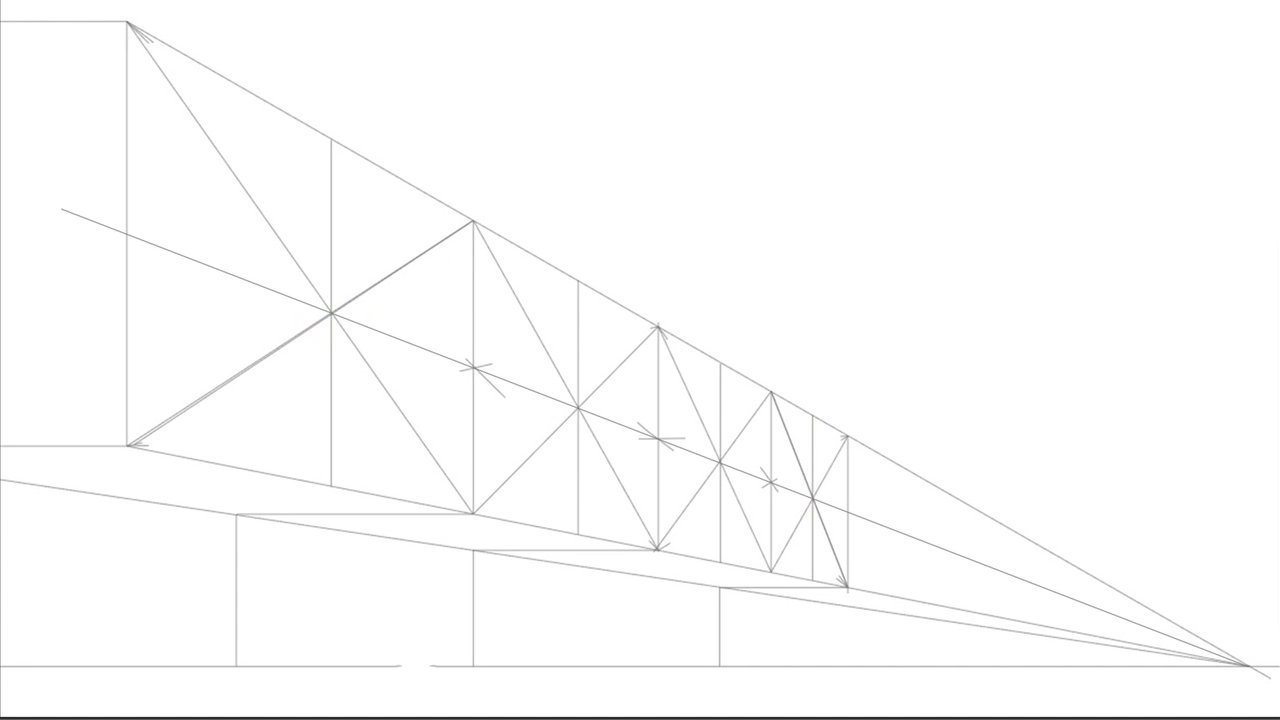
Drawing now the latest helplines for the front view.

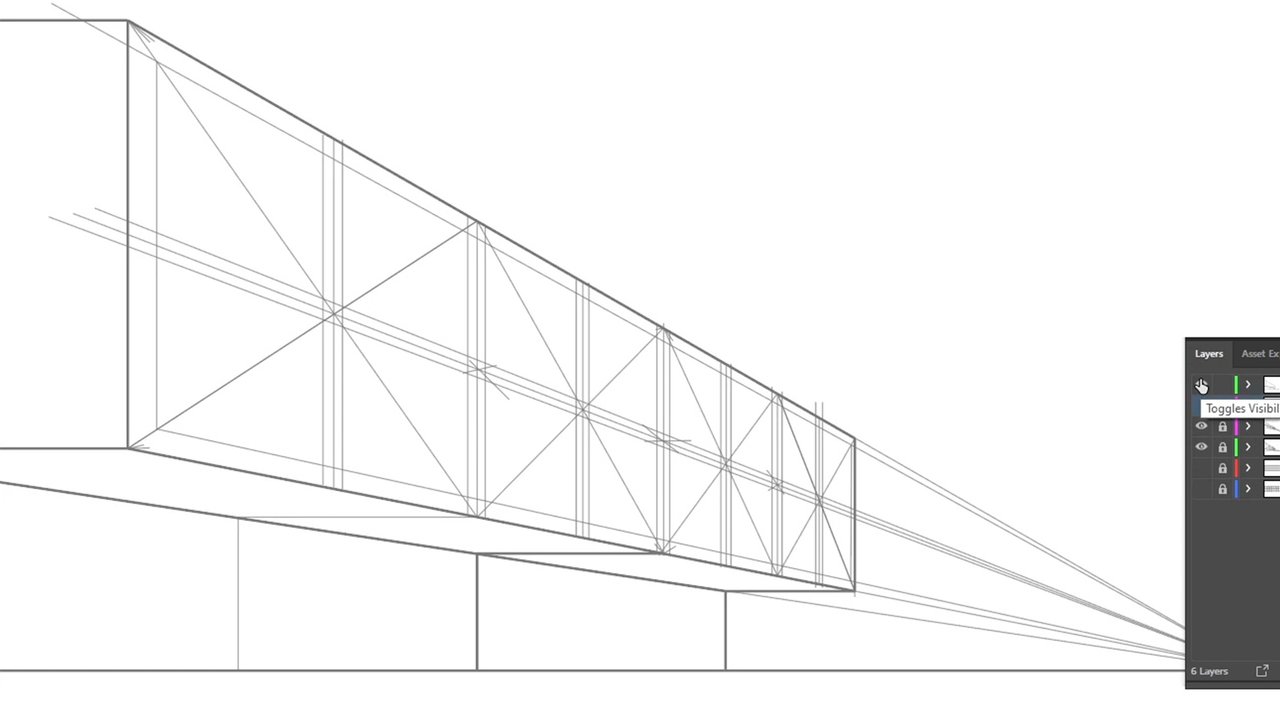
We now draw the final contours and erase the helplines inside the rectangle.
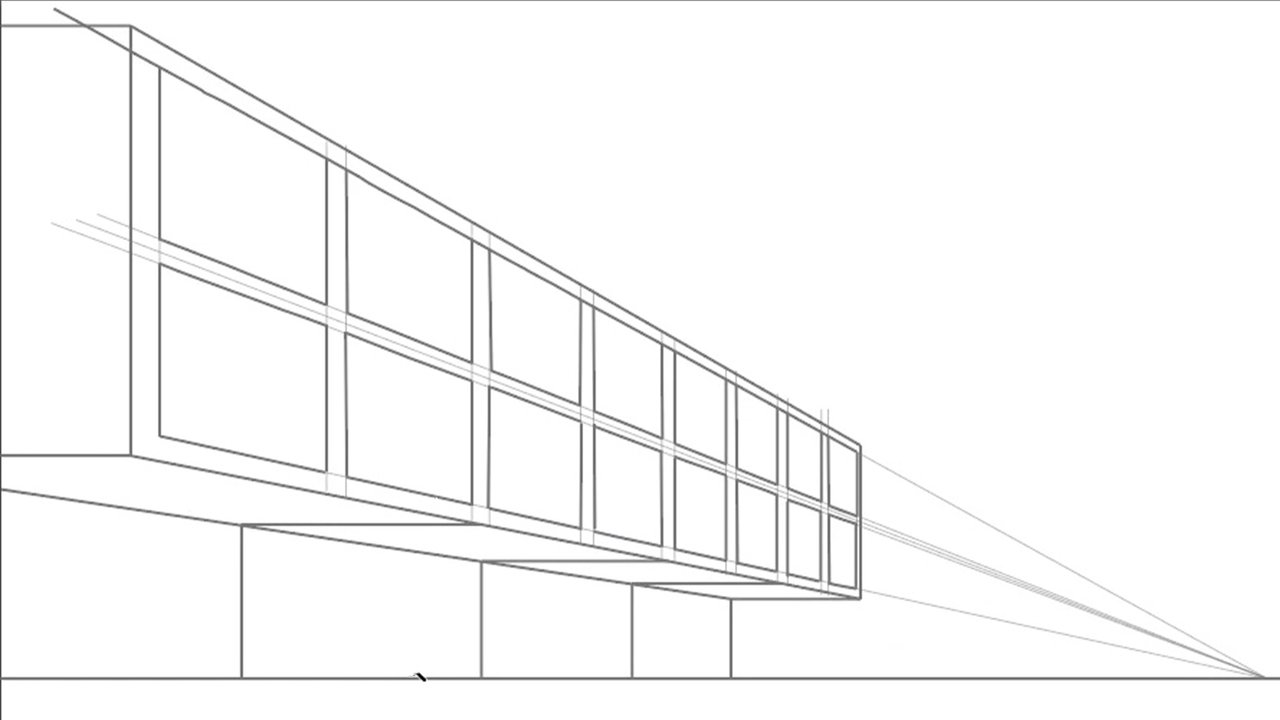
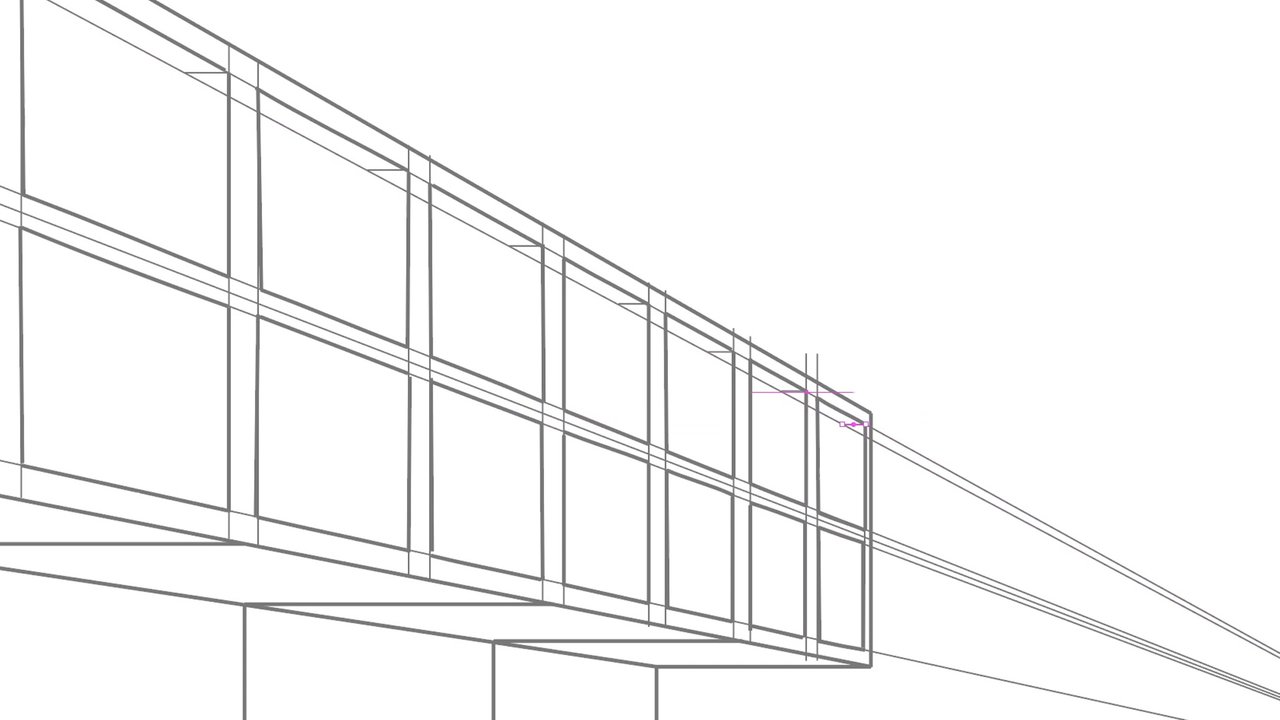
We'll go one step further by drawing the windows in our front wall view in perspective.
Draw a short horizontal line starting from the corner of the inner square as shown in the drawing (this line represents the depth of the wall), then draw a line to the vanishing point as seen in the drawing.
Then, we will be able to draw all the depth lines of each window.
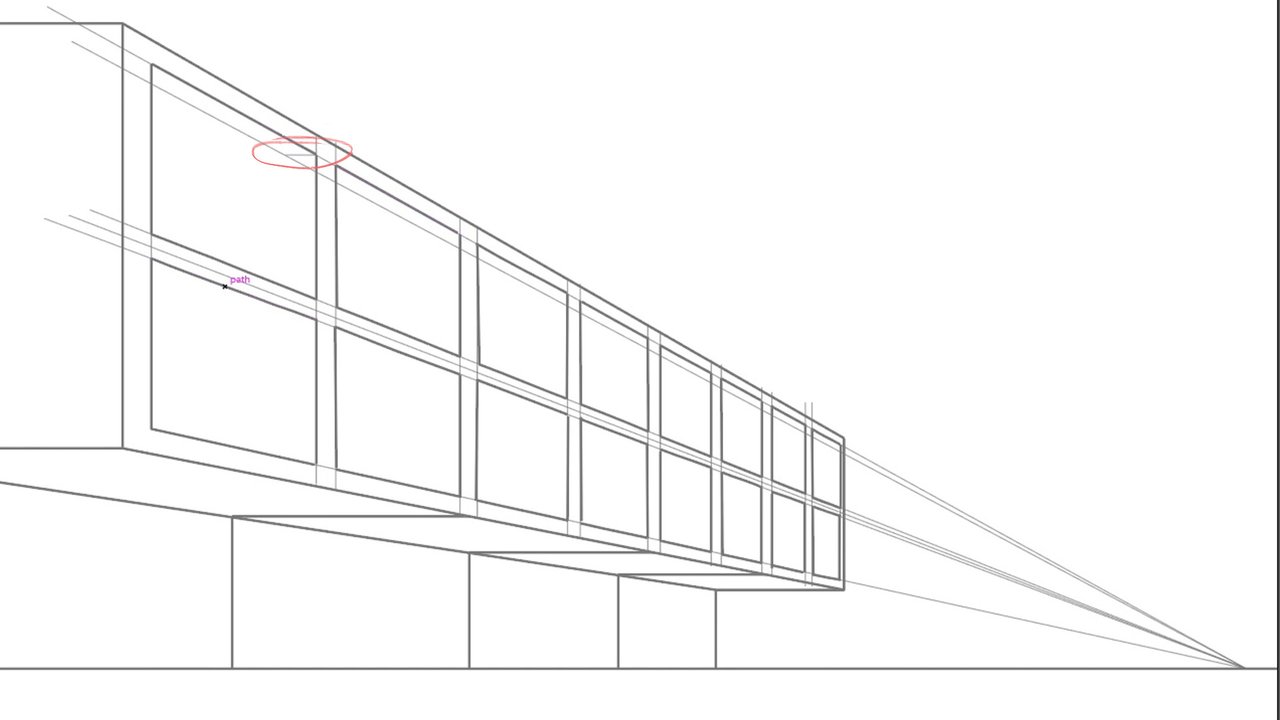
Here we will draw a vertical line starting from the intersection point as shown here.
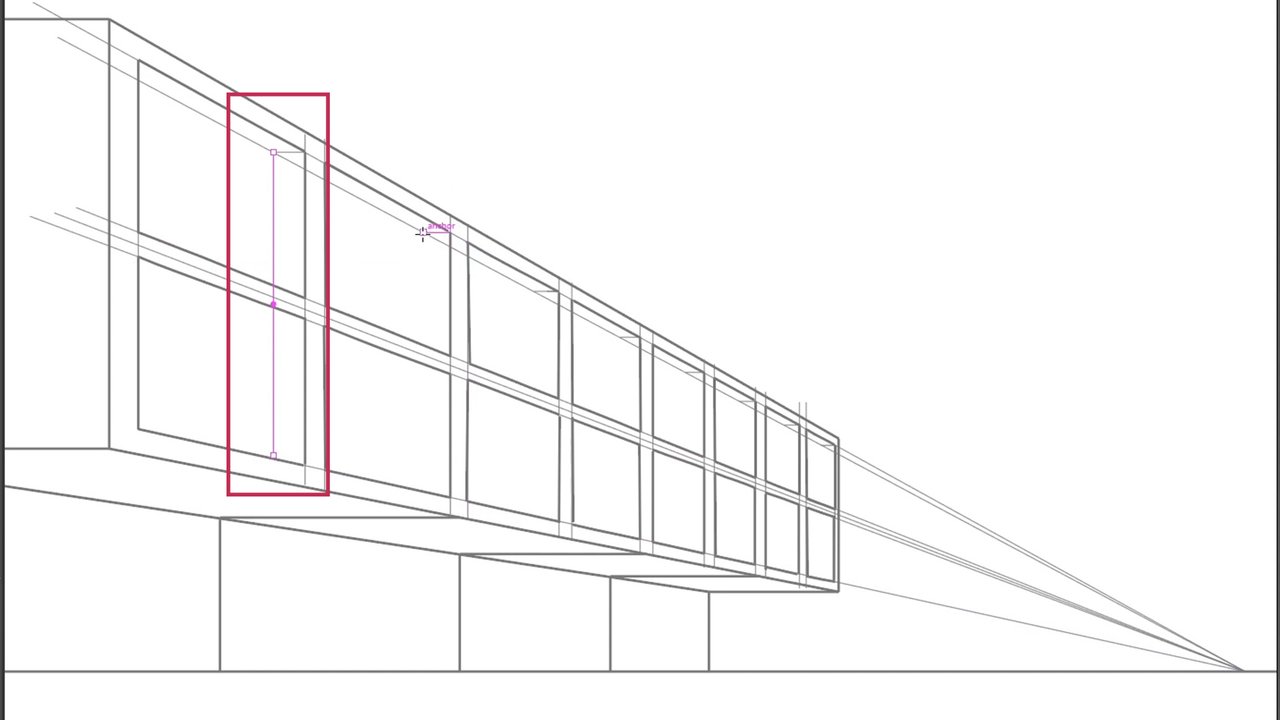
Repeat the same process at the bottom
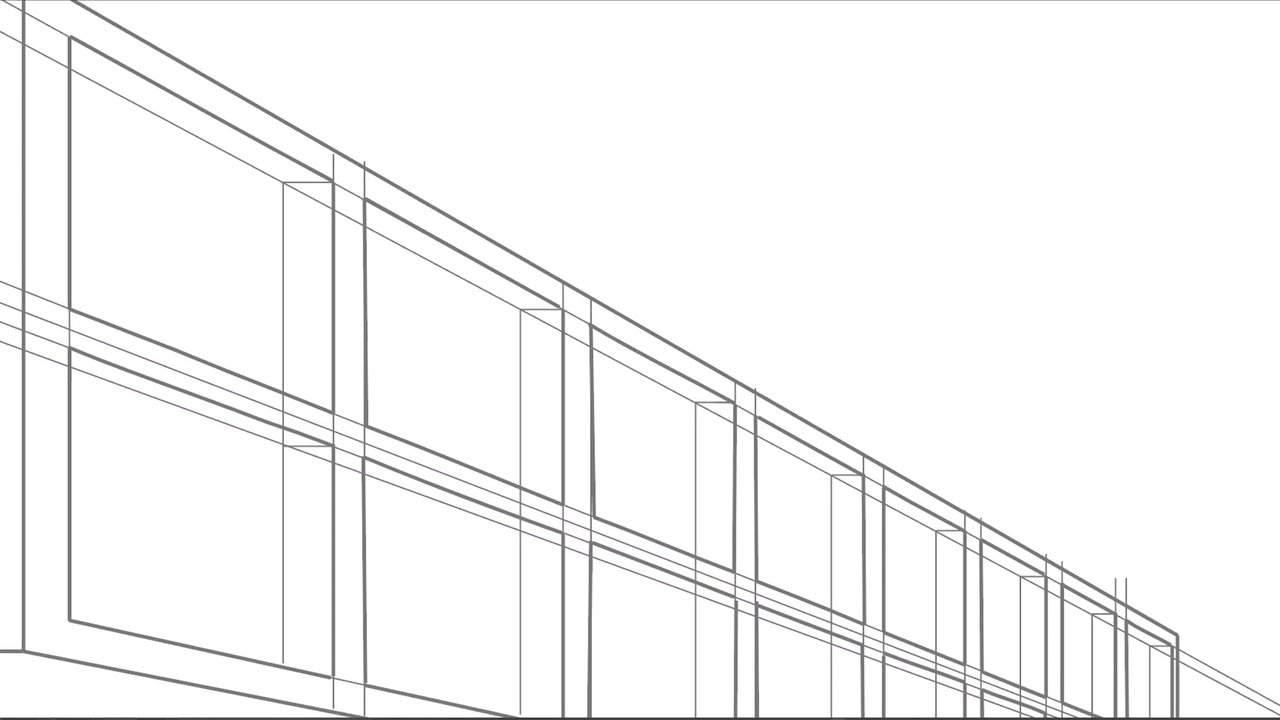
Finish by outlining the entire drawing and erasing all the helplines.

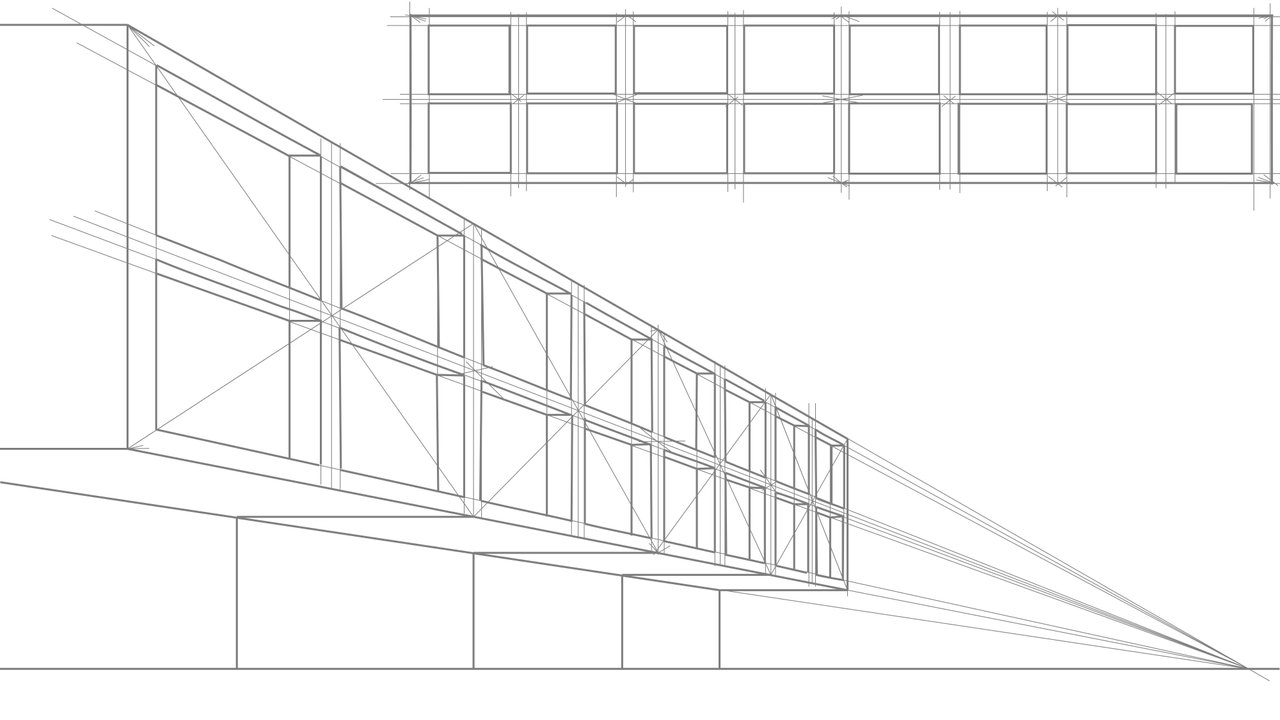
These are the two views of the wall.
I wish you a very nice day and good exercise!
Take part in this week's HOMEWORK CONTEST!
and get upvotes rewards from WOX community members.

Here are the links to the previous related posts.
1-Introduction - 2-Introduction - 3-Introduction - 4-Introduction -
5-Introduction - 6-Lesson - 7-Lesson - 8-Lesson - 9-Lesson - 10-Lesson -
11-Masterclass - 12-HW Contest - 13-Lesson 14-Lesson - 15-Lesson -
16-Lesson - 17-HW results - 18-Masterclass - 19-HW Contest - 20-Lesson - 21-Lesson - 22-Lesson - 23-HW results - 24-Lesson - 25-Lesson -
26-Masterclass - 27-HW Contest - 28-Lesson - 29-Lesson - 30-feedback
Thanks, @bambuka and @stef1 once again for their encouragement and support of these drawing lessons initiative and for supporting with their upvotes who take part in this Homework Contest
Also, thanks to @xpilar for making these initiatives possible.
100% SP (manual transfer to SP)
#club100