Hi friends!
I hope you enjoy this practice by making lots of drawings in different positions relative to the eye-level line. You could try to change the position of the vanishing point, a little more to the right or to the left.
If you want your exercises to be more interesting, you can add colour to your shapes by following the very interesting light and colour lessons that @fumansiu gives us on his blog.
Banana Study 1
Banana Study 2
Banana Study 3
Enjoy his fantastic banana study by using wonderful shades of yellow and also take the opportunity to observe how he has drawn the sketch before applying the colours, see how the concepts of freehand drawing with ease are present in his drawing, just as I have shown you that it can be achieved with the practices explained since my first lessons.
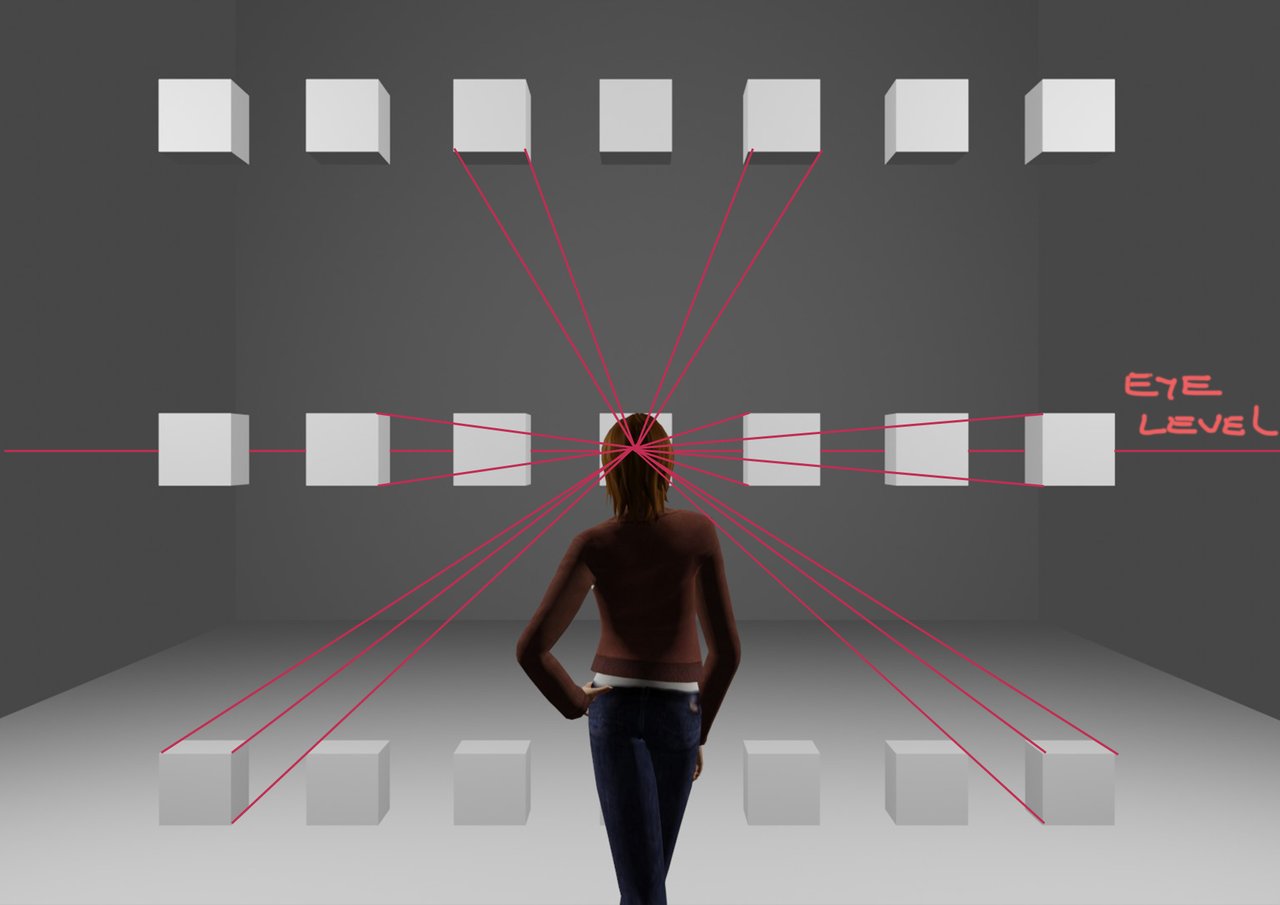
Imagine that you are behind the character who is looking at the cubes in front of her. Here you see a row of cubes at her eye level, another row above her head, and another row below in front of her feet.

By drawing a horizontal line at the character's eye level we will have the horizon line (eye-level) as shown bottom.
Having the vanishing point right in front of our character's head, the next step is to see how the lines go from the corners of the cubes to this vanishing point.
I drew some of these lines to make this more apparent to you.
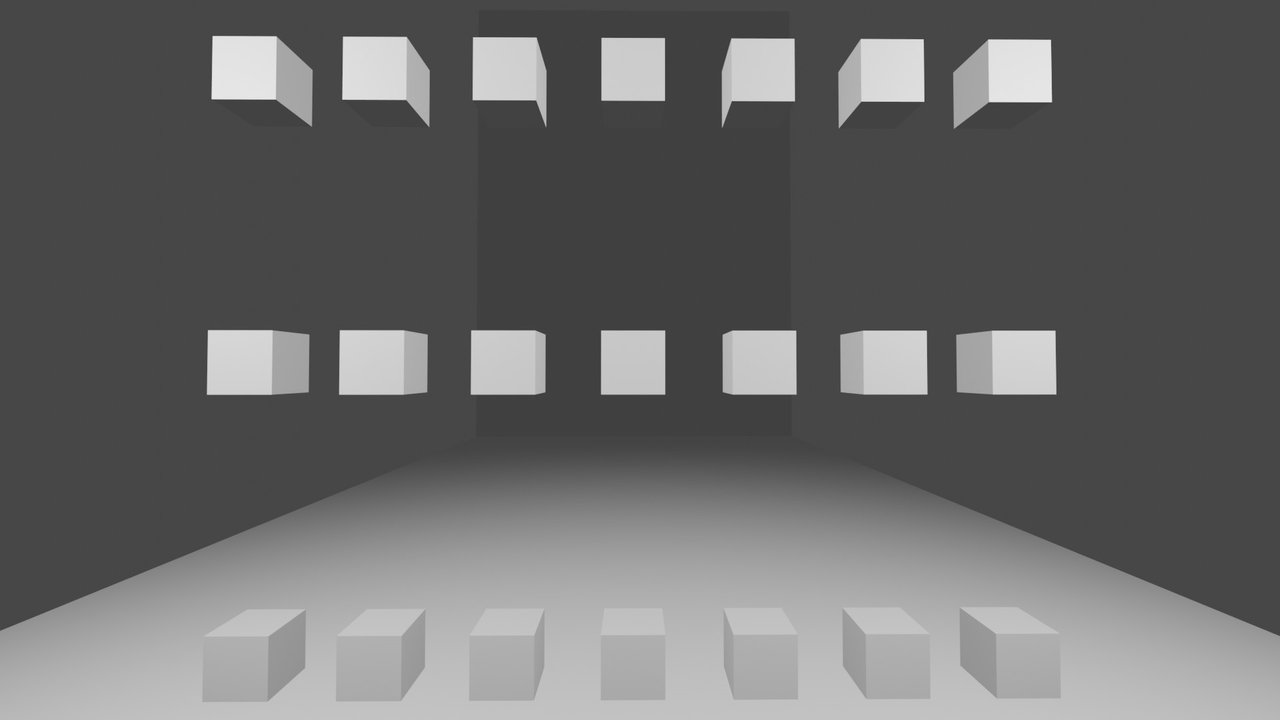
This is a side view of the same scene, so you can see the character standing in front of the cubes, the distance and height of the rows in relation to her.

Imagine now that we are located in the place of the character, we can see the cubes as "she was seeing" them.
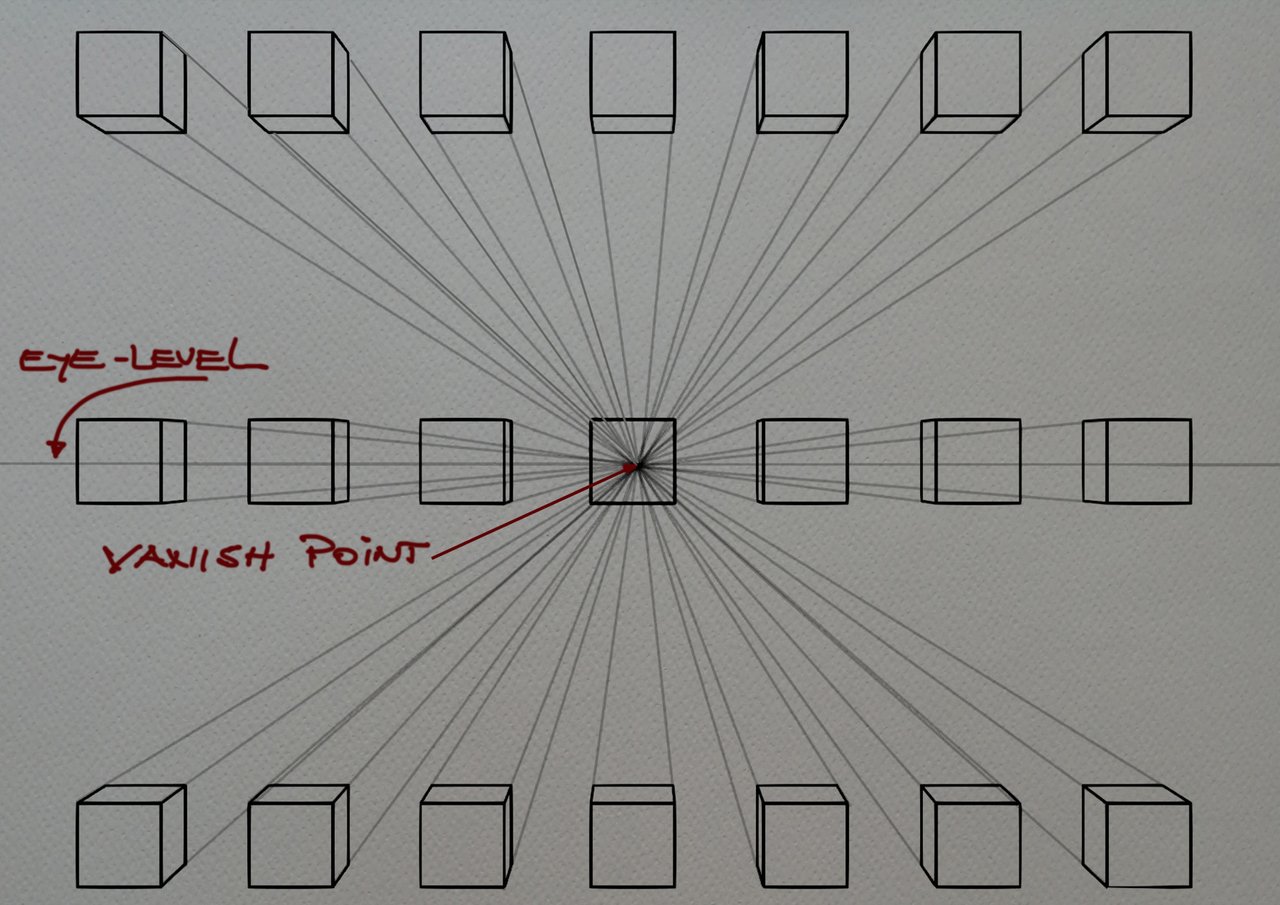
Finally, this is the drawing that we can make on our sheet, following the instructions explained in the previous lessons.
26-Masterclass - 27-HW Contest - 28-Lesson
It is very important that you understand and practice these basic concepts to continue with this fundamental topic that will allow you to draw everything you want.
Take part in this week's HOMEWORK CONTEST!
and get upvotes rewards from WOX community members.
I wish you a very nice day and good exercise!
Here are the links to the previous related posts.
1-Introduction - 2-Introduction - 3-Introduction - 4-Introduction -
5-Introduction - 6-Lesson - 7-Lesson - 8-Lesson - 9-Lesson - 10-Lesson -
11-Masterclass - 12-HW Contest - 13-Lesson 14-Lesson - 15-Lesson -
16-Lesson - 17-HW results - 18-Masterclass - 19-HW Contest - 20-Lesson - 21-Lesson - 22-Lesson - 23-HW results - 24-Lesson - 25-Lesson -
26-Masterclass - 27-HW Contest - 28-Lesson
Thanks, @bambuka and @stef1 once again for their encouragement and support of these drawing lessons initiative and for supporting with their upvotes who take part in this Homework Contest
Also, thanks to @xpilar for making these initiatives possible.
100% SP (manual transfer to SP)
#club100