Hi friends!
The representation of objects with two vanishing points is the most used in artistic drawing since it is what allows us to represent in two dimensions (on our drawing paper) the three-dimensional world as we normally perceive it.
To get started in perspective, the easiest and most practical way is to work with cubes since they are the basis of everything we can represent.
If we consider that the cube is the three-dimensional extension of the square or the rectangle, we can draw a sphere if we circumscribe it to a cube just as we circumscribe a circle to a square. If we can divide a rectangle into equal parts by drawing diagonals from its vertices, we can also divide a cube with the same technique. In short, once we have mastered the representation of cubes in perspective, we'll be able to conceive more complex drawings that will allow us to represent a landscape with buildings or a still life with bottles, for example.
So be patient, we are closer to drawing without having the obstacle that the lack of technical knowledge means. Once we have a basic but clear vision of the representation of objects in perspective we will continue with shadows.
Studying perspective is a huge and complex subject, so we could spend a lot of time studying it (we still have a lot to learn about the one-point perspective) but since we all want to achieve more "artistic" and less "technical" drawings, we are going to make soon our first still life or urban landscapes as an artist who has already incorporated the use of the necessary techniques would do.
Two vanishing points perspective
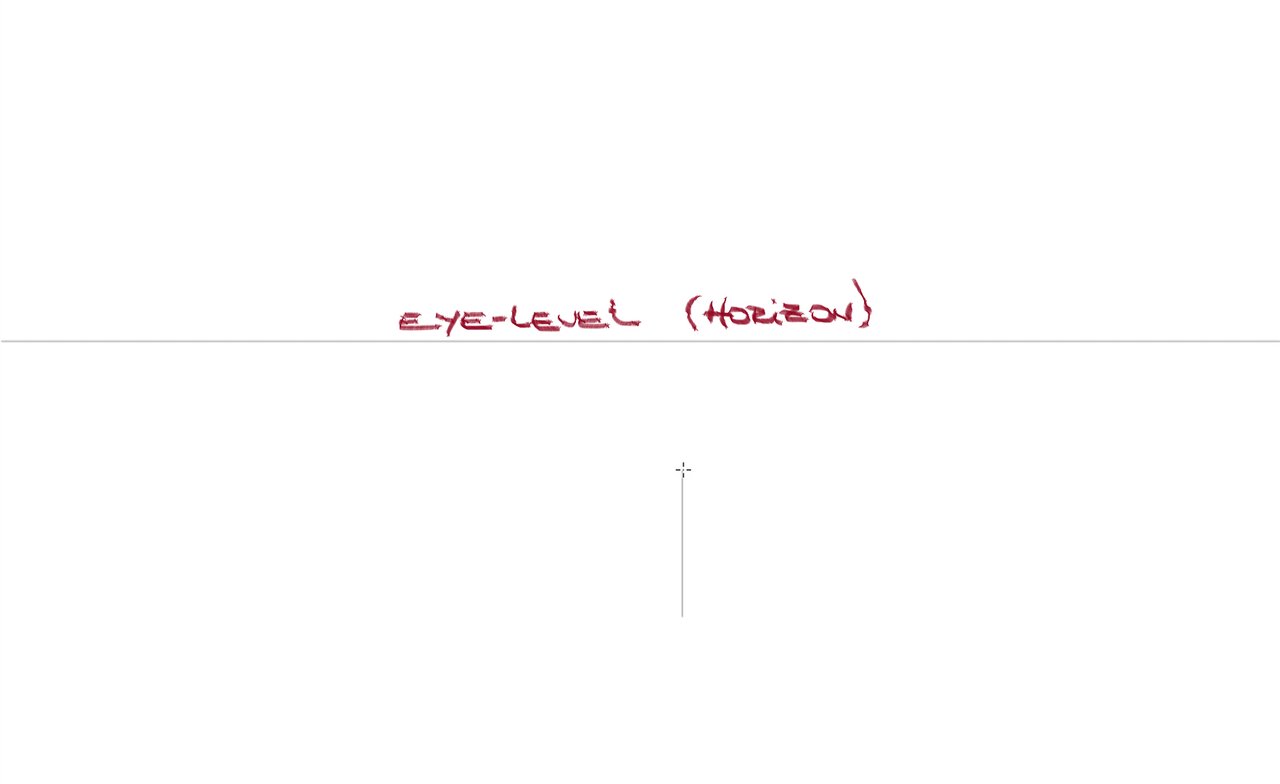
Starting with drawing a horizontal line that represents our eye-level line, then we draw a perpendicular line as shown. This line represents the height of the cube that we will draw.
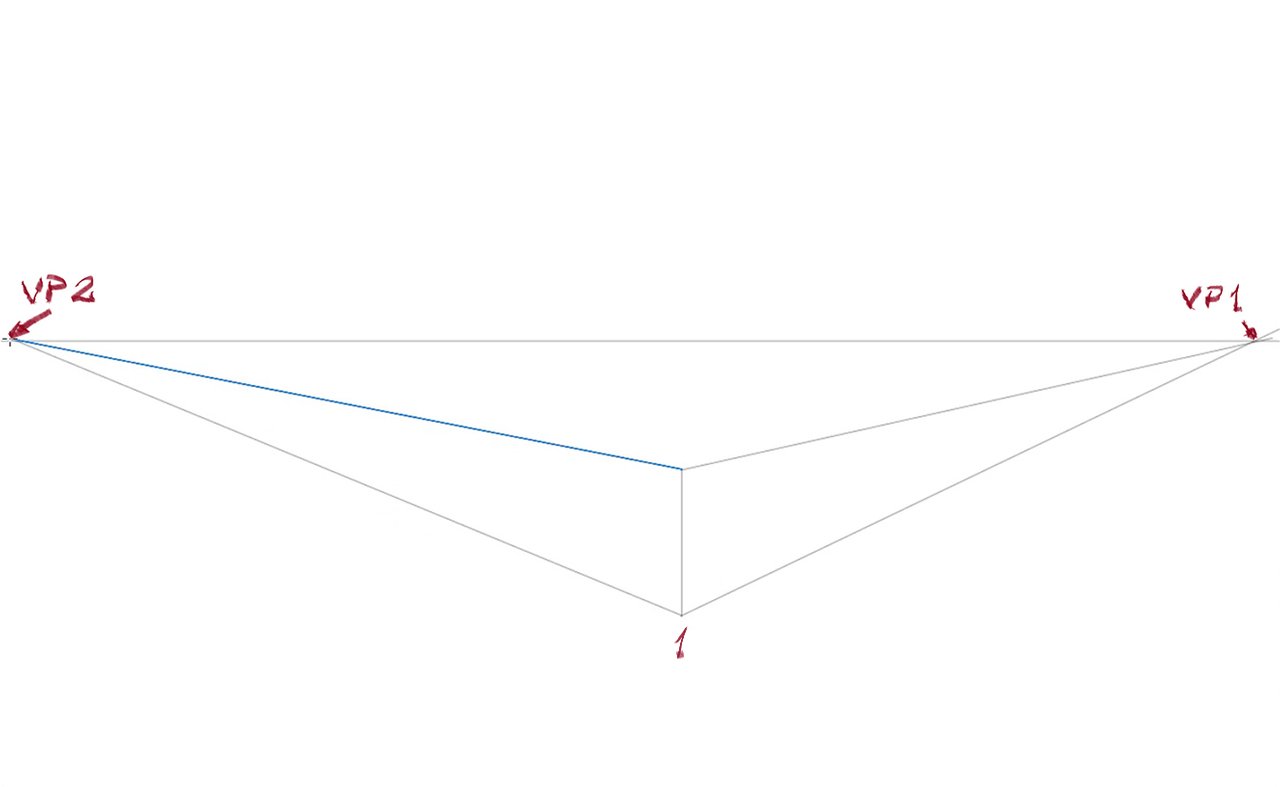
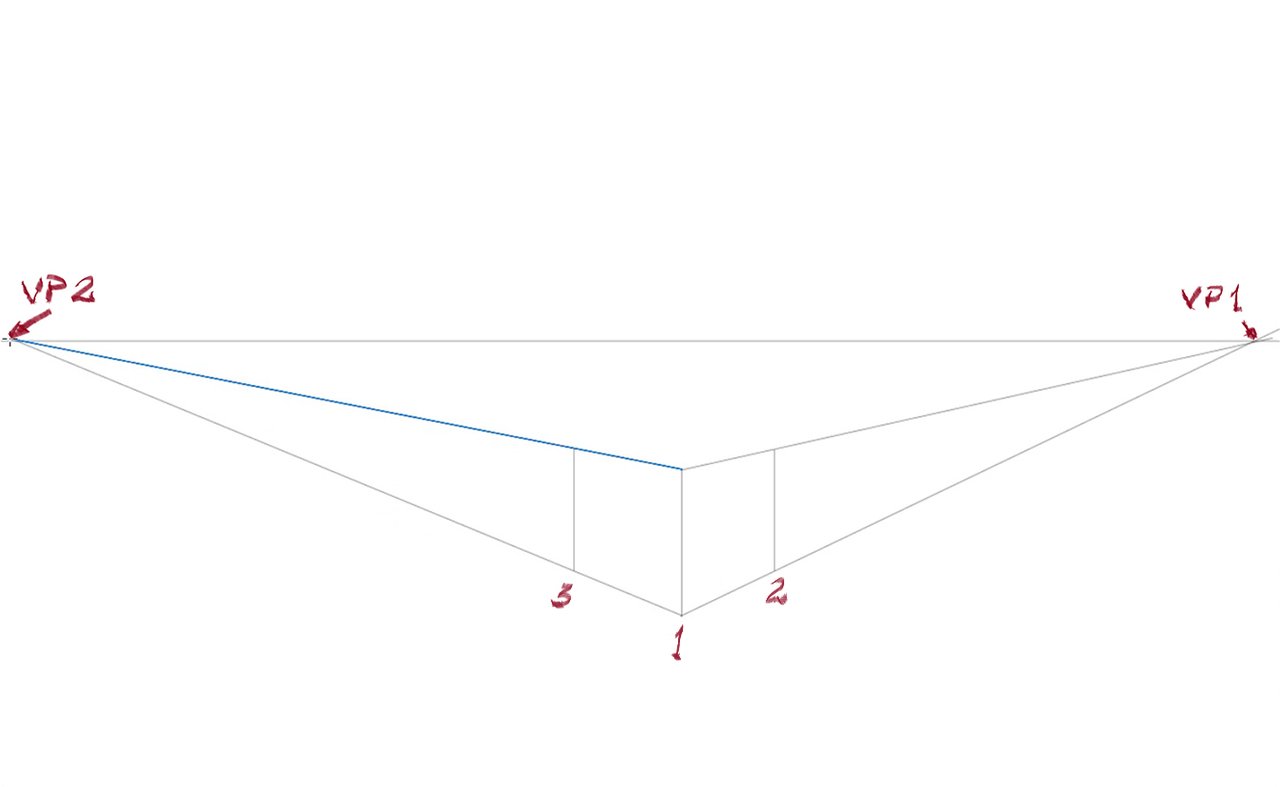
By drawing lines from the ends of our segment 1, we draw lines towards the eye-level line at a point on the right side of our drawing paper. Then we repeat the same process on the left side of the sheet. Try to do it in a similar way as shown in the image below.
We have now a vanishing point 1 (VP1) and a vanishing point 2 (VP2).
To draw the cube we must draw two lines parallels to line 1 (lines 2 and 3) as in the figure below. Try to set a distance similar to the height of line 1 but in perspective. Don't forget that we are drawing the helplines first before drawing the cube in perspective and also keep in mind that throughout the practice of measuring you will learn to recognize when the proportions of a subject are drawn correctly.
There are rules and mathematical calculations to determine the exact dimensions of a cube in perspective, but I think it is not convenient to introduce that now.
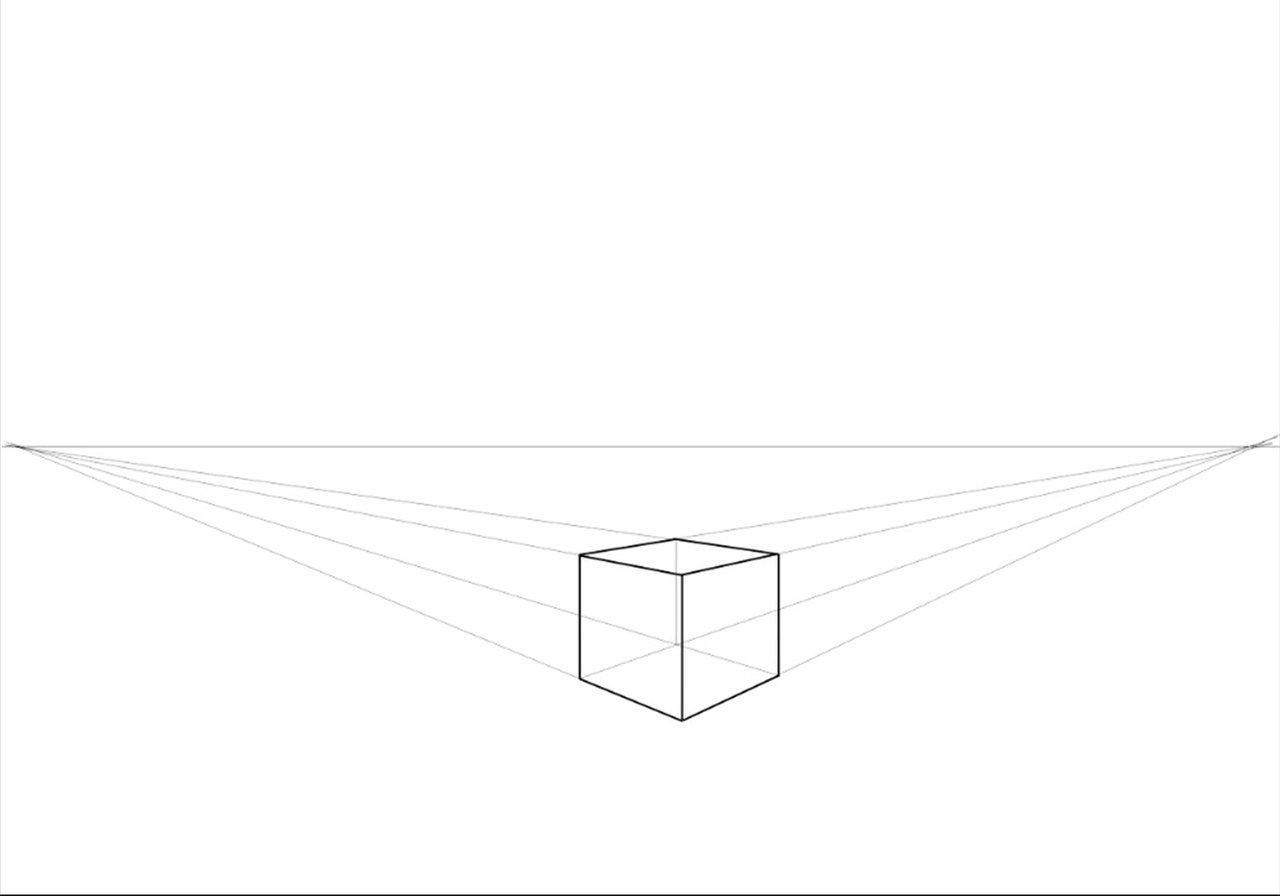
Then, once the two visible side faces of the cube are defined, we continue drawing lines towards the vanishing points, from the two ends of line 2 towards VP2 (left) and also from line 3 towards VP1 (right). At the intersection of these lines, we get the points to draw the fourth line of the cube, line 4.

Now we draw the final lines, showing only the visible sides and corners.
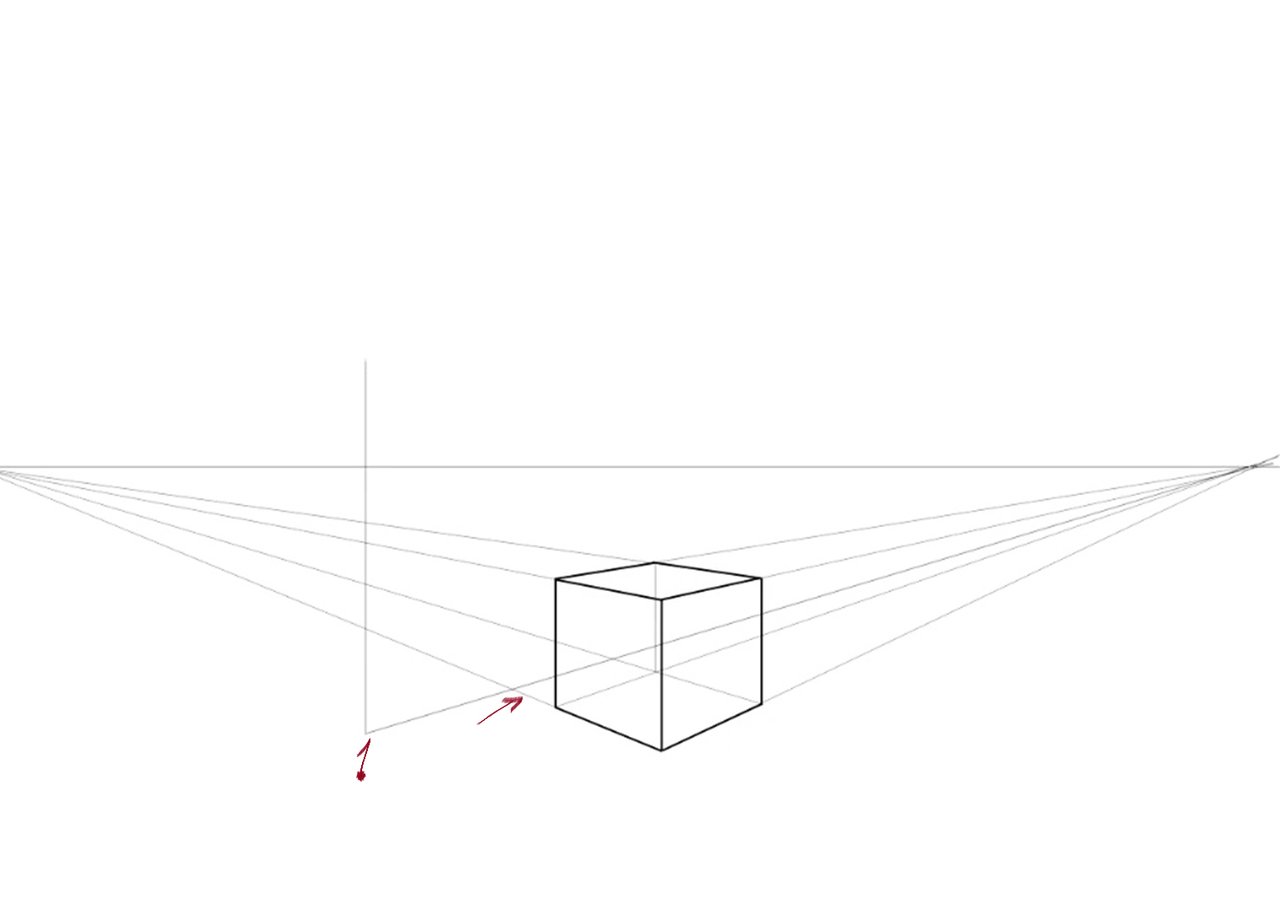
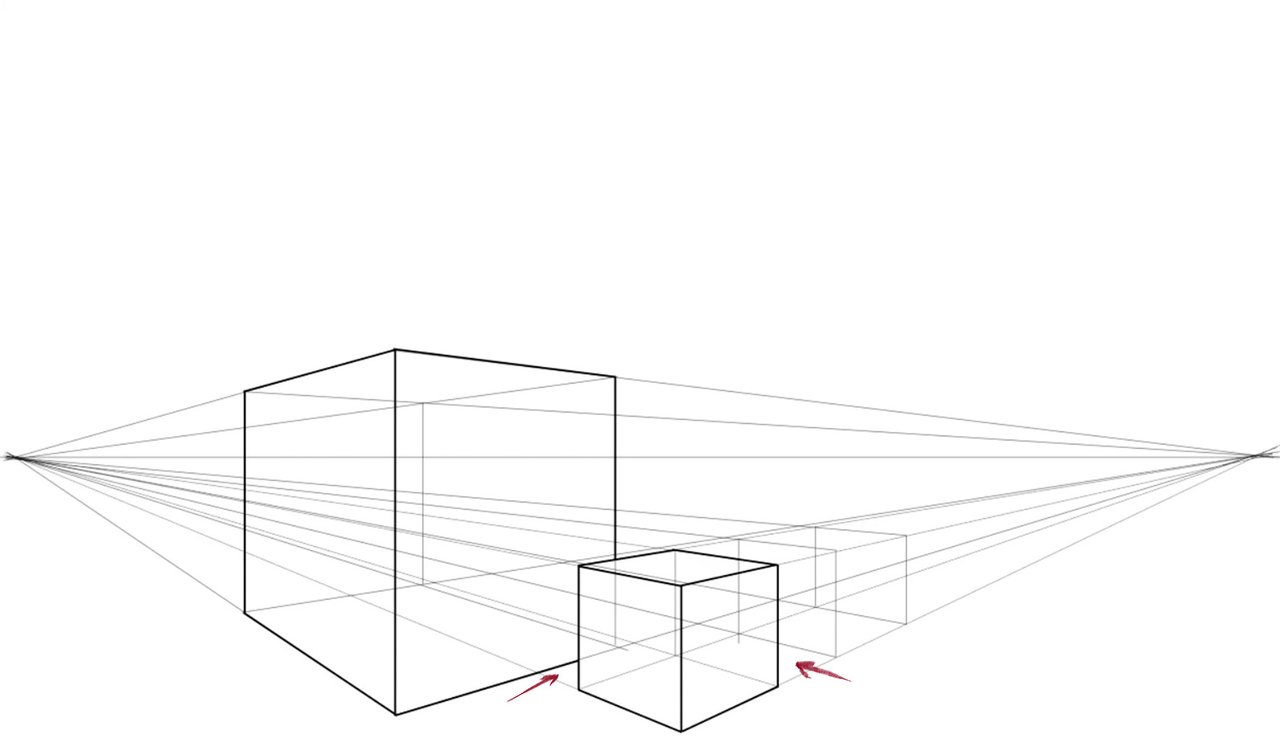
Starting now by drawing another perpendicular line (1) and drawing the lower helpline we can already guess a space (see the red arrow) between the cube we have already drawn and the one we are drawing now. We can also guess the ground bounded by the horizon line (or not? See it?)
Following the same instructions with which we drew the first cube, we draw this bigger one. Pay attention, when you draw the definitive lines of this cube, the parts of the lines that are behind the first cube, do not draw them.
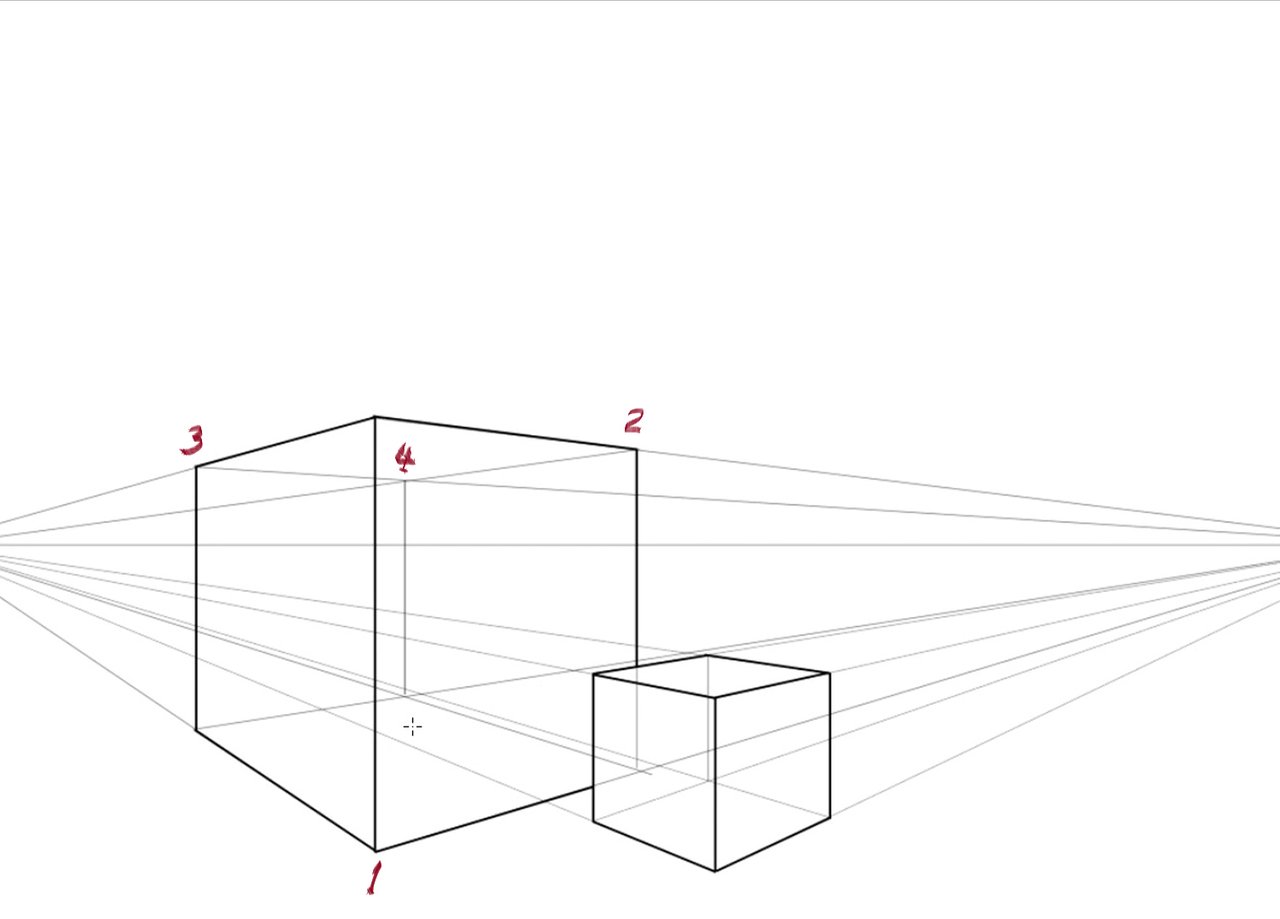
At this stage, we are going to use the helplines we used to make the first cube to draw a second cube behind it. The instructions are the same, the only exception is that it is not necessary to draw the first helplines. Don't forget to keep a distance between the lines to maintain the proportions of the first cube. Once again, keep in mind not to draw the part of the lines behind the first cube when you draw the definitive lines of this cube.
And... can you see the space, on the ground, between the cubes (signalled by the red arrows).
So on, in the same way, make the third small cube.
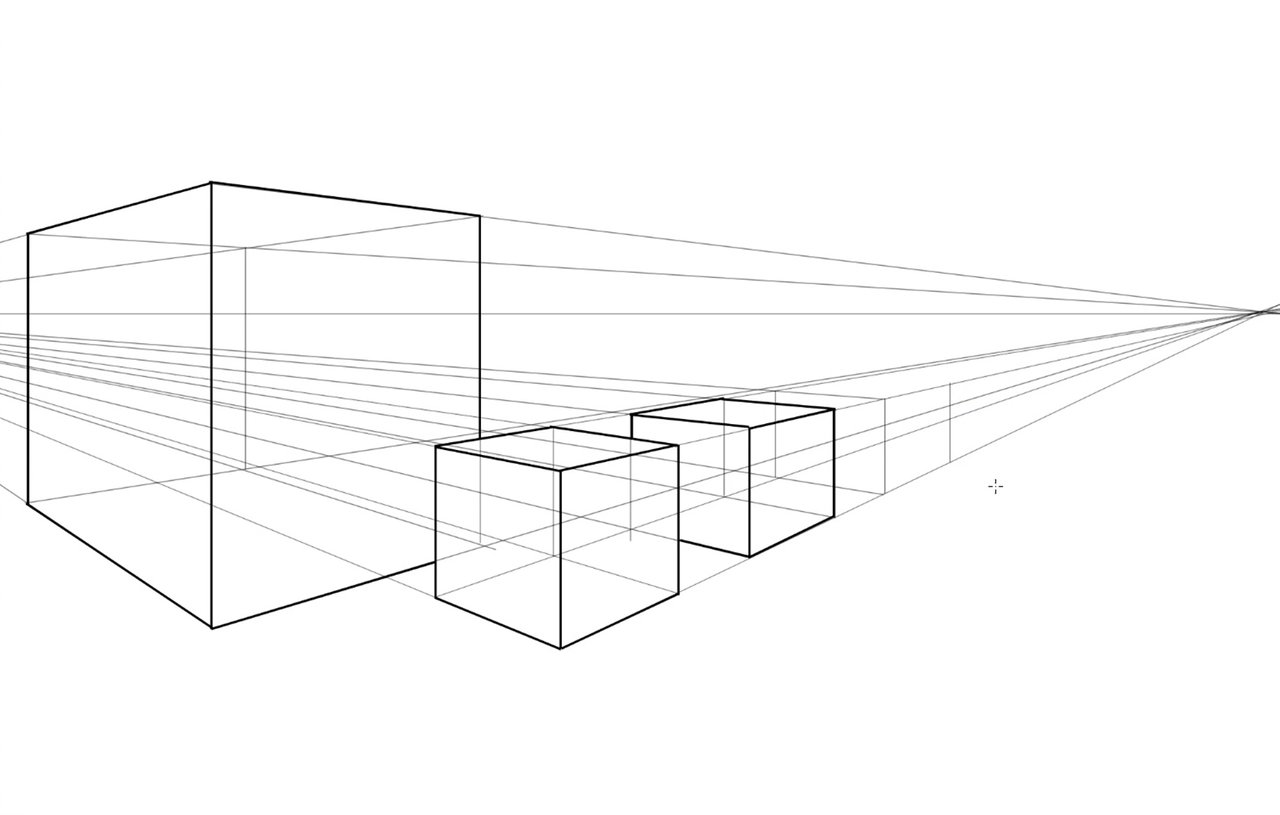
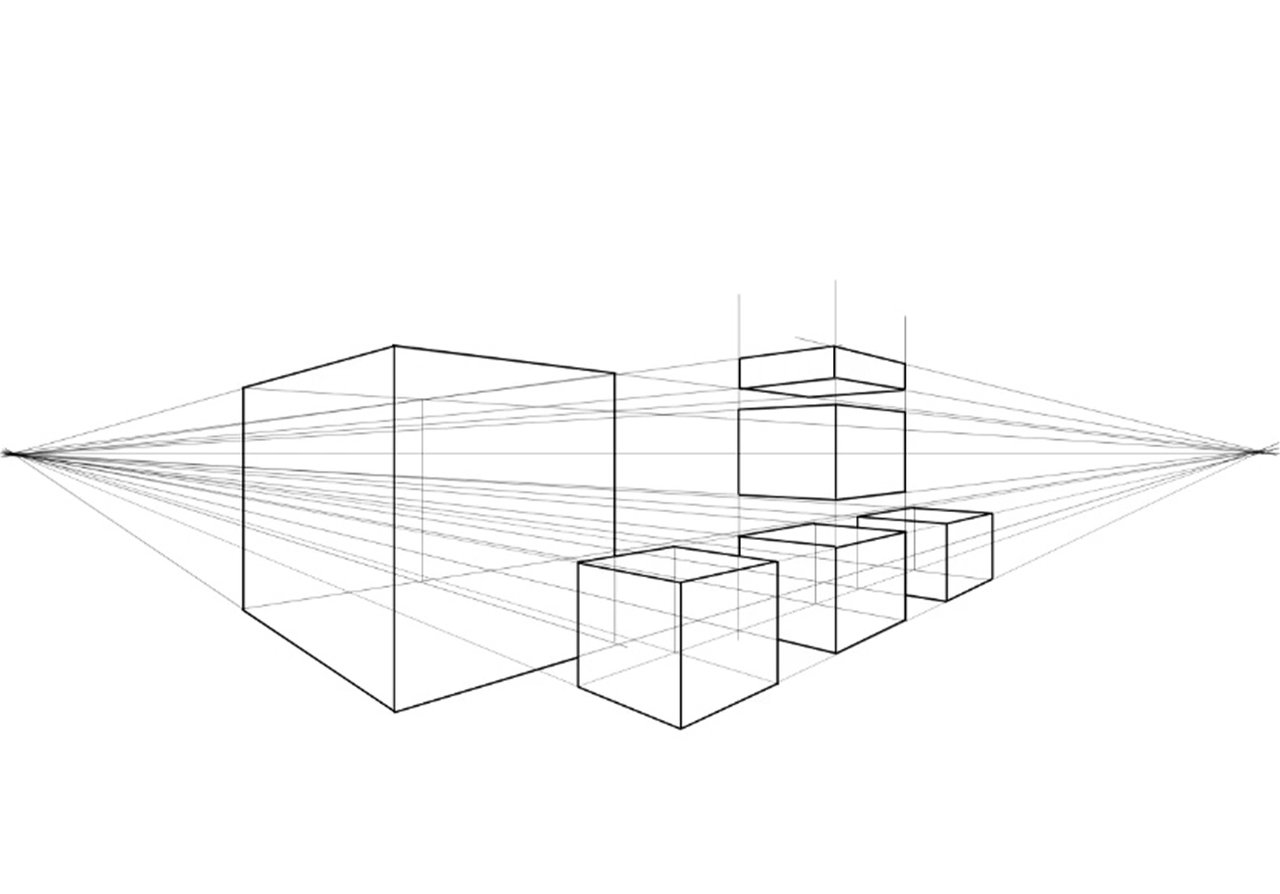
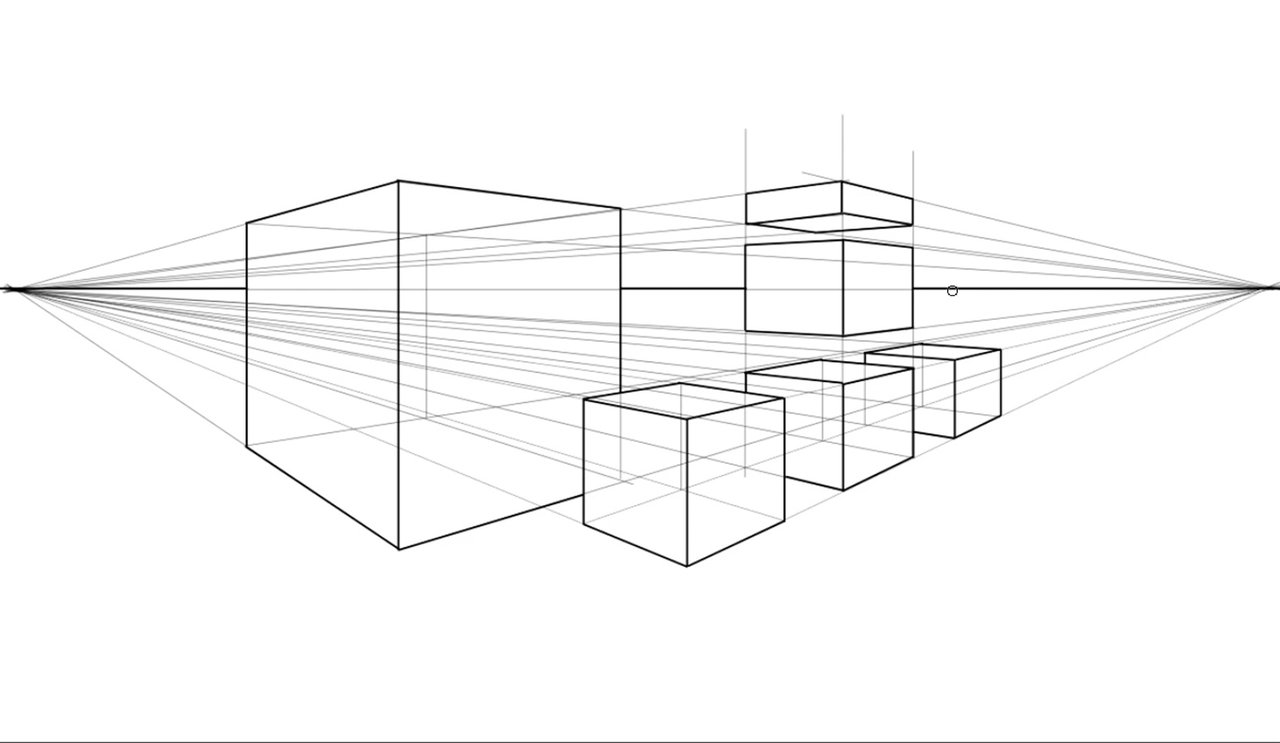
Extend the vertical helplines from the small cube in the middle up as shown.
Following the same previous steps draw these two cubes that are floating.
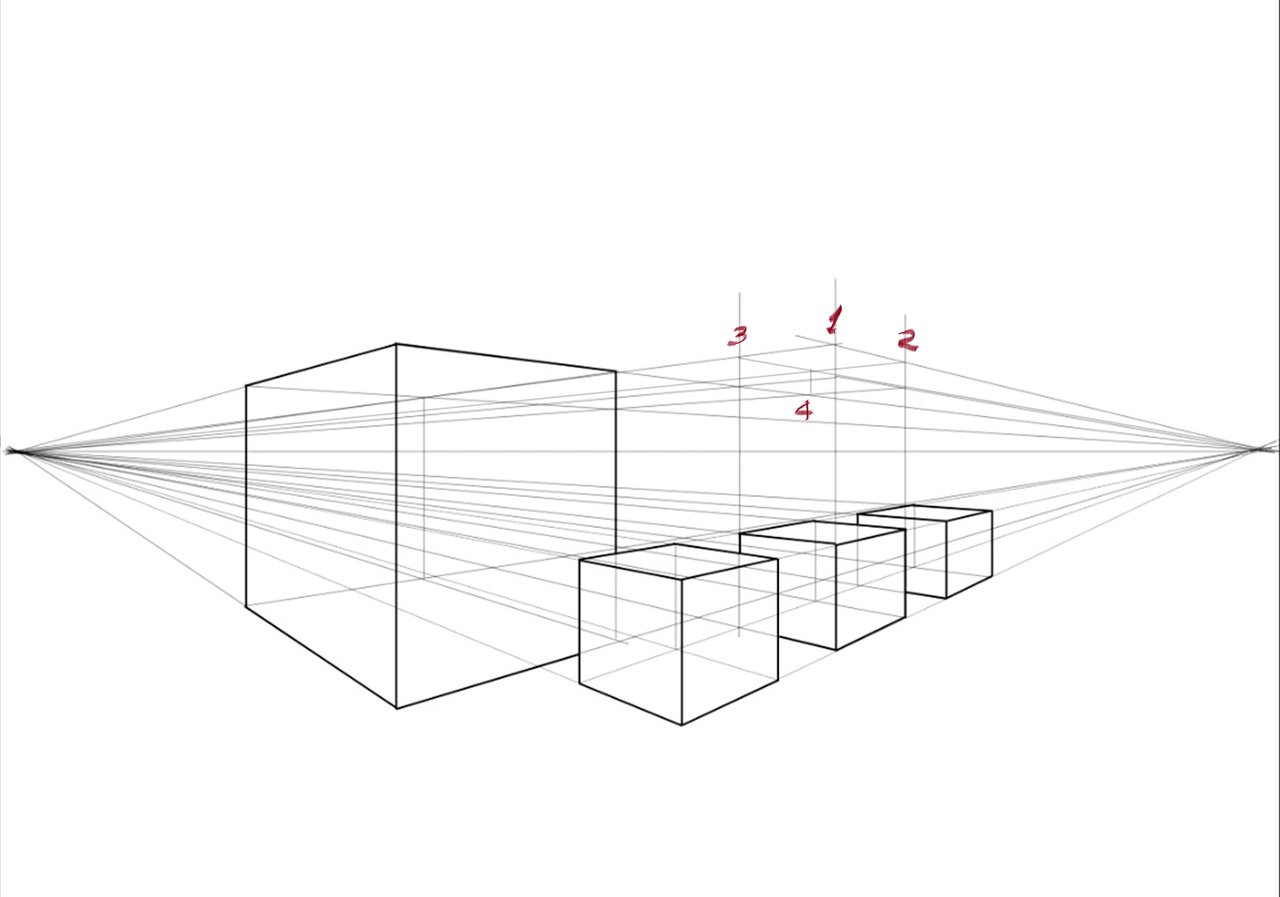
This is the drawing with the helplines used.
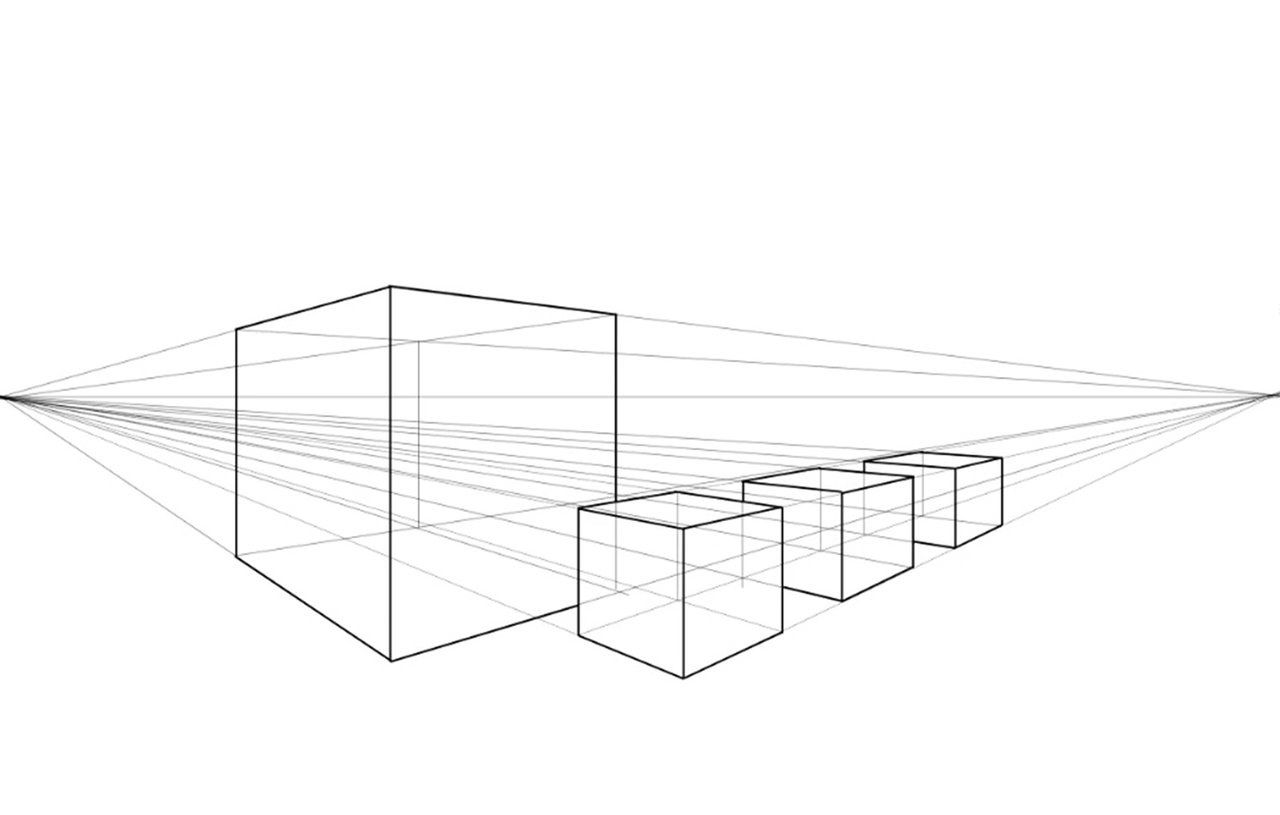
After removing the helplines. Can you see the ground? Do you see the four cubes sitting on the ground? And the two cubes floating?
We have gotten the basic elements of a landscape: the ground, the horizon, the sky above the horizon line, and some objects on the ground.
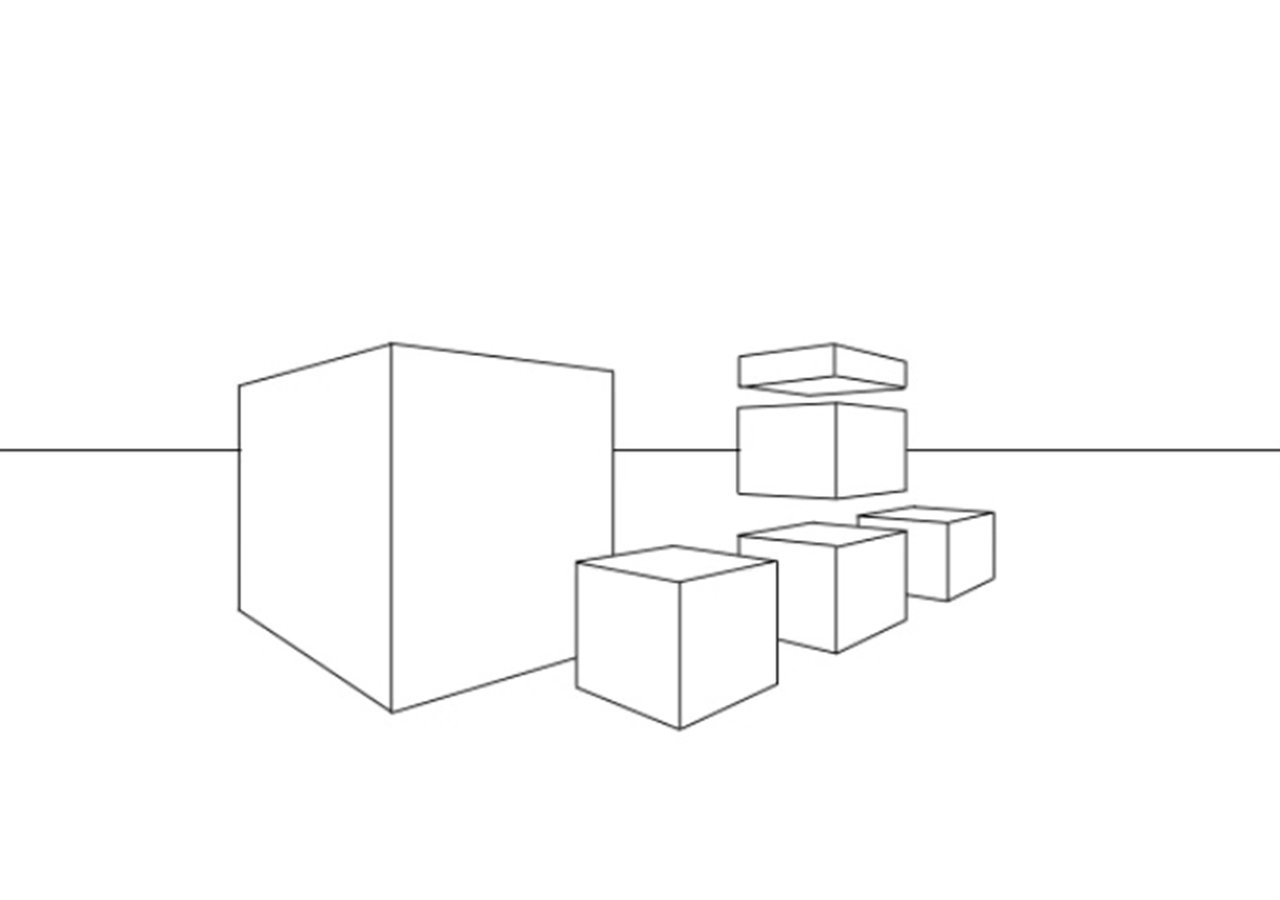
We have gotten the basic elements of a landscape: the ground, the horizon, the sky above the horizon line, and some objects on the ground.
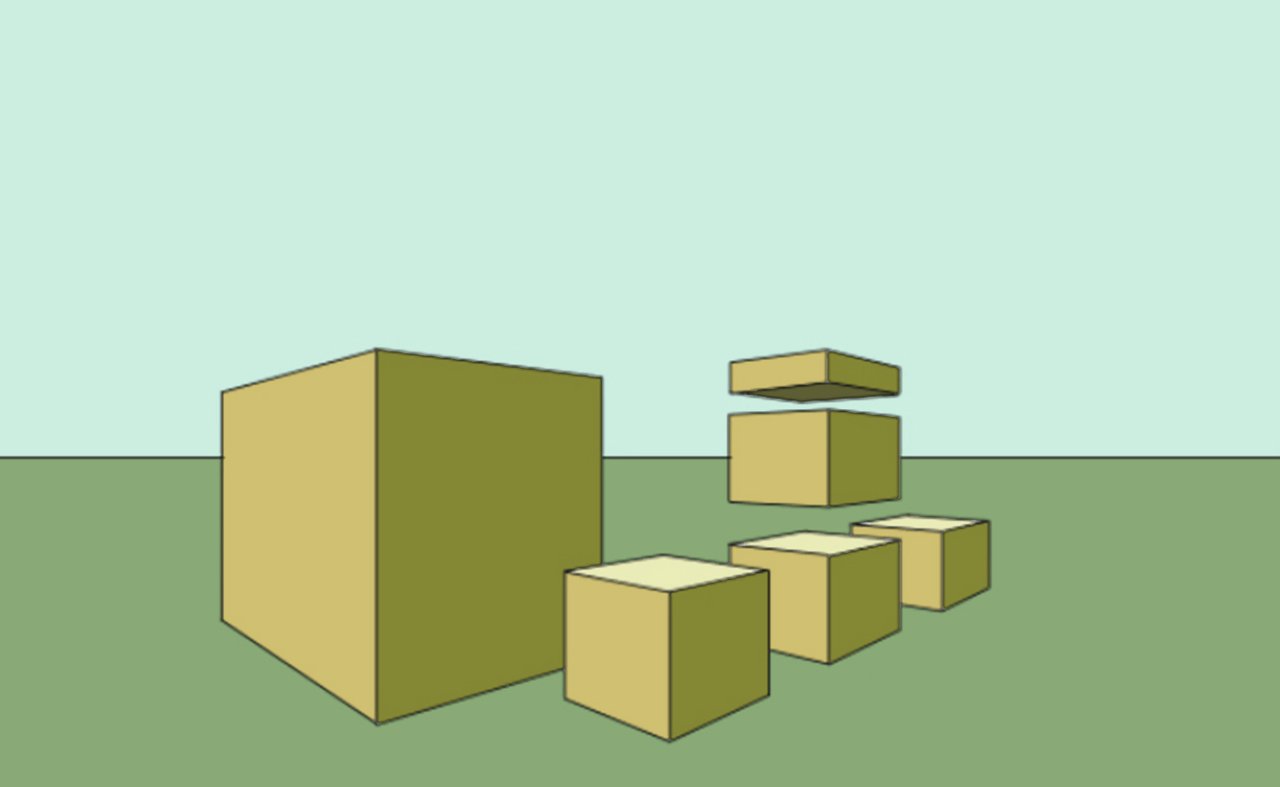
If you want, you can color this scene (don't worry about the shadows, this is for later) Maybe you could use some of the great color schemes proposed by @fumansiu, I recommend you follow his interesting lessons of light and color that you could apply to your drawings.
This is my coloured version
I wish you a very nice day and good exercise!
Many thanks to @bambuka and @stef1 once again for their encouragement and support.
Also, thanks to @xpilar for making these initiatives possible.
Here are the links to the previous related posts.
1-Introduction - 2-Introduction - 3-Introduction - 4-Introduction -
5-Introduction - 6-Lesson - 7-Lesson - 8-Lesson - 9-Lesson - 10-Lesson -
11-Masterclass - 12-HW Contest - 13-Lesson 14-Lesson - 15-Lesson -
16-Lesson - 17-HW results - 18-Masterclass - 19-HW Contest - 20-Lesson - 21-Lesson - 22-Lesson - 23-HW results - 24-Lesson - 25-Lesson -
26-Masterclass - 27-HW Contest - 28-Lesson - 29-Lesson - 30-feedback - 31-Lesson - 32-HW results - 33-Masterclass - 34-HW contest #4 - 35-feedback - 36-feedback - 37-feddback
100% SP (manual transfer to SP)
#club100