Hi friends!
Once I return, I will return to comply with the usual continuity since there is still much more to know and exercise in the craft of drawing.
Today I will give my opinion, commenting on the penultimate drawing shared by @stef1 about the "two-point perspective" @stef1/drawing-like-a-pro-38-masterclass-two-point-perspective-lesson-by-jorgevandeperre, lesson that we have seen previously in 38-Masterclass
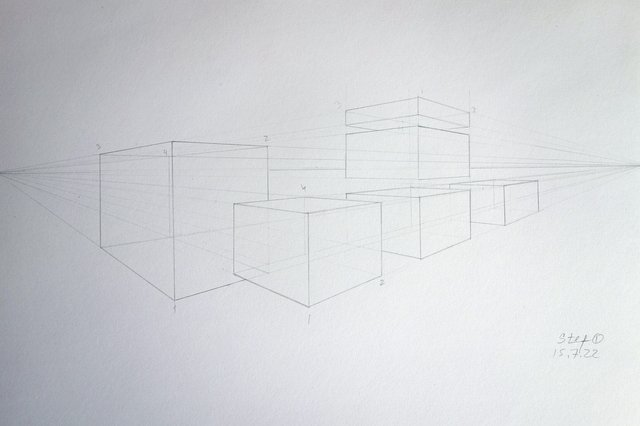
This was the drawing I used to teach the lesson, which @stef1 has done excellently.
As you can see, the drawing is cute and well done (the aesthetic is always very important). The two vanishing points are located at a suitable distance from each other, which prevents the nearest cubes from deforming. Although we have not yet discussed this topic, it is good that we keep it in mind from now on.
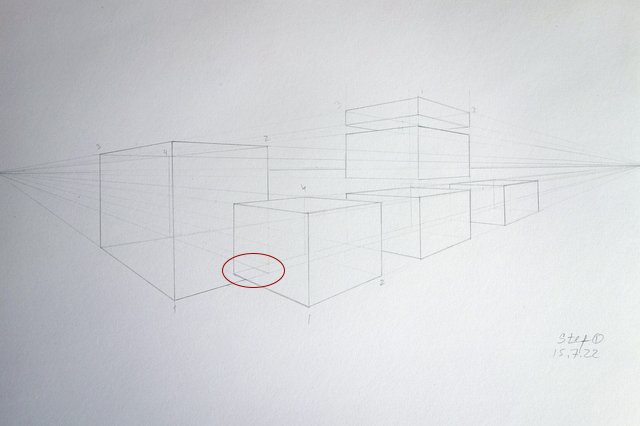
Well, I have a small observation to make. It is a mistake that is frequently made by all those who are dedicated to architectural drawing. Sometimes we get lost among so many lines that we have to draw at the beginning, but later, with practice and experience, you will see that everything is very easy and, in the future, most of the helplines will be in your brain.
This is: one cube is inside the other. See the intersecting lines at the bottom of the cubes.
Then, the observer gets the impression that a cube is floating next to the other.
First solution:
By cutting the large cube you give the illusion that one cube is inside the other and both are on the same floor.
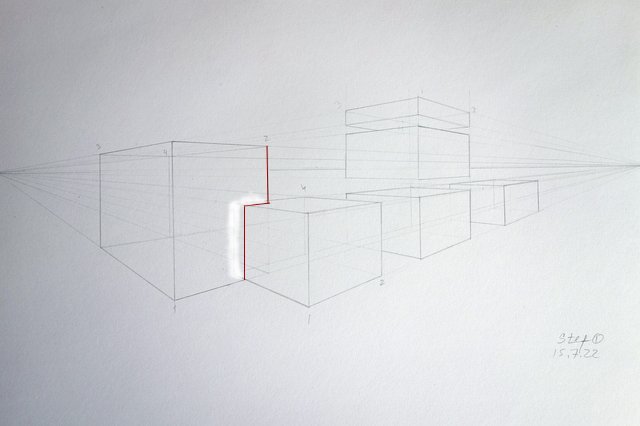
Second solution:
Making the small cubes a little thinner will give the illusion that the cubes are next to each other without touching. Look at the space shown by the red arrow.

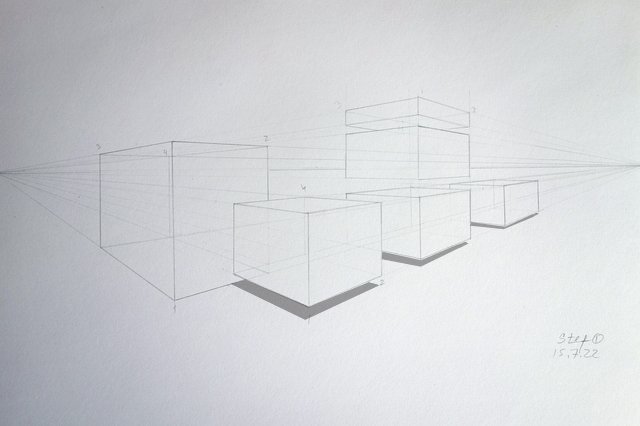
Third solution:
This solution doesn't apply here at the moment because we haven't seen shadows yet.
Here are the links to the previous related posts.
1-Introduction - 2-Introduction - 3-Introduction - 4-Introduction -
5-Introduction - 6-Lesson - 7-Lesson - 8-Lesson - 9-Lesson - 10-Lesson -
11-Masterclass - 12-HW Contest - 13-Lesson 14-Lesson - 15-Lesson -
16-Lesson - 17-HW results - 18-Masterclass - 19-HW Contest - 20-Lesson - 21-Lesson - 22-Lesson - 23-HW results - 24-Lesson - 25-Lesson -
26-Masterclass - 27-HW Contest - 28-Lesson - 29-Lesson - 30-feedback - 31-Lesson - 32-HW results - 33-Masterclass - 34-HW contest #4 - 35-feedback - 36-feedback - 37-feddback - 38-Masterclass - 39-HW Contest #5 -
40-feedback - 41-feedback - 42-lesson - 43 feedback - 44-feedback - 45-HW feedback - 46-lesson
Hoping to be helpful with my observations I wish you a very nice day and good exercise!
Also, thanks to @xpilar for making these initiatives possible.
100% SP (manual transfer to SP)
#club100