Hi friends!
By applying the rules of perspective that Giants of the Arts and Giants of the Mathematics have inherited to us, rules that often become cumbersome and we find ourselves lost between dozens and dozens of lines and different vanishing points, we are not only acquiring drawing skills but we are also developing a sense of abstraction of space. Each time we perceive more easily the inclination, verticality or horizontality of the lines and each time we can better draw lines parallel to each other and each time we have more visual acuity to capture drawing errors. We may not yet find the root of some drawing problem but that we can recognize it , that denotes a great advance, the rest is study and observation.
The more we master these drawing techniques, the less need we will have to draw countless lines and the freer we will be when drawing, and in this process, observation is essential.
When you do not know how to represent something or when you are not sure that your drawing is correct, always resort to observation, look for a suitable model that allows you to solve your drawing problem. This is a constant practice of all professional artists.
Comic book artists, futurist artists, sculptors, architects, surrealist artists, etc. Everyone always resorts to observation, so it is absolutely advisable to always exercise observation.
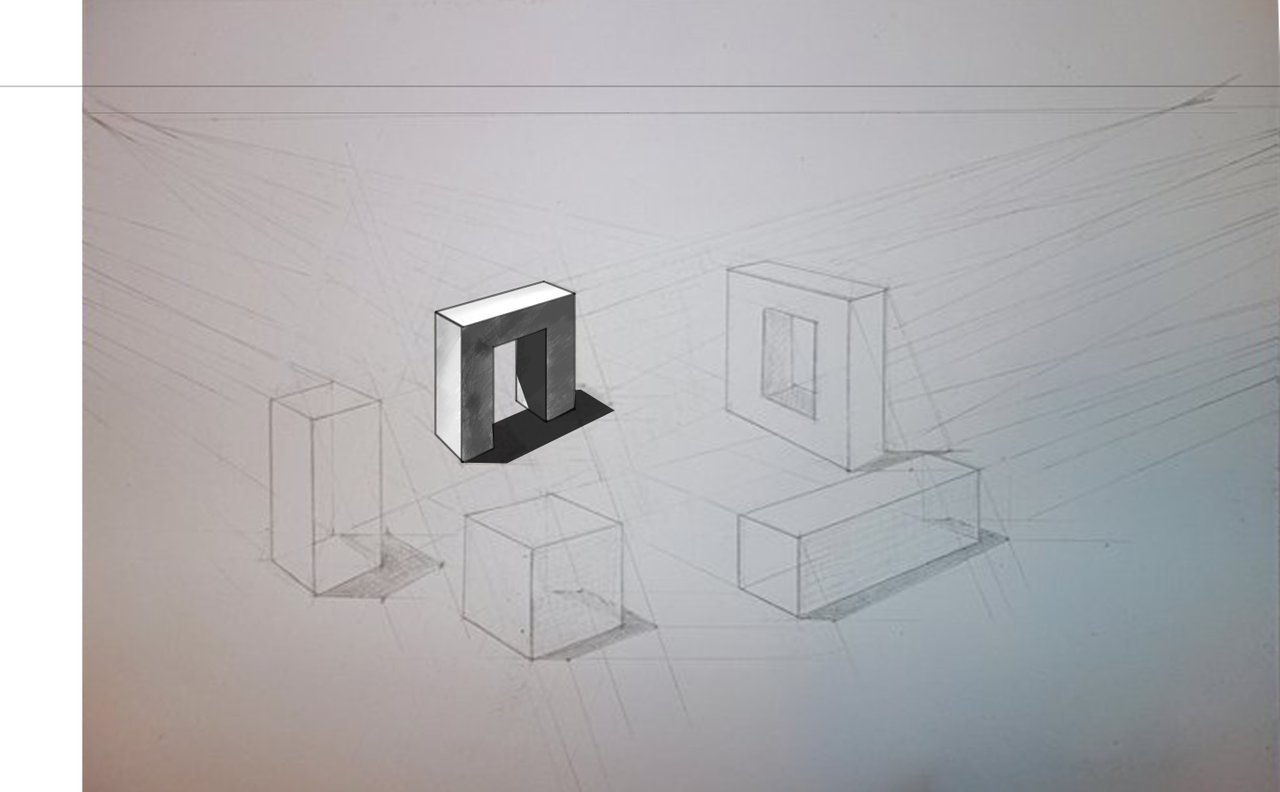
I know that the first steps in perspective drawing can often be very difficult when we start to get out of the comfort zone and try to apply the rules to somewhat more complex figures.
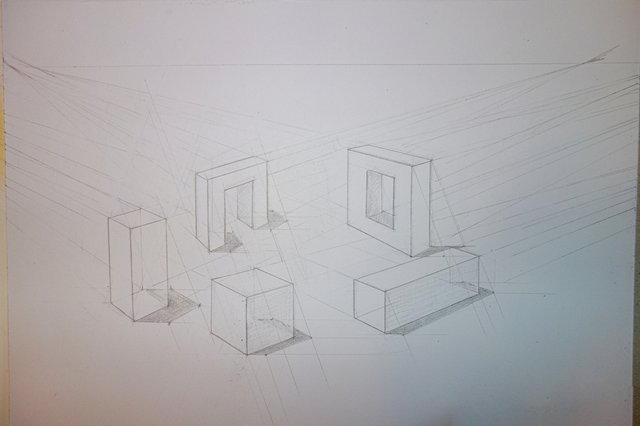
And this is what happened to @setf1 when trying to draw shadows for somewhat more complex figures.
First, congratulate her on the good performance of the composition of figures, clearly she is already mastering the basics of perspective. Also congratulate her for wanting to go a step further and consider new challenges.
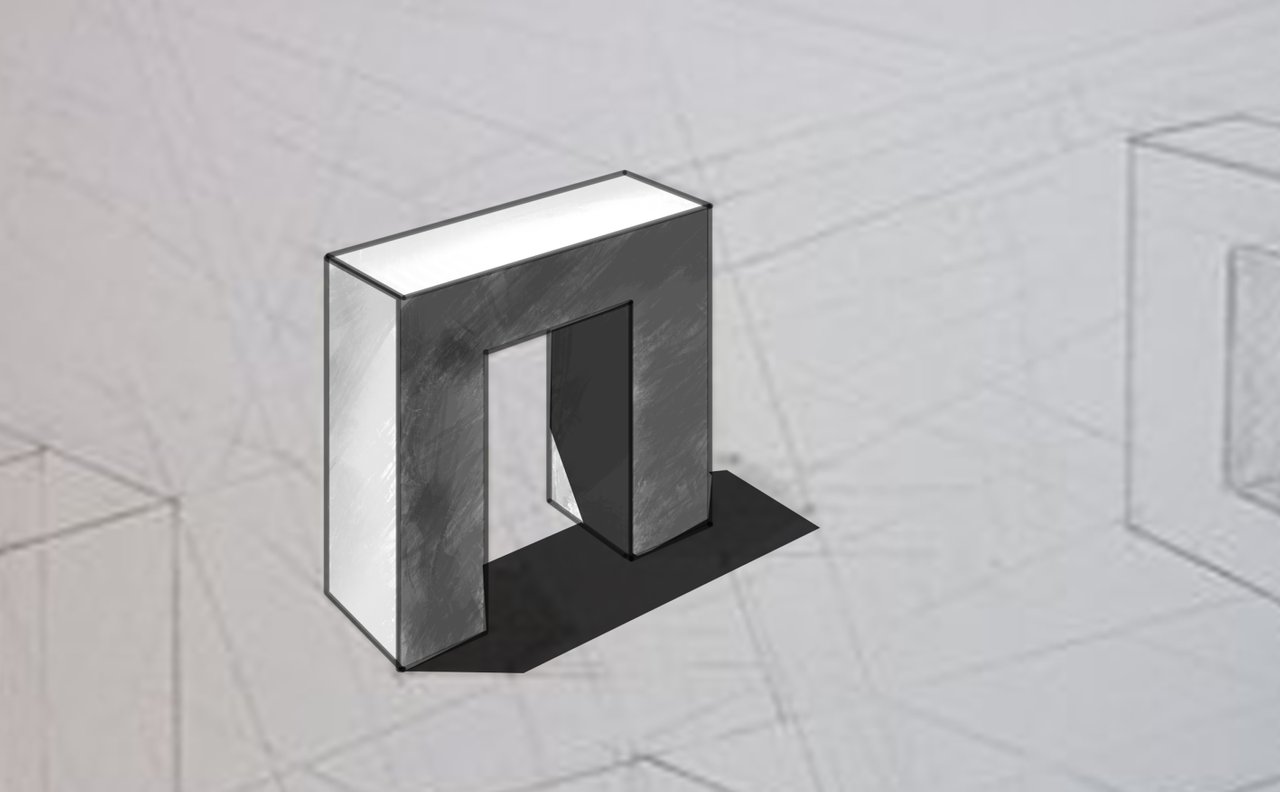
Both, the representation of the forms as well as the projected shadows are very well achieved, except for the two more complex figures for which she could not represent the shadows.
This happens because we haven't yet seen how to draw shadows from an object that isn't standing on the ground, which is suspended in the air, and we haven't seen yet what happens when a shadow is cast on another object.
Don't worry, you had no way of knowing this situations.
Here is the link to her exercise: @stef1/drawing-like-a-pro-61-homework-contest-light-and-shadows-by-jorgevandeperre
I will try to explain somehow how to fix this problem.
Imagine your object divided into blocks, three blocks in this case.
The cast shadow is how you drew it.

The same for the second vertical block.
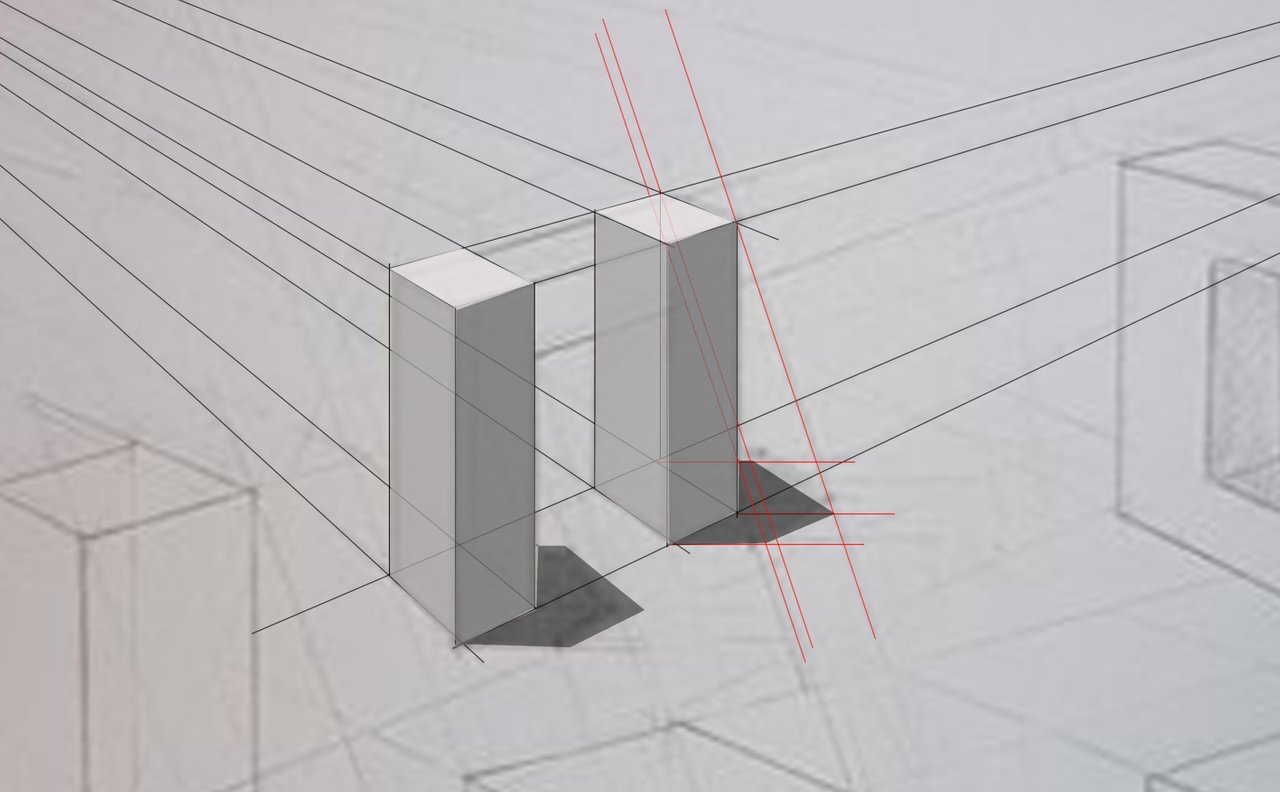
Here, with the third block is when the troubles beginning.
The green shape on the ground is the outline of the shadow cast by the block.
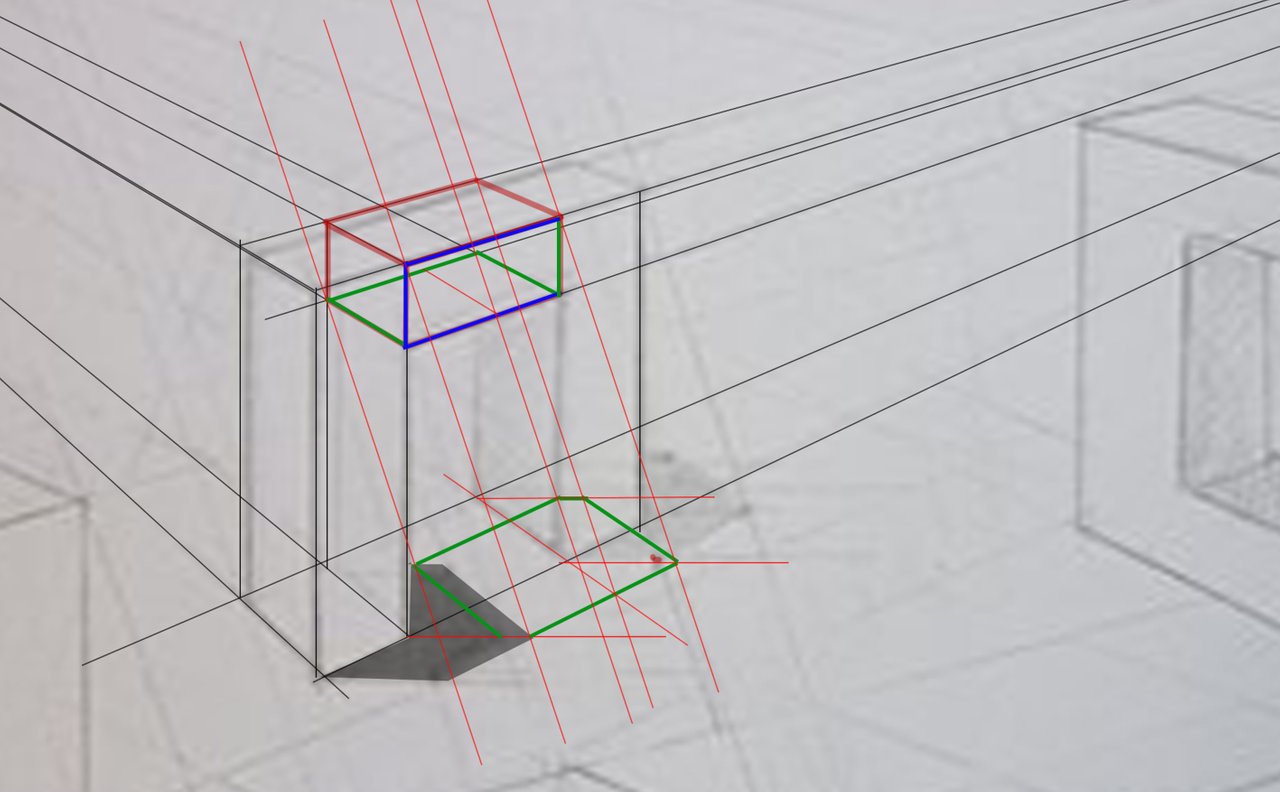
When projecting the shadow we notice that a part of it falls in the place that is already occupied by the block that we outlined previously, so the shadow is cut off, as you can see.
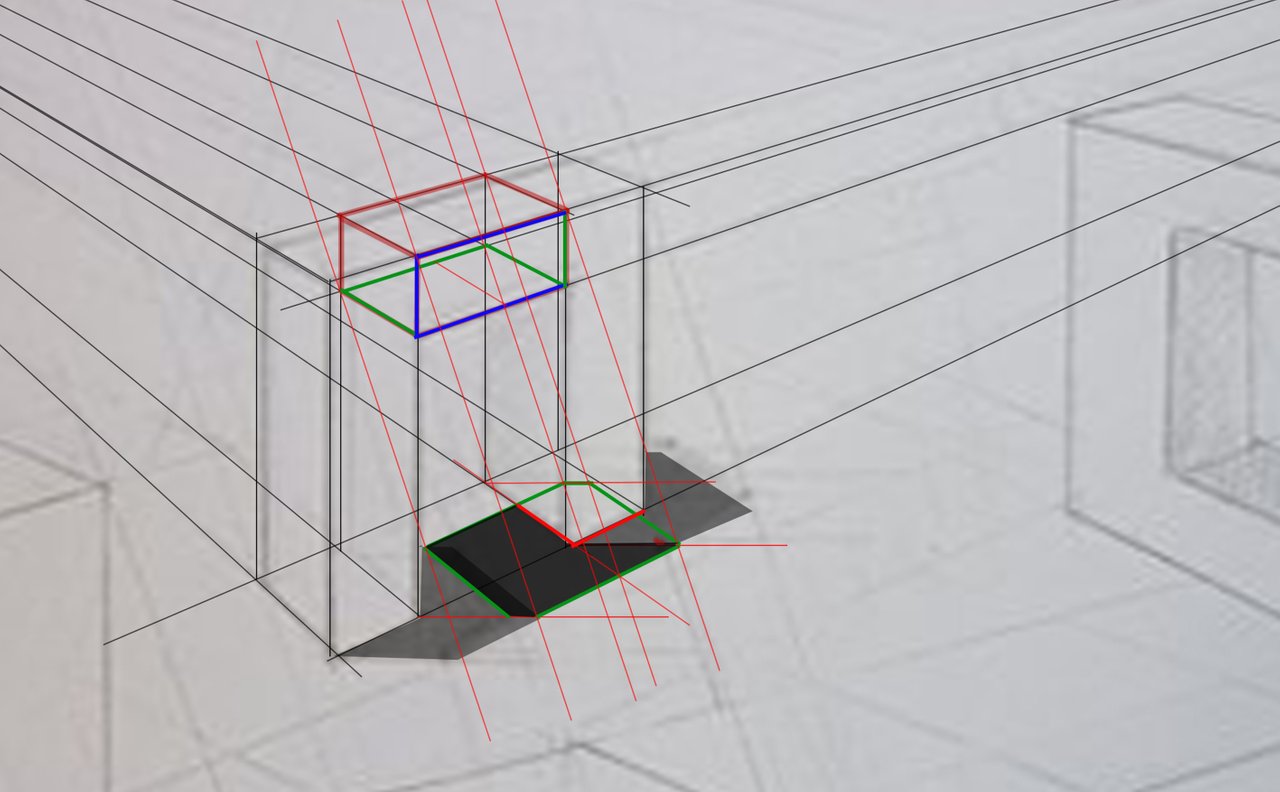
So that part of the shadow falls on the face of the cube on the right. We cast the shadow as shown below.
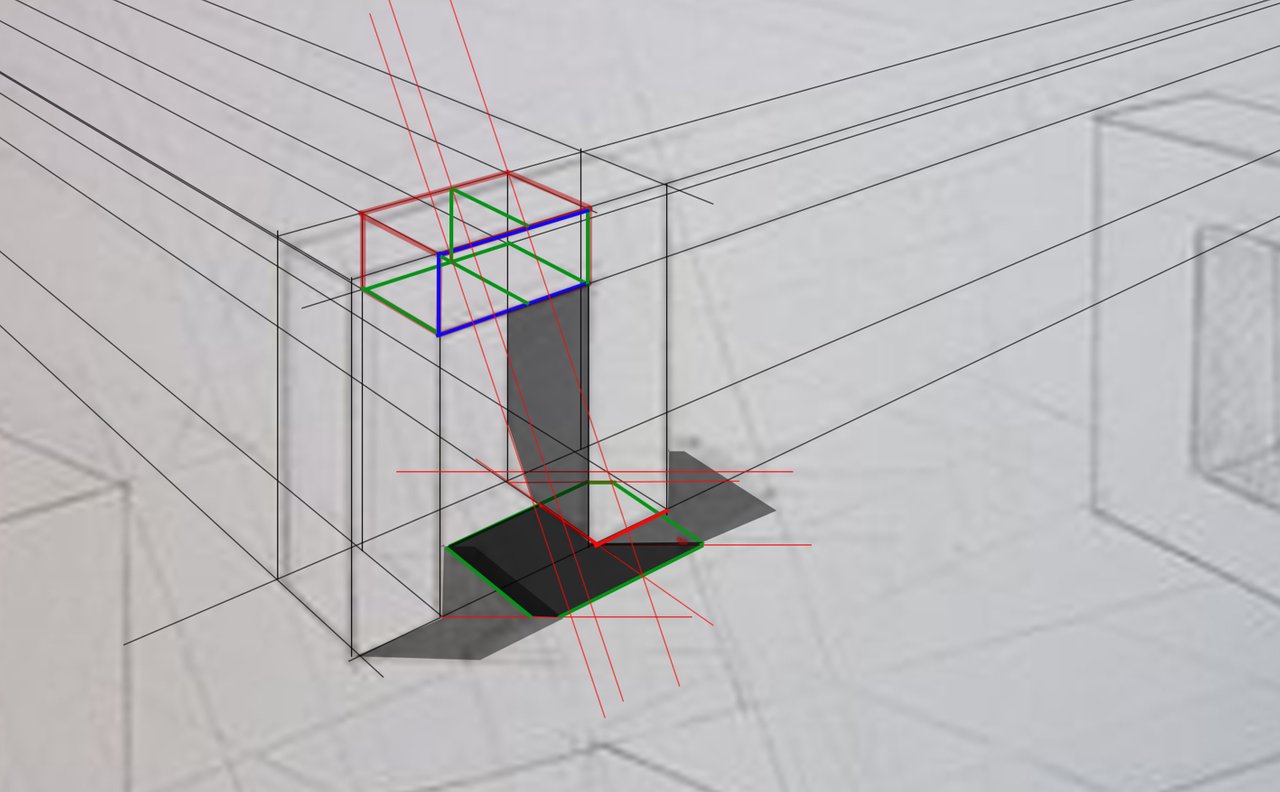
This is my solution to draw the shadows in this case. Please don't take this as an exact or absolute solution, because the shadow can fall a bit higher or a bit lower, that depends on the precision of the drawing. Always think that these methods are a help to develop our drawing skills and for a better understanding of what we observe.
I hope that these explanations have been clear and understandable enough.
I have divided this comment into two parts due to the length and complexity of explaining these particular cases without first starting with somewhat simpler examples.
See you in the next lesson.
I wish you a very nice day and good exercise!
Blue Buddies 1
Blue Buddies 2
Blue Buddies 3
Blue Buddies 4
Blue Buddies Round 2
are his newest lessons. Very interesting indeed!
***
Here are the links to the previous related posts.
1 - 2 - 3 - 4 -
5 - 6 - 7 - 8 - 9 - 10 -
11 - 12 - 13 14 - 15 -
16 - 17 - 18 - 19 - 20 - 21 - 22 - 23 - 24 - 25 -
26 - 27 - 28 - 29 - 30 - 31 - 32 - 33 - 34 - 35 - 36 - 37 - 38 - 39 -
40 - 41 - 42 - 43 - 44 - 45 - 46 - 47 - 48 - 49 - 50 - 51-feedback - 52-Masterclass - 53-Homework Contest #6 - 54-Lesson - 55-Lesson - 56-Lesson - 57-Lesson - 58-feedback - 59-feddback - 60 Masterclass - 61-HW Contest - 62-Lesson - 63-Lesson - 64-Lesson - 65-Lesson - Lesson-66
Also, thanks to @xpilar for making these initiatives possible.
100% SP (manual transfer to SP)
#club100